Hey all
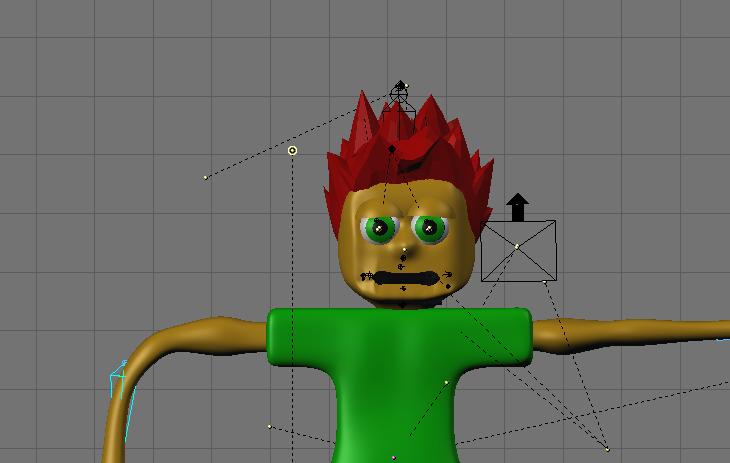
Well I have bee making leaps an bounds with my Blender but I have now encountered a new type of problem. I am trying to make just some cartoon characters (Nothing fancy) and I have encountered two problems, when I make arms the best I can get is an odd bend shape that looks something like Gumby from the old nick days. ANd I don not know how to control the mouth. (Second picture shows my second theory) I tried putting a set of bones around the mout to control it and another set around that so the “mout” bones wouldn’t change the face. This did not work. (well the top and bottom worked ok but over all it didn’t work) SO if any of you had any ideas how to fix either of these two thinks I would appreciate it. Or if you knew of a good character generation tutorial. I do plan on using these guys for basic animations.
Thanks Black Manta
PS I know it look like Jimmy Neutron meets crappy manga (I was kind of going for that.
The reason he looks like gumby at the arms is because he is modled like gumby. The joints should be smaller than the arm itself. Also the legs. Try using a more round leg with the knee smaller. This will keep the bendy look down.
Well I used the create from closest bone feature. I know this isn’t probably the best approach (I willd definetly shrink the joints) The blender tutorial was not updated and I had trouble understanding to to assign groups by hand.
Thanks
BlackManta
Ok i got your pm blackmanta. can i see a setup of the rig? would help me a lot mine isn’t exactly perfect but it will do also to make a mouth work properly you can really shove a plane on it you have to model it going in which i have done making the jaws seperate so they move heres my rig of just the mouth i have labled it althouh the bits not labled are just the tongue do not need to take notice of them i am no expert at this myself as mine is not even correct gotta change mine around but heres my rig of the mouth it performs my effect but still needs tweaking to make it easier
I think it’s a whole lot easier to use RVKs. You just set up different positions of the vertices for different expressions, and you can use them over and over and combine them via sliders.
yeh i have heard bout them i agree with this i just dont use them because i haven’t really go to grip with them yet :x any tuts wud be help not just to the thread maker but also to me
That’s a pretty complicated rig for the mouth. It would probably be easier to do it with a few RVK’s or Shape Keys: one for the corners of the mouth, one to open it, and one for the teeth. That way you just have three things to animate instead of eight, and the results look better, and the process, once you get the hang of it, is much easier.
<edit>
looks like I just repeated someone elses post
The shape keys do take a little messing around with to get the hang of, but once you get it, you’re golden. To get the feel for them, I started with just a simple cube. Added a basis to that, then made a shape key to make the right side bigger, and another to make the left side bigger. Then added some IPO curves to control them.
</edit>