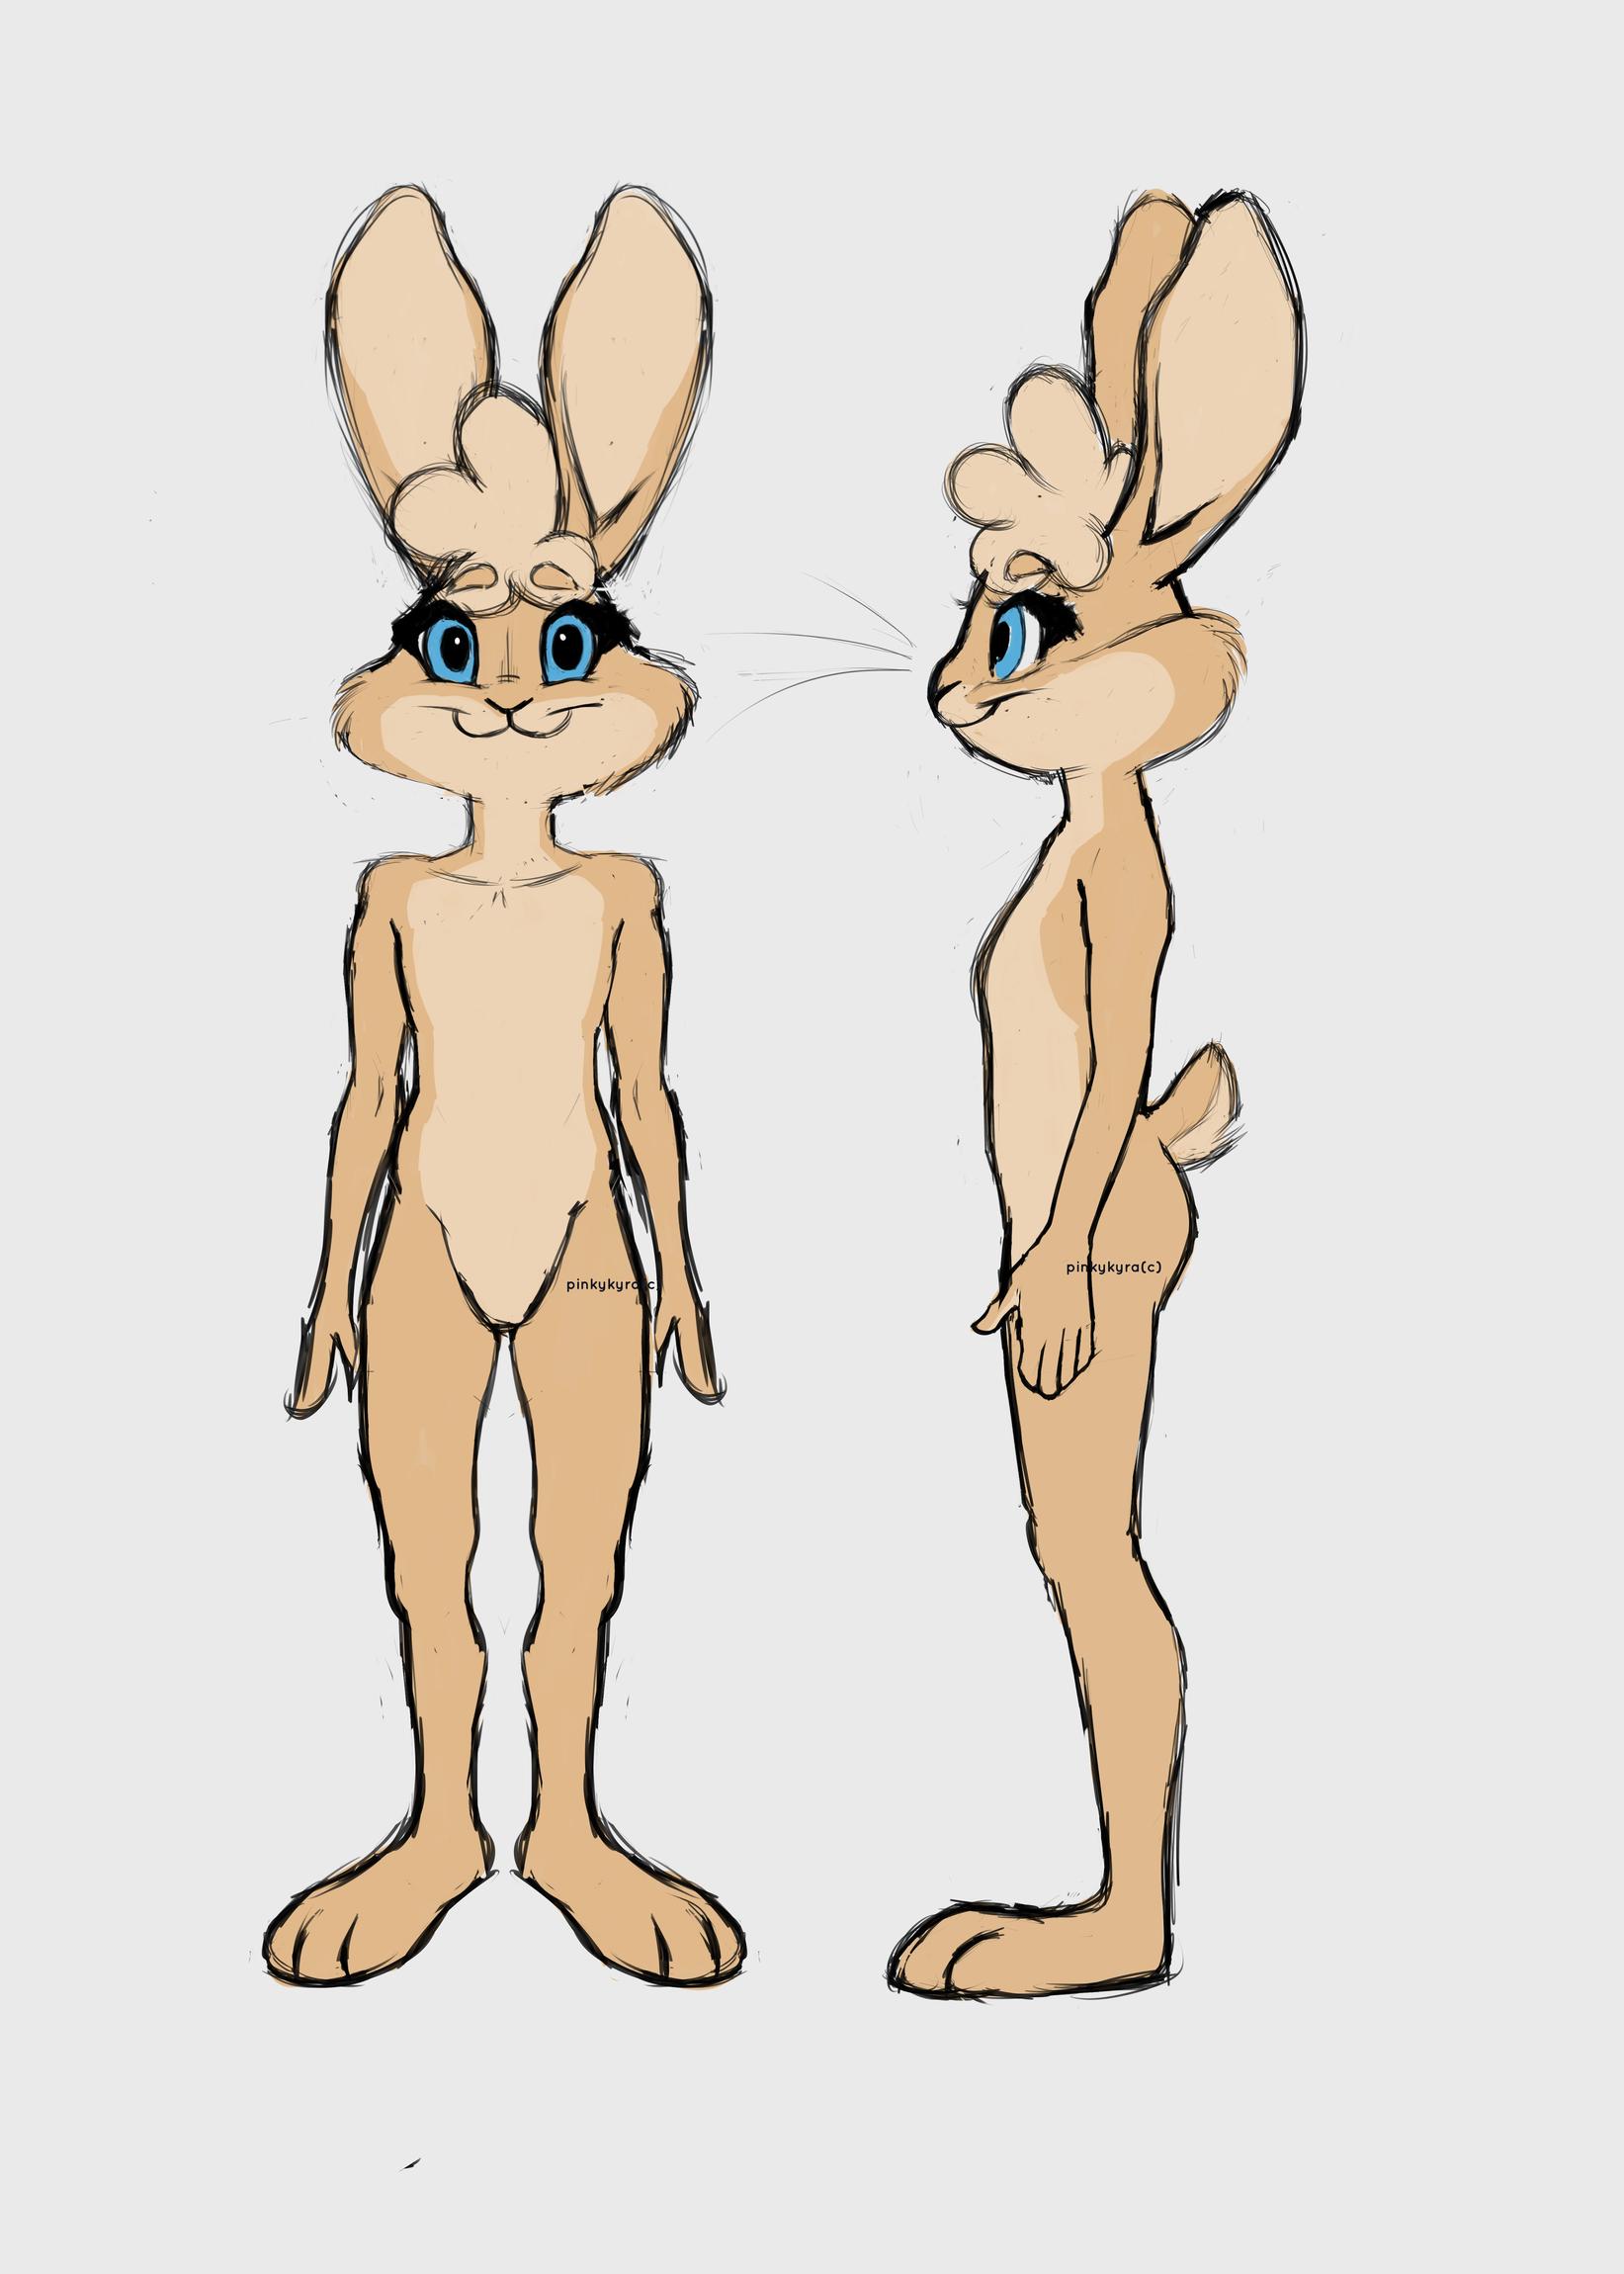
But I can’t seem to grasp how the topology might look on this character, when I go to model in blender. I’ve tried sculpting, box modeling, point to point modeling, and even plane modeling. All with different results, but yet I end up stopping at either the nose, eyes, mouth, or cheeks all the same. So which route should I really take in going about modeling this character? And how do I achieve a nice topology for animation and rigging? Any advice would be appreciated.
(Also, I’ve thoroughly looked up references of rabbits, topology of both animal and human, YouTube tutorials, and other artist’s work to see what I can do before asking for any advice. Some of them seem to help but up to a certain point unfortunately.)
Whichever you like, or combining all. Since you already have the forms and proportions as a sculpture, could build the structure on top of that and don’t have to worry about the forms and proportions anymore. The technique is called retopology. That should be easier, since the reference doesn’t describe forms and there’s some figuring out to do.
It depends on what the character is supposed to be able to do in terms of articulation and expressions. If it’s a highly stylized cartoon character with goofy and unrealistic deformations, might not be able to incorporate all of those deformations in a single model.
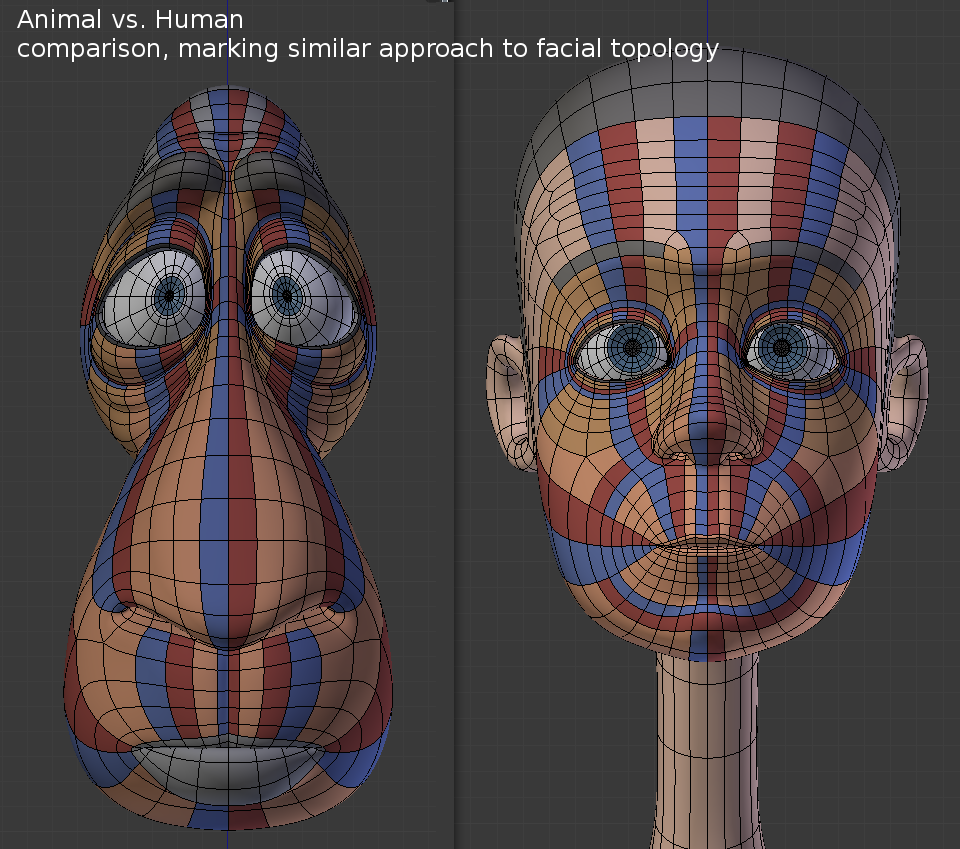
In general though, the topology in animals vs. humans can be very similar
That’s because the bone + muscle mechanisms are similar and work the same way
Muscles work in groups to create the movement, including ones that move bones which pivot at bone joints. Edge and face loops follow those muscles because that’s the movement direction. You need as many loops as needed to have the control over the deformation, and describing the new forms that result from that movement.
Oh ok. I actually thought about doing it that way, but I thought it would be necessary to know more about the other modeling techniques before I dove into that.
It depends on what the character is supposed to be able to do in terms of articulation and expressions. If it’s a highly stylized cartoon character with goofy and unrealistic deformations, might not be able to incorporate all of those deformations in a single model.
I think I’ve heard of using another model for expressions before but don’t know what the term for it is called. Does it involve using blend shapes? If so, would I still be able to see the original model deform into those expressions, using the blend shapes? Like a live animation? The character doesn’t have too extreme facial expressions, but I’d say it has some level goofiness like Bugs bunny from Looney Tunes and soft, feminine expressions like Judy Hopps from Zootopia.
Muscles work in groups to create the movement, including ones that move bones which pivot at bone joints. Edge and face loops follow those muscles because that’s the movement direction. You need as many loops as needed to have the control over the deformation, and describing the new forms that result from that movement.
Ok, I will keep that in mind during the retopology process. Thanks so much for the help and information!
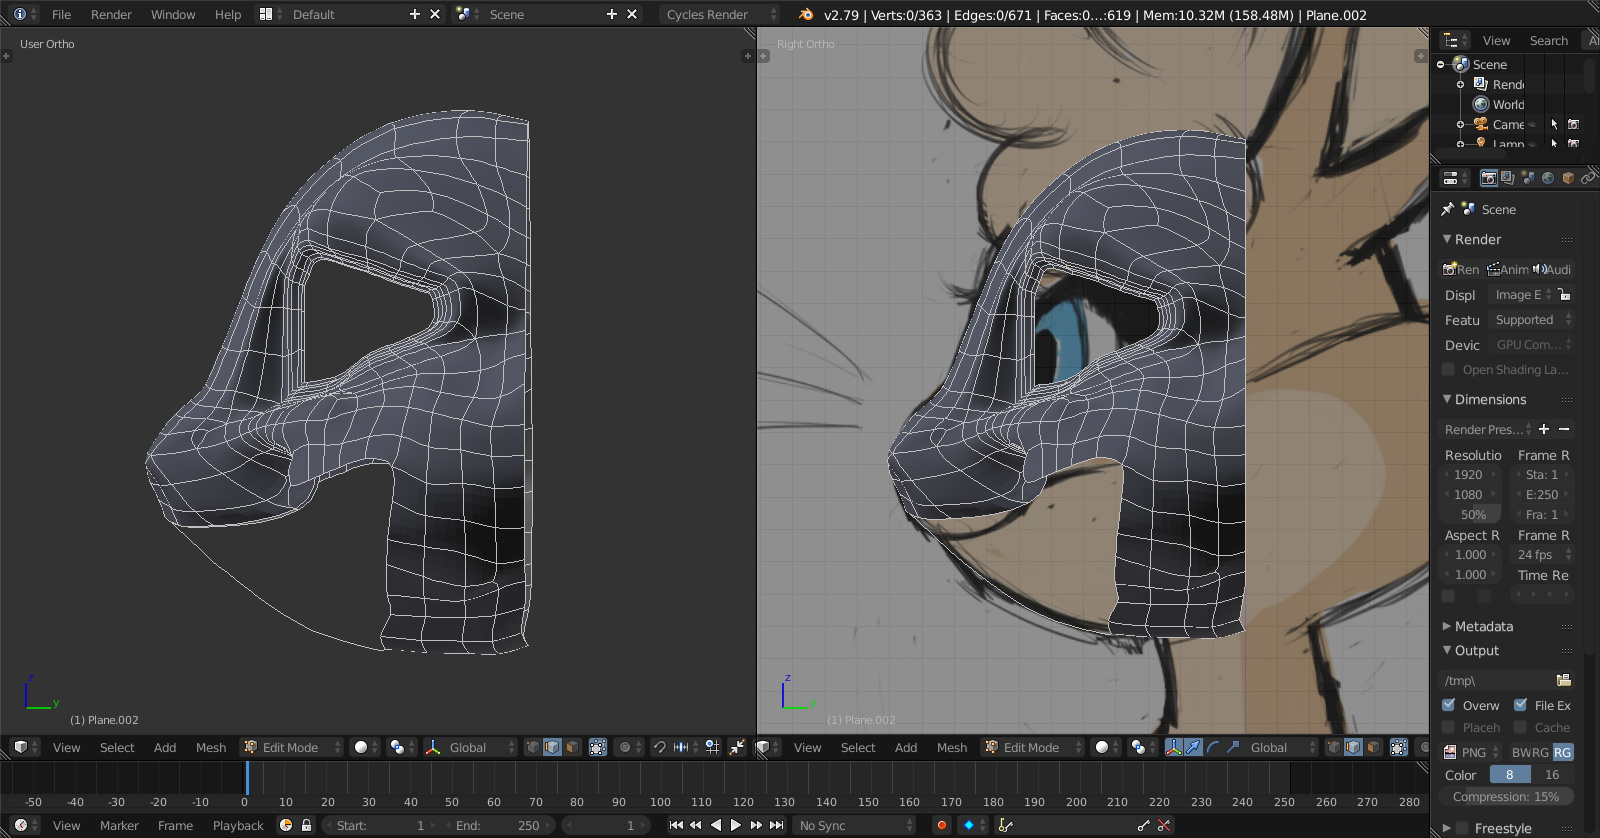
Oh and I meant to post this in the original post, but here are the screenshots of how my progress is now.
I didn’t mean using another model for expressions. What I mean is that the vertices you put in the model are used to control all forms that are needed for the deformations, and also control the subdivisions that refine those forms with more geometry. If the amount of geometry in your model is not enough to make the new forms, it becomes challenging to do with just one model.
Goofiness is fine. Also turning a human head into a werewolf is not that big of a problem https://vimeo.com/16783367#t=346s
I meant more extreme deformations. A cartoon character might put another character in its mouth, which then tries to escape by running away across the block while stretching the cheek, which would mean your model doesn’t have enough geometry to describe the forms needed for that particular effect. Might need to make another one for that and/or get creative with the shots.
Shape keys are commonly used for expressions and lip syncing. One model. The keys can be combined, limited with vertex groups, driven with bones, to get the variations and have control over them. Proportional editing tool in connected mode is handy when making the keyed expressions.
Lip syncing would be done in similar ways. Phonemes are the different distinct sounds in the spoken language, and visemes are mouth/lip/tongue/jaw positions in shape keys and bones to make it look like the character is forming those sounds. Triggering them in sequence makes it appear like the character is talking.
I didn’t mean using another model for expressions. What I mean is that the vertices you put in the model are used to control all forms that are needed for the deformations, and also control the subdivisions that refine those forms with more geometry. If the amount of geometry in your model is not enough to make the new forms, it becomes challenging to do with just one model.
Oh ok, I understand what you mean now.
Goofiness is fine. Also turning a human head into a werewolf is not that big of a problem https://vimeo.com/16783367#t=346s
I meant more extreme deformations. A cartoon character might put another character in its mouth, which then tries to escape by running away across the block while stretching the cheek, which would mean your model doesn’t have enough geometry to describe the forms needed for that particular effect. Might need to make another one for that and/or get creative with the shots.
Shape keys are commonly used for expressions and lip syncing. One model. The keys can be combined, limited with vertex groups, driven with bones, to get the variations and have control over them. Proportional editing tool in connected mode is handy when making the keyed expressions.
Lip syncing would be done in similar ways. Phonemes are the different distinct sounds in the spoken language, and visemes are mouth/lip/tongue/jaw positions in shape keys and bones to make it look like the character is forming those sounds. Triggering them in sequence makes it appear like the character is talking.
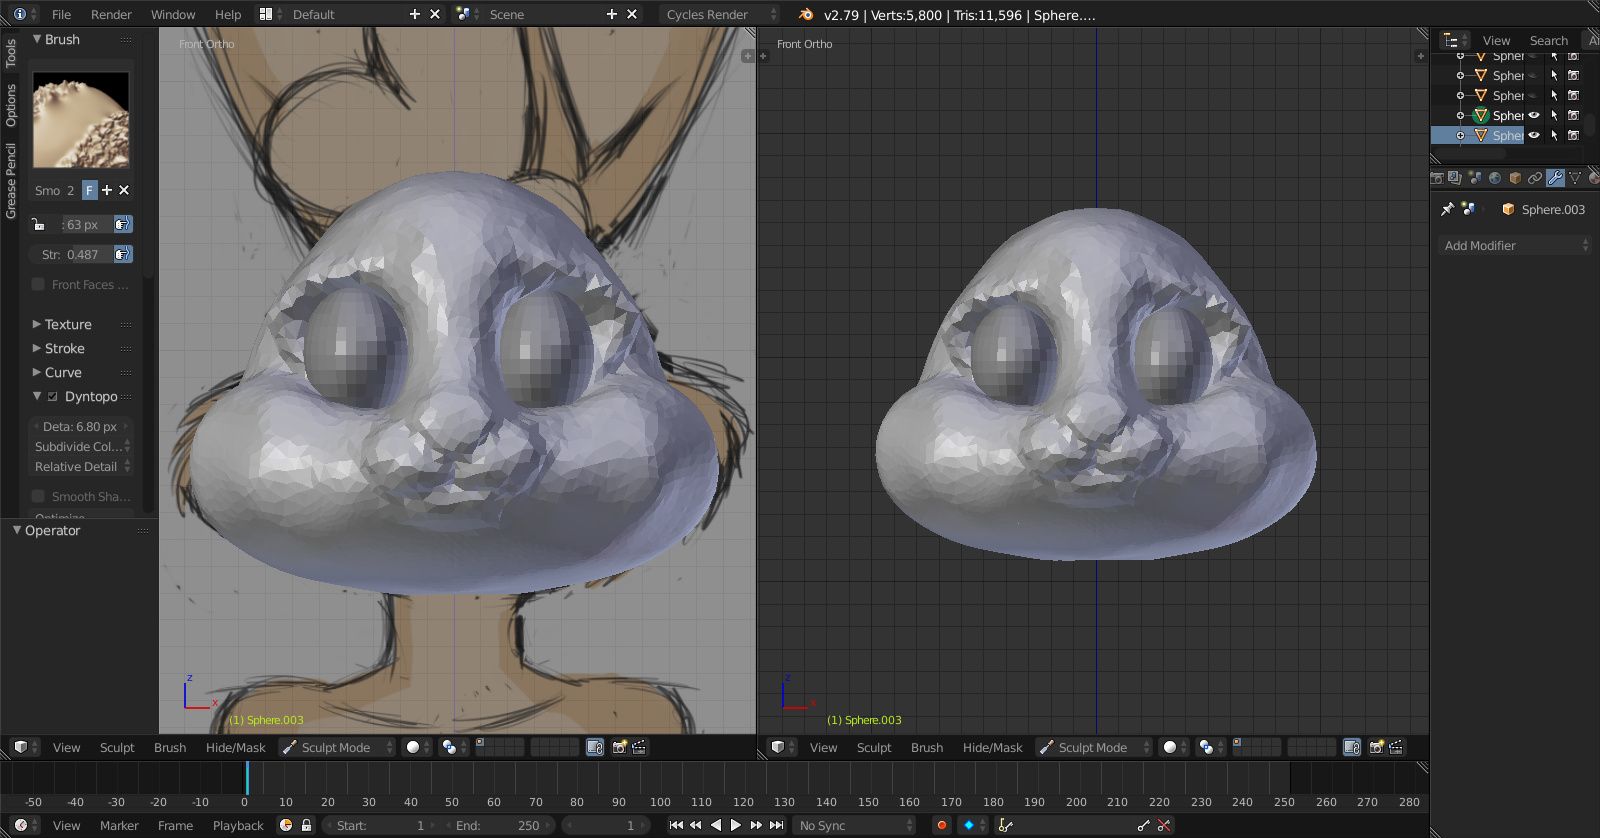
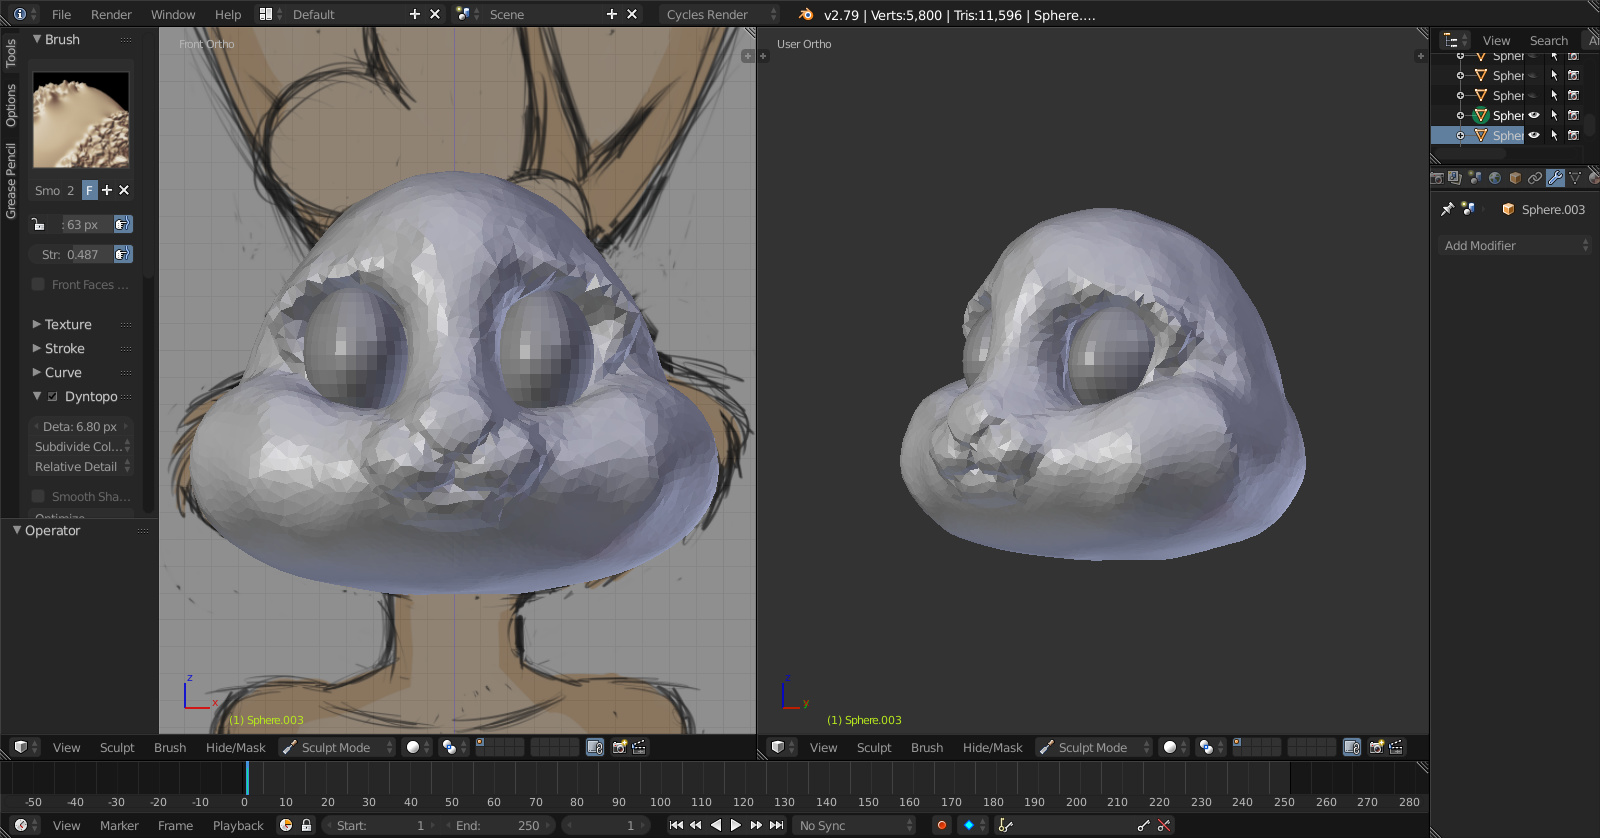
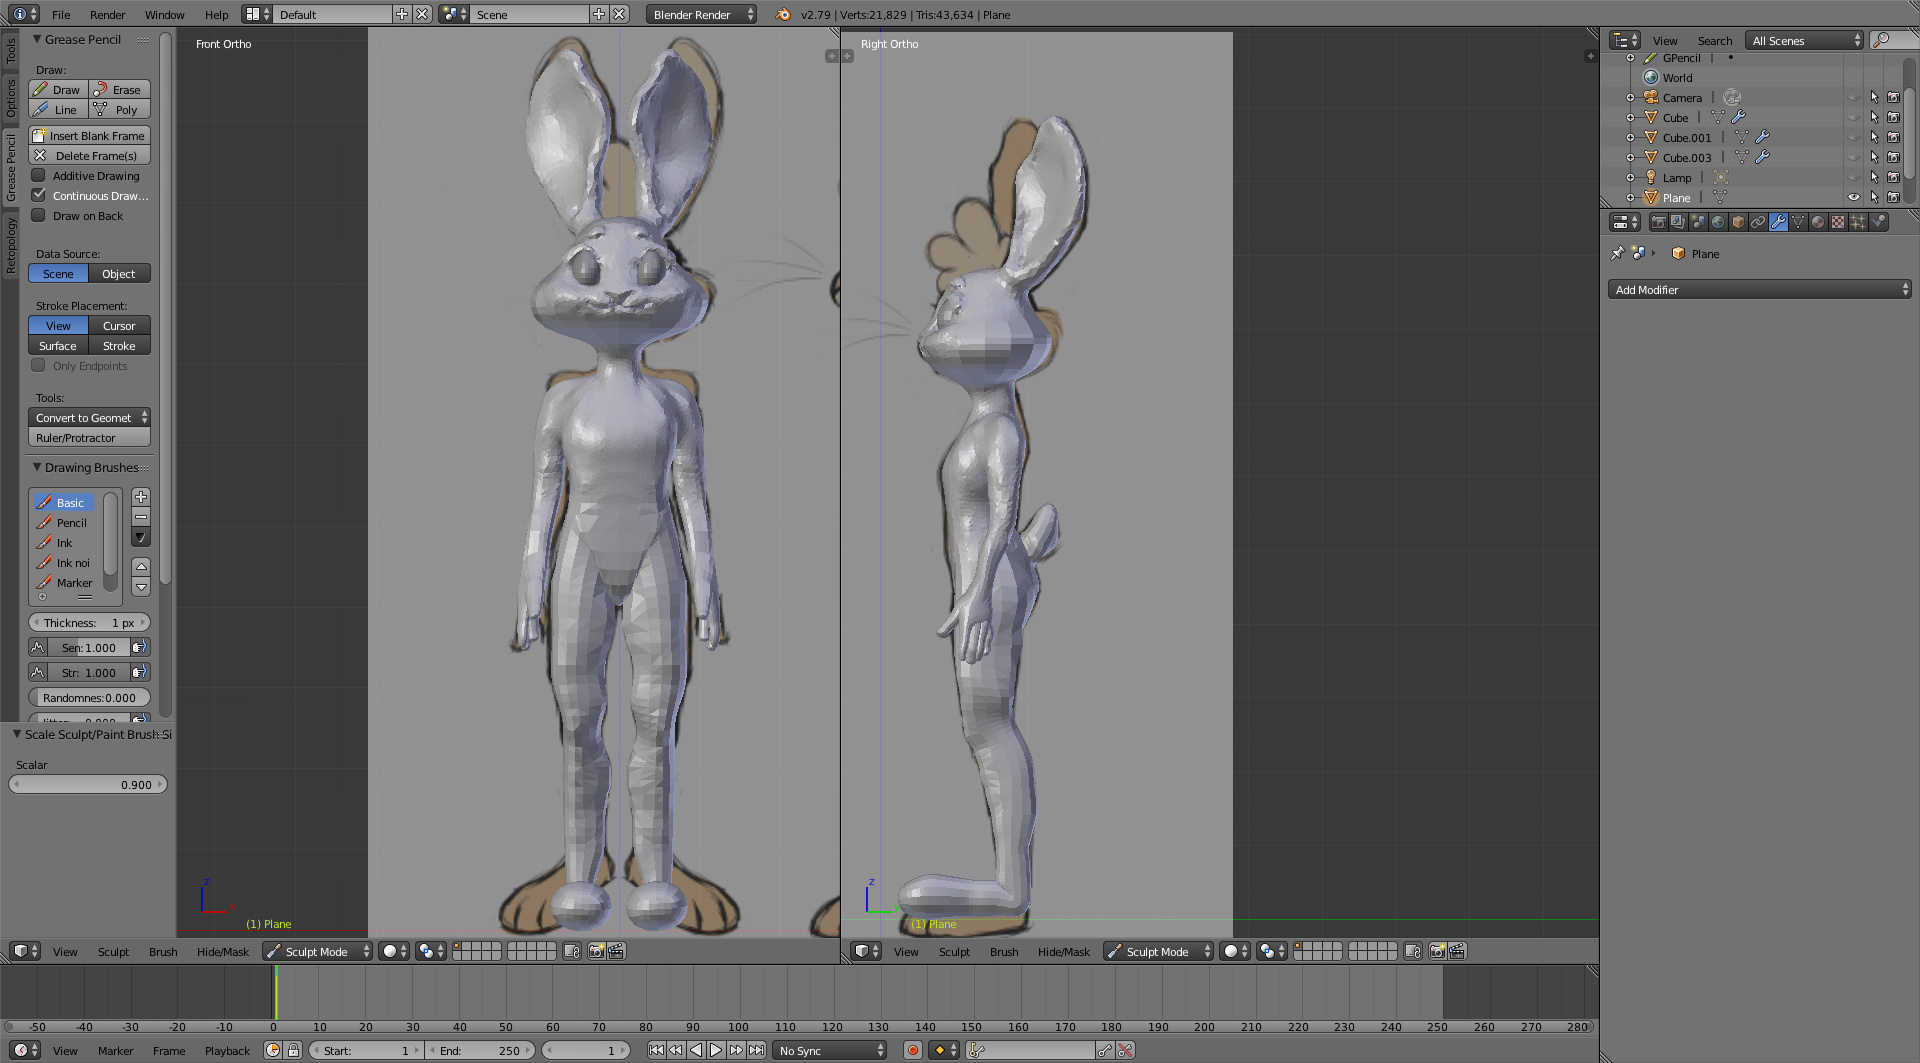
Ah ok, fortunately that kind of effect I won’t be aiming for with this character and the videos were very informative of what’s to come for me to do later down the road. So thanks. I actually been sculpting the character today and this is my progress so far:
Looks alright. You don’t have to refine the surfaces too much if you do a retopology pass on it afterwards. The new structure will be much smoother and controllable. You do need to figure out the main forms and features.
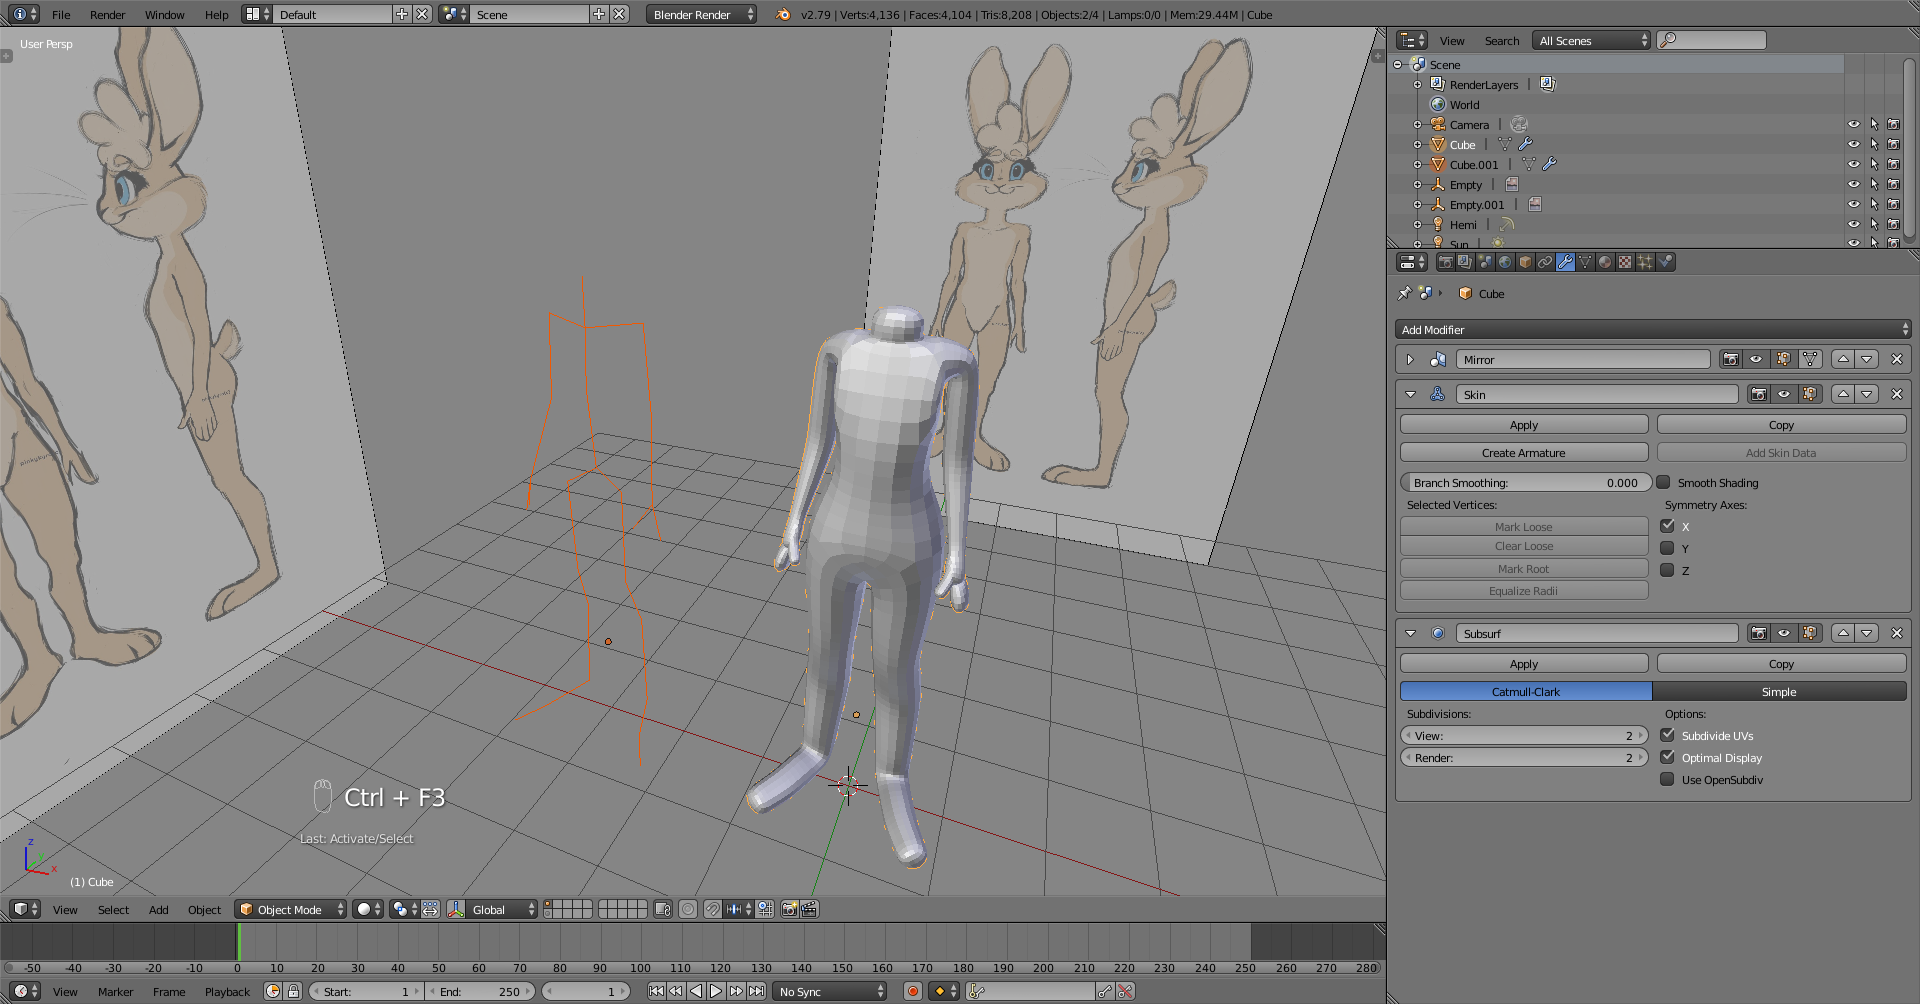
A skeleton structure with vertices and edges. Vertices scaled with ctrl+A with skin modifier. This creates main proportions and volumes before sculpting.
There are other block-in methods like boolean operations (with bool tool addon) and metaballs.
Thanks. I actually did the body the same day but I didn’t know you could block in the body like how you did. Seems so much easier by the image but when I try to do it myself it comes out like this:
I try to keep even proportions but the areas like the armpits, waist, and hips come out weird. Any ideas of what I’m doing wrong here?
I also tried out metaballs but I don’t think its for me… kind of complicated to get the forms right on this character with the way I do it. I’m probably not understanding something with that either. However, I haven’t tried boolean operations, so I’ll give that a shot next.
Could I also use a human base mesh, whether from addon for blender like Manuel Bastioni’s or just from the internet? I was going to adjust the proportions necessary to match the character and then do sculpting from there. Though I wouldn’t do it right away, as this would be my last route I would take before trying to make the base mesh on my own.
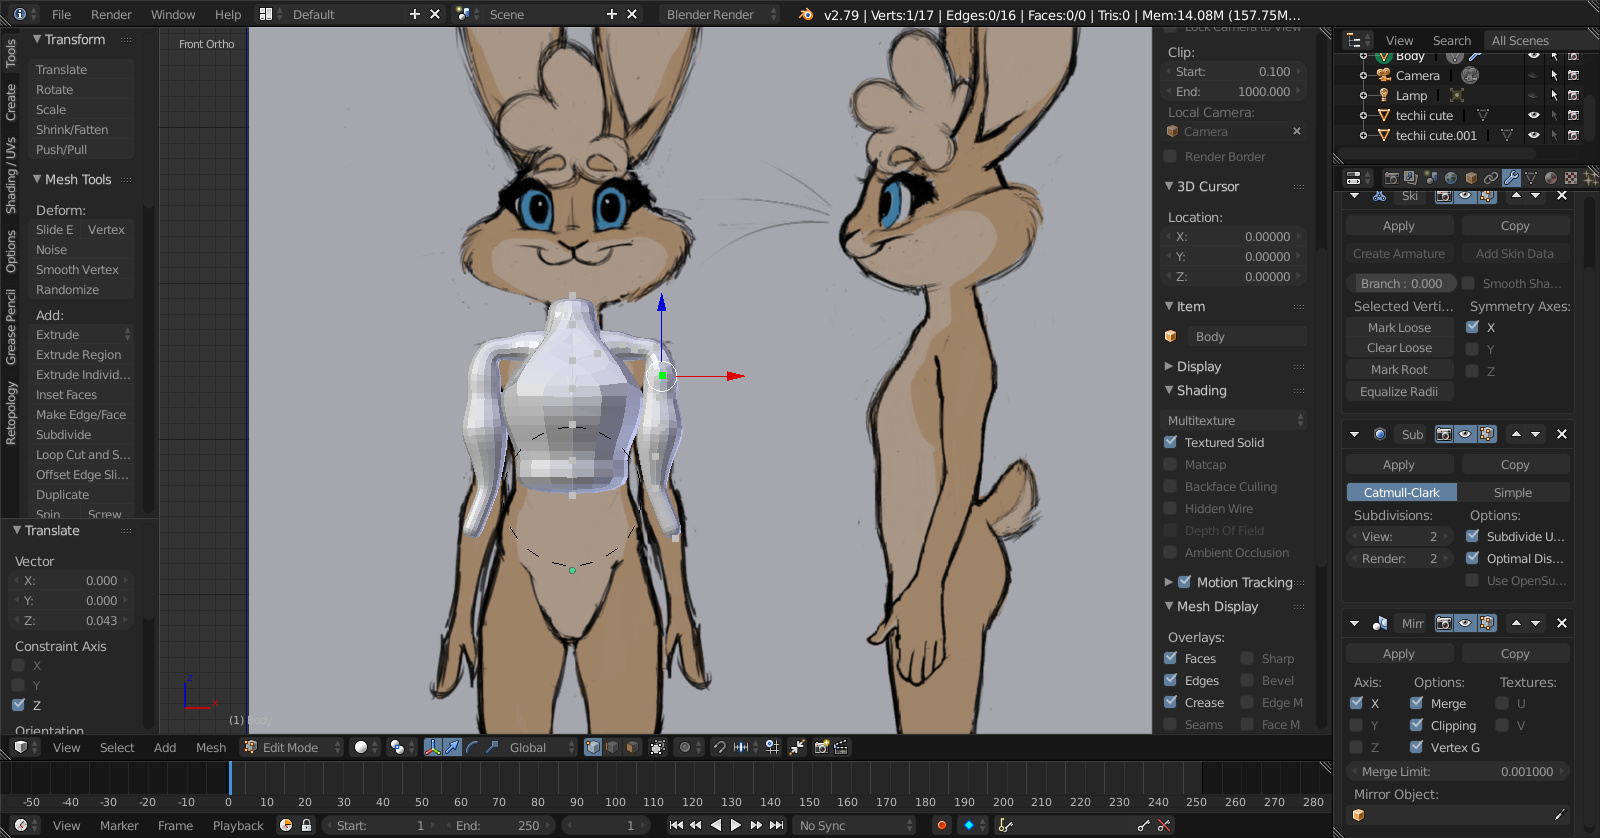
Wrong modifier order. Mirror first, then skin, then subdivision surface. The root might be too high up, select the vertex at the crotch and mark root on the modifier. I’m also suspecting unapplied object scale, object mode, ctrl+A -> scale to apply.
The skin modifier and metaballs might seem weird at first. Bool Tool addon helps to manage boolean modifiers with hotkeys which creates a new workflow for building the forms, especially for hard surface models, but could help also with organic models when building the basemesh. When sculpting with dynamic topology, boolean operations are also one way of adding to or cutting the already sculpted mesh.
Yeah that seemed to have fixed it. I also messed around with the vertices and did some scaling, I got at least the proportions I wanted now. I even went as far as doing the fingers, tail, head, and ears. Though the ears were tough to get right without the geometry going bonkers.
When I use the addon and click “Make Manifold” the mesh completely disappears in Object Mode. I try to do the steps in the video but I still get that effect.
The ‘default’ t-pose ain’t no golden standard and in terms of mesh as well as UV deformation having limbs at 45 degrees at each joint can be much better. However, sure more difficult to model.
Yes, T-pose is not a rest pose. Muscles (deltoids and trapezius) do work to lift the arm, which also lifts the shoulders.
Could take that into account while modeling, which is not in the reference. Or could model the arms down and use various masking methods to hide the arm when necessary. Or could make a temporary rig and pose it.
Sculpting has its own mask tools. Could also hide geometry (h, alt+h), use clipping border (alt+b to draw and toggle off), or use mask modifier to hide geometry in all viewport view modes.
An animator wouldn’t mind arms down as a rest pose because it’s more natural.
Ok, that’s also good to know. I always thought it had to be in a T-pose, which was another thing I thought about doing while making the model but wasn’t sure how to execute right. I’ll think about using one of the methods you listed and go from there when I get to that point.
Just a quick update, I ran into a problem with the area around the shoulders and arms. It looks like, when using the skin modifier earlier, I made the shoulders a bit too far out and now the shoulders a kind of hard to sculpt to get that “natural” look that humans have. The shape just isn’t there to me.
Here’s some pictures:
I’m probably looking into this too much but it bugs me, you know?
Edit:
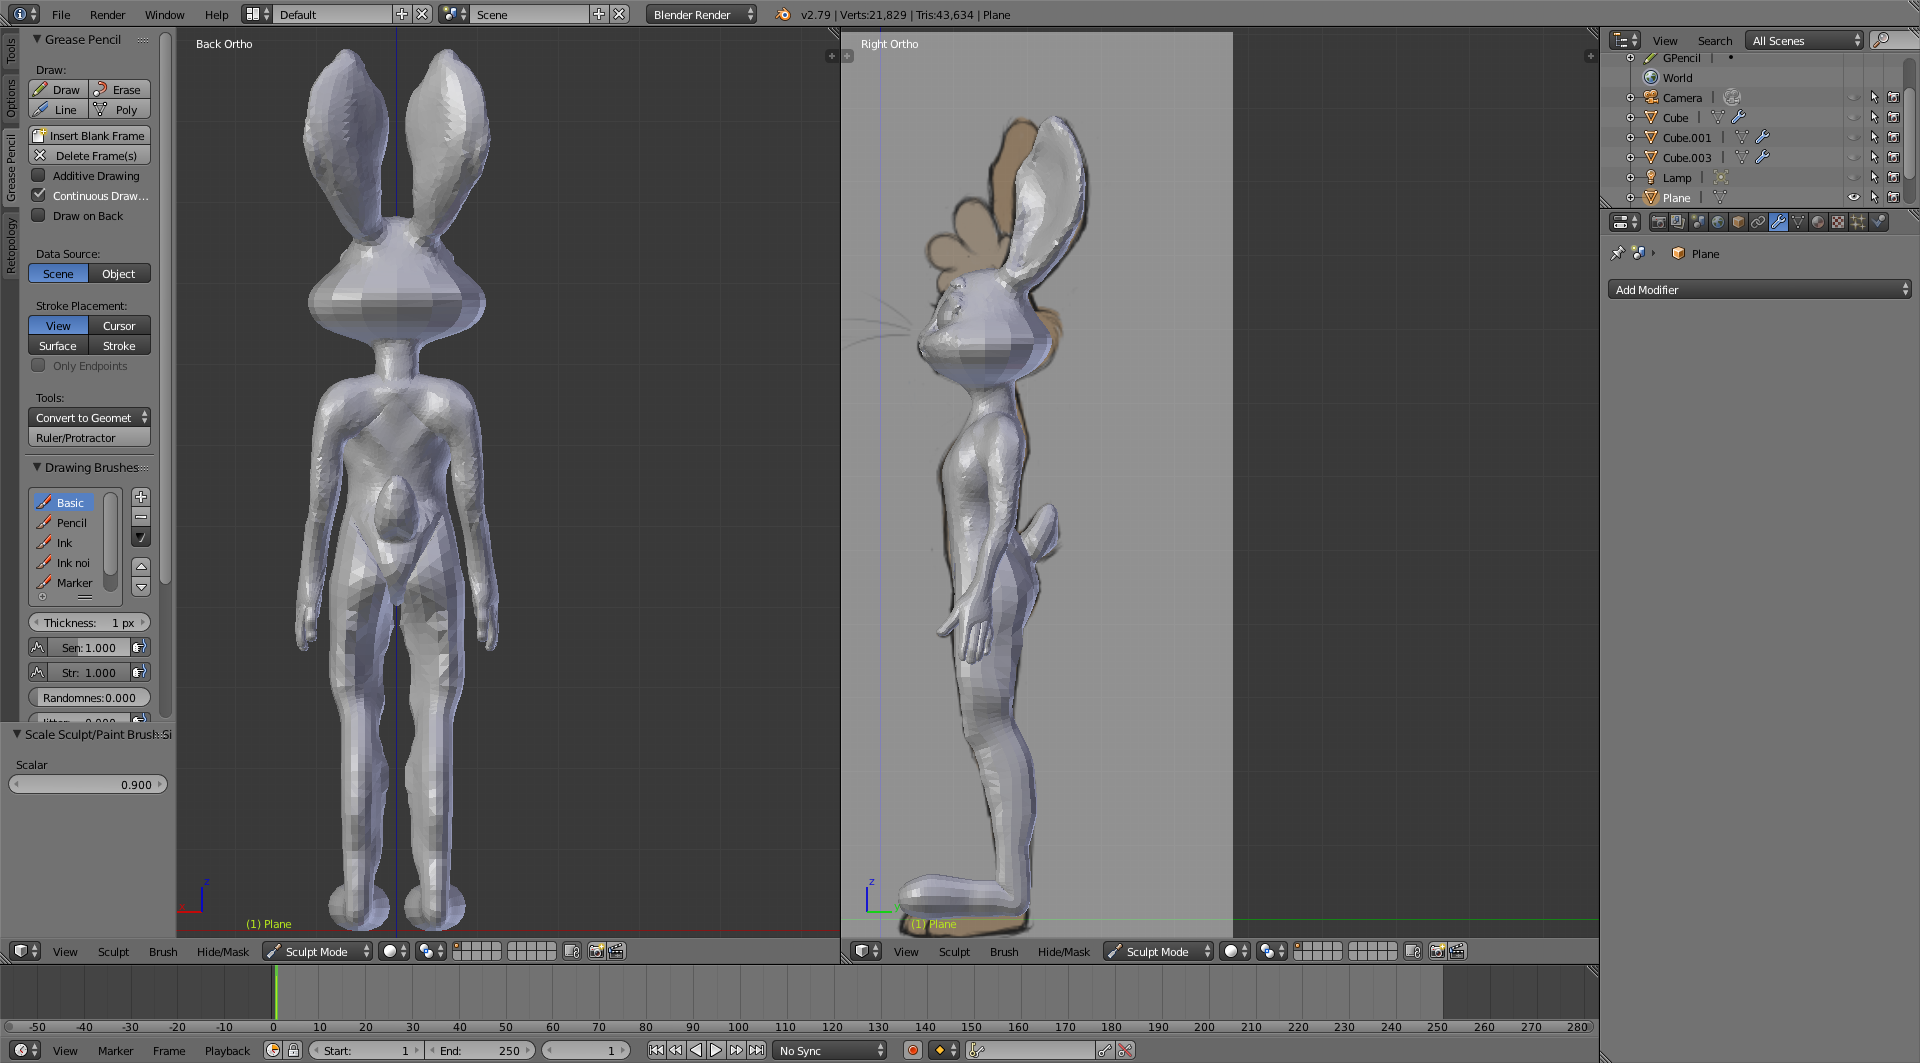
I just started over and used a temporary rig to pose the arms. I couldn’t really figure it out on my own without starting from scratch. I first used the skin modifier for the ears and limbs. Then I used UV spheres to shape the body and used the bool tool addon to union everything together.
But before that, I posed the arms and hands into a T-pose. I know it wasn’t really all that necessary but I went through so much trouble trying to get the shoulders right, and in the second attempt, I made the mistake of fusing together the hands by the leg.
Hopefully, I can get it right this time.
Thanks so much for the advice and help everyone too!


