Hi everyone,
I am new to the forum, and above all thank you for your time!
I am “new” to Blender in a way. I started using Blender around 2003 I did it temporally for a 4 months Uni course. At this moment, it is like a new program and I have been remembering the basics by myself at home for the last week.
I would like to explain what I am looking for and what I would like to attain with this. I would like to fix it so I can design textures for the tank, I was using that material as example but I do not see any improvements.
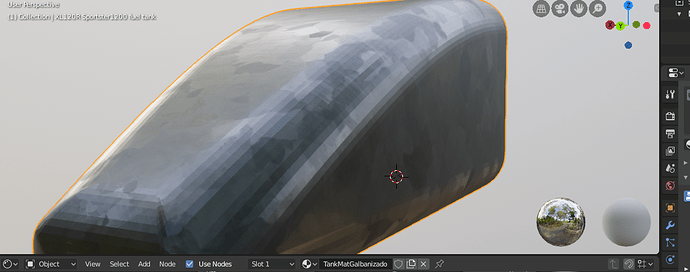
This is the model I am using, and as you can see in the picture I cannot get right that lateral part. As you can see the light reflects and exposes those areas. I think is a problem that could be fixed in modelling, am I right? So far, I was not able to get it right, so I wanted to ask for a bit of help.
I tried beveling, smoothing the area and cannot get it right.
Any ideas? Right now I cannot upload the project file because I am new to the forum, although I would be interested on uploading it somewhere else if someone wants to play with it.
Thanks!
Not a sure if I understand your problem correctly, but in case you want the model to look smooth, you have the enable smooth shading.
Depending on the keymap either
“W” - shade smooth
Or
“Right click” - shade smooth
Hi there,
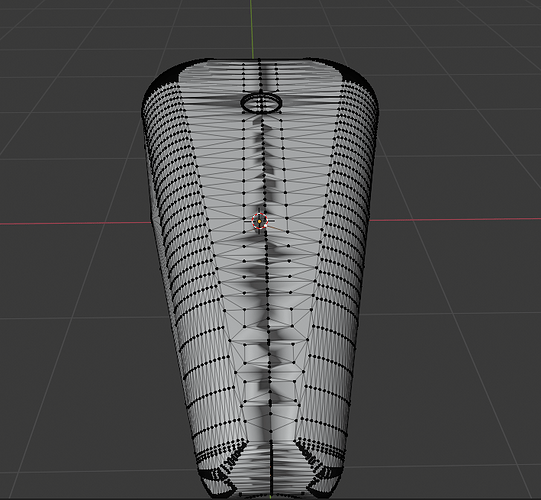
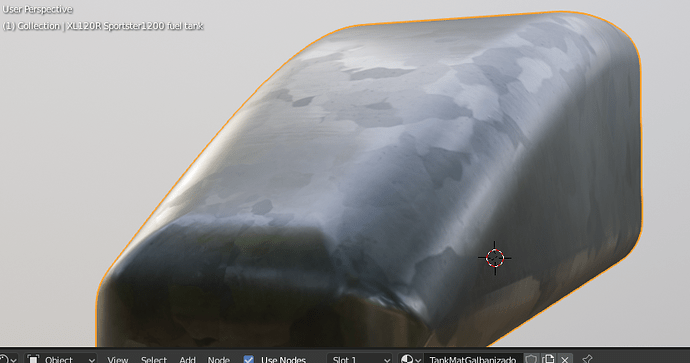
Thanks for your answer. I tried that and this is what happens. More info, I initially downloaded this model from the internet from a Cadsite I think. The model was not symmetrical so I cut it in half and mirrowed it to create a full model.
Do you have geometry inside the mesh? if yes, you should delete the inside faces.
Things you could also check:
Are there flipped normals?
Fix in edit mode: shift+n
Are there overlapping vertices where the model has been mirrored?
Fix in edit mode: select everything, then alt+m - merge by distance
There is nothing inside, no extra geometry.
But it looks like it is creating those anomalies following the cut line I did.
For mirrowing I followed TL;DR – 3D this:
In Blender 2.72, and above, enable the pie menus in the user preferences. CTRL + ALT + U or File – User Preferences then the Addons tab. Search for “pie”, enable the add-on called “User Interface: Pie Menus Official” (more info: https://wiki.blender.org/index.php/De…). In edit mode, select all of your objects. Press PERIOD to bring up the Pivot pie menu and LEFT-select 3D cursor. Next, press SHIFT + S and choose “Cursor to Center”. Press SHIFT + D to duplicate selection; RIGHT-click to snap duplicate back to initial origin. Press CTRL + M for mirror and press X to mirror on the X axis and press ENTER to commit the change. Finally, reset your Pivot point by pressing PERIOD and choosing “Median Point”.
After mirroring you need to recalculate normals, this should be the issue with this one.
You are right! SHIFT + N fixed it.
It is looking great.
Also mention that after normals were fixed, the smoothing created anomalies in a couple of places. These were fixed adding Edge Split modifier.
Thanks for your help!


