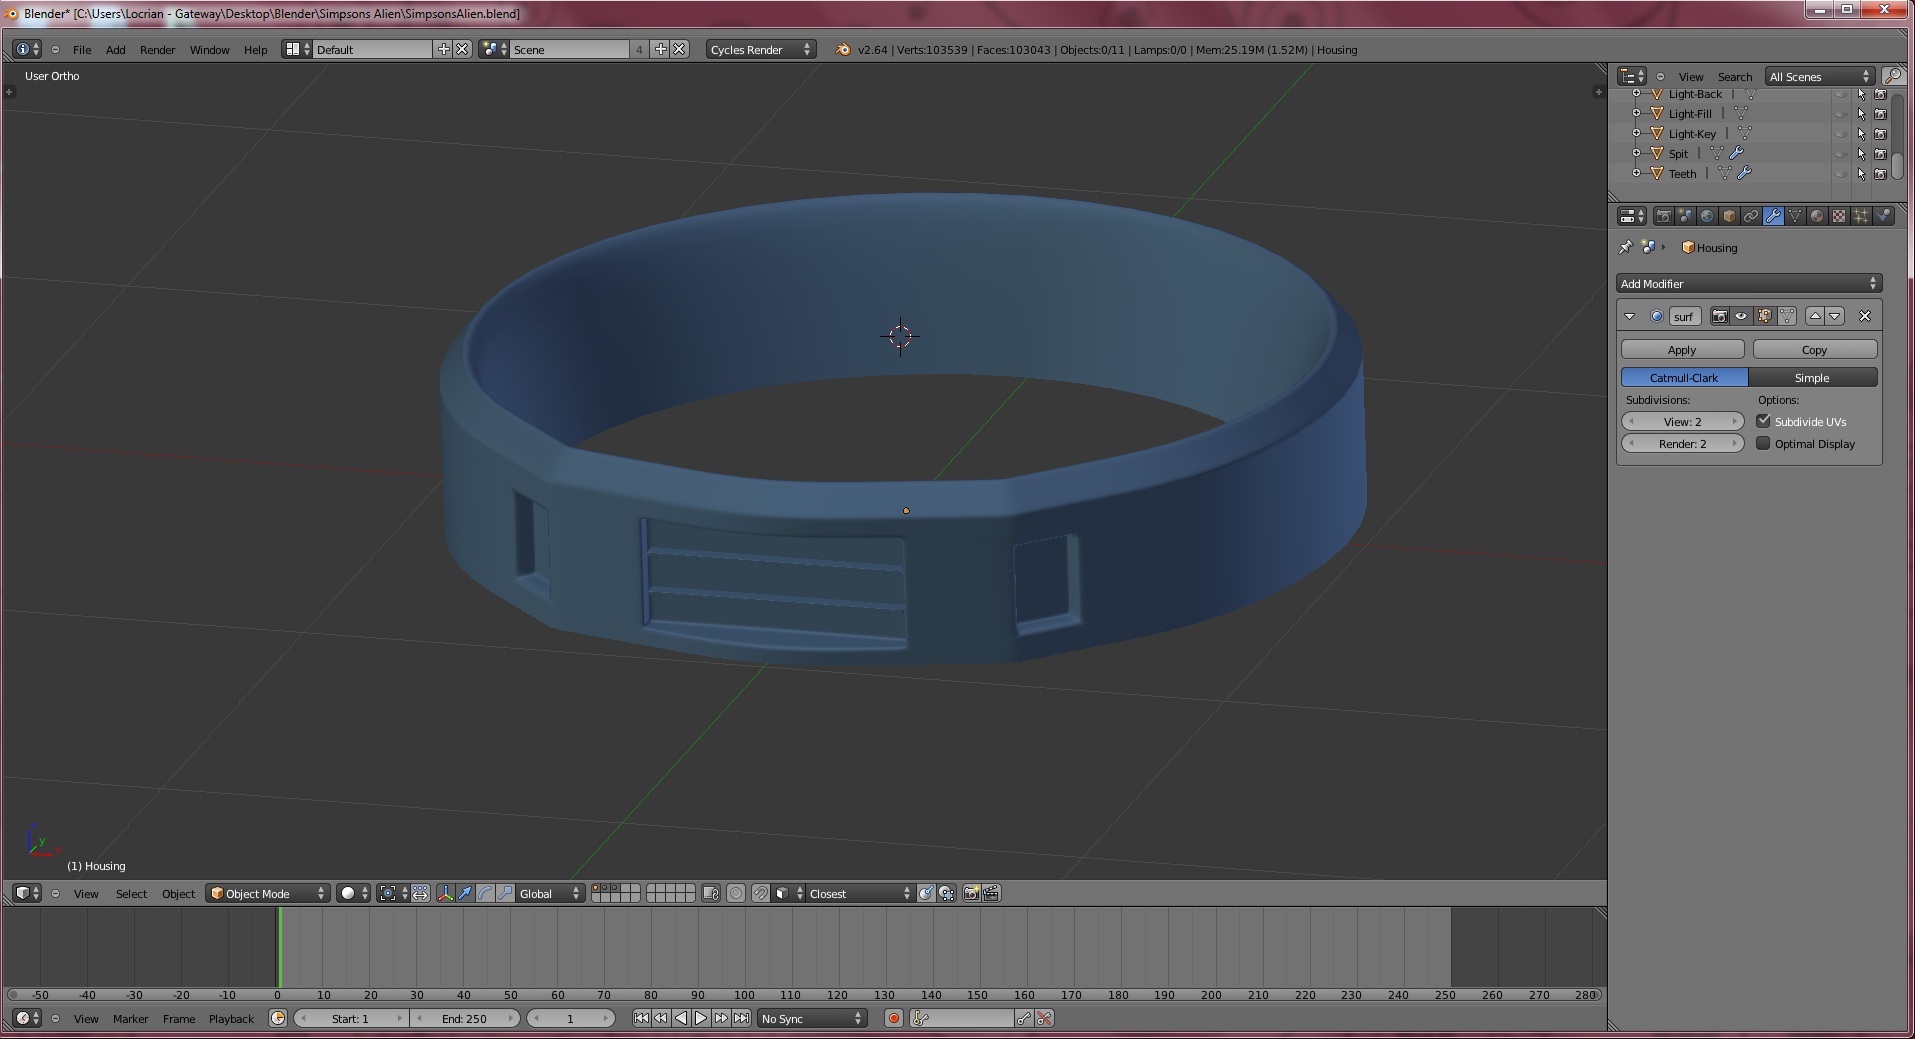
Here’s where I struggle with Blender. I have a main ring shape and want to add three different pocket areas. Every attempt I make at this results in my ring looking faceted. Can anyone help point me in the right direction so that I can keep the overall cylindrical shape, but have three crisp pockets?
You should start with a circle with enough points, so to evenly subdivide the ring and get the right distances for the pockets since then.
Sorry for my bad English, I hope you can understand enough.
paolo
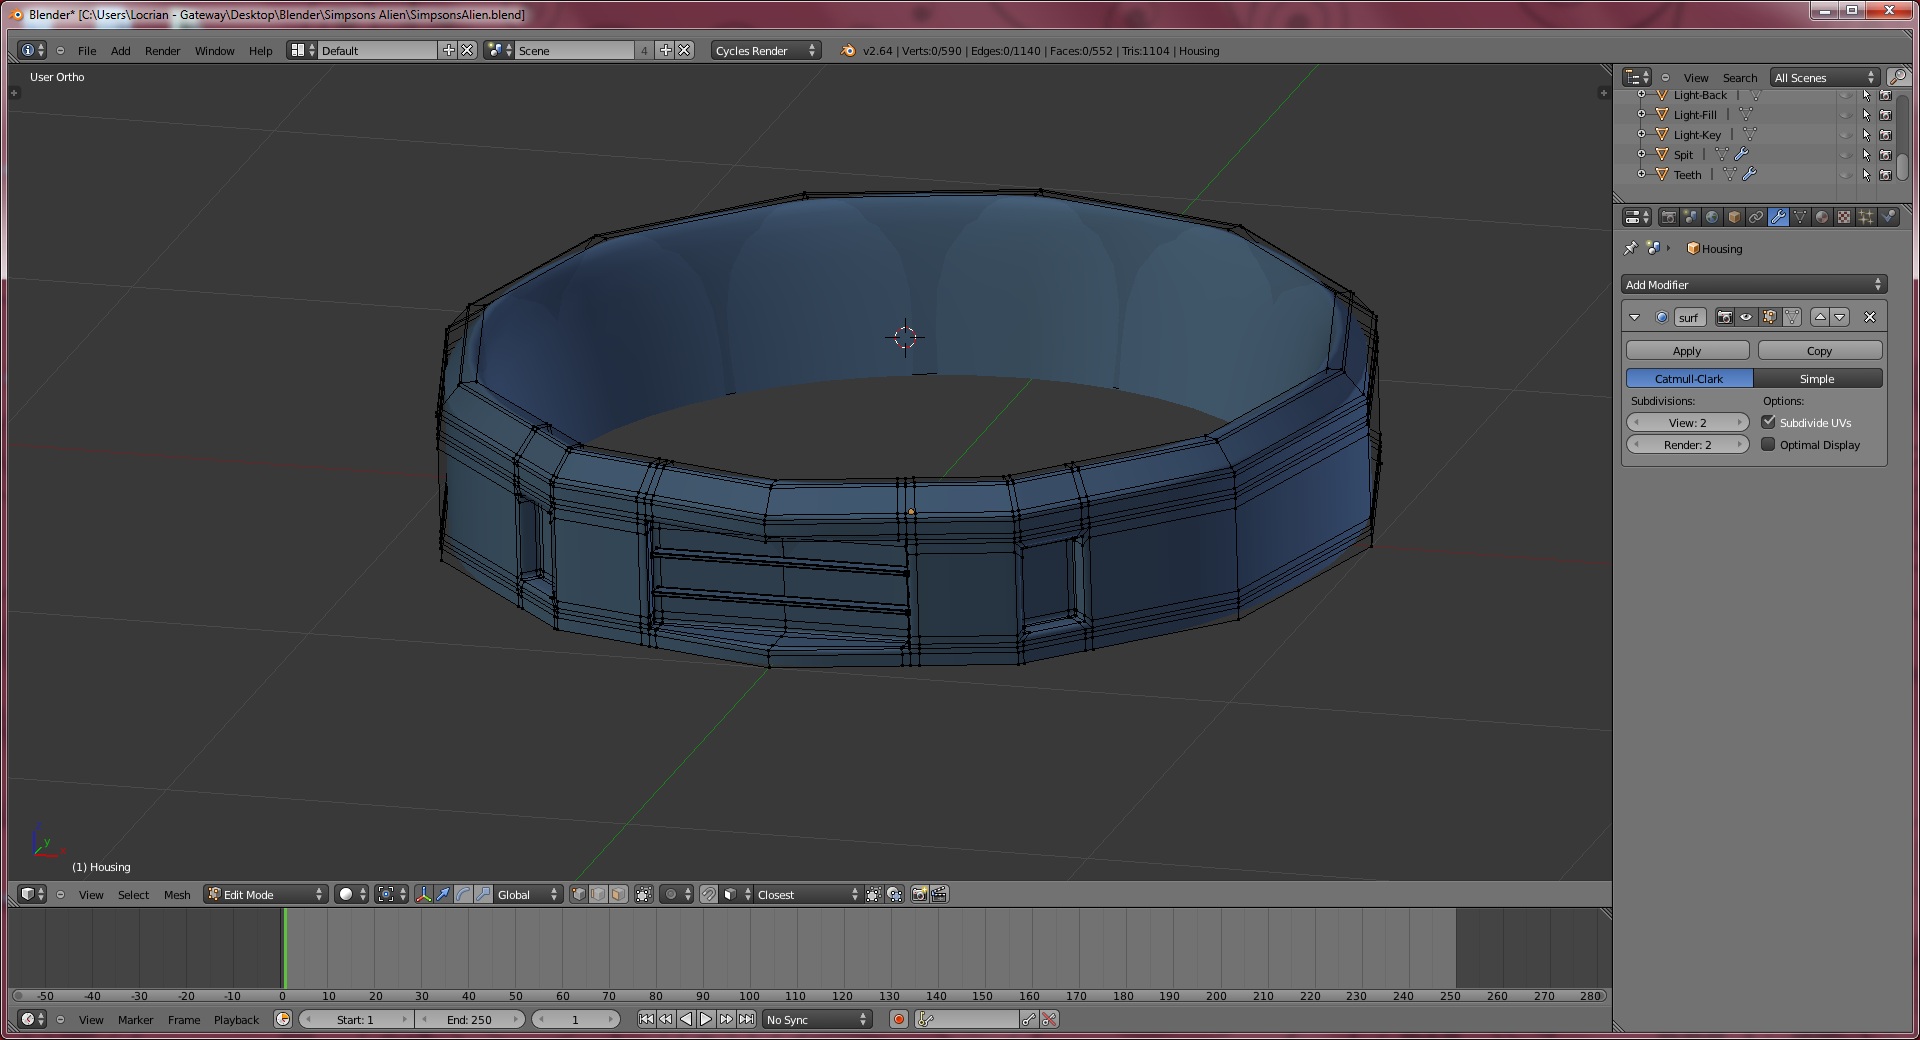
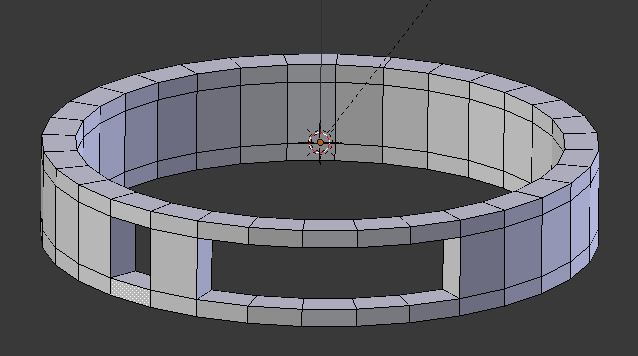
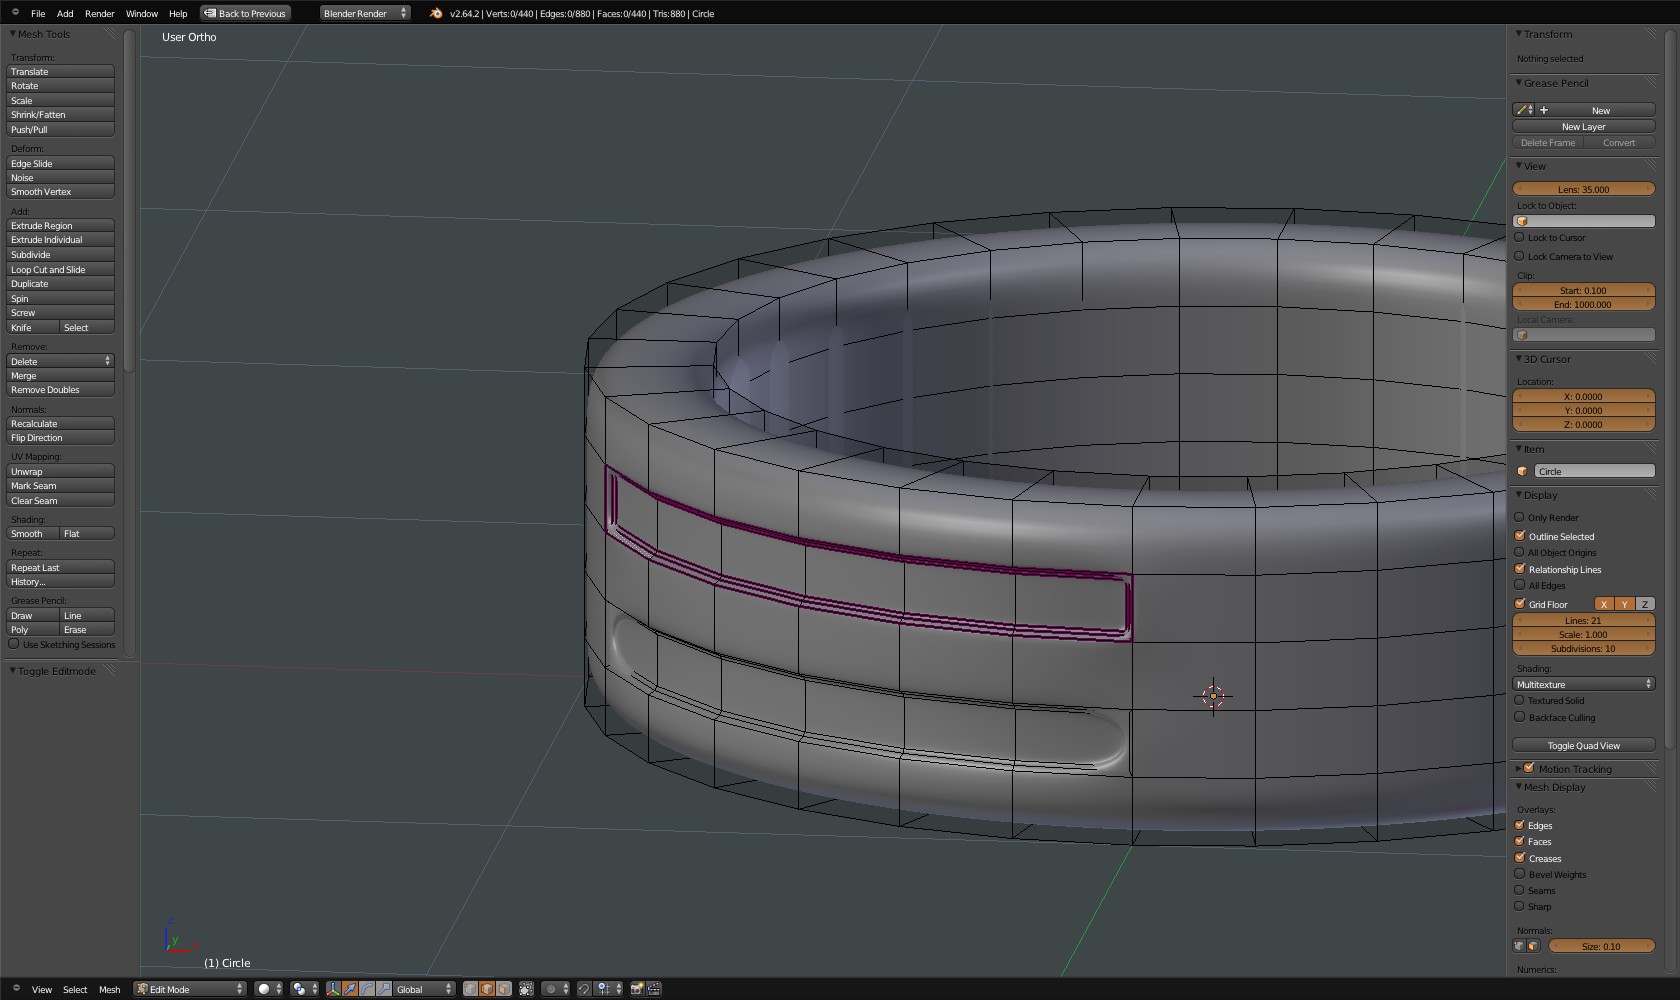
few things: I dont understand why you have so much unecessary geometry. . . . it should be 3 loops per edge (1 is the bevel edge on the top/bot of the ring) and 2 loops for the top/bot lines for the extrusions.
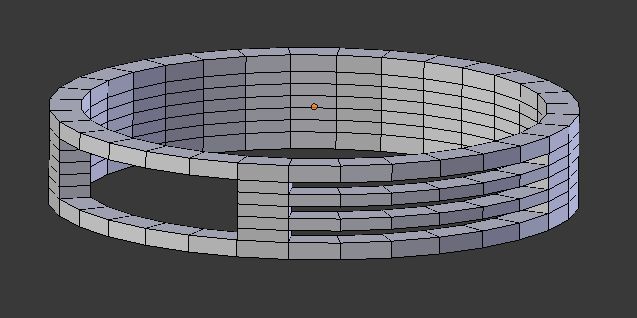
then, using the knife tool (K key) you can hold down ctrl, and click on the edge loops to snap to center. . . makign the boxes that you see in my images below. you can use the knife tool for all of them, and then extrude inward. then to make the 3 ridges inside the big box, i did a knife tool in the center of that box to get the middle line, which makes the internal box able to be edgelooped (CTRL+R hotkey). i made 2 outer edge loops, then made 3 edgeloops right next to each line, selected all those faces and extruded back outwards towards the outer edge of the ring.
notice the purple lines in edit mode, those are where i applied a CREASE to them edges alone, which is where you said you wanted CRISP EDGES. Hotkey = SHIFT+E and then select teh value, which i used 1 for a hard crease edge.
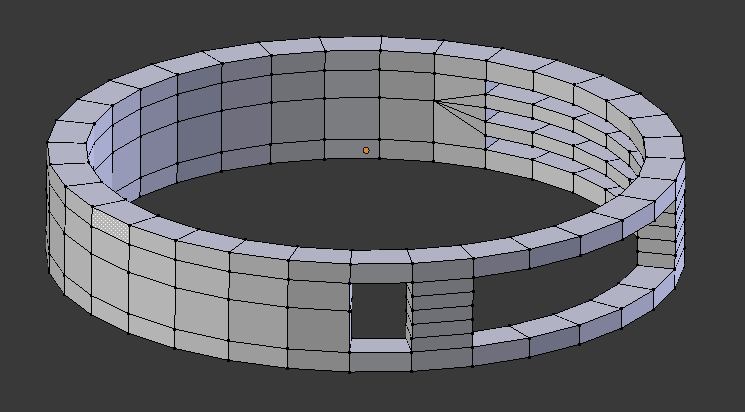
i made the original ring as a circle with 16 faces, as you did. if you want rounder, double it to 32. but the added geometry you have in your model isnt really needed in my opinion. . . way too many edge loops.
oh and be sure to reset normals (CTRL+N) to get rid of that nasty artifact on the right side of all the edge cuts i have in there lol. . sorry 
ifcruickshank,
You could look at this tutorial by Jonathan Williamson at blendecookie:
it’s only the start of a training course exclusive for citizens, but there is a good example of modeling (it is the part 02 - High poly modeling).
paolo
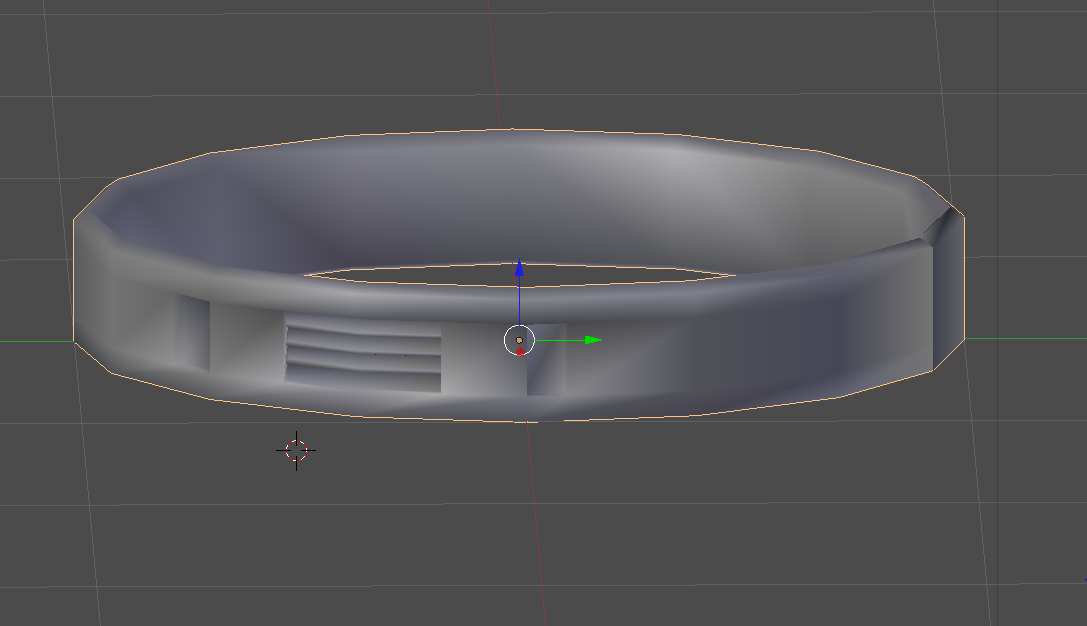
Try to use inset tool or extrude and then scale in, to get something like this
and a blend file
http://www.pasteall.org/blend/16979
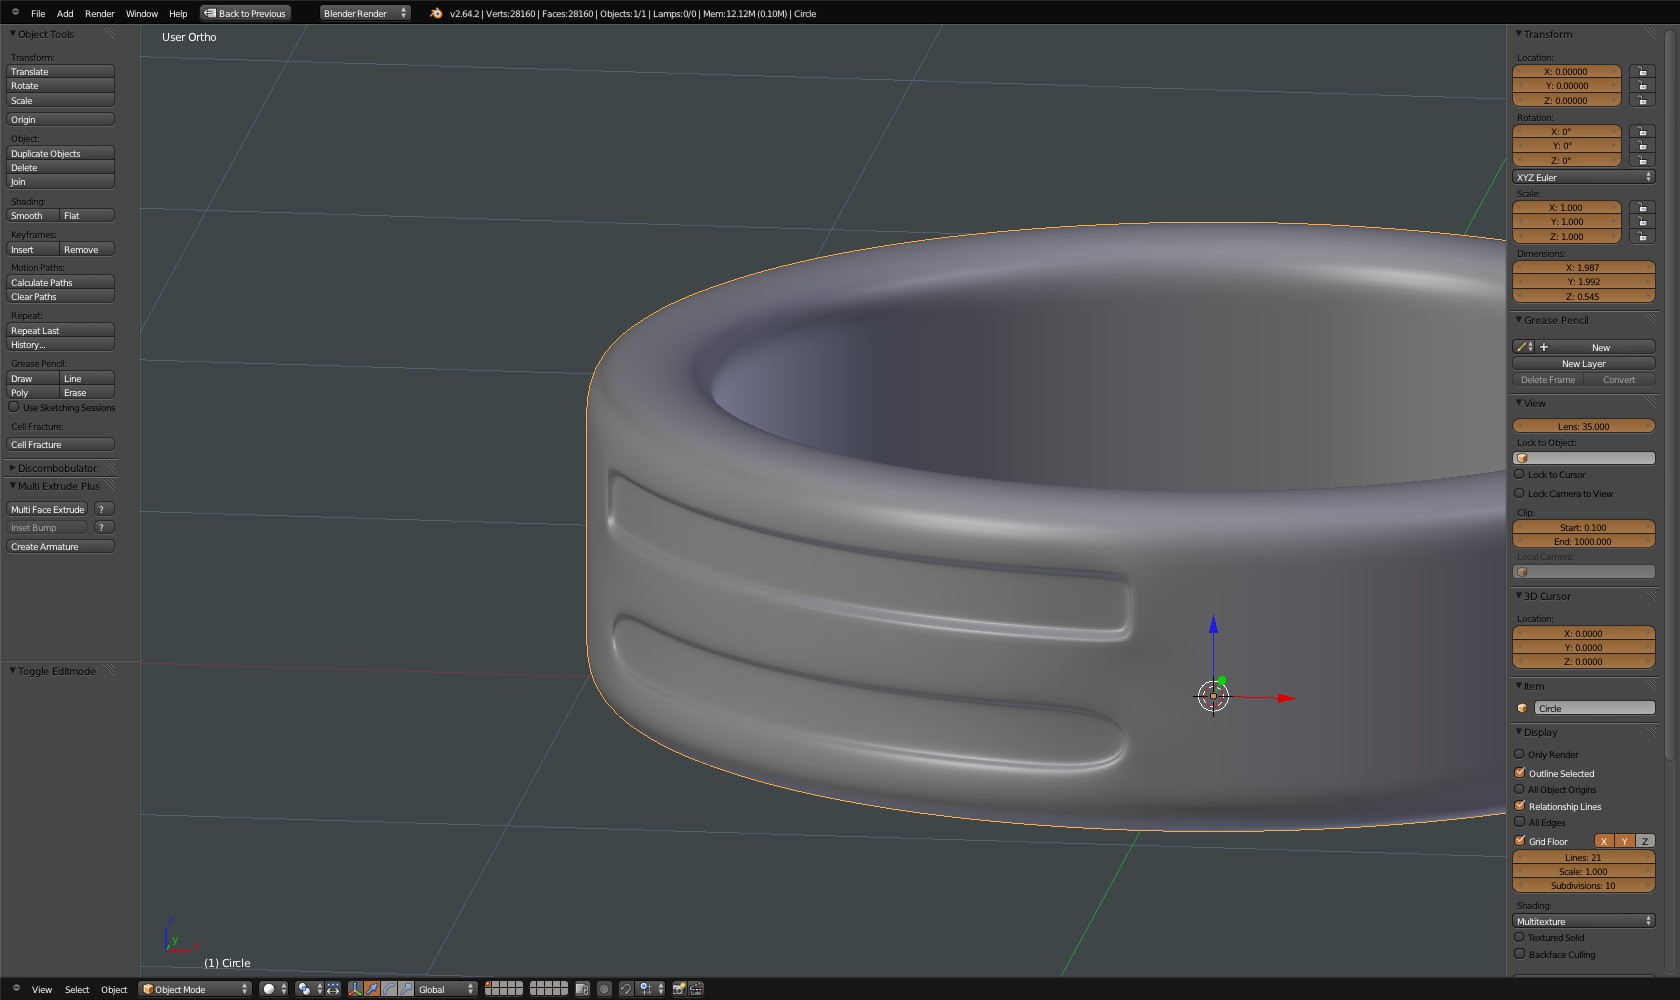
A couple of things I should note in case it wasn’t obvious. The two thin horizontal “shelves” are separate mesh objects and aren’t affecting the main mesh, and I have a subsurf modifier on. I’m noting the subsurf because if I don’t add additional edge loops the openings in the main ring look more bowl shape than rectangular openings.
Paolo, thanks for that link. I’ll check out the tutorial and see if that helps.
RRTK, thanks for the blend file. I’ll take a look when I get home.
Why have a subsurf & the additional object for that shelf loop? Are you animating it at all? Does it need to be seperate for any particular reason? You can do this all in 1 bmesh with some simple knife cuts and re-facing the middle with alot less topology and the desired outcome you originally stated you wanted.
are you adding more 0on top of these seperate “shelves” after this ring is finished?
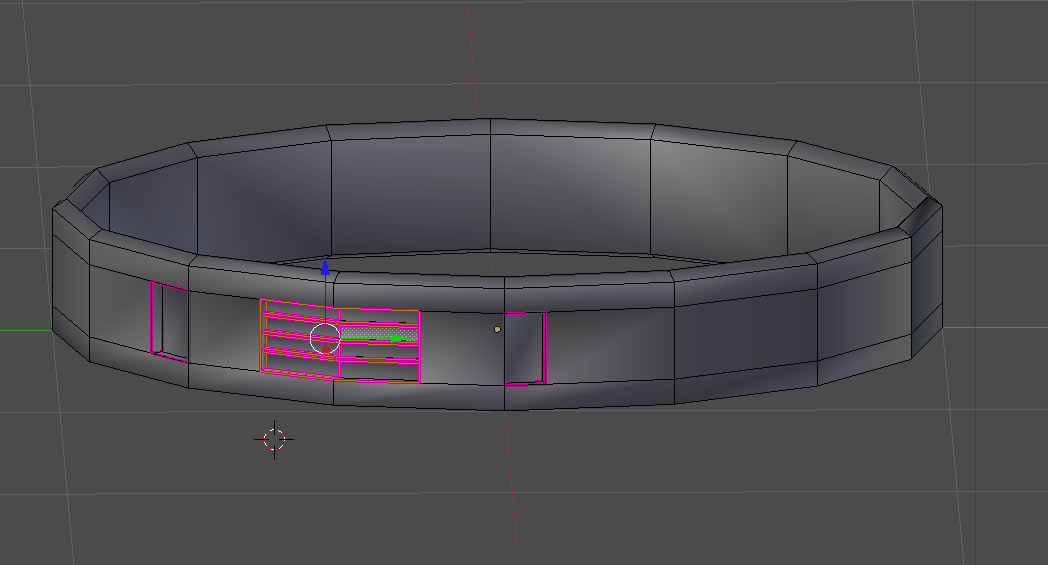
It’s just going to be a still shot, and from the camera angle you wouldn’t be able to see whether or not the shelves were actually attached, so I was trying to keep the main ring mesh as clean as possible. It’s more of a grill, but like I said, from the angle to me it didn’t seem necessary to add much detail there other than what I have. Also, there is also a gap behind the shelves because I plan on adding an emission plane behind them.
I’ve attached a screenshot of what I’m working on. Do you think I should keep the shelves/grill as separate meshes?
Attachments
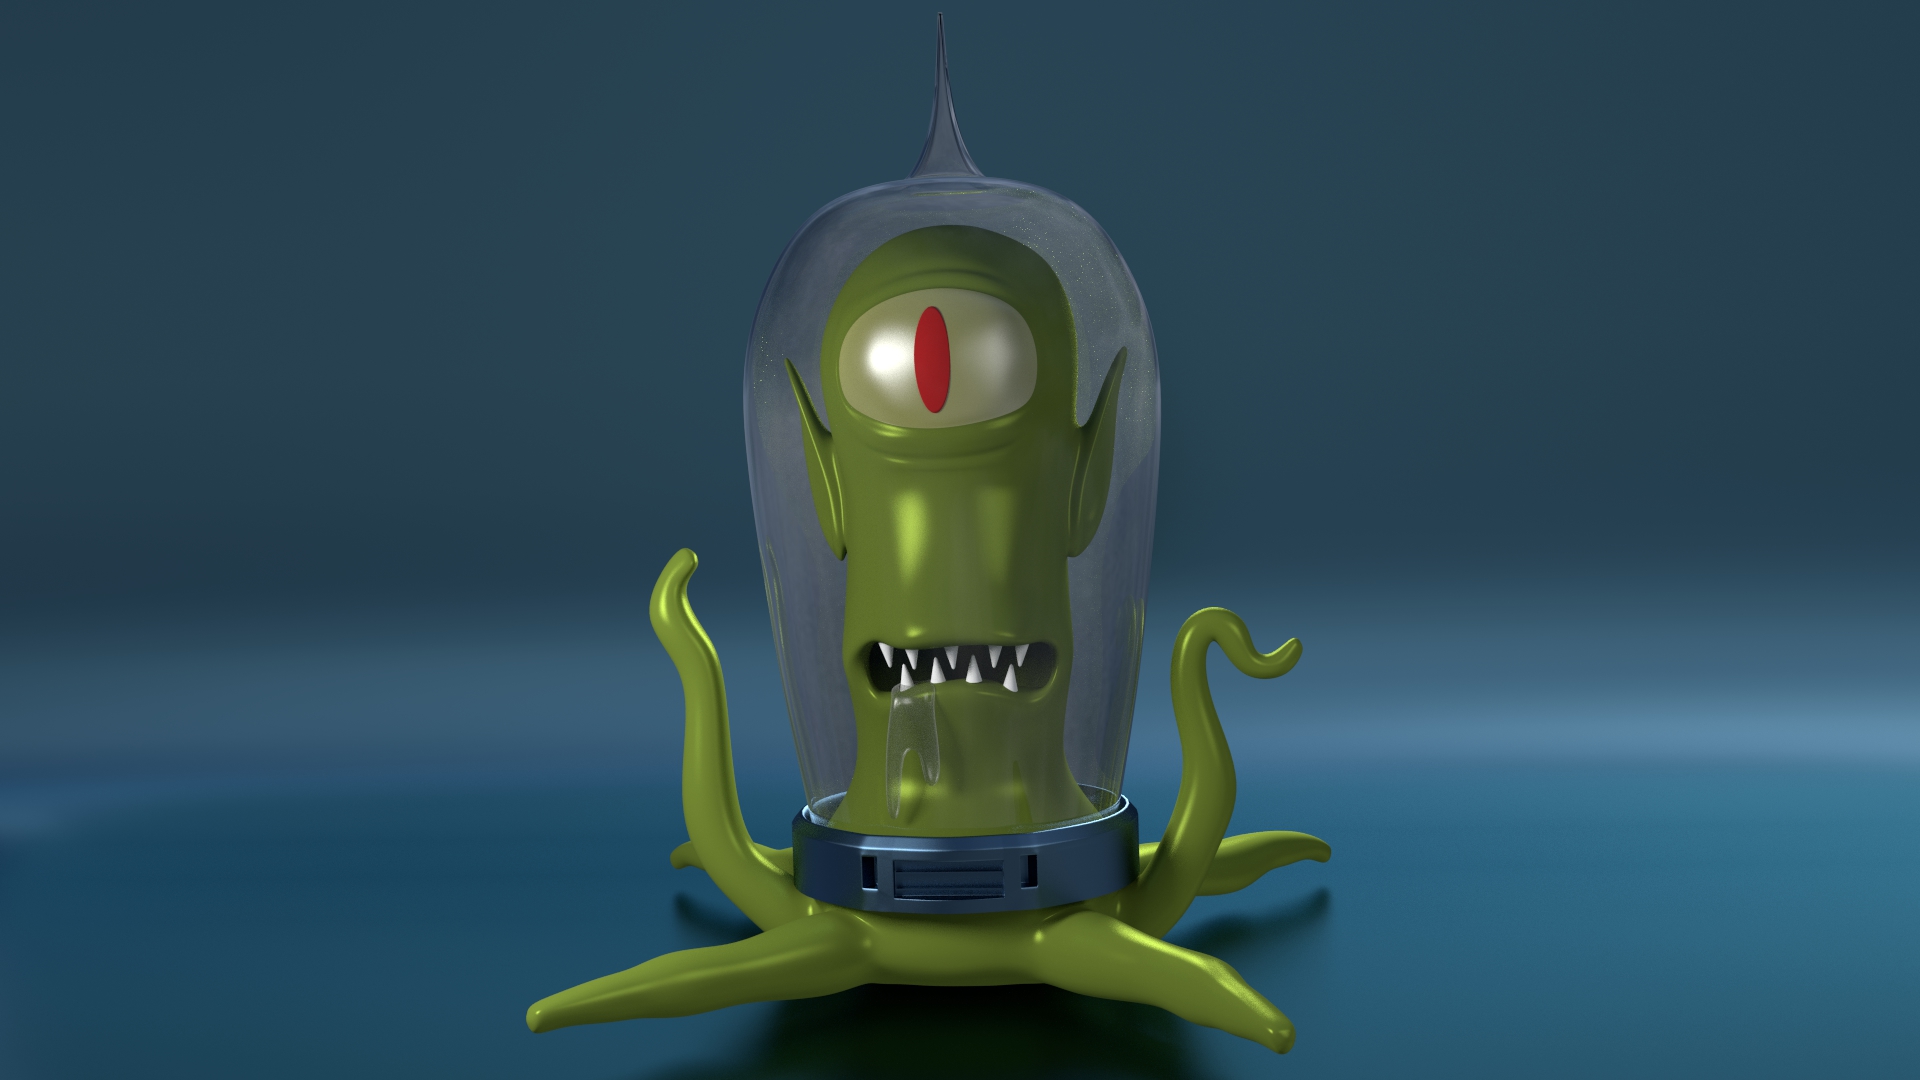
maybe its my untrained eye, but i see no emission source of light from these intrusions on the ring. I wouldnt keep them seperated at all, unless your going to animate this, and have the “grill” actually open when the guy breathes or talks. . . but i wouldnt keep them seperate from the ring overall mesh.
honestly its too simple to put too much thought into it, as Jwilliamson will tell you . . . keep it simple Dont need anymore than the necessary topology/poloy’s to fulfill the job that you need. and with Bmesh system as advanced as it has become, you can do alot without having extra poly/topology into your objects.
Something at this scale wont matter at all if you have a few extra faces or not. . but throw this little guy into a movie/game and it would make a difference for sure!!
also: instead of relying on shadows for the 2 squares on either side of this “grill” you can simply select their faces, assign new materials with a black matte color associated to the faces. that way you ensure the “hard edge” your looking for and the difinite black color that is shown in the pic.
The emission plane isn’t there yet, I got stuck on the ring/grill. :mad: LOL.
I’ll keep playing around with it, and see if I can get a better result using ngons. I’m getting better at modeling with each new project, but I obviously still need to work out how to keep things simple!
The reason for your facets in the first post is because you are adding loops and “pinching” the subdivisions closer to one another.
Anyway… this will help you out a bit… It’s for 3DS Max but can be applied to ANY polygonal modeler. Give them a watch.
http://www.3dtotal.com/tutorial/3d_studio_max/hard_surface_essentials/hard_surface_01.php
And this bit of info from Richard Culver using LightWave 3D
http://lightwiki.net/wiki/All_about_Subpatch_Modeling
Both of these sources provide great info when using subdivision modelling.
Thanks for those, I’ll give them a look. In the meantime I think I’ve managed to fumble my way through this particular issue.