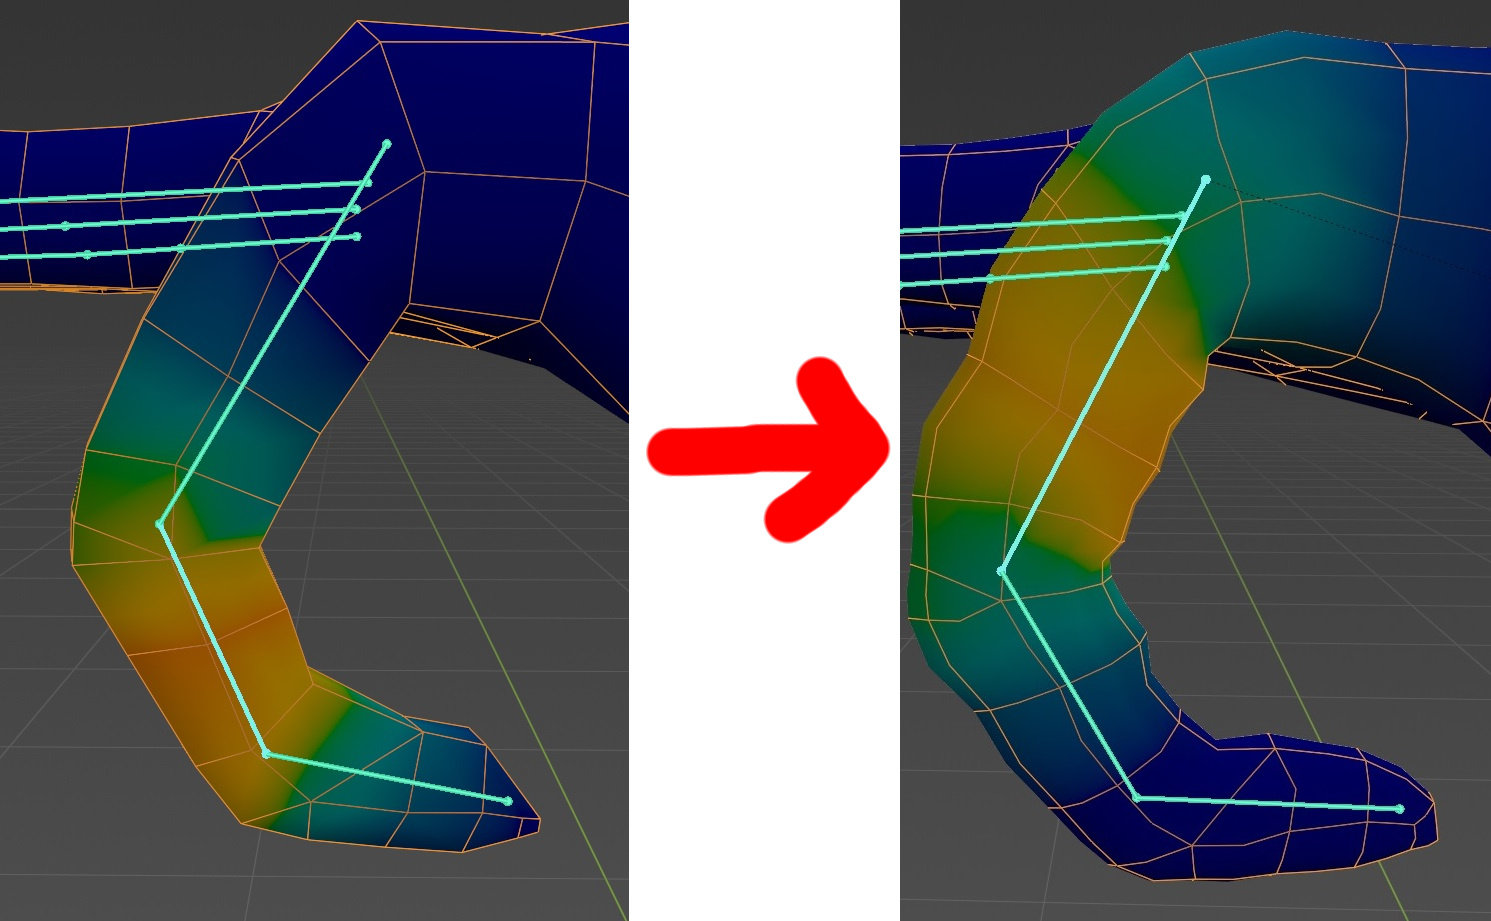
I’ve just finished retopologizing and rigging my character. Now I would like to use subdivision surface along with shrinkwrap modifier’s to make a higher poly version that preserves the shape of my sculpt. However my issue is that when I subdivide the mesh, the weight paint data comes out “all jaggy” as seen on the finger:
Should i manually fix the weight painting after subdividing? Is there a way to get a correct weight paint output?
It comes out like this both with and without shrinkwrap applied.
In the modifiers tab, is subsurface above the armature? It’s normally good practice to keep the Armature at the top.
Subsurf is averaging out vert positions, so it’s going to effect the rig a little. Normally, you’d add the subsurf whilst retopo-ing and before you rig.
The shape looks good only when the subdivision is left un-applied under the armature modifier, but I need it applied to export the model with higher poly count.
So should I just subdivide my retopo and rig that? It’s horribly lot of vertices to weight paint then.
To what purpose do you need to apply and export?
I’m trying to get it ported to unreal engine 4. Rigged and with high polycount.
Something else you want to do, is make sure Shrinkwrap is above subsurf. How high poly we talking? For game engines, you generally speaking don’t want to be too high.
But again, usually, this is all done in the re-topo stage before any rigging is done, that way you get no surprises. Trying to subdivide the mesh after rigging is going to cause some problems. You could just try using the weight paint smooth feature to smooth the weights.
Also, are you not using automatic weights? I found that Rigify is actually pretty solid without many modifications.
When shrinkwrap sits above subsurf it shrinkwraps the low poly version, not the high poly.
My retopo mesh is 7370 polys, the subdivided one sits at 29,932 polys.
I manually weight painted the whole mesh as automatic weighting proved to be very bad, and yes - I ticked the auto normalize option.
Smoothing the wieght paint is the reason I created this thread - it’s simply a lot of work for a whole character but if it is the only way to do it then I will do it.
Can you specify how would your workflow look for a character?
I scored for: sculpting - retopo - creating skeleton & weight painting - subdividing - texturing - exporting.
In my Experience, shrinkwrap should always be above Subsurf. It’ll shrinkwrap to whatever you set it to. It’s order in the stack doesn’t affect what it binds to, that’s defined by you. The modifier stack order is important.
Smoothing weight paints is easy. You go into weight paint mode, and then in the top bar, under weights, there is an option called smooth. Select it, and then in the option ‘Subset’, select all groups, and it’ll smooth out all of the groups. You can then press SHIFT R a couple of times if needed to quickly repeat. That’s a quick and dirty way to smooth some transitions if you have some issues after subdividing, if you were to go down that route.
Your workflow is correct, but just remove Subdividing. It’s not a necessary step. When you retopo, you should add a subsurf modified anyway, which does a lot of the heavy lifting. When you later export, it’ll automatically apply the modifier (if you check apply modifiers) when it exports. In character workflow, there aren’t too many times when you’d actually ever apply subsurf.
I’d definitely look into rigify though - from my limited use with it, it gives decent results by default, plus it auto sets up IKs and controlls etc…