I’ve never actually done this but I think this is how it’s done. I’ve made a high res sculpt of a face, I have retopologized it and now I want the detail back with subdivisions in blender. I have baked a displacement map and now I want to displace the surface and recover the high res detail and look. When I use the displace modifier and insert the displacement texture, change the coordinates to UV, it get all scrambled up. I don’t know how to do this, anyone could explain it? :o
You will need lots of geometry to show the detail so add a subsurf modifier above the displace modifier. The adjust the displace strength value (I guess its too high)
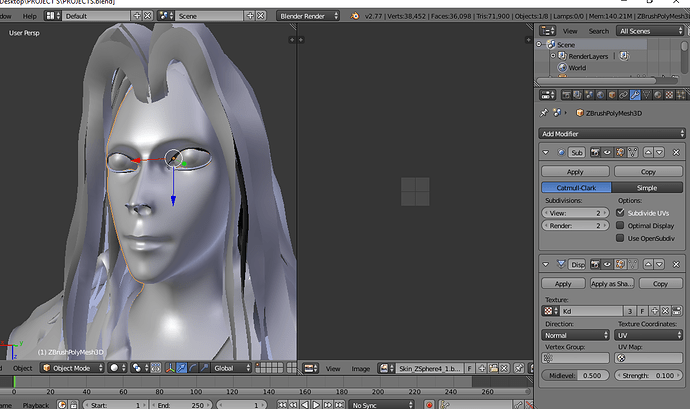
Here’s a screenshot, as you can see it’s all scrambled up and nothing I change seem to fix it. I’m no doubt missing some step, know what I’m missing? Thanks.:o
Attachments

Also check the scale of your model you should set it to 1.
Your screenshot doesn’t seem to be showing up, at least I can’t see it.
What is visible in the cropped screenshot is too high strength on the displacement modifier. Unapplied object scale would also affect the strength/normals. Scale is on the 3d view properties, ctrl+A -> scale to apply.
The scale is set to 1, I lowered the strength still looks odd as if the texture has no effect on it.  Edit: The result is better if you change the color space to non color, not sure what you’re supposed to change the color space option to in the texture panel…
Attachments

Two things: Try changing the midlevel and change the (maybe i’m optimistic) subsurf to simple so that there is no deformation before putting the displacement.
Have you more than one UV map. If so ensure you select the map in the displace modifier. You also don’t have a particular high res object to show any detail in your map. Supply a download link to the .blend file and ensure you also include the displacement map
Alright thanks, I have put a displacement map on all models, if you could check if they’re put on right I would appreciate it since I wouldn’t know. When I try to render it the displacement seems too harsh, not sure why that is.
http://www.filedropper.com/projects_13
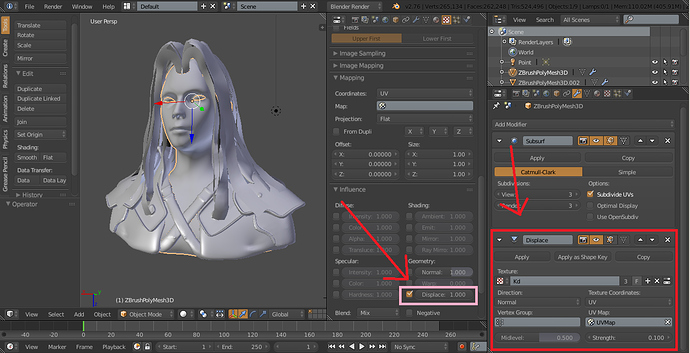
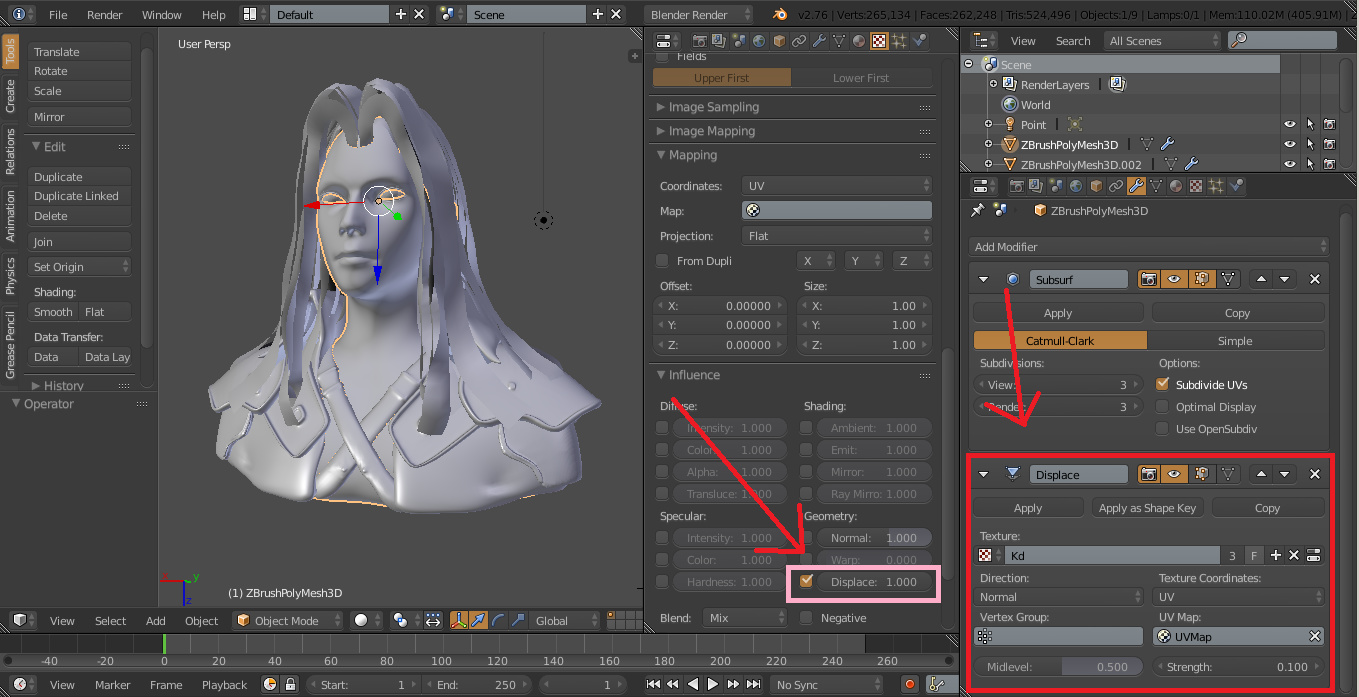
So I think I’ve found your problem. You put the displacement as a modifier but also in the Texture menu, you got to choose which one you want. Hope it helps and happy blending!!
Under the displace modifier you’ve got to select a texture slot.
Ok so that fixes the rendered result, but everything else is setup correctly then?
Yes, seems like it, just don’t forget to change the previous problem on all the meshes.