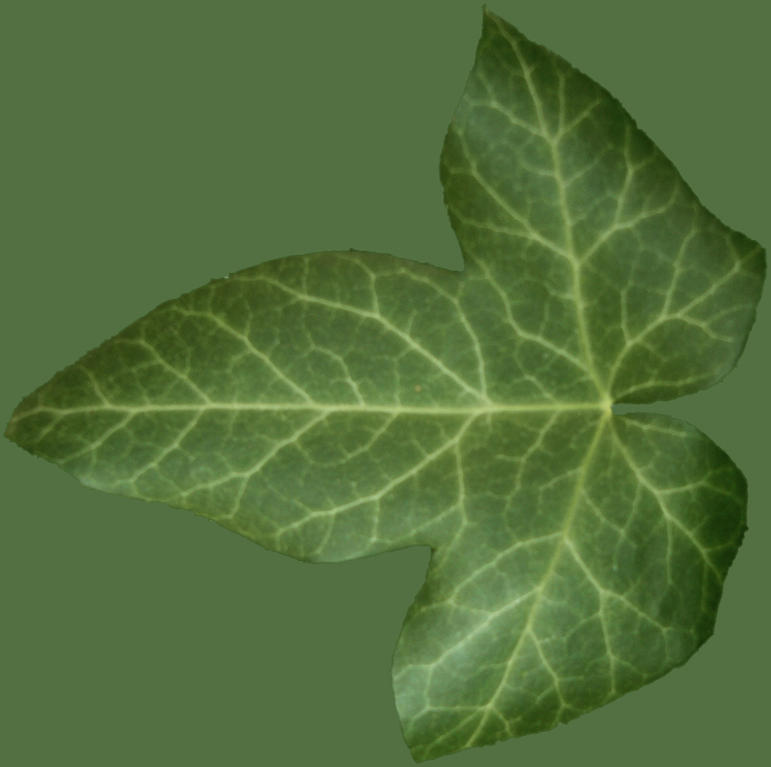
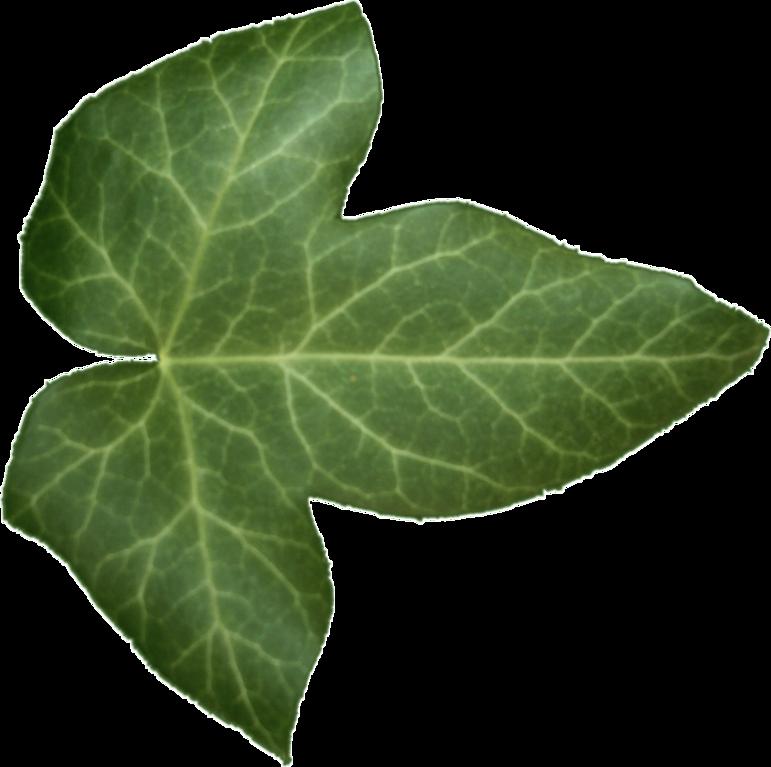
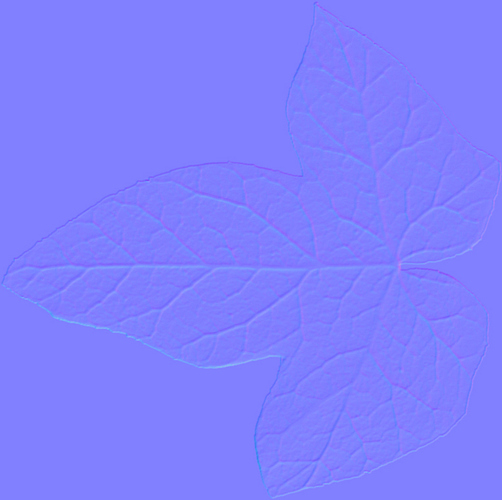
Yah well, assuming thats what the OP meant, here we go 
If that´s not sufficient I do a full tutorial on request.
A Small tutorial for making leaf textures:
Introduction:
You´ll need a camera - any does the job, even a cellphonecam does it nowadays, you might want to have somthing with a flashlight though unless you got a lightrig.
You´ll need some kind of battery powered point light source, or you take the leaves home with you.
GIMP - free image manipulation tool (any other does too that can work either with transparency or alpha channels)
xNormals - google for it, it is a powerful free tool for normal map generation either from images or high poly geometry
-
Shutdown your computer and leave the house with or without a camera, don´t forget to dress and prepare yourself for social interaction - if you fail to do so you got to get a life we´ll cover that in another howto 
-
Go and gather some leafs, real ones from plantlife and bring them home.
You now got 2 options to take the images, you make only one image for the diffuse texture map and make a “fake normalmap” out of a “fake heightmap”, or you do the whole procedure for high quality normal maps.
Prepare:
As a leaf usually is green, try to find some blue towel, paper, sheet whatever.
If you don´t want to use the flashlight you´ll need a lightcube or a lightsetup to prevent shadows for the diffuse image.
If you want to do a high quality normal map you need a camera tripod of some kind.
Step 1.a- diffuse texture:
Simply take the picture of the leaf and get it on your computer. Be sure to have a nice lighting and almost no shadows. You either need a small lightcube, a light setup, or take the picture with a flash.
Many digital cameras got a nice preset for taking macro images of plantlife with softflash. Should work nice.
We don´t want to have shadows actually because the texture will get a normal map and the shadows should be cast by the geometry lateron in the scene. If you don´t want to do a high quality normal map, you can skip step 2
Step 1.b - high quality normal map:
Setup your camera with a tripod above the leaf, neither the camera, nor the leaf should move for the next 5 images, you could also align the images lateron in GIMP if you got no tripod and want HQ normal maps.
Take the first image like in step 1.a just with the tripod to be sure nothing moves, else you got to align everything lateron.
Now for the following images it is imperative you take them without flashlight. You´ll need your pointlight here, the color quality of the images is secondary.
If you look down on your leaf, put the pointlight “north” of the leaf so it is outside the image and the shadows are cast to the south, take image 1.
Now continue with east, south, west so you got 4 images casting shadows. Those will be used to calculate normal maps. In short, a algorithm will detect the edges in the image and in regards of the shadowlength it is able to calculate back on the geometry.
Remember that you need 4 images for this process.
Step 2 create the diffuse texture:
Download and install GIMP if you got no image manipulation tool, it is free.
Open up our picture from Step 1. Naturally the image comes with no transparency, also the file has none yet.
First step, use the rectangular select tool <R> and once you started to drag hold down <shift> so it maintains a 1:1 proportion, make a nice selection just around the leaf.
Now press <shift>+<ctrl>+<c> or go to Edit>copy visible
Now press <shift>+<ctrl>+<v> or go to Edit>paste as>new image
Extra step if you plan to make hq normal maps and got the 4 additional images:
If you got the 4 additional images, you need them to have the same size and positioning as your diffuse texture map. So at this point, load them in your file.
<crtl>+<alt>+<o> or File>open as layers
Now select your 4 files and they´ll load as layers.
Your selection should still be active and thats what we want.
Turn off all layers with the eye symbol in the layer list. Now turn on the 4 layers one by one, copy the selection and pase as new image.
In the end you should have 6 open images.
One with the layers of your original images, 1 with the new diffuse image and 4 with the 4 matching differently lit images.
In the following steps do the copping and trimming also with your 4 source images for the normal map, however you can skip removing the background as it doesn´t matter because it will be transparent lateron on the diffuse texture and the normal map will not affect the shading there.
Close the original photo and save your new image(s).
Now on the right you see the layer management rightclick your layer and choose “add alpha channel” or go to Layers>Transparency>Add alpha channel
As first step you want to resize the image now to your designated texture size. Usually powers of 2 because UV mapping and memory managment works best with it, not going there now. So 128x128, 256x256, 512x512, 1024x1024 - you want to choose a higher one, because you can always shrink the texture lateron but you can´t make it bigger later without loosing quality unless you redo it.
Now we got to get rid of the background. If you had a blue or really different colored background you can use the magic wand tool - or fuzzy select tool as it is called in GIMP, by pressing <u> or selecting it from the toolshelf.
Be sure to select [x] feather edges and set it to 2-5px in the tools options.
Now click in the blue background and DO NOT release the button. You´ll notice it selects most of the blue background but maybe not nice around the edges of the leaf. Move your mouse up and down (forward and backward, in any case, don´t lift it  ) and you´ll notice it selects more or less of the same color. That is how this tool works. It selects similar colors. As our leaf is green and blue is a color that not really is present in a leaf it is easy for the tool to select all the blue.
Once you are happy with the selection, just press <del> (not backspace, delete)
Now the blue should be gone, you should have a feathered (blurred and not pixelated outline) leaf that is sitting on a gray checkerboard, which shows transparency.
If you are unhappy with parts of it, use the eraser tool or select tool to clean it up.
If you can´t use the fuzzy select for some reason, you got to cut the leaf out manually, you use the “lasso tool” called free select tool in gimp, and cut around the leaf. Once the selection is closed, you press <ctrl>+<i> to invert the selction, as you currently have the leaf selected and press <del> again to delete the background.
Last but not least, safe your new texture. You got to safe it in a format that supports transparency. I usually use .png for compressed textures, if I need them uncompressed I usually use .tga.
Give it a nice name you´ll recognize lateron like “ivy_leaf_diffuse_map_1024.png” for a 1024x1024 texture.
Step 3.a: Create normal map from 1 image:
With your image still open, make it grayscale - desaturate it: Colors > Desaturate
Now open up Colors > Levels. You´ll see 3 small triangles blow the top graph, move them around till your image looks something like this:
High areas almost white, lowest areas almost black.
You got to judge what is supposed to be high and low on the image and use the middle triangle to have an even color distribution.
Once happy, apply it and save the image again as “ivy_leaf_heightmap_1024.png”
Now open up xNormals, which you downloaded and installed earlier obviously.
Under Tools you´ll find “Height map to normal map” open it.
righclick in the left window, open the heightmap, righclick in the righ window and press generate.
Your fake normalmap is done, save it “ivy_leaf_normal_map_1024”
Step 3.b: Create HQ normal map from 4 images:
This one takes some preperation again if you didn´t work feral and the images are aligned already.
You´ll have to fit your 4 images to match the diffuse image in position and size. If they don´t match already, do so by opening them in one file with layers as done before, and turn down the opacity slider for the 4 layers and move/scale/rotate them until they match the diffuse image. Once done, turn opacity back to 100% and save all 4 images.
Now it´s time to fire up xNormals. For this use tools> PhotoNormal.
The interface is pretty self explainatory. You got 4 slots where you rightclick and load the 4 images “left-lit, right-lit, top-lit and bottom-lit photo” then you righclick in the right slot and press generate.
And it will calculate your normal map. Save the image and fire up blender.


