I’m not sure it’s possible, I think only regular lamps have the option to not cast shadows.
As far as I understand, in cycles Diffuse and Shadows are kind of related (it’s the same thing) , that’s why this is complicated to do.
Maybe it would be better to cheat this in compositing ?
Why would you want such a light for archviz? I though realism was strived for.
Anyhow, you could setup the lamp itself to be camera visible only, and fake the effect using a circular array of area lights with shadows turned off, as we don’t have light tubes/cones which would be better suited.
Don’t forget that in real film, if the practical light doesn’t cut it for lighting purposes (hardly ever), additional off screen lights are brought in to help it out. I.e. a table lamp in the background isn’t enough for proper backlighting/hairlighting, so an overhead is used off screen to mimic that the rimlight is caused by the table lamp.
Rendering cheats are fine, but it doesn’t hurt to have the tricks real photographers and filmatographers (?) have up their sleeve and utilize those for rendering instead.
Try using an area lamps instead of an emission plane. Emission planes tend to be finnikier in general, as well as needing more samples. On the area lamps setting, you can check off the “cast shadows” button And, if you need fancy light patterns (the only reason I can think of using a emission plane) try using and IES texture in the new 2.79 builds.
@Handel:
Afaik, only lamps have no shadows option, found in the lamp tab settings. Objects using emission are not lamps so the option is missing.
I fiddled around with this, and the point is it takes a while to setup to make it approximately match the nonfake version. You’ll also have to render out the nonfake version first just to keep it as a reference for tuning the fake stuff. And the fake version might be noisier because it requires more (area) lights.
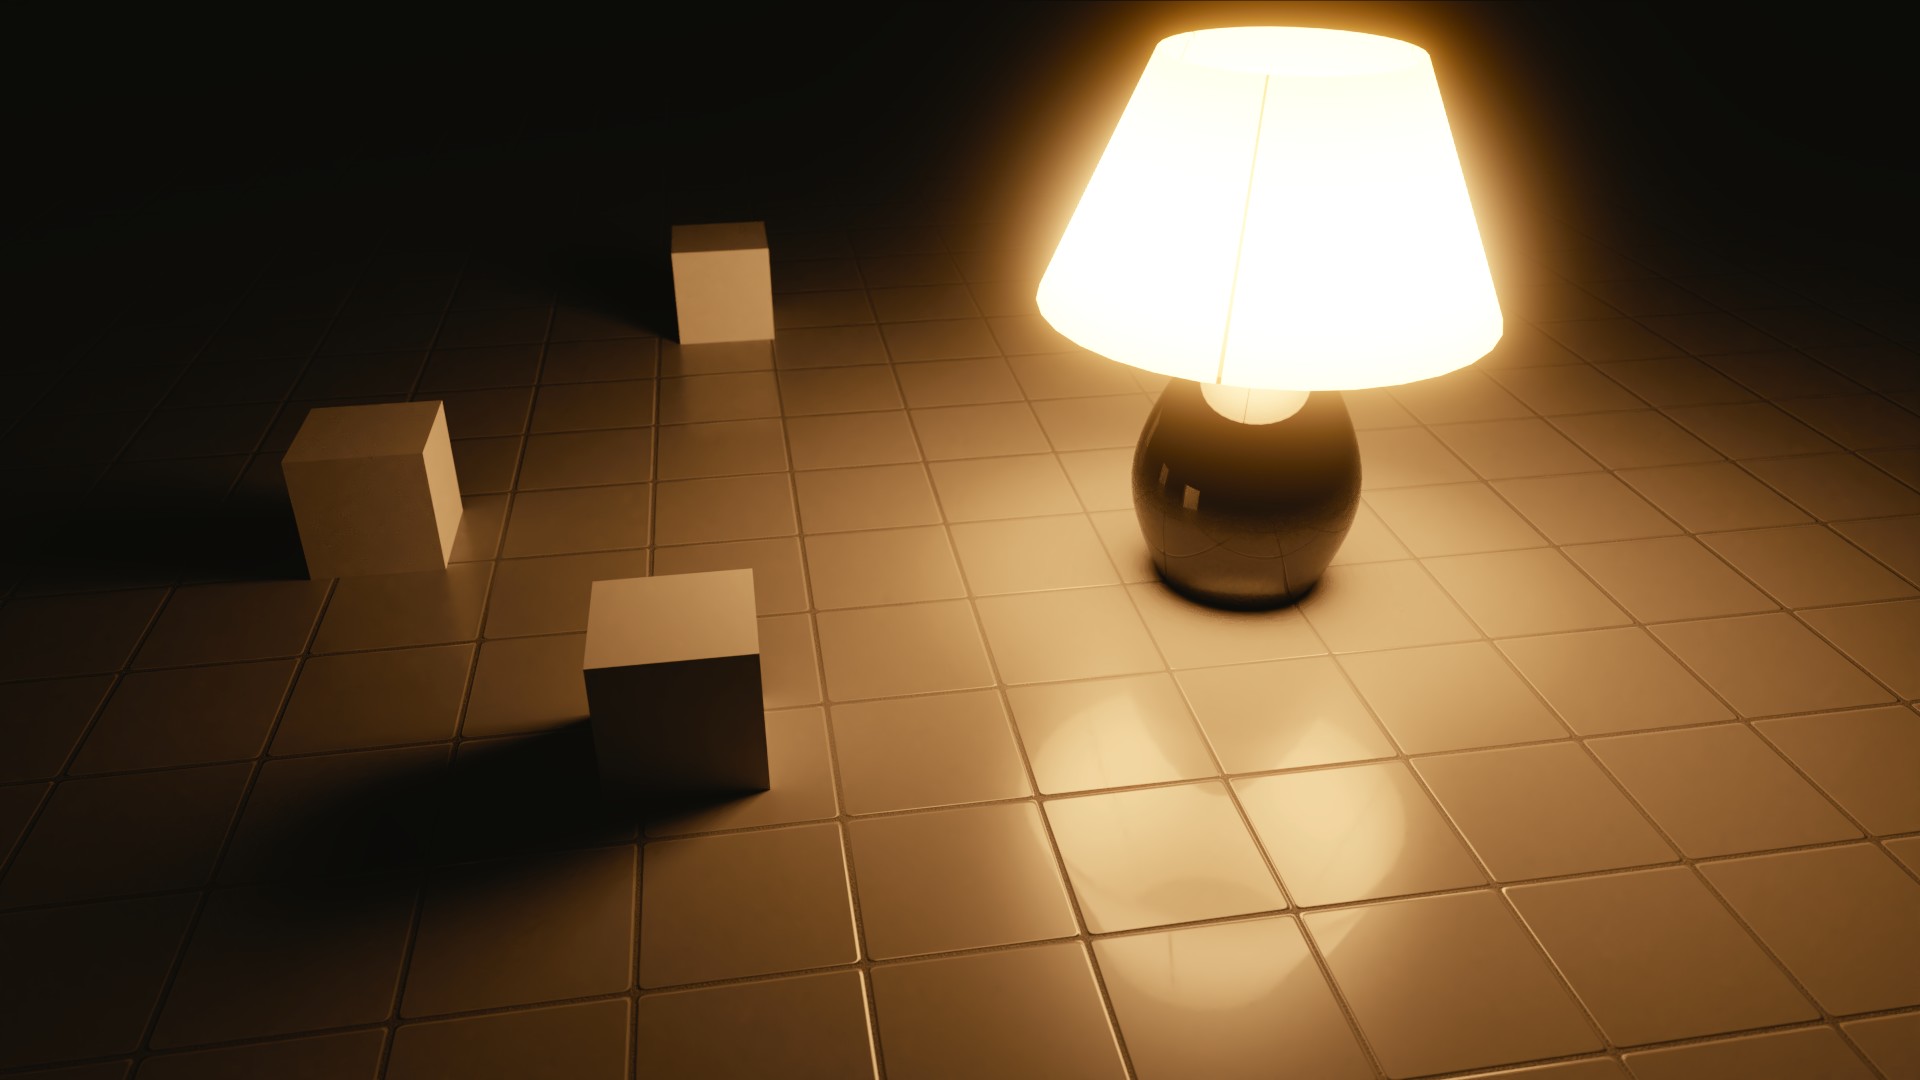
Here is the real version of a table lamp on some shiny tiles:
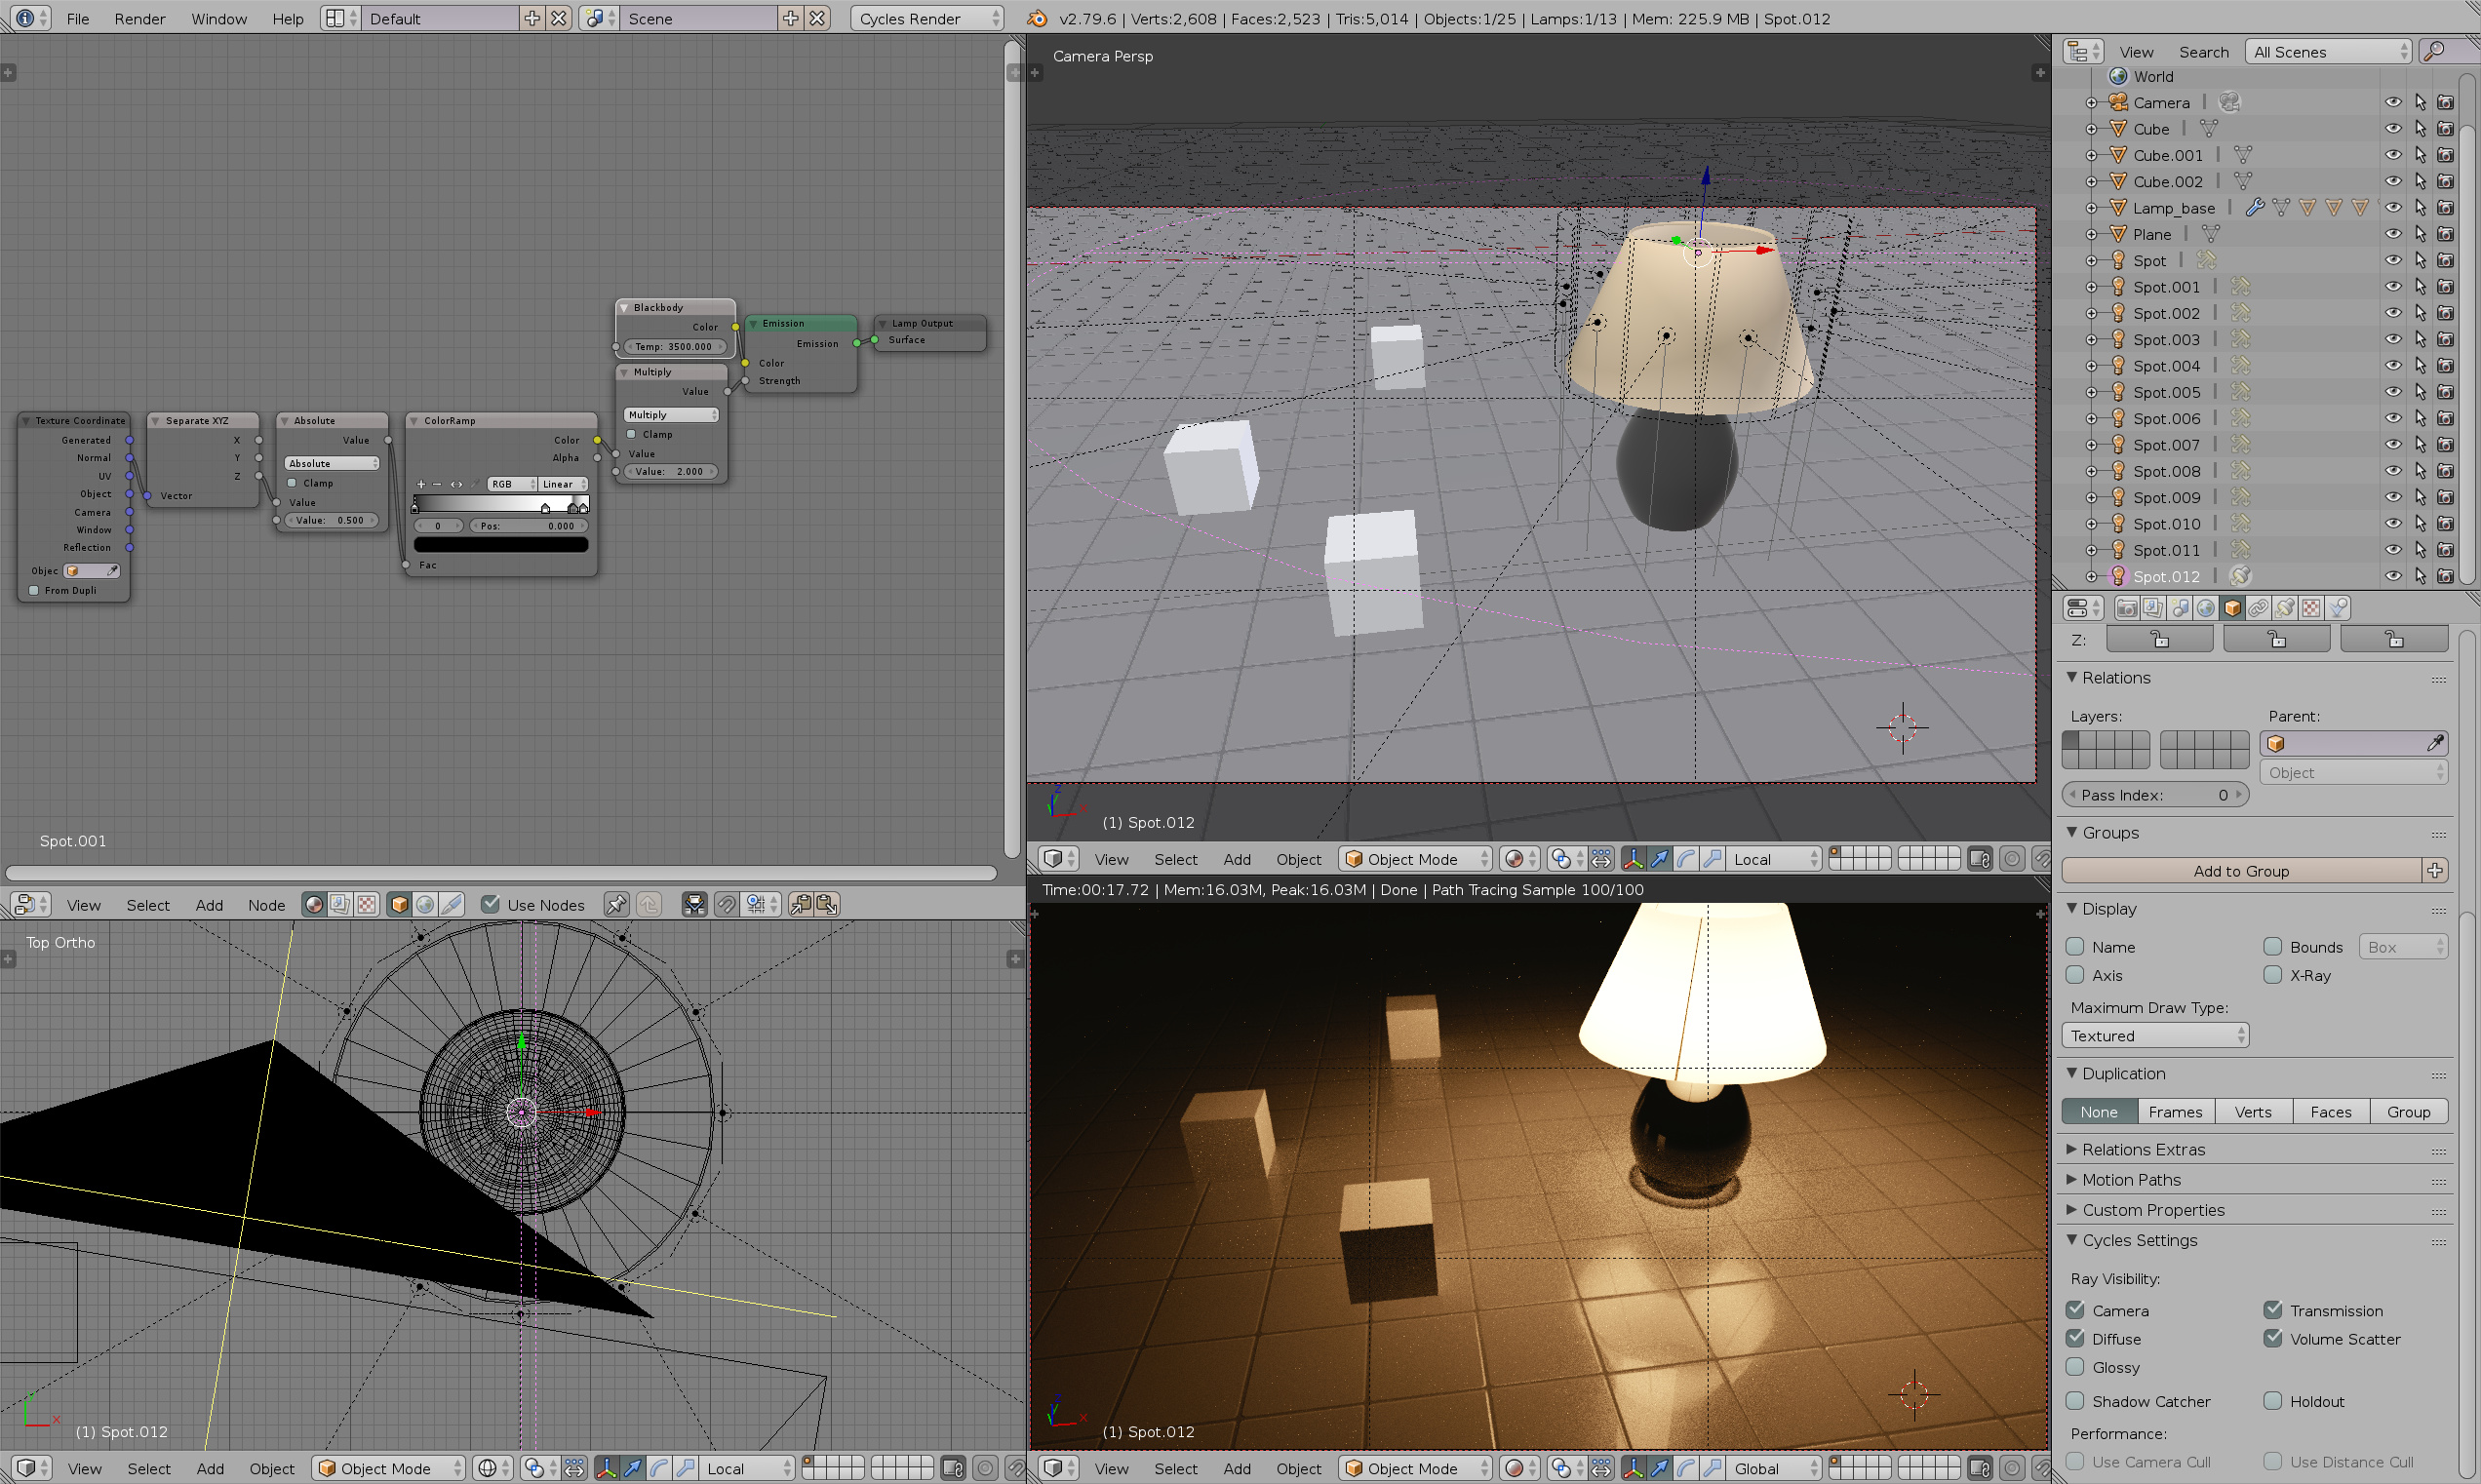
And here is the fake version; “not in shadow area” under the lamp is deliberate to show this is something you’ll have to consider. A couple of area lamps are also glossy visible, indicating this is also something you have to consider.
Screenshot. The righmost white tab is what is creating the “not in shadow area” part. The shade itself is just math nodes describing fake lighting values and “shadows” of the bars inside - it’s just a conical mesh with nothing inside (except the base).
Btw, the selected light is an actual spot light inside the lamp so I could control the shadow from the lamp base itself. The rest of the lights, although named spot, are actually rectangular area lights in a circular array.
Mesh using Emission shader applied is only visible to Camera & Gloss (Object Properties > Cycles Settings)
Within, there’s a Point Lamp with Shadow casting unchecked & Gloss invisible to camera (Cycles Settings).
PS. Also, shadeless shading is prepared within as an example, if such a need occurs.
Yup, used a lot in arch-viz, when it’s more important to get a pleasing (winning) image fast and less about physical accuracy. Think competitions & satisfying clients with cheap kitsch furniture… bling-bling.