No prob, I really do like to help people and the task was pretty simple to me ;). This might get long but hopefully it does help. The one video can be great somewhat but no control for the foot rotations so you need to counter animate by polishing the ik and foot at the same time. With the constraint that makes the hand following the handIK rotations then you don’t have to think about polishing the hand rotations. Though it can be fast for quick posing for a still shot.
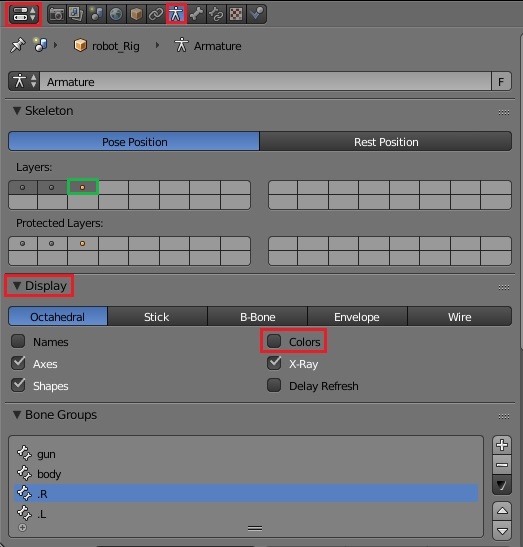
Alright first lets take out your bone colors by going to your Display under the Armature Object Data. It will allow you to see your bones that has constraints.
Green box is the third layer that has the gun rig. Just giving a side note where it is.
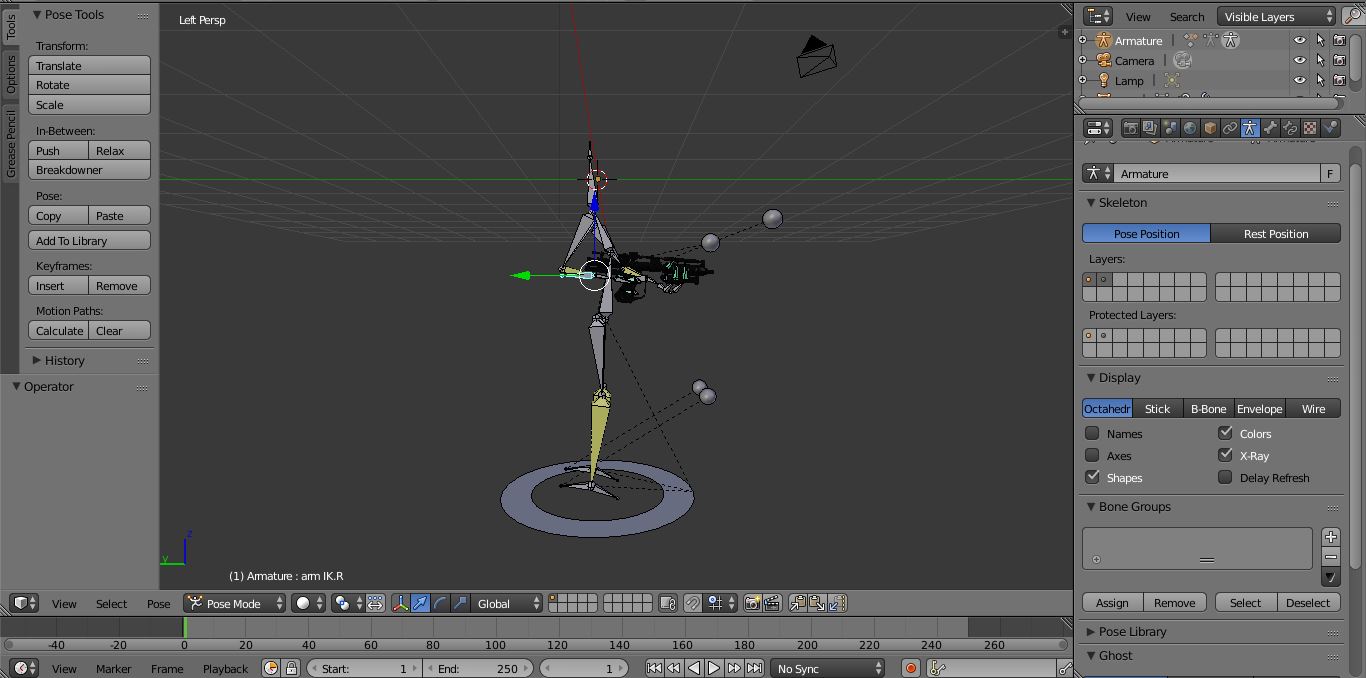
I changed the elbow bones to the back and changed both knee and elbow bone rotation’s. Currently the knee and elbow bones you had were pointing up. Most of upward movement will be in the Z instead of Y. So changing the rotations will allow you an easier time animating and polishing. I changed the locations of the elbow poles because it is where they are pointing to. Think of it as you are almost picking up the elbow and placing it in that spot.Wrists and hand rotations follow handIK rotations. If you select the wrist.(x) or hand.(x) you will see your constraint. Now if you rotate the hand IK, both hand and wrist will follow. These IK’s are constrained on to bones inside the gun. Might be hard to see so you might need to put some shapes in them. One is trigger and the other is shaft. The shaft bone can be animated so you can cock the gun for a reload in the animation. Torso bone was added so the movement for the body will be easier to locate in the animation but know where the body is. Your control bone that is down underneath the character is usually called the root or rootbone. Its better to keep this “root”/“rootbone” not keyed into the animation.
Root bone Game wise: The root is the origin point to the character. So all actions as jumping or falling is stemmed from the root bone. You have a jumping animation where your character is similarly all originated close to the hips without animation to the root. Once imported to a game engine the root will be animated by script in the three of X, Y, and Z. If the root is animated it can cause the scripter, the one that develops movement in the game engine, a hard time.
Root bone Production wise: Almost like the game but a little different. I usually leave the root and just animate the rest of the bones forward. Though some animate cycles or cyclic animations to put onto paths. Cyclic animations is like a walk cycle. It repeats the last of the animation to make it into a cycle. Sometimes putting a path on animations for characters really doesn’t look good. It takes more time just to get the path to act right. Don’t get me wrong though. Paths can work for other animations and setups.
=============================================================
I’ve been an animator/rigger for a few of indie games past two years on Indiedb.com so some experience is from those games. A lot of the help comes from tutorials and lessons I found. I picked up DVD training 8: Humane rigging by Nathan Vegdahl in the blender store. It has been helping greatly in these past few months and still valid for v2.7+. Animation wise I would consider going to CGcookie.com/blender for Beorn Leonard’s tutorials. A couple of months ago I checked out Beorn’s animation fundementals in the cgcookie.com/blender and helped GREATLY. Now knowing the fundamentals I can look at most animation tutorials on other software to help even more. Those lessons are not for free but pretty cheap comparing what you could have needed for an animation school. Not saying that an animation school shouldn’t be needed. It can help even more than just tutorials and a few lessons.
The sites or youtube channels I usually go for animation and rigging tutorials and experiences are:
[VscorpianC] https://www.youtube.com/channel/UC1ZS-KP7tdjiTyE8ld-sq3Q
CG Spectrum College of Digital Art & Animation https://www.youtube.com/channel/UCGmf0-IO40vNPRjcXacrb8Q
11secondclub.com
CG spectrum has awesome animation tutorials though in maya. Once you get the hang of animation in
blender then you can look at practically any animation software and learn from it. Now rigging can be a
different story. Constraints can behave differently between software.