if no tutorial, explain like im a beginner please. thanks!
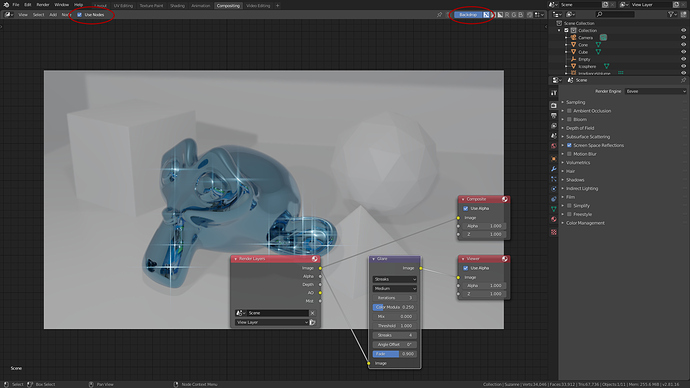
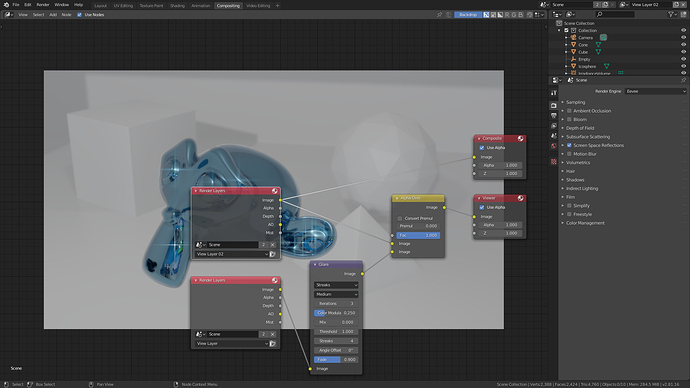
You can add a Filter > Glare node in the compositor with Streaks or Simple Stars. Use threshold to increase/decrease effect.
After your render is finished. Hit the Compositing tab, enable Use Nodes and Backdrop.
Nodes will start with a Render Layer and Composite node only. Add a Viewer node and a Glare between them. Compositing works just like materials but for post processing.
my problem is that when i add a light source to make bright spots on the water, it makes the land too bright, and when i add the glare node, it makes the land sparkle when i don’t want it to. any way to fix that?
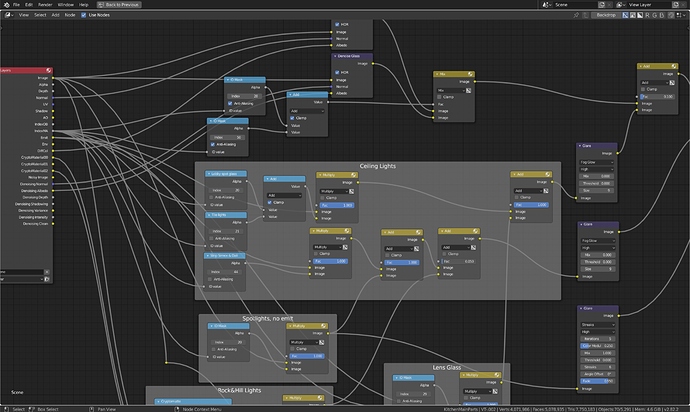
Using Material or Object IDs (or cryptomatte), you can assign different glares to different things. Here is the glare portion of a real project:
Be sure to check the matte. For some transparency based glass I had to resort to cryptomatte because the mask was also affected by transparency.
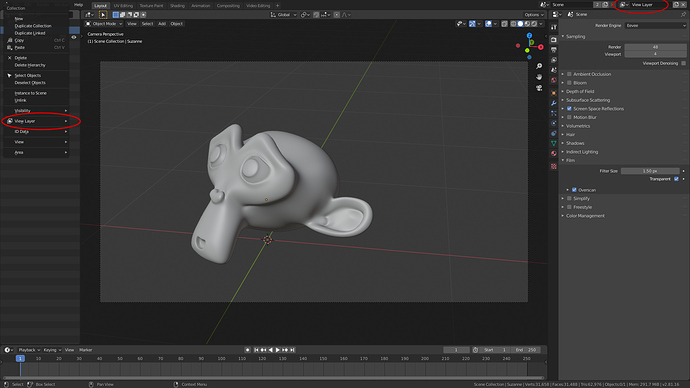
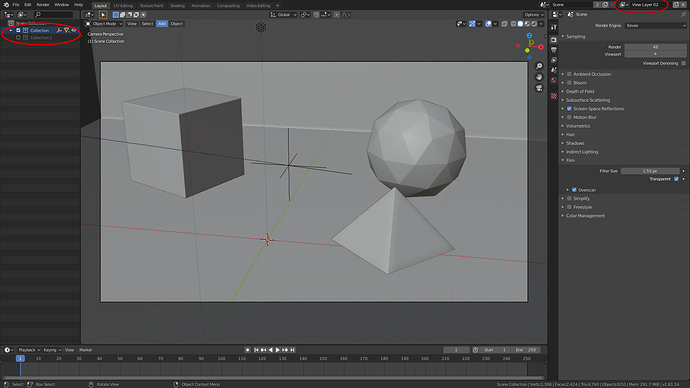
You can isolate an object with a new View Layer and a Collection. Create a collection for the object that you want to isolate, and a new View Layer. You can switch layers but when you hit render F12, will render two images separated.
In one View Layer you right-click the collection that need to be disabled. So in one layer you have the water enabled and other the background. After that you can apply effects in Compositing individually.
I am using Eevee, but for Cycles, Criptomatte is a better option, require render layers knowledge.
Compositing is a incredible good resource. I think It worth expending more time in compositing than the actual render, each artist has it own opinion about it.
Thanks for the advice, but the land is part of the object that the water is on. Any work around for that?
thanks for trying to help, but i’m a beginner (first project) and i can’t decipher that enough to apply it. can you simplify it any?
Select your object go to Edit Mode, select the faces that are water, press P > Selection, this will separate your mesh to another object. So you can composite as previously said.
Also adding a HDR to the scene will improve overall reflections. In materials node ate Shading tab, there’s a drop box where you can choose, Object, World or Line Style. Select World, then add Texture > Environment Texture, select a HDR image.
For free HDR’s: https://hdrihaven.com/ or https://hdri-skies.com/
Don’t forget to tweak Roughness and Metallic in your water material, for Principled BSDF node.
the water has a super complicated outline though. how could i select it’s faces? basically my object has a map of the earth on it and i gave the ocean a water texture and the land a golden texture with a bump map
For Cycles only, you can add a Pass Index to a material. At Properties tab select the Object Material > Settings > Pass Index choose a number, 10, or 12 or 20. In the Compositing there’s a node Converter > ID Mask, input your number of choice and those exactly pixels for that material will be isolated, like a Photoshop mask.
For Eevee will need to create a new layer with collections them isolate like mentioned before.
https://docs.blender.org/manual/en/latest/compositing/types/converter/id_mask.html
Anyway you must learn something about render layers, it’s not a beginner feature but I highly advise.
If compositing is not what you are looking for, you need to test different water materials.
Now with custom AOVs in 2.82 alpha, how about rendering out a screen-space/coord based animated voronoi which is then used as a mask in post, possibly in combination with depth buffer and ID mask? Not something I have time to toy with right now though.
