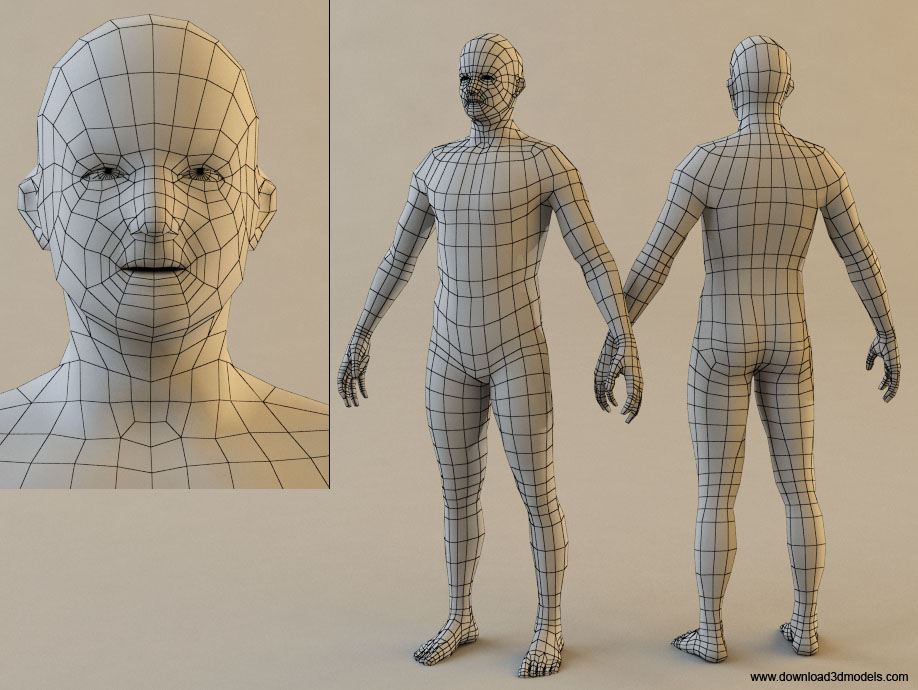
I tried to make a model with not too many polygons, like the ones we see made for videogames, where they look realistic, but in fact are made with a small amount of polygons. And when you see their wireframe, the polygons are very smoothed out, and the shading without the material applied looks smooth as well. Like this example:
Every face reacts to the lighting individually, instead of “spreading out” the light and shadow making it look smooth.
How can I achieve this? What have I done wrong? Of course, my model has way more topology than the example I gave, which, in my head it would make more sense if my model looked smooth and the lower poly model’s shading looked more blocky. But clearly that is not the case.
So what am I doing wrong? Is there an extra step I need to take?
For a little bit more detail on making your objects smoother, see my post here: Not like glass
Also, @Joey_Hillerst mentioned the use of Auto Smooth as an option for smoothing in this post here: Not like glass
You may not want to use Auto Smooth on a character that has the potential of being animated. You may end up deforming your mesh past the angle threshold, and that wouldn’t be good to have flat and smooth shading popping in and out during an animation. Additionally, you can selectively shade smooth different faces in the same mesh by doing so in Edit Mode. You select the faces you want smooth and perform the Shade Smooth procedure described above. Hope this helps!