I’m using blender version 2.83.1
Now when I move the in the timeline the slider to frame 1 the point light is in specific position but when I move it to the last frame it’s in another position and then when I’m playing the animation when it’s getting to the last frame it’s jumping to the first frame and not smooth continue from the last frame.
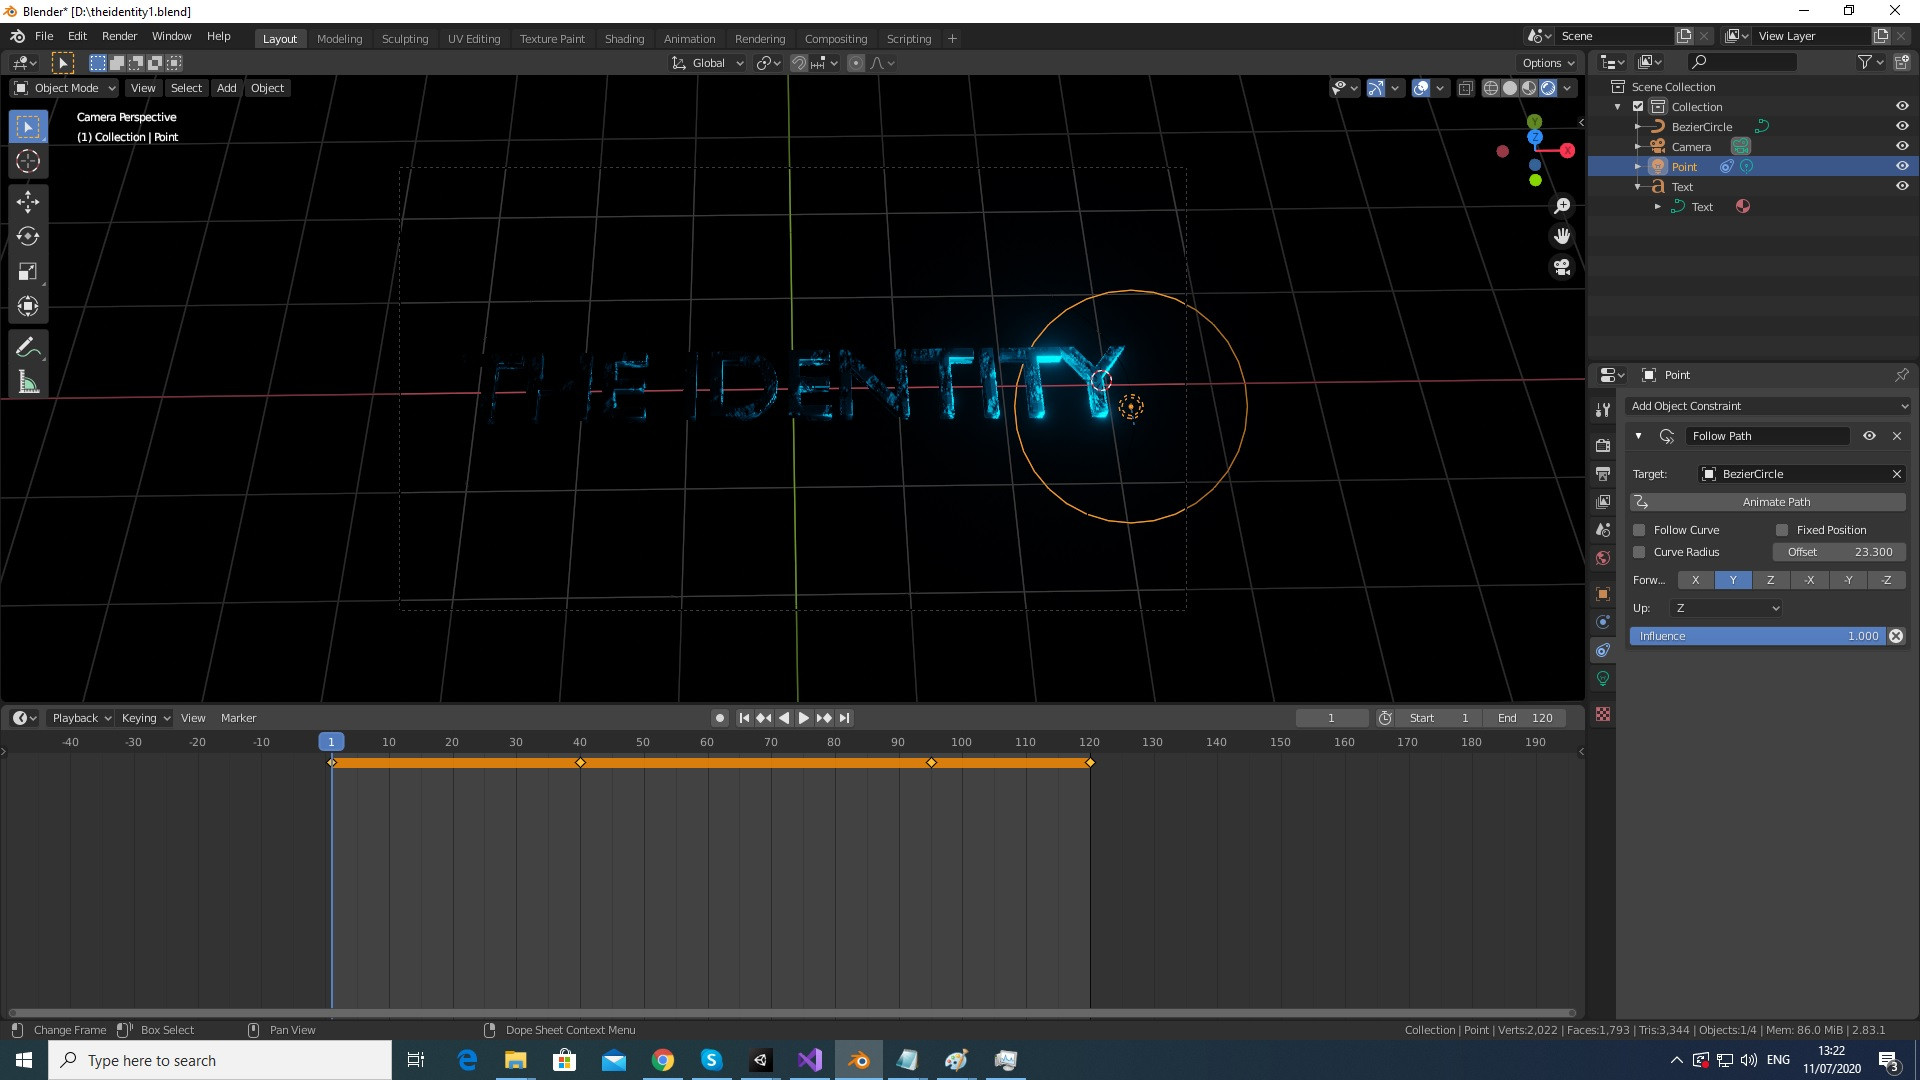
This is frame 1 screenshot :
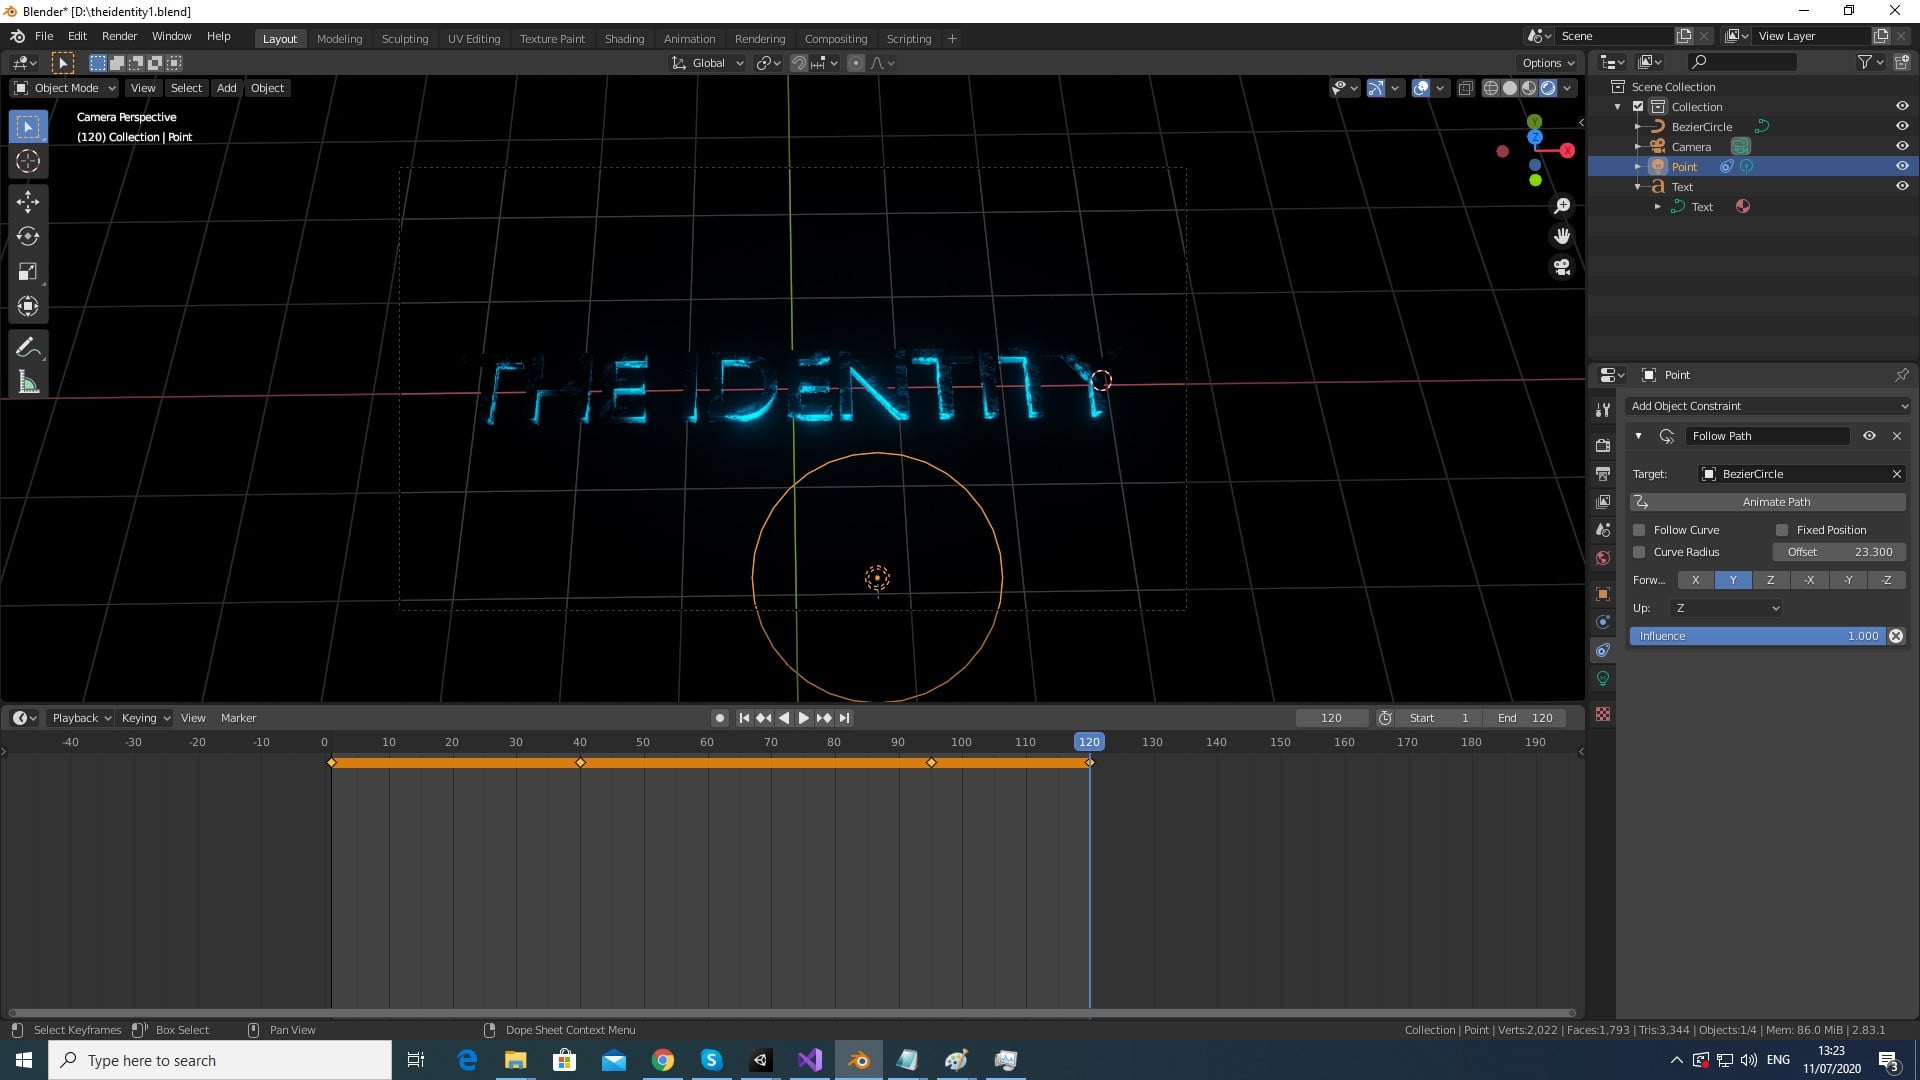
and this is frame 120 the last frame screenshot now the light point is in another position :
I tried to change the offset on the right but beside it’s not accurate I can’t be sure if I changed the last frame offset so the point light will be at the same position like frame 1 it’s not working good. Each time I change the last frame offset to make the point light the same position of frame 1 when playing the animation when hit the play button the last frame and first frame the point light is not at the same position.
What I tried :
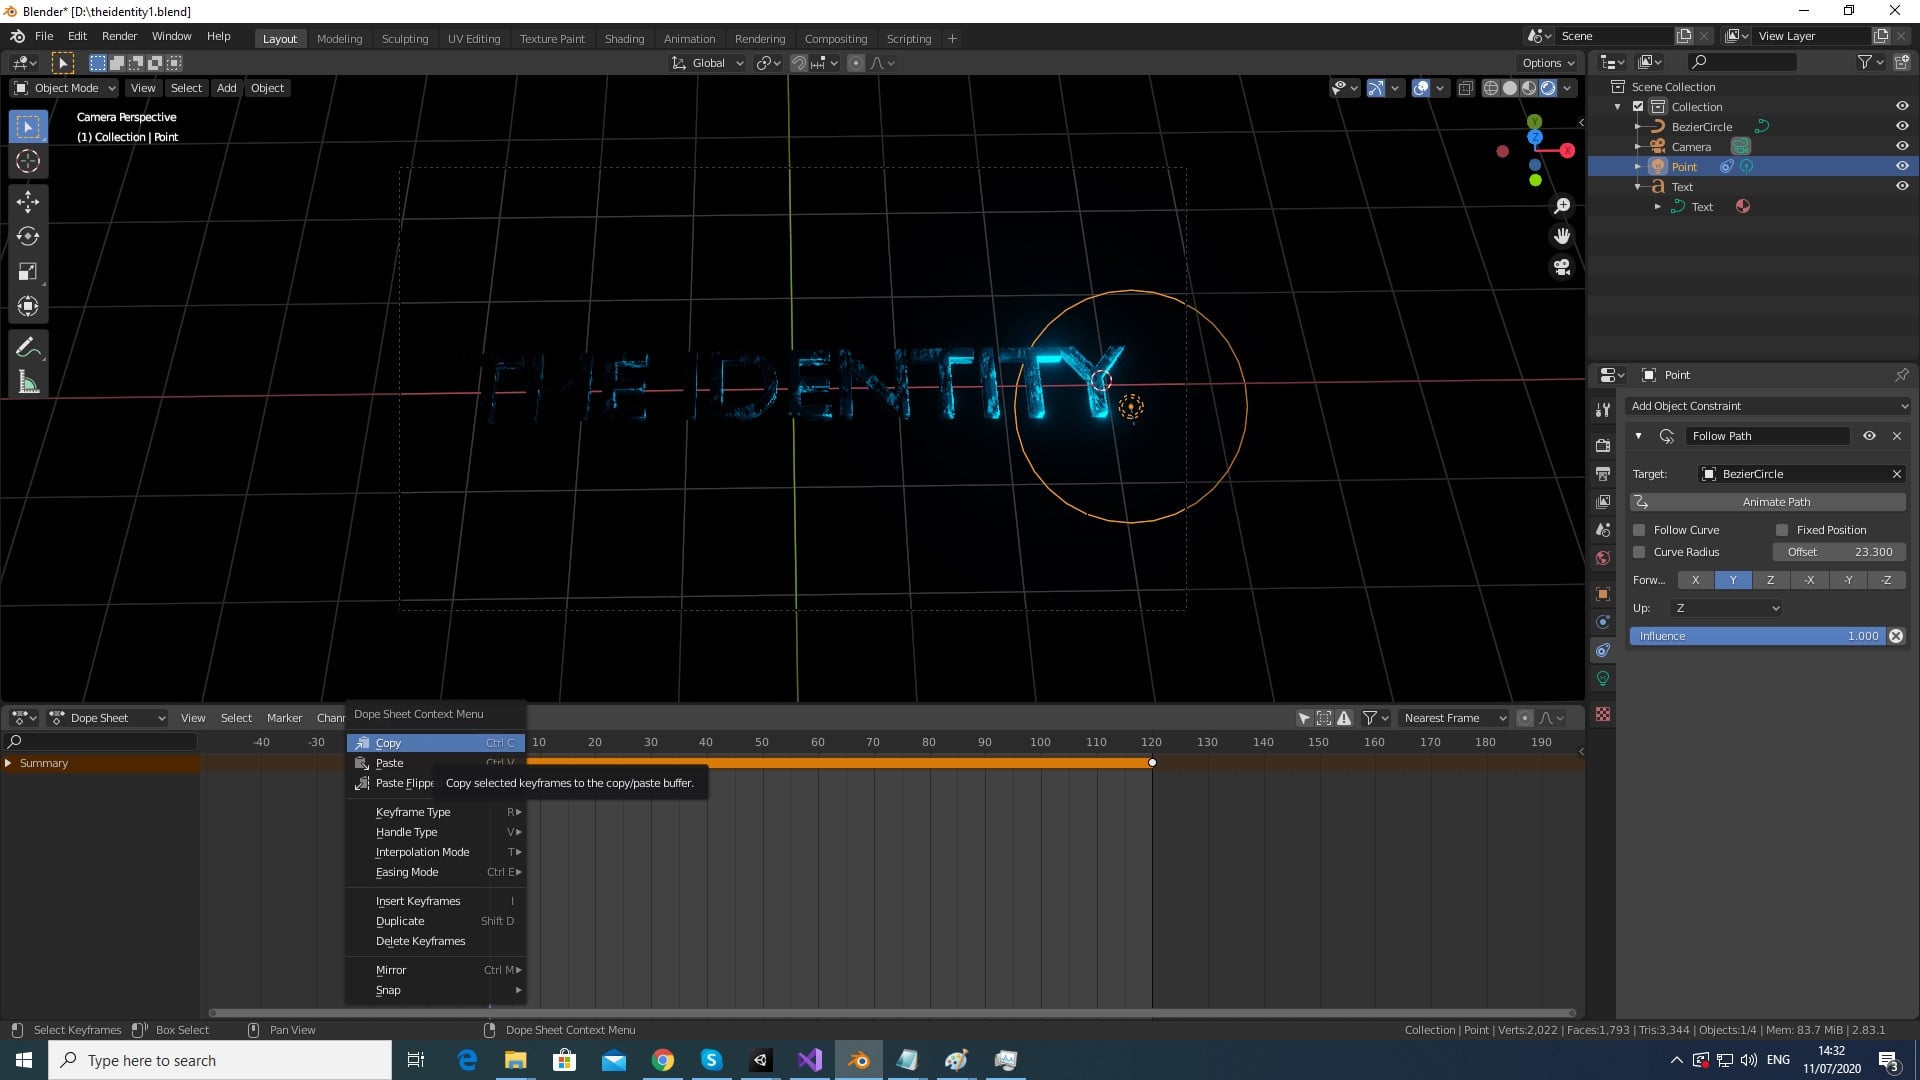
Changed in the timeline the editor type to dope sheet and then on frame 1 key frame I did right mouse click and Copy but I’m not sure if that is what I suppose to do and then I paste it to the last frame key frame but it didn’t change the point light position.
I tried also to remove all the keyframes and leave only the first keyframe on frame 1 then did duplicate and moved it to the last frame but still it’s not working.
Hi Ben,
as fare as I understand, you are animating the spot-light, right? And finally you want to have a (so-called) looping animation?
Well in order to help You, Your screenshots are missing essential informations about your animation. The dope-sheet only with the summary of key-frames visible offers the only information, that ther are keyframes. You are even not showing the transformation-data (the n-key menue), which at least could show the x-y-z transformations at key-frame-point.
So in order to help: Either do several screen-shots on any key-frame with n-menue open, or which is the better way: Select Your Spot-light; go to object-data, then navigate down to “Motion-Path” set “path type” to “in range” ; set “Frame Range Start” to “0” (zero): “end” to “120” (your last keyframe) and “step’ to '1”. Then press “update paths”
Then You see the whole path of movements of your object. That would be a first information, of what is really going on.
By the way: Your last attempt (deleting all K-frames and copying the first to the last) is technically without any result, naturally. Just because between frame 1 and fram 120 there is no transformation and with this blender is unable to do any interpolation bewtween those two frames.
Well another option is, to upload this blend-file, so someone can look inside (without asking too many questions here, cause also my request for more information, will not at once lead to a solution)
I took this from a youtube tutorial and in the tutorial he is using 120 frames but I found now that if I change it to use only 100 frames from 1 to 100 it’s working perfect. So I wonder why he is using 120 frames in his tutorial ? Maybe it’s important I’m not sure because it’s working perfect now. This is a link for the tutorial I did youtube.com/watch?v=jLqD2_cVdQM&t=9s