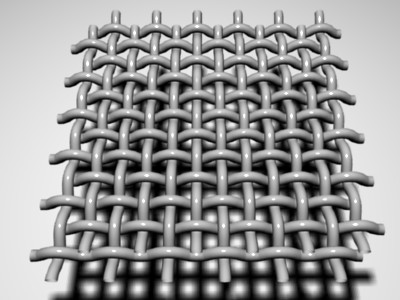
Where could I find one or how could I make this mike ‘skin’. I don’t want it to be a texture, I actually want it to go through each other like that.

maybe… take a sphere and cut it in half, triangulate it, set the material to wire, then duplicate it and rotate it around by 10 degrees then duplicate it again…
edit: the problem is that the wires need to be thick…Im just messing around atm, Il get back if I find out how to do this…
edit 2: maybe you could make the links using the array function, but flat, then use retopo to make the links meld into the shape that you want it…
here is a site with a good tut on how to do a fencelink thing
http://blenderunderground.com/files/posts/roundup/blend/chainlink.zip
Salutations
You can create a quick approximation of the microphone dome with a UV sphere. Then open up a scripts window and run Mesh->Solid Wireframe. this will give you a true wireframe solid mesh (not a texture). After you run the script, the original sphere will still be in place. So make sure you move the newly created mesh away from the original source.
You should see a dome constructed entirely out of connecting wire. At this point, you will realize you can indeed get a modled wire mesh failry easy. So then you should go back to your source and modify verticies in the source sphere to create the over under look by putting the sphere in sub-object mode and pushing every other vertex in a bit. Then re-apply the script to the modified source. Use the duplicate and rotate technquie that Mandoragon mentions.
A sub-surf modifier on the final should give you the rounded look.
Thanks to all of you, but I really have trouble understanding some stuff.
Mandoragon: I can do your wire technic but I don’t know how the array functions quite work. Also, I don’t know how to use the retopo.
RickyBlender: Although the file was kinda helpful, it’s hard because I don’t really know how the got there.
Atom: I don’t know how to open up a script. Maybe if I did I would understand.
But, seriously thanks to all of you.
Here is my attempt of just pushing verts around for 10 minutes. I then setup two arrays to build the mesh. Note: This is going to be very high poly if you try to model they entire Mic grill this way. One thing I cannot figure out is a good way to take this from a flat mesh to a spherical mesh. This same is I think 16000 faces already.

Here is the Blend, if it helps:
MicMesh.blend (146 KB)
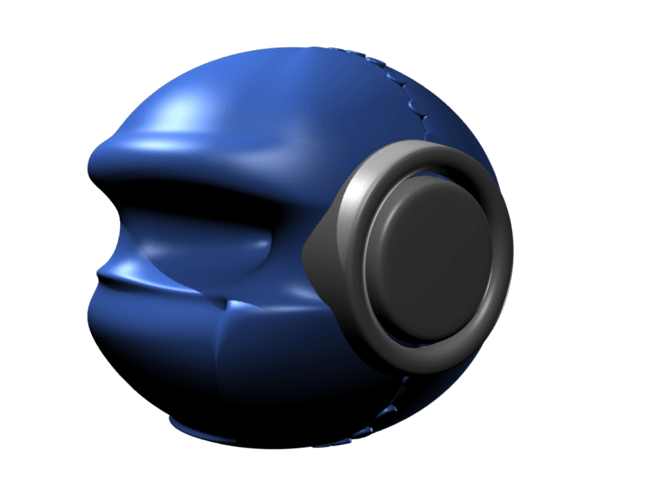
This is a picture of what I have in my robot head so far. The grid I wanted will go to the ears. Representing some kind of hearing aid. So… maybe that will be helpful.
Attachments
I would make it flat first, like DichotomyMatt’s, then use the warp command twice to make it spherical. To use it, place the 3d cursor where the center of your sphere will be. Then, press shift-w to warp it to a cylindrical shape. Note: you must have your view aligned properly for it to work as expected. You ought to now have half a cylinder. Now, warp it again from another side to turn it into a sphere. For example, if my grid of wires was sitting on the x-y plane in the 3d view, I would first warp from front view, then from the side view.
Check out this thread if you need more help with this technique:
http://blenderartists.org/forum/showthread.php?t=127440
