Thanks, I only ever wrote that I needed a path…
I believe the double spiral file I posted is a path.
I do not understand “Substitute your wavy curve by roll shaped one. Make sure Origins stay the same - move roll curve where wave was.”
how do I substitute?
how do I make sure the origins stay the same?
how do I move roll curve where wave was?
Have you done the double spiral as in the last blend i posted?.
Blend file i did take a look in before had perforated film animated along curve which did look like a wave to me. This curve has an Origin.
If you’ve done double spiral curve it’s origin needs to be where previous curve’s Origin was. Otherwise film goes crazy loops if you set double spiral on film’s mesh Curve modifier (which is where you ‘substitute’ path).
You can move double spiral curve to the proper place by setting 3D cursor to first (‘wavy’) curve’s origin by Shift-S, Cursor to Selected, then select double spiral and Shift-S, Selection to 3D Cursor (all this in Object mode).
Does this makes a sense? Should i make another gif? Movies are pain to upload for me.
I am using my original double spiral - I thought it was a path.
wave? nothing is supposed to look like a wave.
still don’t know what to do.
thanks Eppo for all your help.
“wave? nothing is supposed to look like a wave” yet i’m pretty certain i saw some
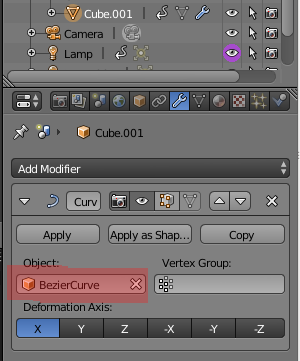
The origin of the wavy curve should be visible in image. If your original double spiral is still a Curve then it should be moved there as in previous post. As soon as this is done select film (named ‘Cube.001’ in file) and change curve names in Curve modifier:
oops - I don’t remember using a curve modifier!
will look see.
thanks
the FILMMOVE blend file has no modifier. how di I make the film follow the curve?
You could (and i’ve done in your file) but this takes a bit of a tweaking.
I could not manage to select original curve’s endpoint (right side)- for some reason it is not visible (animation?). Found that convert to mesh and back corrects this however parenting, as expected, is lost, also animation is gone after.
Other than that add two spirals one of which is mirrored first, check for curve normals so that they point one direction, join, done.
Changing one curve to other in Curve modifier does not cause destruction and is easier to do in this case.
how did you join the 2 paths, the box had special at the top.
how do I know exactly where to put the start and end of where the object should be to be on the path?
do they all have to have the same Z value?
thanks
If you set 3d cursor on the leftmost point on the initial curve in edit mode (Shift-S, Cursor to selected) and then in ortho Top view set cursor where you want to add a spiral Z will be the same. If for some reason added spiral is not on the same Z select all curve points (provided you have joined spiral and curve) and scale Z0.
For joining - select one curve, Shift select other and J to join, there was nothing special to do. Not sure what special box you are talking…
Joined curves in edit mode are still separate: select two closest points and F to create segment between them.
Film mesh will automatically adjust to the new start point of the curve; you can move it on X in edit mode and set precise position if triangle icon on Curve modifier is on. Do not forget to be on a first frame though.
Oh, i was not aware of the ‘film roll’ file when i did this image with W menu, missed the point likely. This was for a mesh, you needed path curve though. Not that this was completely useless - you could have taken one loop and converted back to Curve.
To align path curve and object which should follow path initially object’s origin should be aligned with curve’s origin and object should not have any not applied rotations. What’s left is to figure which axis you’d need to set on Curve modifier. If the rotations are not applied or origins are far from this could turn into quite a puzzle.


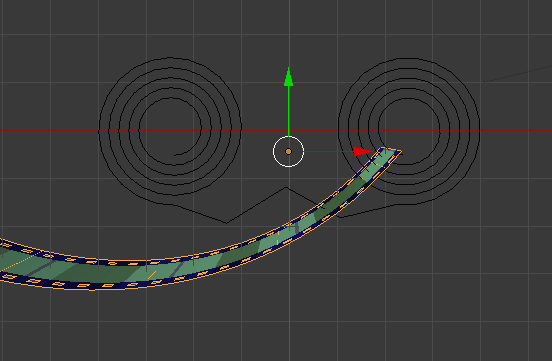
 this is what I need where the film is ON the spiral coil as well.

