Hey people,
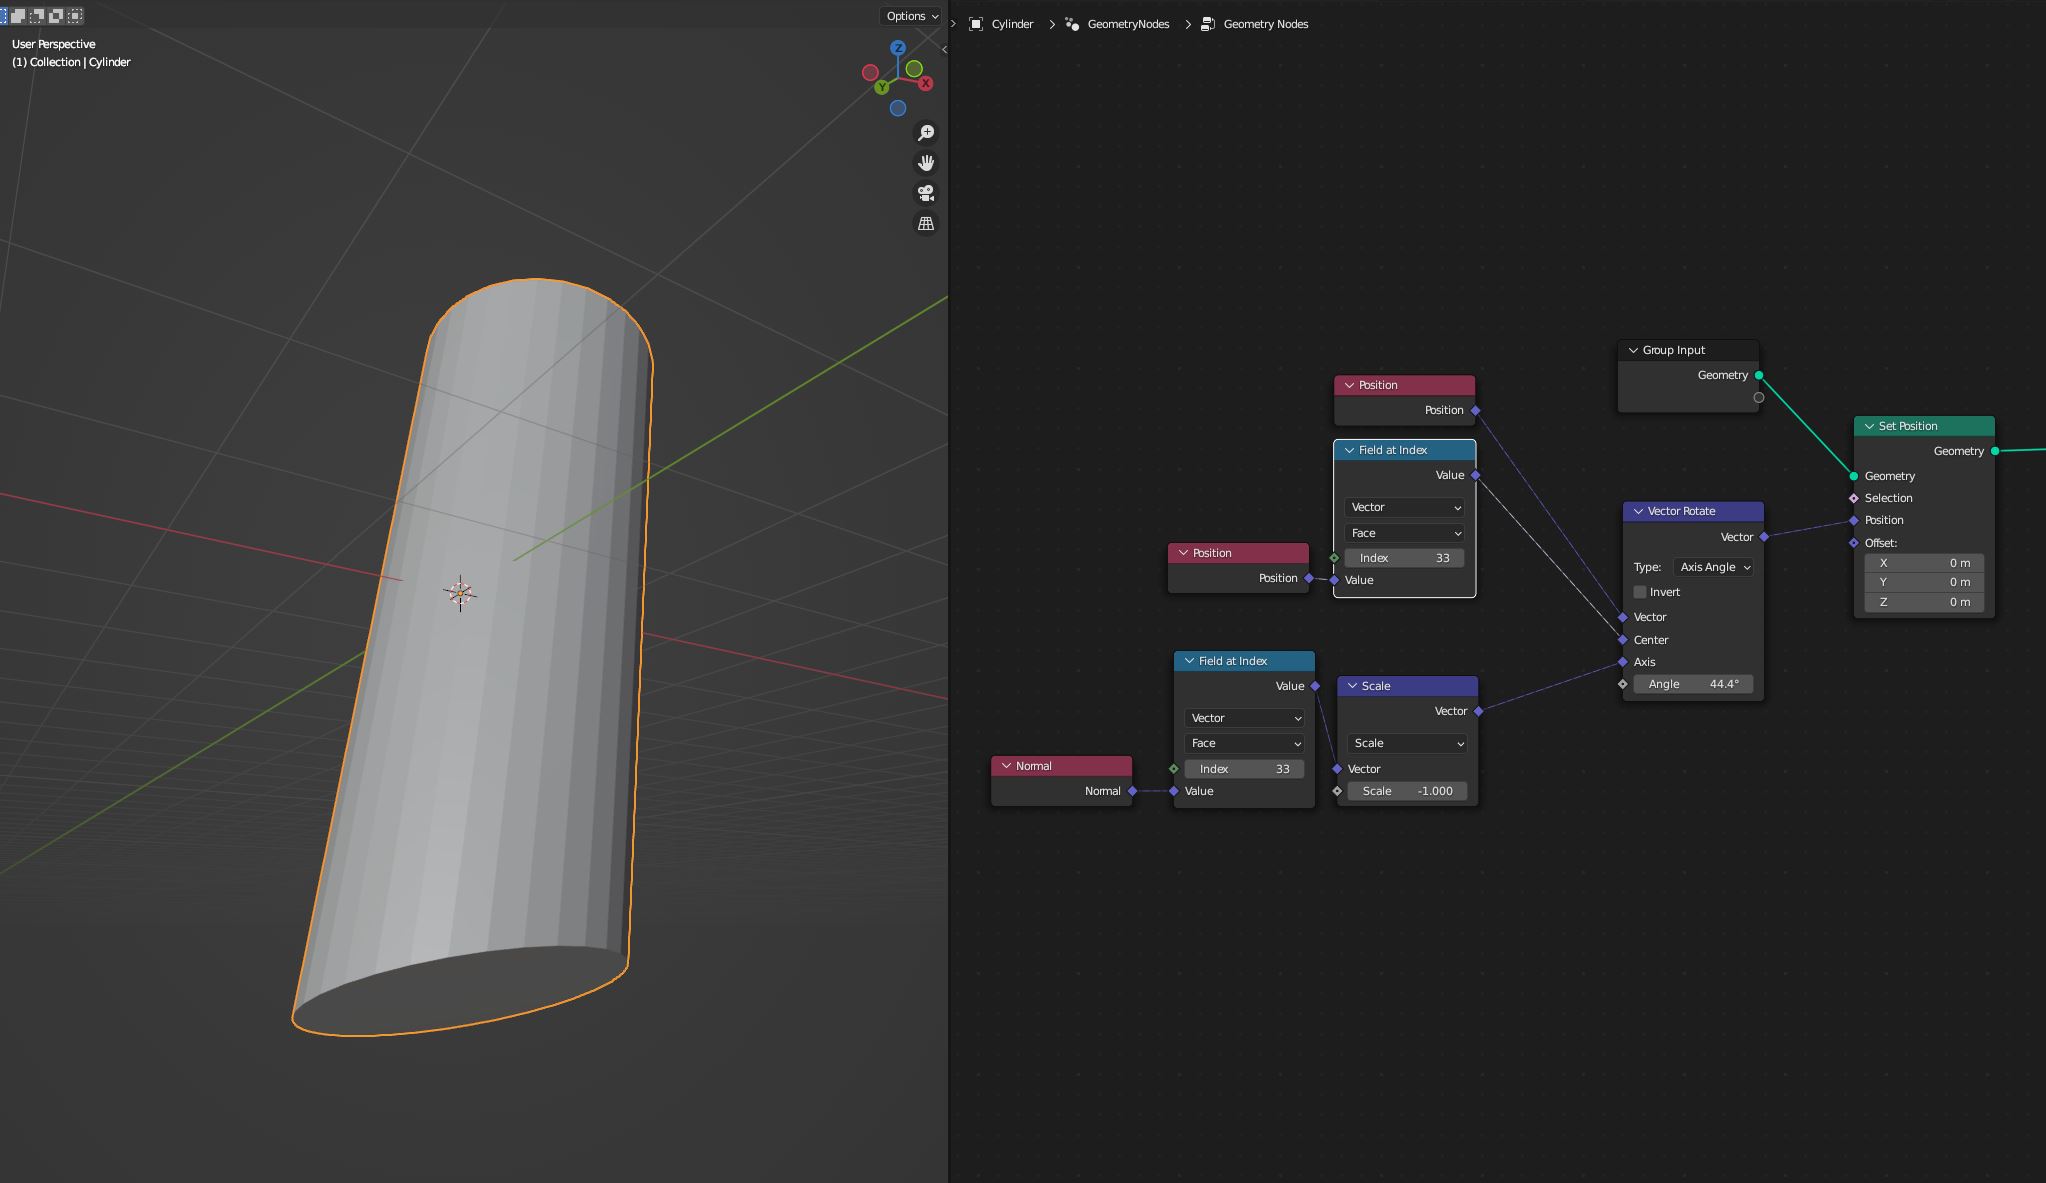
can anyone tell me how I rotate an object like this cylinder around its baseface-normal axis / or around its local axis ind Geometry Nodes?
It seems so easy, but yet I couldn´t figure it out.
thanks for your help.
best eL
Hey people,
can anyone tell me how I rotate an object like this cylinder around its baseface-normal axis / or around its local axis ind Geometry Nodes?
It seems so easy, but yet I couldn´t figure it out.
thanks for your help.
best eL
Thank you caneraslan,
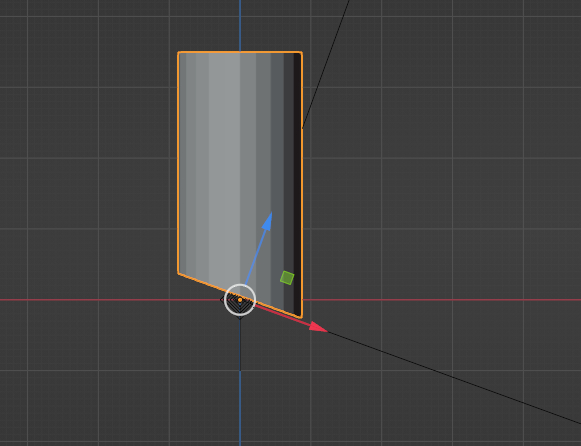
this works for the rotation, but i encountered another problem. When I rotate the object with the nodetree you provided, my mesh will shear along the y axis upon rotation.
I attached a screenshot. after a 180degree rotation, the topface is now angled at 20 degrees and the bottomface is now perpendicular …
how can i avoid that?
(btw. I am not using your setup for now, because i want to fully understand and learn the noding myself - but thank you for providing me your nodegroup)
thank you for your help, and especially for capturing a short video.
best eL
Can you provide the blend file, I can’t tell why it is behaving like that.
Sure. Here you go.
I meanwhile found out that it is not working only when yozu retrieve ObjectData from a different Object.
As soon as the Object you want to rotate itself carries the GN Modifyer, it works as you suggested.
The problem is that I cannot set it up that way because this is only part of the whole geometry, and the other part has exactly the same sloped endface…
I´d be very happy if you could have a look and maybe know the solution.
thank you
eL
rot Setup.blend1 (1.1 MB)
rot_Setup_test.blend (961.7 KB)
Ah Ok, usual suspect. Always check scale and rotation at transform menu. Scale should always be 1,1,1 and rotation 0 unless you want to rotate at world coordinates. Original object or another object you bring with onject info node should behave same.
And also you don’t need scale after “field at Index”, I think I forgot it there(I used it to flip normals by scaling it with -1)
…you are so awesome. Thank you for taking your time to sort out such a stupid mistake :-/
I could´ve thought of that…but didn´t
thanks again.
have a good week.
eL
…can I ask you one more thing please:
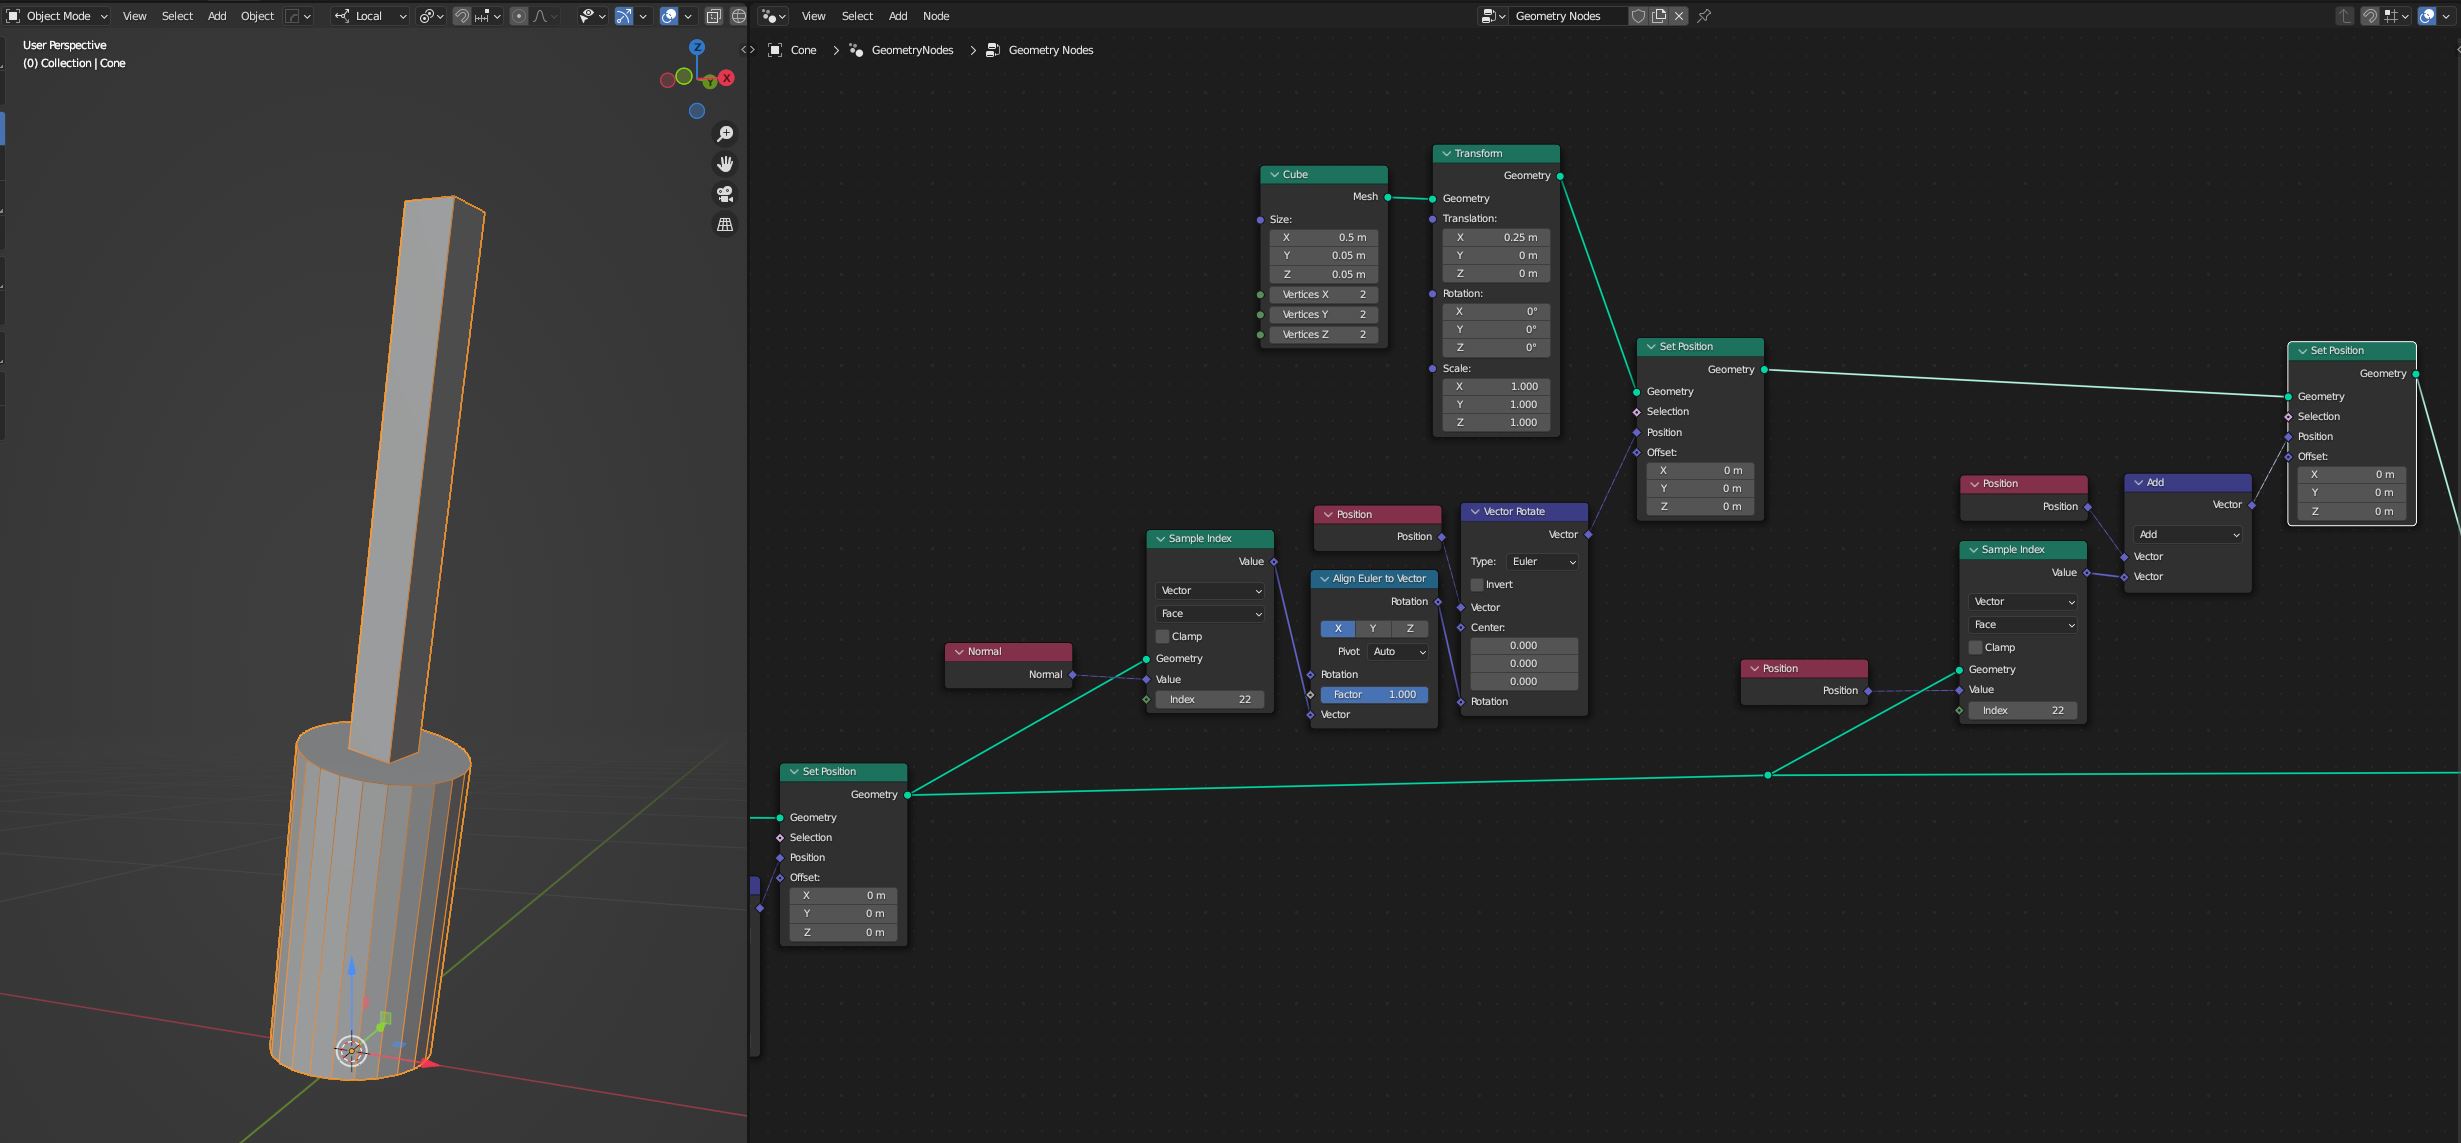
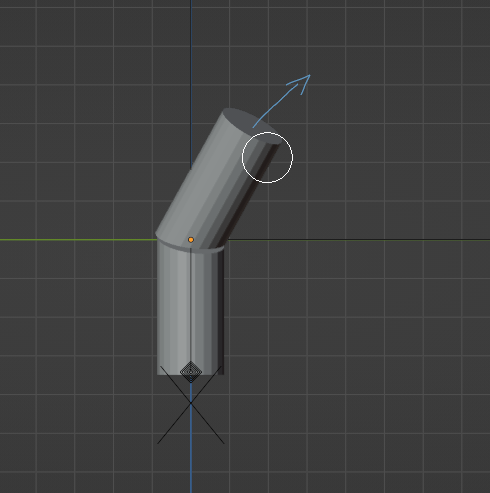
is there a way to read the directionvector of a facenormal? In my example I need to get the direction of the topface of my upper cylinder like in the .jpg
How would i read the vector values?
ahhhh. I have such a hard time understanding what those field index and sample index nodes do…
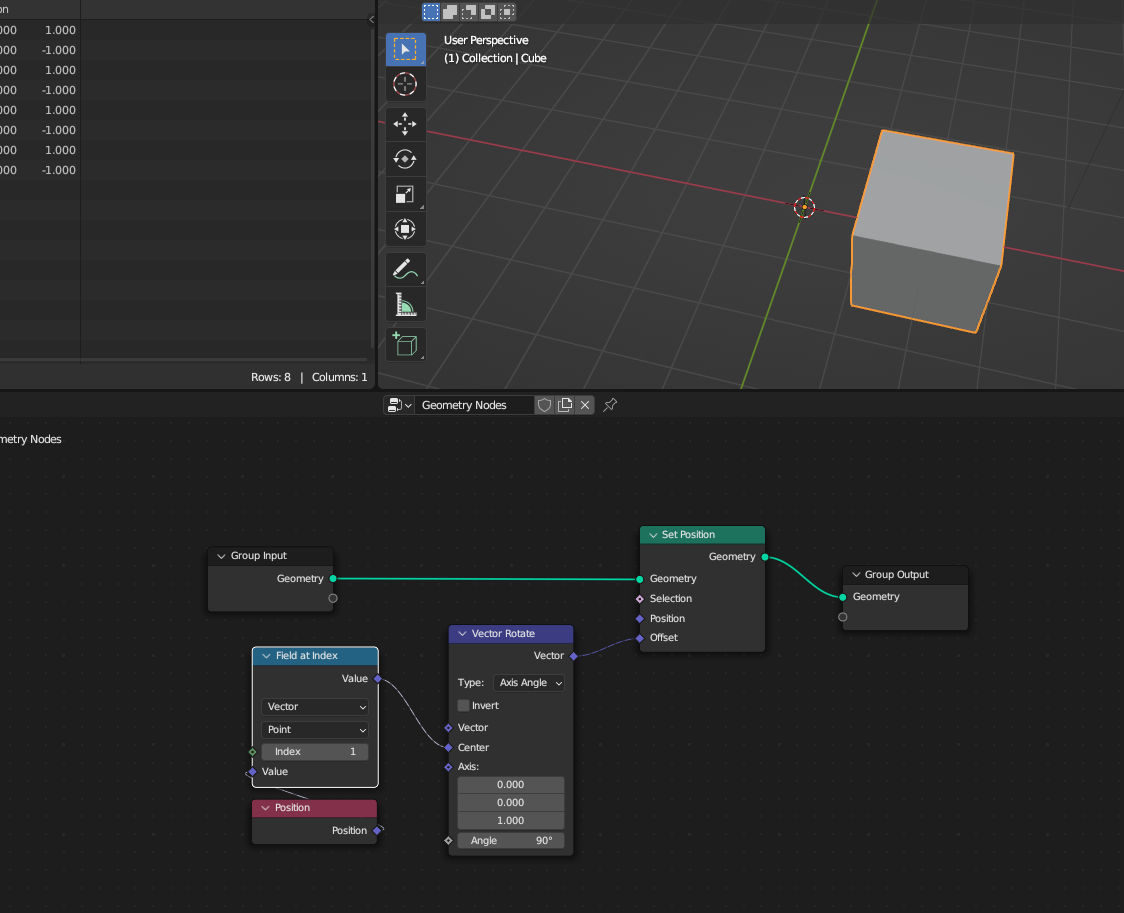
thank you. I can now look at the values in the Spreadsheet editor.
thanks again, very much.
You really helped me a lot with this.
cheers eL
Thanks AlphaChannel for your help.
This is exactly how aslan described it too.
cheers eL
“Field at Index” does the same thing as “Capture Attribute” , difference is while one captures for example all vertex positions, in “field at Index” you can capture single or group of selected vertex, face etc. position. “Sample Index” does the same but it is used to capture from another object.
Use viewer node it is very useful to visualize and spreadsheet also. Try it with simple geometry. Good luck.