I have a simple cylinder I want to place a different image on the top and on the side and on the bottom. I need to understand how to PLACE or ASSIGN a image to a face or certain sets of faces. I need to be able to go into the UV image editor and move it around for each set of faces. Can blender do this ? Can I have a new map for each set of faces ? Is there a way to make sense of blender in how it places images on faces ? Is it possible to do this and know how to go back and make adjustments to each one ?
I have decided that I need to separate my objects and apply materials seperately
unless someone can explain to me why this will screw me up I think that would be my direction. for successfully placing images on faces.
One way its possible to do it.
Does anyone really claim to understand how to really understand do this in any other way. ? Im jsut baffeled as to why the instuctions in the manual are so … they just dont come out and say I mean if I follow those directions in the manual will I eventually get what is going on ? without separating the parts of a object like I just did showing in the pix how would we get back to it to make adjustments in the UV layout without risking the who thing getting messed up. materials going apelike everywhere their not supposed to. sense we dont get to put faces with images and its all implied by order of doing … go back and edit that and what you have to start all over and add the first face and then apply it to the whole image and then go to the second one and then somehow magicly that gets put on the faced I tell it ? what If I want to adjust the UV layout does tha method really work for people ? This whole thing ether is a inside story or something but how blender does this is making me wacky. Its like not making any sense. Maybe its like calc it does not have to make sense you just do it enough times and you grasp it ???
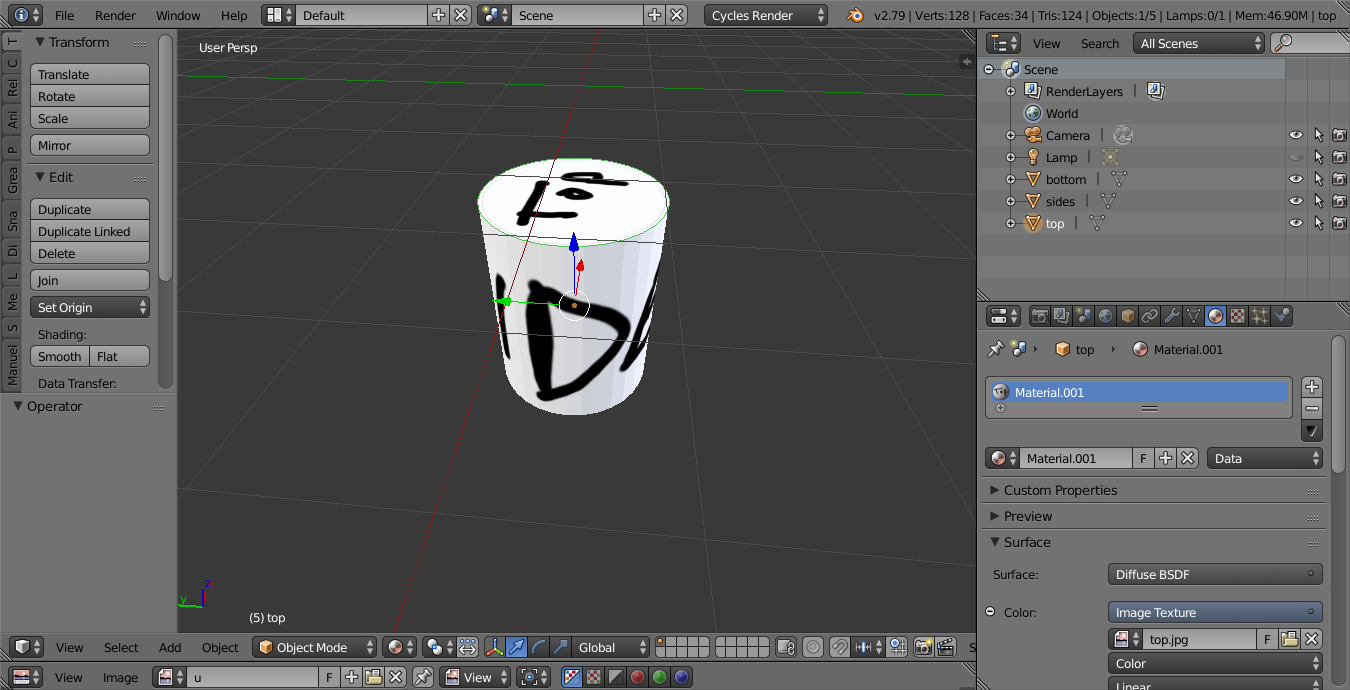
In the properties editor under mesh data you can add new UV maps, say one named top, one bottom, and a third named sides.
To unwrap faces, in edit mode you need to select the faces you wish to unwrap, make sure you have to correct UV map/layer selected in the properties editor and then hit U to unwrap the selected faces into that UV Map.
Finally to keep it simple you can add 3 materials to your object named the same again, assign each material to the appropriate selection of faces and then apply the image to a channel in the material as a texture.
I’m currently on my old and slow laptop or I would otherwise add images too. Hopefully this gives you a slightly better idea though.
A way to do this is going to involve making several different UV Maps and adding each one of them together. But this very much depends on where you are going to use it, what for, and time you care to invest into it for said results.
Keep in mind to utilize the image node clip/extend/repeat setting. If set to repeat, the image will show for faces even if their UV is outside the 0-1 range. If set to clip, any faces you don’t want to be affected by the material image can be moved outside the UV 0-1 range.
Some “bad” software that doesn’t support UV coordinates may have “surface coordinates” instead. To achieve this effect on the sides, where every face gets the image, select the side faces and hit UV/reset. Now you can select side faces in model, then move the UV location as you see fit for variation - although I don’t know why anyone would want this behavior when we have proper UV support.
This uses 3 different UVMaps and materials to get the result. Not usre if you could get the same result using a mix of shaders with 3 different vertex color masks, but this is the simplest route. ThreeUVMaps.blend (1.8 MB)
Thanks for the posts ! we are going to hike this morn so cant wait to get a chance to study this later today.
Felix_Kutt Joseph_raccoon CarlG and colkai I can see your posts are going to clean things up for me thank you.
Joseph_raccoon is that a 2.80 file ?
So yes the UVmap node is the concept I have been clamoring for ! it does tie things together. It lets me name a marked seam to the UV map. What I did not know is that I need to select the uv map Before I unwrap.