Hi, how do you make a bump map in Cycles? I know how to add an image texture but after that I have no clue.
Thanks.
Hi, how do you make a bump map in Cycles? I know how to add an image texture but after that I have no clue.
Thanks.
It depends on the circumstances, but at the simplest - plug the image colour output into a Converter>BW node then plug that into the displacement socket of the material output. You could also use either a colour ramp or a math node to modify the black and white result to control the amount of bump.
Yes although the ‘Add’ method may not give decent results. Multiply usually works better. The Value slider will change the strength of the bump effect. Essentially what you are doing is making the black and white version of the image darker or lighter and therefore changing the amount of bump.
Like I said this is probably the simplest setup - there’s too many things you could do to alter/control/change how the mapping is done (like using UV Coordinates as the input vector for your image texture node) to describe them all, so a more detailed answer will require a more detailed use case explanation.
Can you give a detailed explanation? Since this is the simplest set up can that mean it won’t look good? I’m going to use this method for a lot of things and I want the bump map to be high quality. In a general sense, what is the best set up to get realistic effects? But one set up can’t work with everything right?
Thanks!
Well, that’s what I’m saying. There are too many scenarios to describe them all in one post, and it still depends on what you want to accomplish as to whether or not this setup is enough. I agree that this simple scenario will not suffice for good bump mapping, but it should give you a starting point with which to experiment. This example will basically apply the texture/bump using the ‘default uv map’ to whatever is using the material. More often than not, you want more control than that, and that’s where it can get complex and too much to describe in a few short posts. There are lots of nodes that can be involved and many of them have multiple settings and options that will affect the outcome.
Here is an example - again, it’s a quick setup to show how your node setups can grow and I wasn’t after any kind of quality or efficiency.
https://drive.google.com/file/d/0B0cS0kOrp8Luek4zSm12Zkh0a28/edit?usp=sharing
This makes use of uv maps, an image as a mask to only apply texturing and bump to a specific area, mix nodes, math nodes, colour ramps etc. So basically, trying to explain this in detail would mean having to describe the functionality of every node you could possibly involve.
But it all boils down to this. Bump maps are really just black and white images that describe the difference in height for a given point. The higher the quality of the image the better the bump (typically). You can apply/modify/manipulate/remap it anyway that works for the application just like any other image - as long as it’s still a B&W image that comes out in the end.
Ok; thanks a lot man!
You don’t need the RGB to BW node, it’s converted automatically. In fact you can plug any colour socket into any other color socket and all possible conversions will happen (even including vectors and colours), with the exception of shaders (the green dot) which can’t be converted at all, manually or otherwise.
Thanks.
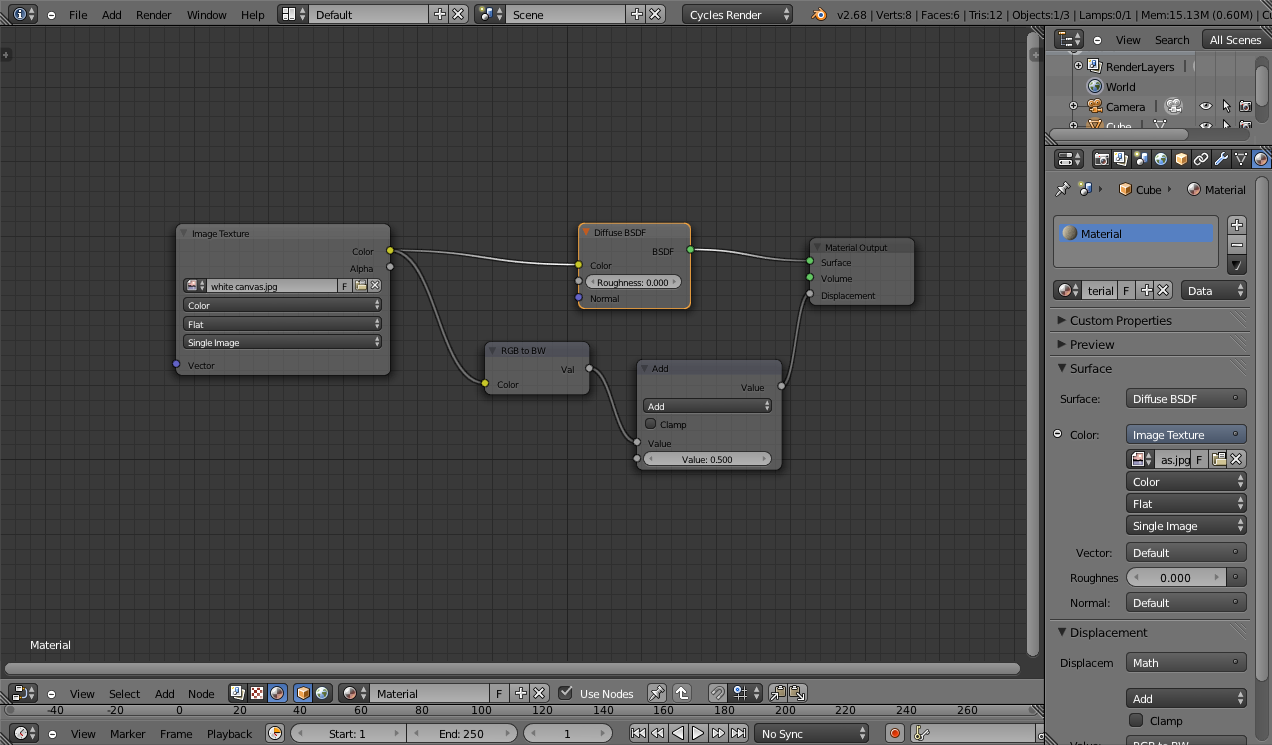
Ok, I’ve got the hang of simply bump mapping and now I would like some more info. The screenshot I’ve attached shows the node set up I know and the bump map I made. I want to know what other nodes I can use to make it more realistic. I can mix and match shaders to see which works but are there any special nodes anyone knows of which helps a lot?
Thanks.
Yes, I keep forgetting that. For some reason I have it stuck in my head that you used to have to, and I just keep doing it.
…I want to know what other nodes I can use to make it more realistic…
It’s still a little hard to tell what it is and what result you want. Looks like an ID tag of some sort? Why the Glass shader?
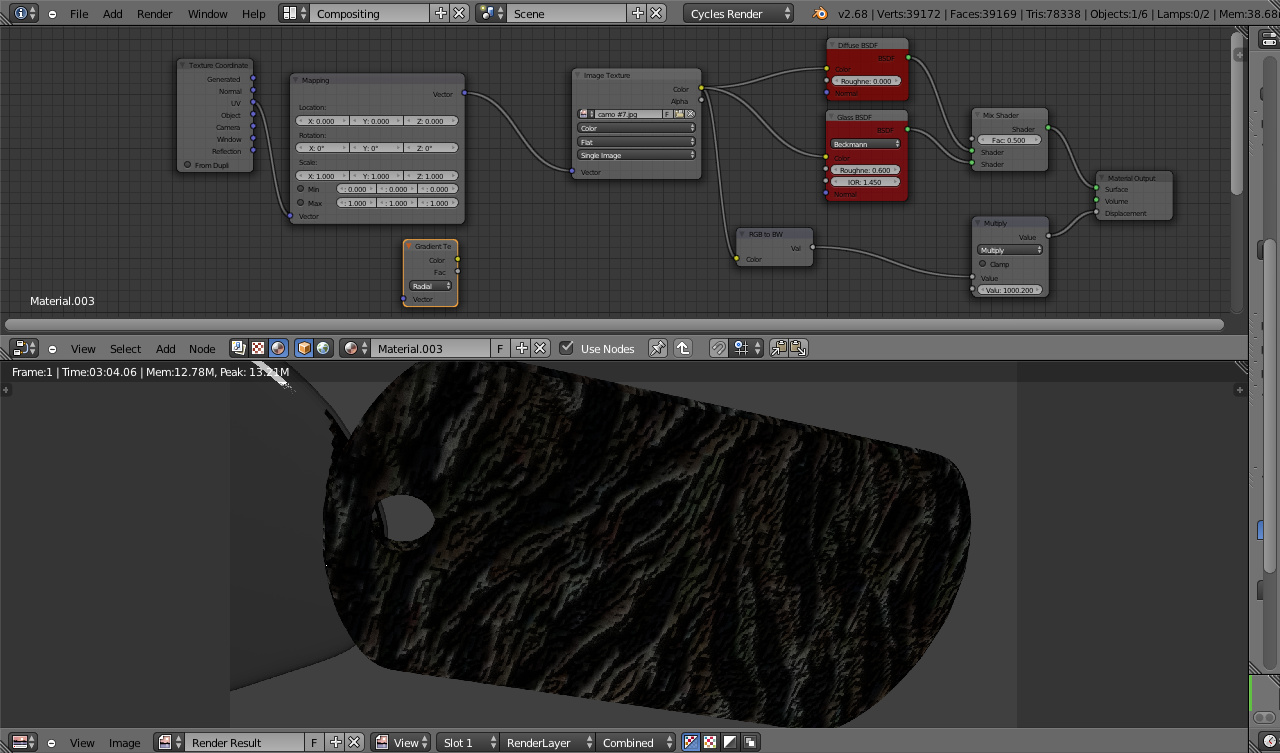
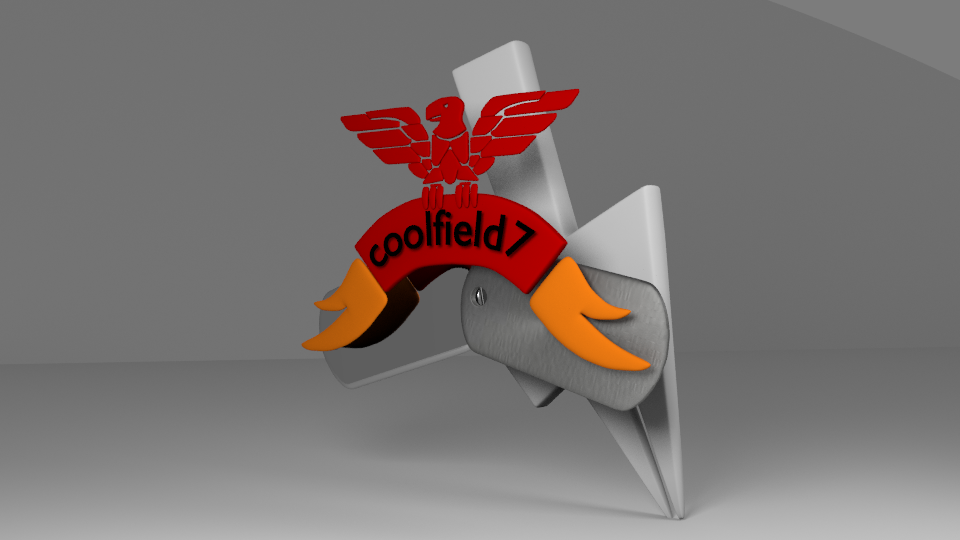
Haha sorry. I’ve recently started a project to make my own 3D emblem. The screenshot below is it. At first I just added colors but it looked lacking in some field, I decided to add some textures and to bump map. Those are dog tags, in real life they’re ID tags. The screenshot above that I added is where I was experimenting with stuff ![]()
Actually your second image doesn’t look too bad. The bump is not over done, perhaps some colour or some gloss with roughness to make it look metallic?
Yeah; that’s what I’ve been trying to do. I added a Anisotropic and Gloss shader… Problem is finding the sweet spot. The Anisotropic node is making that spiral… which it’s designed to do but I don’t like it, I want a shiny surface but not reflective… maybe I should keep a high roughness on the Anisotropic node.