Howdy! This place helped out a ton last time I was having trouble, hopefully the same can happen again. I honestly have no idea how to approach this and it seems like a lot of people have very different methods for every different way this can be done.
So here’s what I need for this model. I need the skirt to not clip into the legs at any point, but still have a mild amount of movement in order to sell that this is fabric. This model also need to look good in both Blender and Unity. As far as I understand, this means that I can’t simply apply cloth physics in either program, as they won’t carry over to each other (if this is wrong, please tell me how).
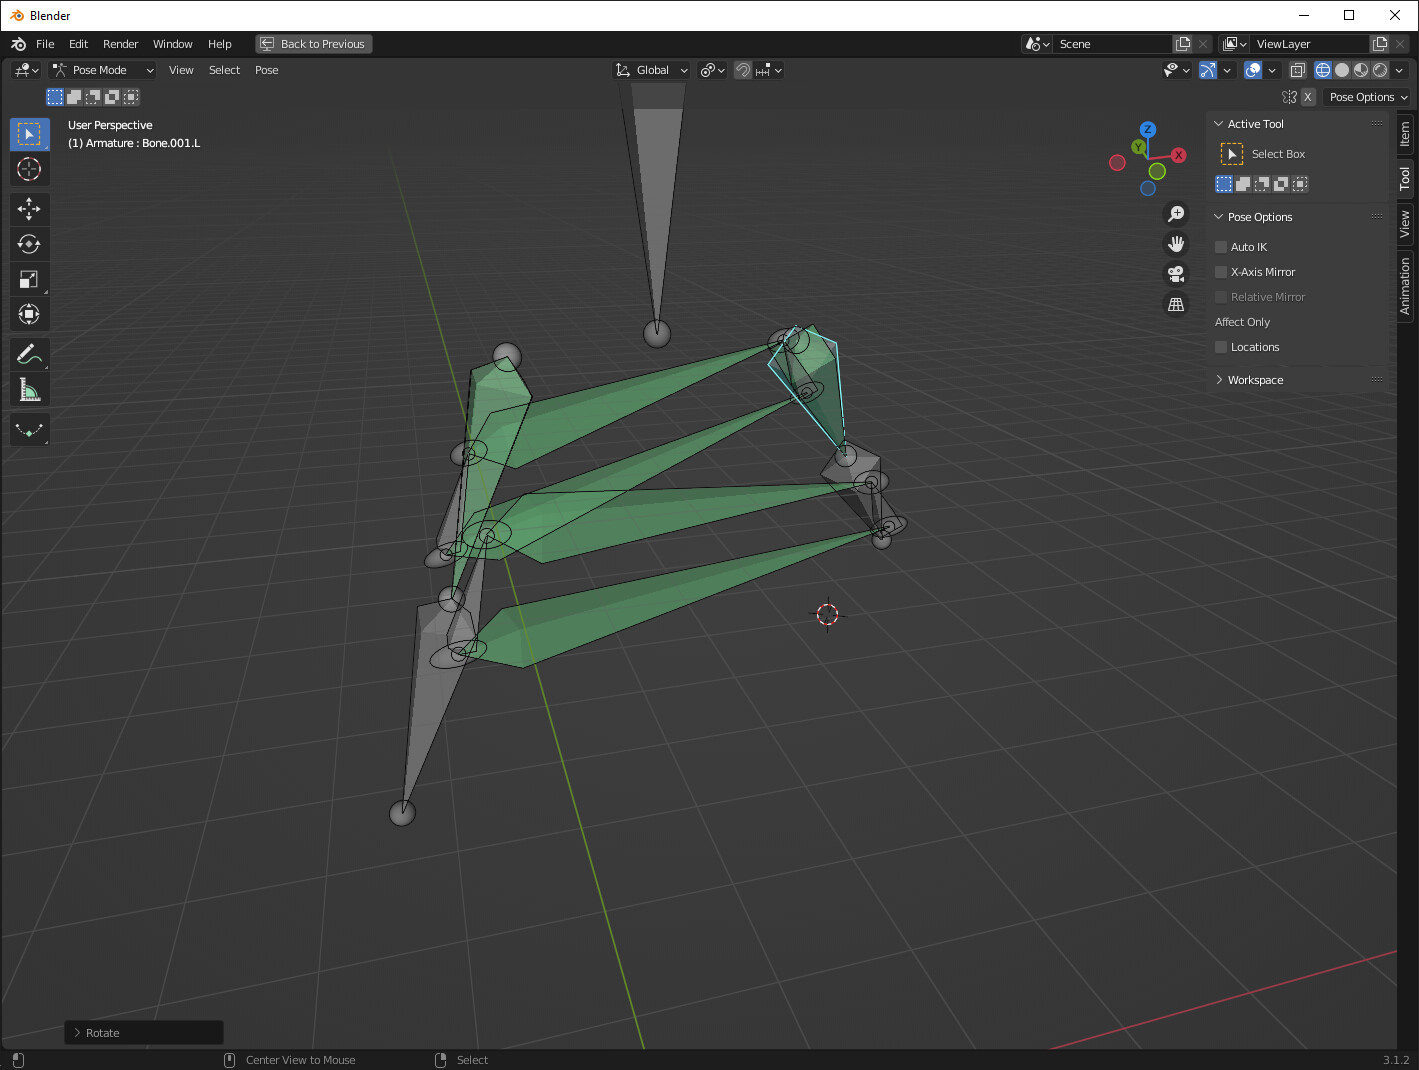
Firstly, the rig I have displayed in the attached image. The belt is meant to be weighted to the hips, and each tentacle controls part of the skirt. I figured 5 tentacles with 3 segments each would be enough to get a nice range of movement (if I’m wrong and need more or less tell me). The constraints on the skirt’s top portions are set up to locally follow the rotation of the nearest thigh, with the middle back having two with decreased influence. The axis of the skirt joints are also tilted in such a way that they bend along with the leg. The remaining bones of the skirt have wiggle bones active to give it that bouncy cloth feel once everything is nice and weighted. These wiggle bones don’t have their settings refined yet, as I was planning to adjust them post-weight painting.
Here’s what I’ve tried so far so not much success:
While Automatic weights gets it pretty nice and close, the pleats end up clipping with one another and most of my attempts to fix it tend to make it worse as I’m not really sure what need adjusting and by how much. Just playing with it doesn’t seem to help all too much and I seem to be making it worse.
Creating a non pleated version of the skirt, rigging that, and than transferring the weights when it looks good. While this seems like the right path to travel down, it has the same problem as the former where I can’t get the weights to move correctly, leading to lots of clipping and awkward stretching.
From what I hear, shape keys may be the way to go, but I don’t have any experience with them yet and I’m not sure where to start, but I’m willing to learn. I’m fine with redoing both the rig and mesh if need be. (I’d attach the blend file, but I am still marked as a new user.)
I would recommend doing this with shape keys, as this is how this kind of situation is usually handled in video games/Unity (yes, some games have cloth simulation, but not most.) To do this, you can sculpt a few different shapes the skirt can be in, say “blowing forward”, “blowing left”, “blowing right”, “blowing back”, “blowing up”, “blowing down”, “momentum forward”, etc, and then just blend between those as needed. For “blowing left and forward”, for example, you just turn up both the Forward and Left key.
I would recommend this tutorial:
I would also recommend this add-on for testing, as it makes working with shapekeys in animation easier:
All right! I’ll look into this stuff then, thank you!
Now with the shape keys, would I do this with the rig I have set up and adjust the stuff that is clipping to look right, or would I use only shape keys to animate the skirt? And if it’s the second method, would getting the skirt to move with the legs and still have a bit of flow be difficult? Asking purely due to a lack of experience.
I honestly think you can lose the rig and just use shape keys. The rig will just complicate the shape keys, and it’ll be harder to export consistently as well.
With just shape keys, you can make the skirt move with the legs and flow pretty easily here’s how: you make a key for “left leg forward”, move the left leg forward on your human mesh, and sculpt the skirt to where you want it. Set that as a shape key. Put the leg back, turn that new shape key to zero, and sculpt some flow keys. For example, a “wind blowing to the left” or something. Now you can just combine the keys- use “left leg forward” and “wind blowing to the left” at the same time you can even choose the flow amount by setting “wind blowing” to something between 0 and 1.
Also since I’m recommending an add-on I wrote to you, if you end up buying it, let me know and I’ll reimburse you in full that seems only fair
Okay! Wow, thank you, that’s very kind! I’ll check out the tutorial and give it a shot! If it seems like your tool will be of assistance based off of what I learn, I may just take you up on your offer!
Also for site etiquette, should I mark this as the answer now, or after I’ve tested this (seeing as how this’ll probably take a while to implement, and from the looks this tutorial this seems like it’ll do nicely)?
You can mark it solved if you want, although it’s quite possible I haven’t actually solved anything haha. One other note that I completely forgot to mention, another huge advantage of shape keys is that you can actually use cloth simulation to sculpt them. You can apply any Cloth Modifier as a shape key- so for example, you could move a leg forward, let the cloth simulation drape naturally around it, apply it as a shapekey. Boom, done. Re pose the mesh, run the cloth simulation again, apply as shapekey. It’s way faster than sculpting by hand
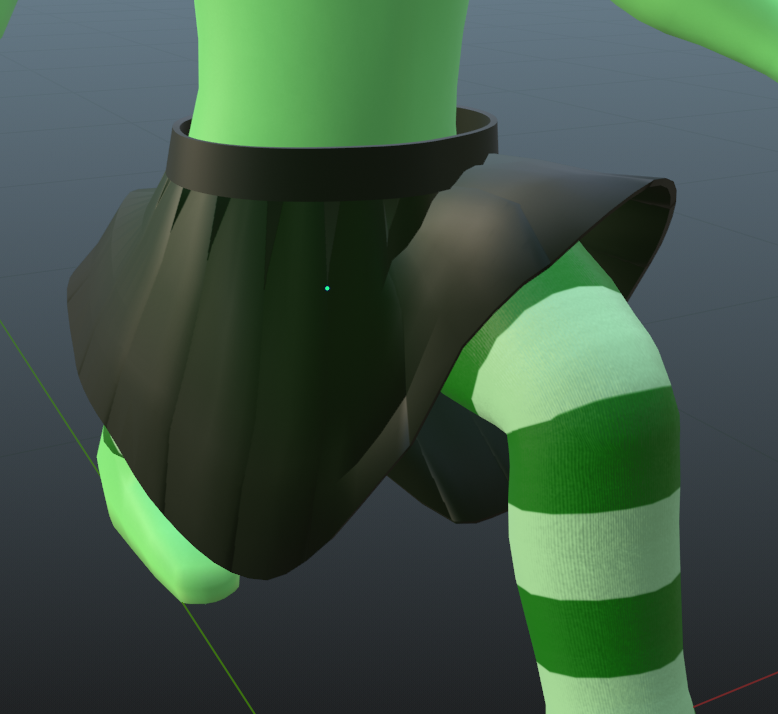
Hey, on the chance you see this, wanted to give an update on this method. It’s working well so far, only I seem to have run into an issue when it comes to overlapping shape keys. If I have both of my character’s legs lifted up (as if they were sitting down) it leads to both of the shape keys activating at once. My thoughts to fix this would be adding a shape key triggered by the value of both shape keys being active, but I’m not really sure how I’d do that. Here’s what it looks like when both keys are active:
Ah… that doesn’t look right it could be a relative issue, I will do some testing and see if I can figure something out. Try checking this out in the meantime: https://m.youtube.com/watch?v=OCQAawcIuJU
There are actually a lot of different ways to animate a skirt in a game engine, ranging from shapekeys, to modelling techniques, to armatures with baked animations, to physics. What you want to do depends on your needs from your skirt-- how close up you’re going to be, how good it needs to look, how dynamic it needs to be, how much performance you can afford to spend on the task.
If you’re going to be animating with shapekeys, then you are likely to have shapekeys for several baked animations, like the animation that would lead to your sitting image. The solution to “shapekeys don’t look right” is to make more shapekeys.
If you want to be adapting, on the fly, to in game animations, then yes, you’re looking at the use of physics. Usually, the key to making physics work in game engines is to simplify your physics. For example, your skirt may be a rigid body simulation: two capsule-type colliders for the thighs, and two or more box-type colliders for the skirt. You then deform from the positions of the skirt’s box colliders (in Blender terms, you copy transforms from the rigid bodies to simple bones.)
The quality of what you get from that depends on how much you’re willing to spend on the simulation. 4 skirt bodies will be better than 2; 40 will be better than 4; etc. Eventually, you reach the point where there’s a collider for every vertex, at which point it might as well be a soft body/cloth sim instead.
Good to know there are so many different ways to go about this.
I guess to simplify, all I need for this model is for the skirt to animate the same in both blender and unity without clipping into the legs or dramatically warping. I don’t really care what method I use so long as the finished product looks identical in both programs.
The purpose of the model is to be used in animations in blender, but I want to be able to bring it into Unity and use it as a game asset at some point in the future.
With this in mind, and with your knowledge of the different methods I can use, what would you recommend I do and what resources can I use? (Also any tutorials you’d be willing to link would be appreciated as well.)
We have a skirt-thigh bone that damped tracks the knee, so that it doesn’t acquire any twist from the thigh. It has children that act as marker bones. Four deforming skirt bones use stretch-to constraints to stretch from one marker bone to the other for the front and back of the skirt.
This will only work well with cylindrical thighs, within certain limits of animation (no doing the splits or folding your feet to your chin.) The range of animation it will permit will depend on how far the skirt is from the thigh.
Okay, I think I get the gist of how this works. All I’d really need to get used to is the weight painting of it. If I were to guess I’d leave the two green bones with damped track with deform off and have the 4 bones with deform on as the stuff I paint. Have the non-stretch handle the sides of the skirt and the stretch handle the center. Seems obvious enough. I’ll give it a shot and get back to you.
The damped tracking bones would replace your thigh bones for purposes of your skirt, in case your body’s thigh bones rotate. They deform the skirt only. The marker bones don’t deform. The stretch-to bones deform the middle of the skirt (front top, front bottom, back top, back bottom.)
Tried this method, and from the outset it doesn’t seem too bad. The skirt moves in an acceptable, albeit stiff manner. It already bends around the legs quite nicely, so that’s absolutely a big win!
An issue I’d like to ask about is the clipping. Granted, I only have the automatic weights on right now, so if this is a simple issue of, “Just paint it so it looks right,” then I’ll shut up and just work on that. Either way the back stretches to too much, the front caves in at the belt, and the pleats clip into one another around the center. Guess what I’m asking is if you have some general tips for how I should paint this?
Hardest part of this seems like the pleats. Honestly at this point I’m wondering if this character’s skirt needs a redesign because of how much trouble these are to rig. Maybe I can do a normal map or something to simulate it? I’m just wondering how other people have been able to do this kinda thing, I feel like I see plenty of pleated skirts in 3d and there are so few tutorials out there.
Also while I got y’all, thanks to everyone for all the help so far. Succeed or fail, I’m learning a lot!
If you’re talking about the clipping at the butt in your pic, you need to have more weights to the body pelvis in that area (and in the front.) The rig I demonstrated should blend into body weights (other than the legs, instead of which, it should use its own “leg” bones.)
For a simple rig like this, I would do pleats via normal mapping (and other high->low baked textures) rather than via geometry. You’ll get best results from tuning your topology to your needs-- good rigging requires meshes made to the requirements of the rig. However, pleats really shouldn’t be a problem with the rig I demonstrated, on the mesh you’ve shown. They should deform fine.
you need to have more weights to the body pelvis in that area (and in the front.)
Apologies my dyslexia is going crazy trying to read this. So you’re saying I just need to fix this with weight painting, yeah? Sounds about right. For a moment I thought this meant adding more verts for some reason.
And I guess I’ll be back after I’ve remade the skirt this time? Means I’ll probably have to redo my texture atlas again at some point, but hey, in for a penny I guess…
Thanks again for the pointers.
At this rate I’m never rigging a character with a skirt again if I can help it.
Probably, yes, that’s what I’m saying. It depends on how well I’ve been understood. The skirt rig should be part of the body rig, and the skirt should include weights from the body. The rig that I demonstrated is only for the lower part of the skirt. Parts nearer the waist should use your existing body’s bones and weights.
Hey everyone, sorry for the delay on my progress, I had some health issues.
Anyway, I’m now able to post more things in regards to my project. So after trying to wrangle this for the longest time, I think I’ve got it to the point y’all were thinking of.
Does this look right to you? I can’t get the back of the skirt to look any smoother and while I am just barely able to keep the left leg from clipping through the skirt. Am I doing this right? It still looks kinda messy.