There is a section about Initialize Face Sets using ‘Face Sets Boundary’. I really don’t know how this feature works Anyone familiar with this please enlighten me how this feature functions.
The text described this as:
Creates a face set for each isolated face set. This mode is useful for splitting the patterns created by Expand Face Set by Topology into individual Face Sets for further editing.
What is isolated face set mentioning here?
When you try ‘Expand Face Set by Topology’, I cannot control the point where it starts, and just like expanding an area coloured by the software.
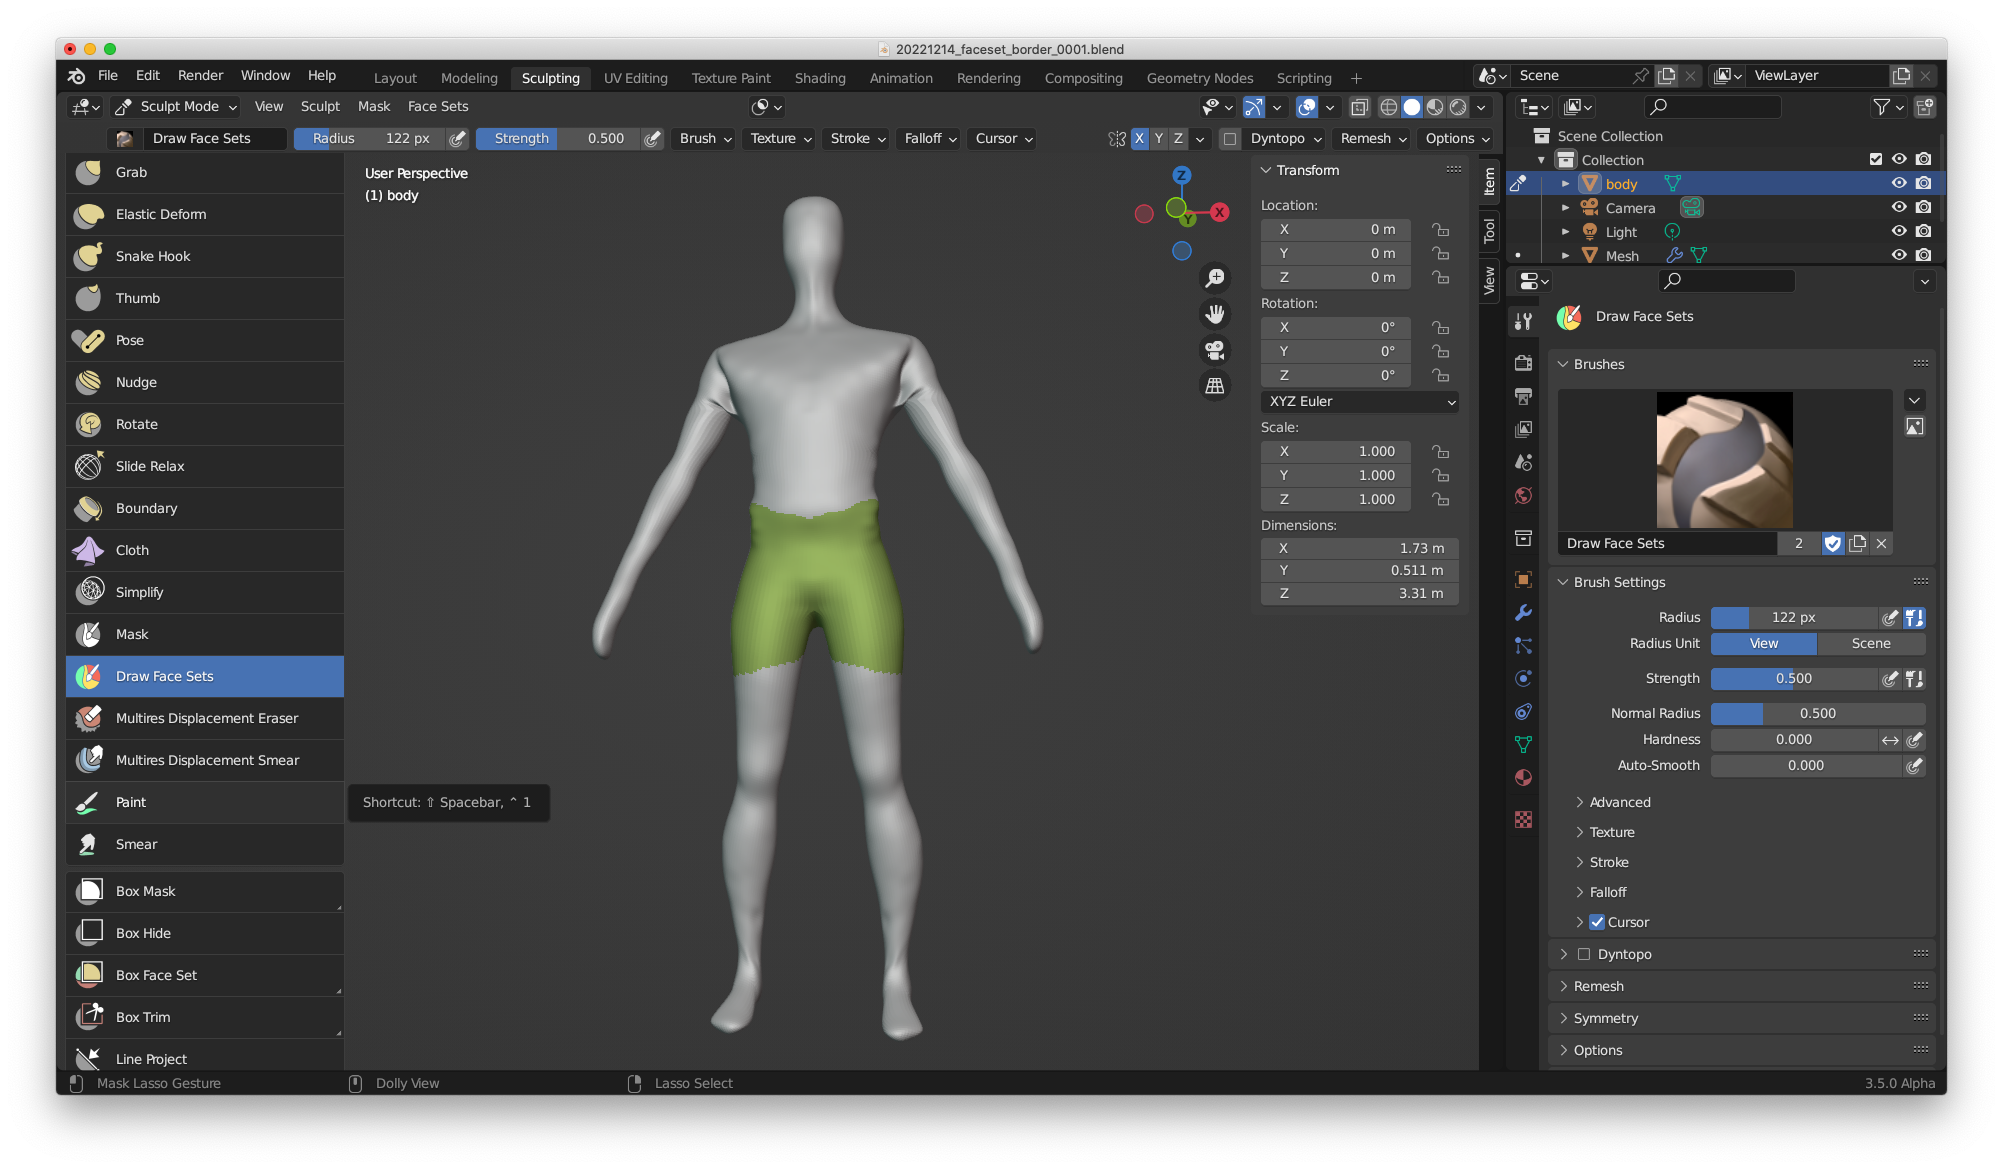
When face sets are created, by releasing the mouse, the face set area is defined by the area coloured. Why these is a need to Initialize Face Sets using 'Face Sets Boundary' again? I just don’t get it.
When you use expand tool, starting point is position of mouse pointer, brush cursor.
So, if you position a mouse pointer on extremity of a finger, press Shift W to expand, you can create a face set that can correspond to a phalanx, a finger or an hand or an arm.
If you position mouse cursor above middle of face, you can create a face set corresponding to noose.
An isolated face set could be considered as an Island inside a bigger one.
So, it is also possible to have a face set or several face sets in the middle of a big one, cutting it into several parts.
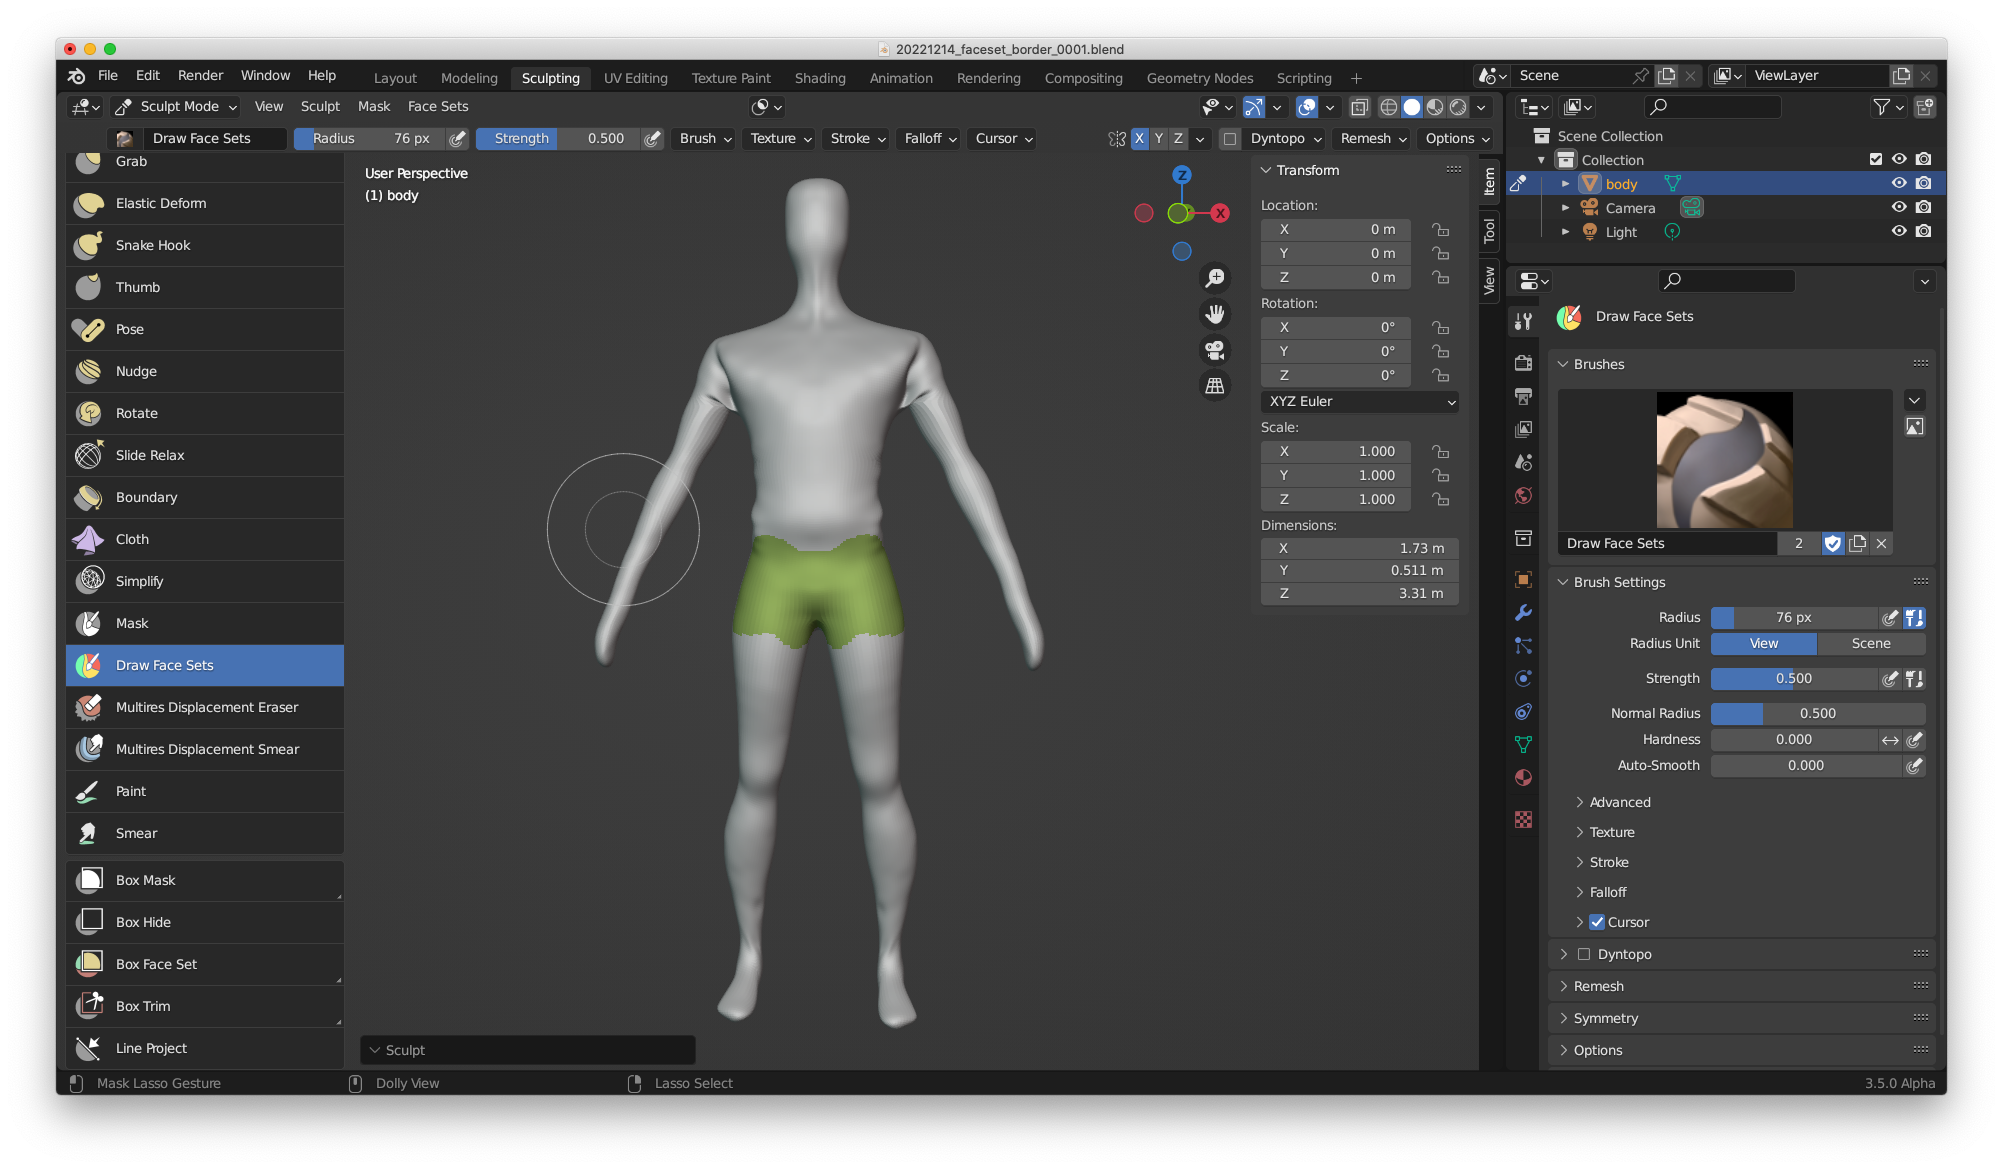
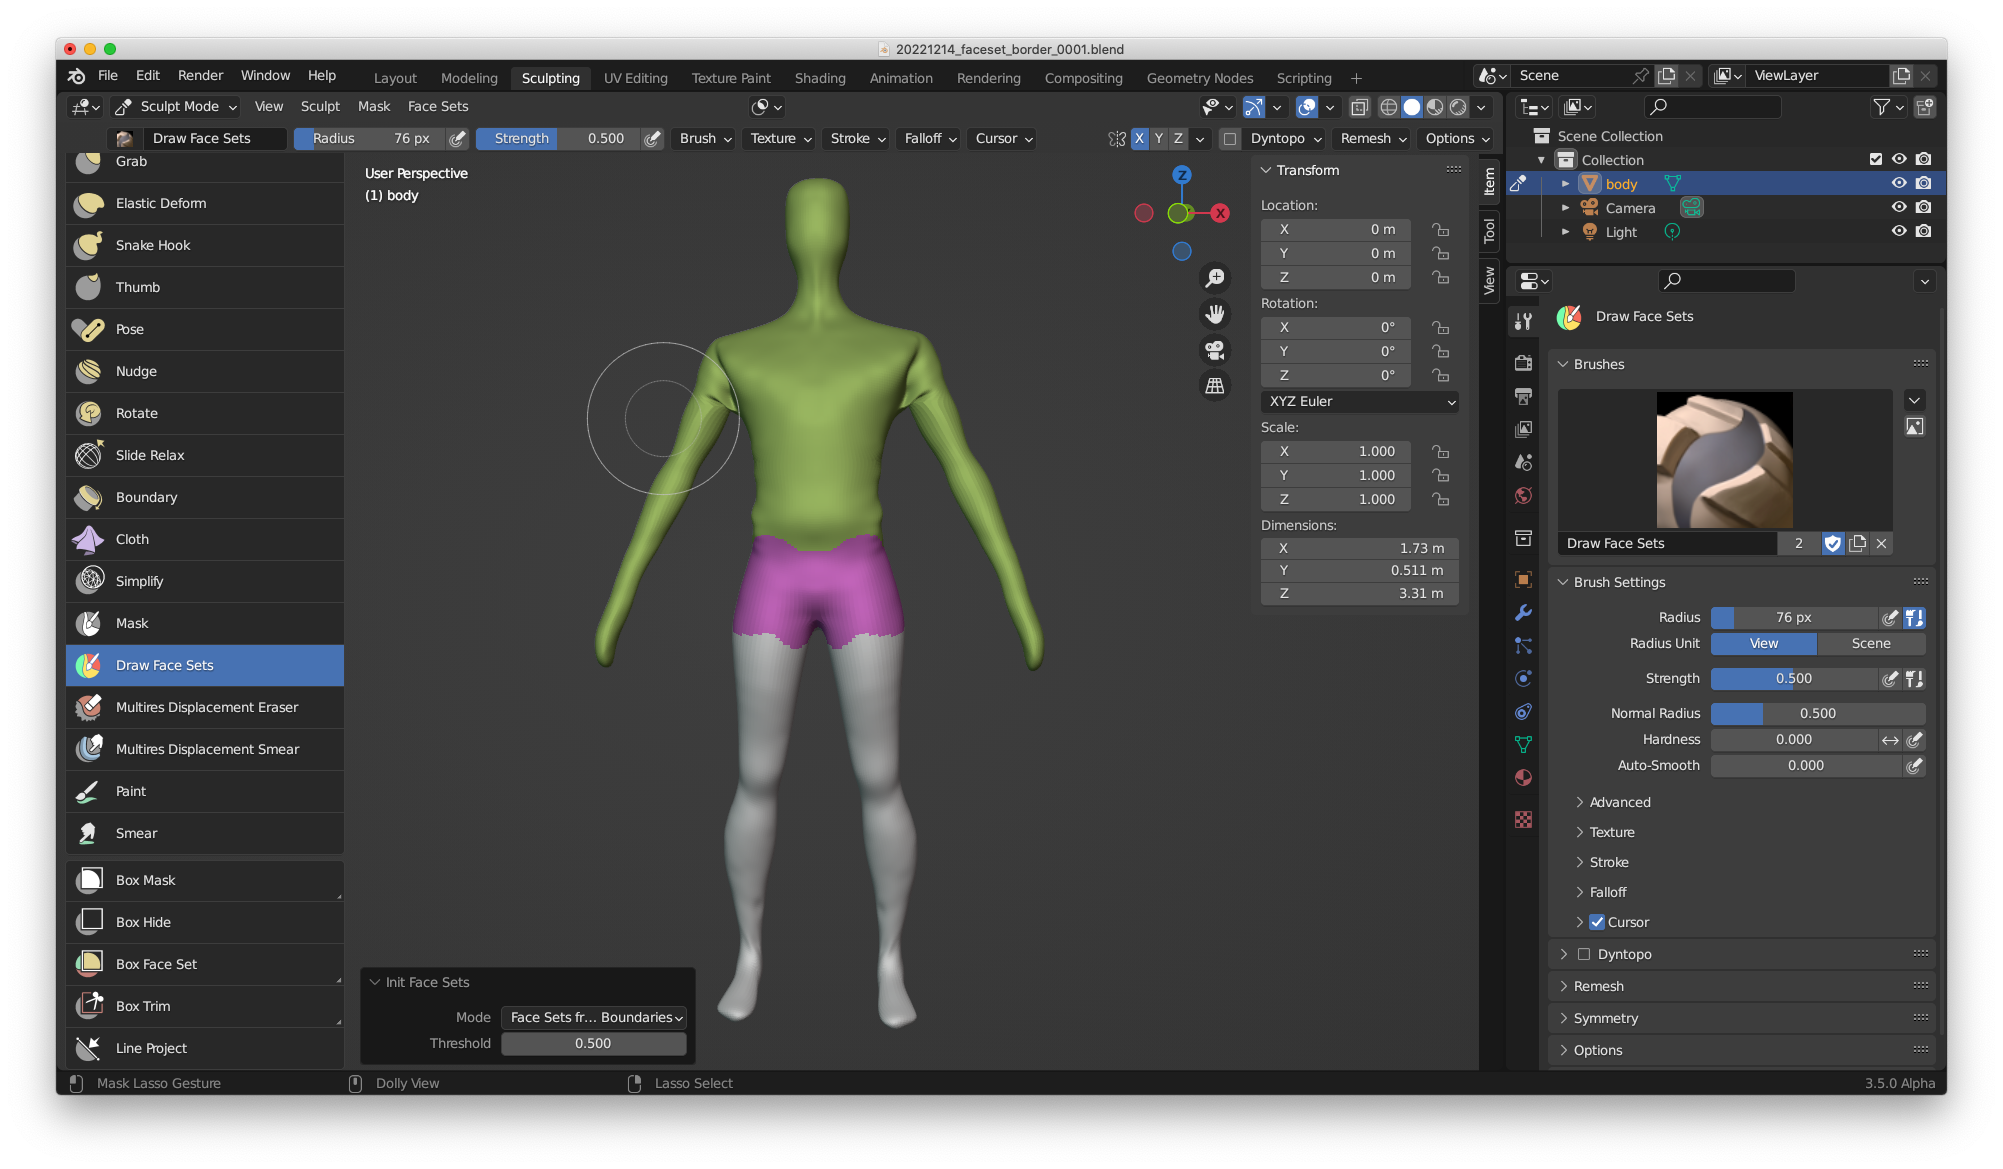
If you use expand tool or draw face set tool to create a face set corresponding to pelvis of a character, you end up with 2 face sets : a face set corresponding to pelvis and another one corresponding to legs + upper body.
If you initialize face sets creation by face set boundaries in this case : you end up with 4 face sets.
Upper Body, Pelvis, Right Leg, Left Leg.
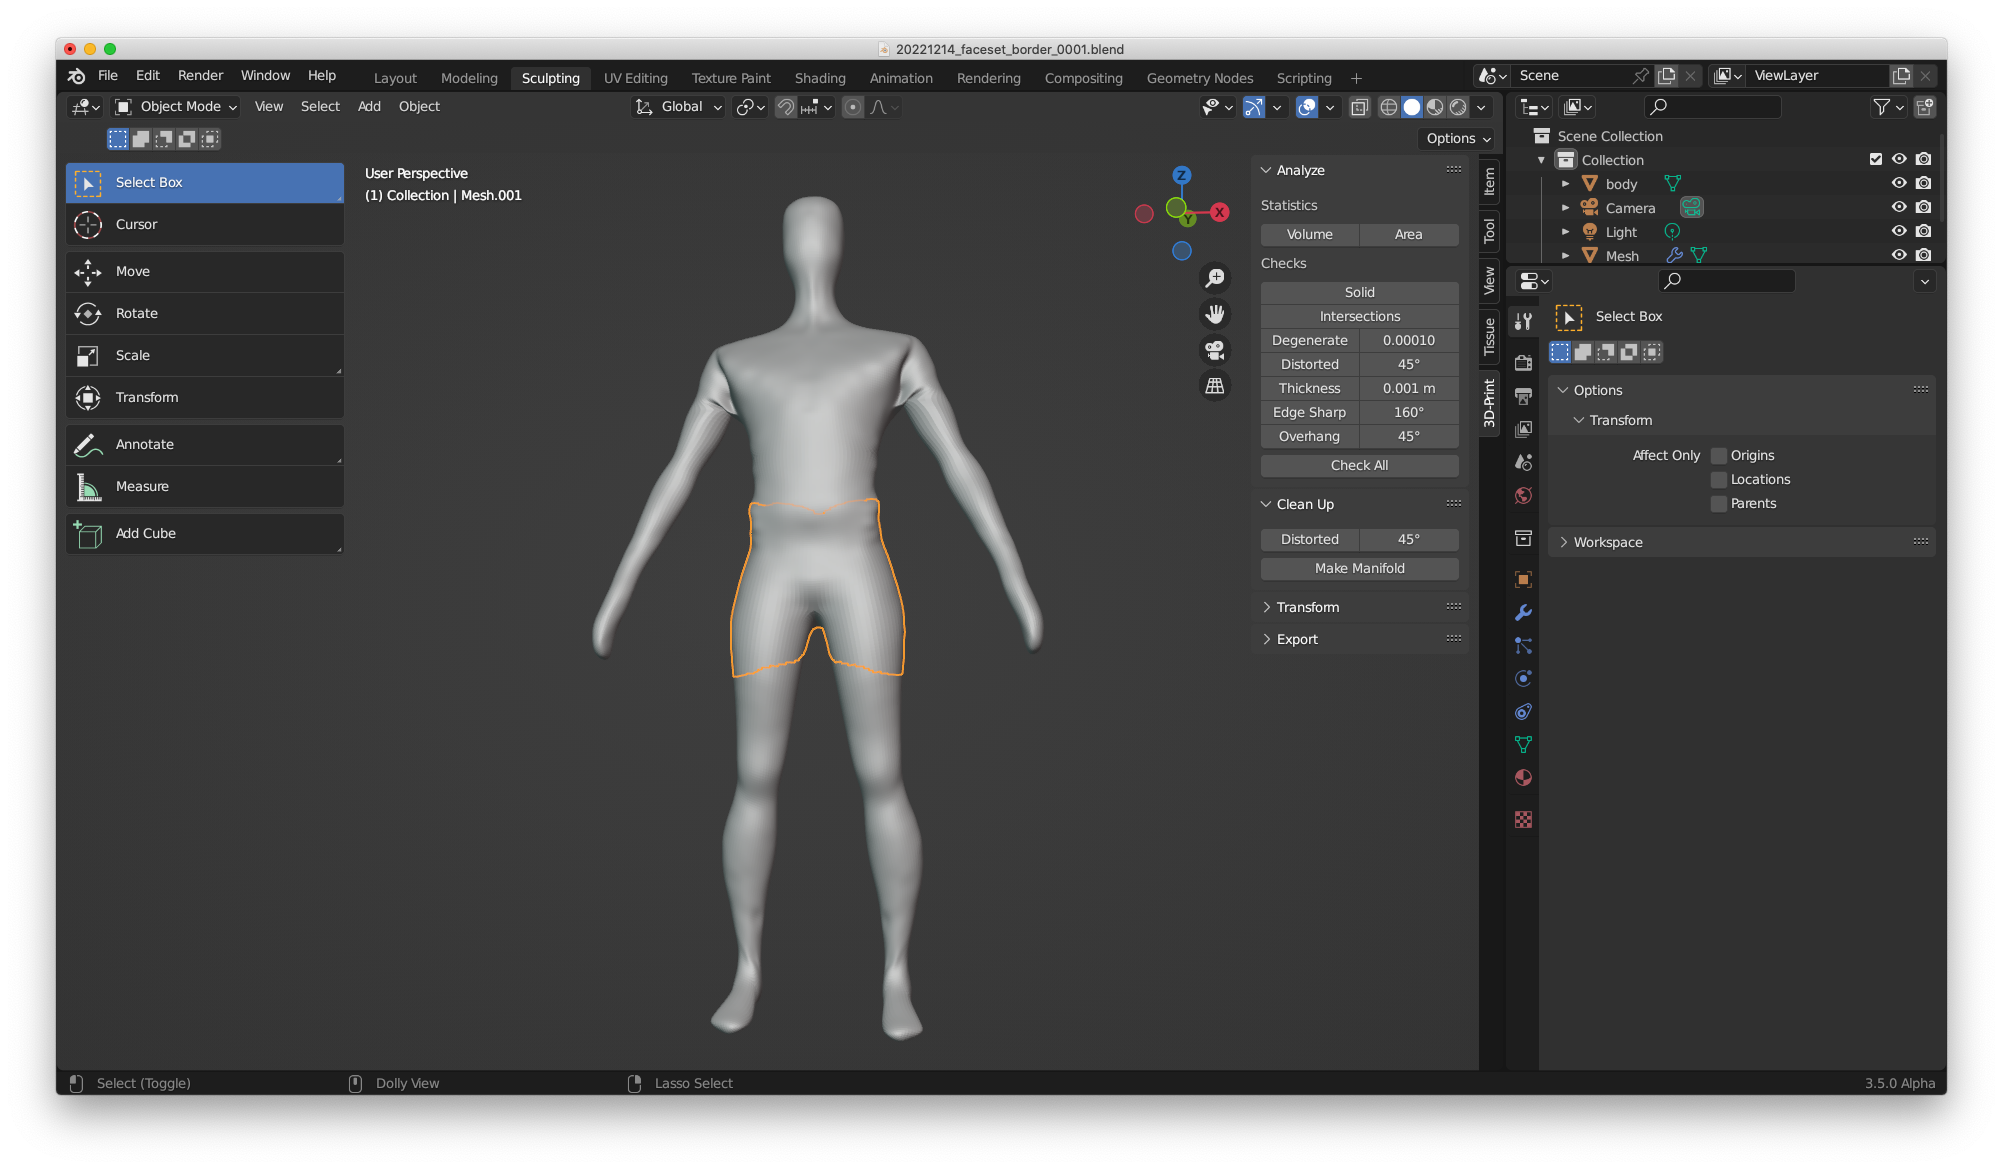
I found no options to view all face sets created, so I used ‘Face Sets → Extract Face Set’ and pointing to chest area (non colored) and this is what I’ve got:
I found how it works. After drawn to face set for pelvis area, then go to Face Sets → Initialise Face Sets → By Face Set Boundaries and it separate areas by boundaries, like this: