Hey all!
Today I want to share not just my final work, but what I learned in the process. A cool rigging trick that will give extra artistic freedom to your characters! It might have happened to you: you link your rig into a scene - and all materials are sort of locked. You can adjust them only in the rig file. But what if you wanted to animate the color of your character?


In the latest episode of my Funny Legs project I wanted to do just that: switch Bob’s body color to show the change of emotions and change his hair style. I needed to rig the color change for both mesh and Grease Pencil. Here’s how it looks in animation.

I really hope you’ll like it. And if you want to try it yourself, I recorded two tutorials (links below)! I’ve never done tutorials before, so, please, don’t judge me too hard. ![]() In case the videos are a bit fast, here are the short instructions to follow.
In case the videos are a bit fast, here are the short instructions to follow.
Mesh color change ![]()

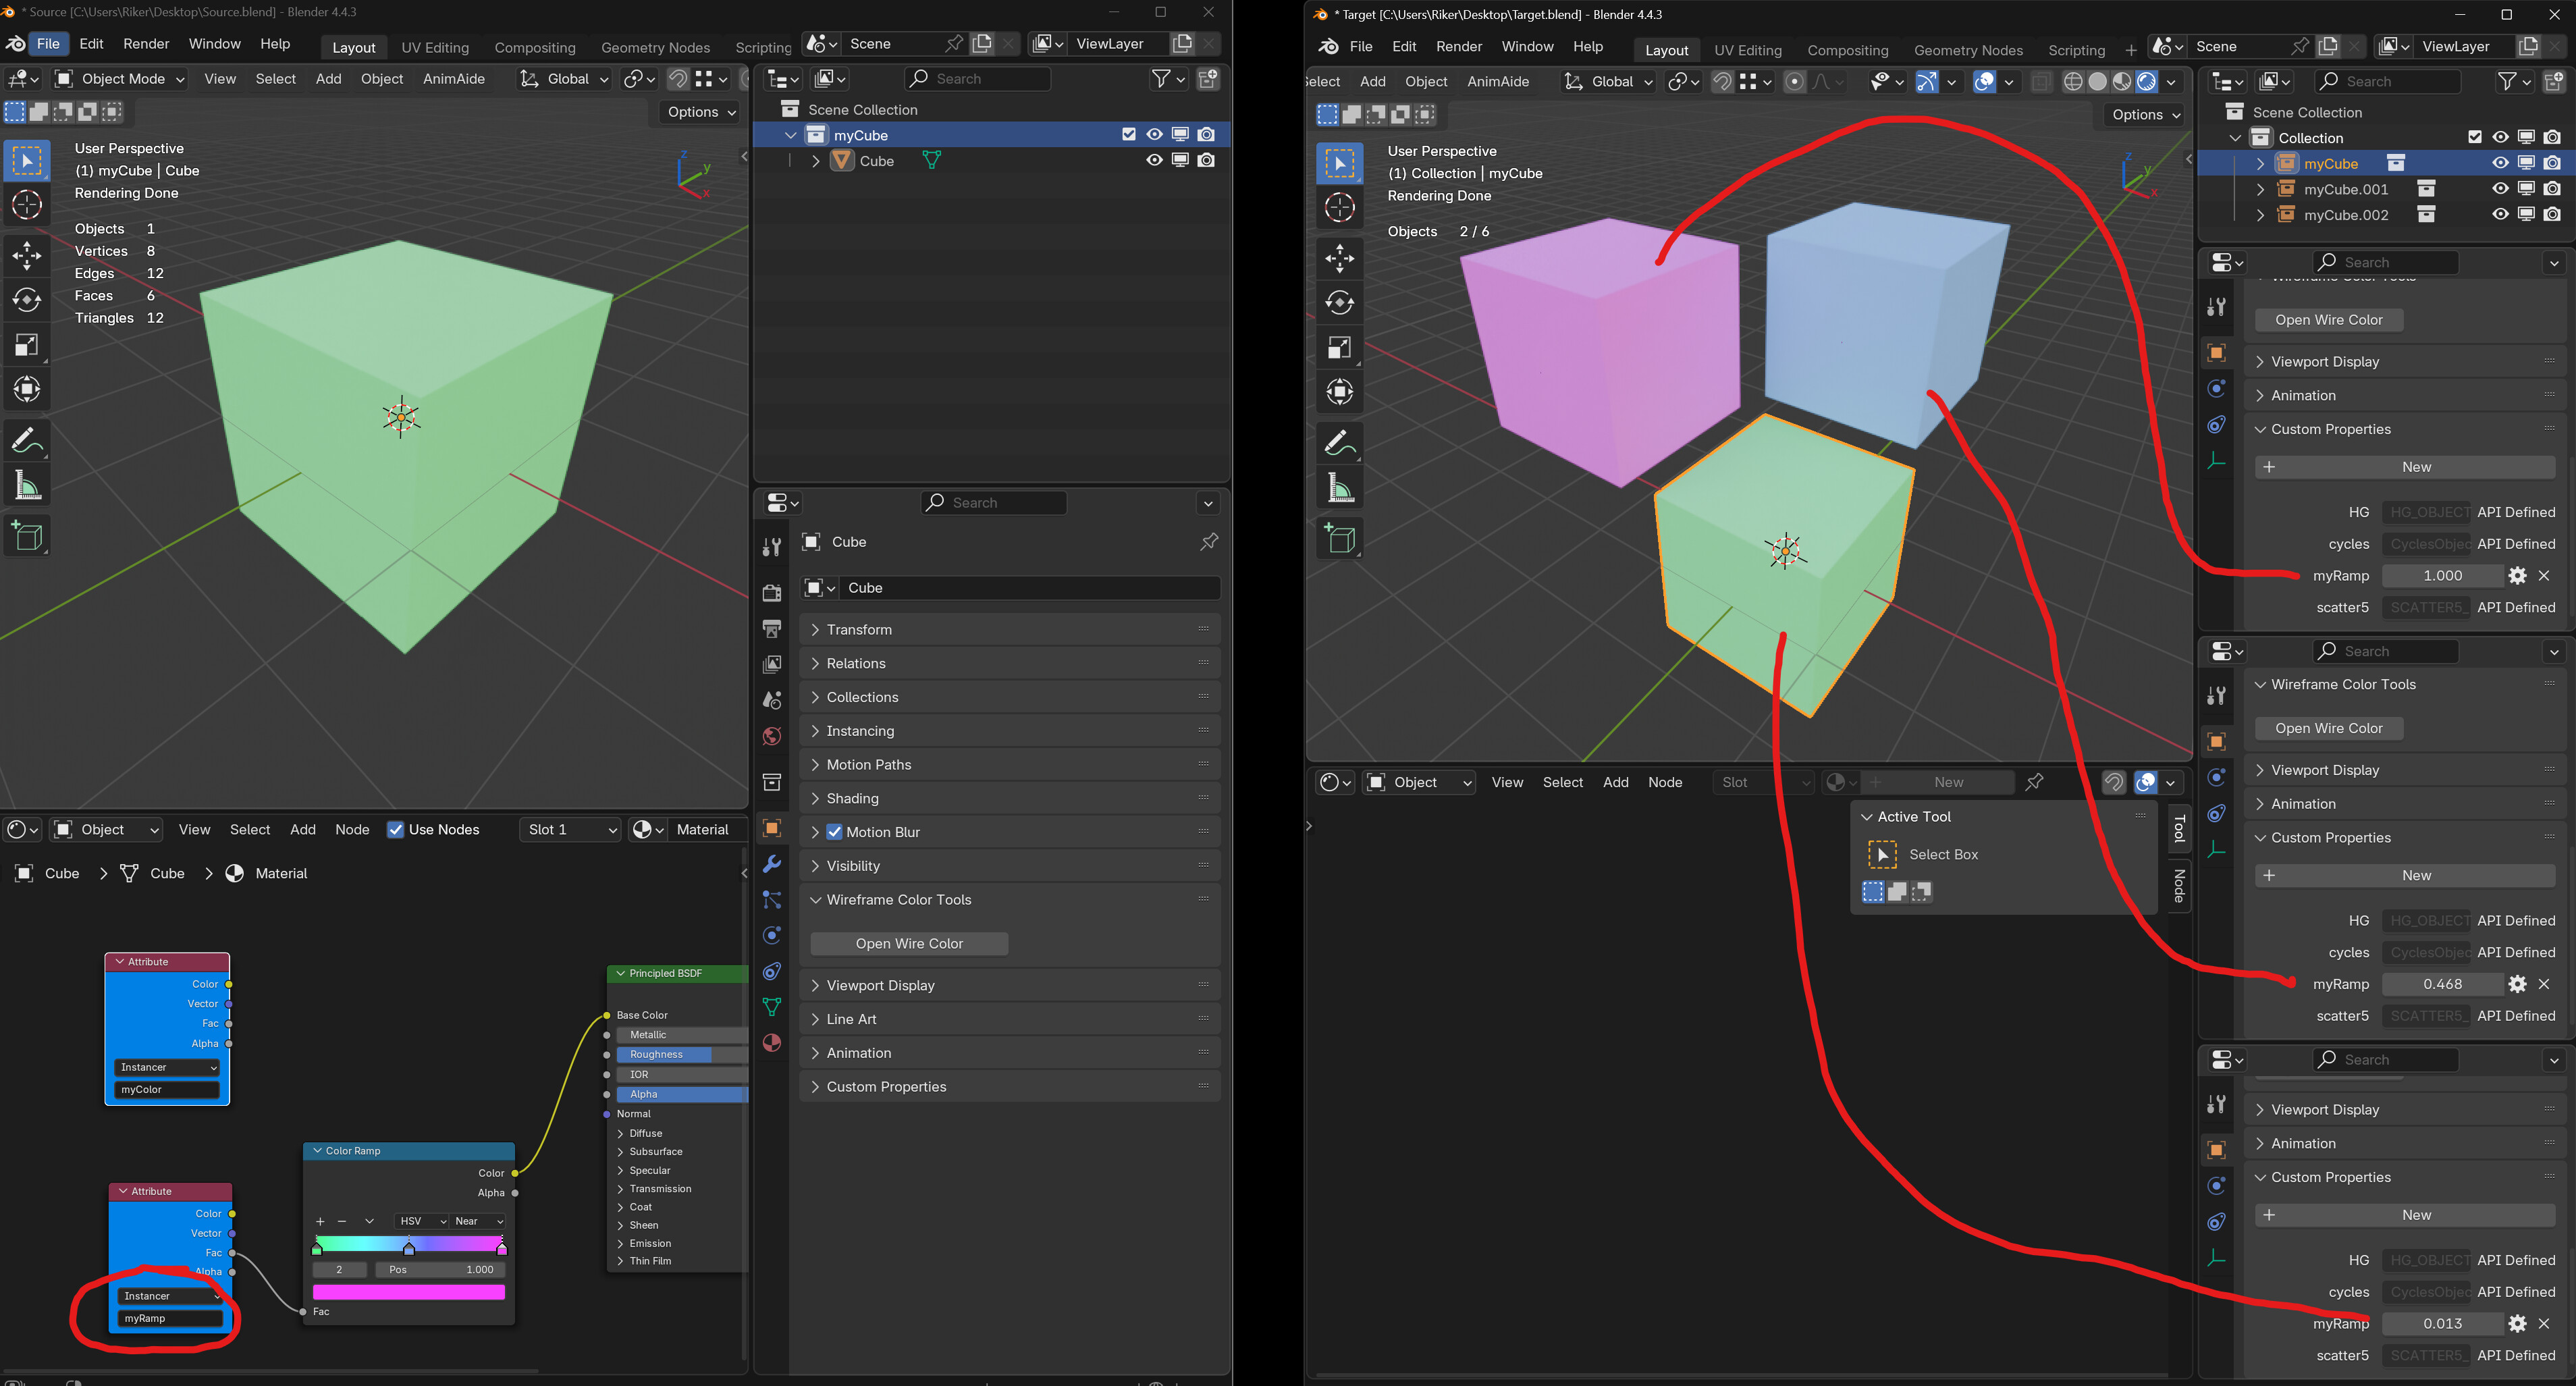
![]() Create Color Ramp in Shader Editor.
Create Color Ramp in Shader Editor.
![]() Connect it with default Principled BSDF or directly with Material Output.
Connect it with default Principled BSDF or directly with Material Output.
![]() In Pose Mode select the bone that will control the color change.
In Pose Mode select the bone that will control the color change.
![]() In Bone Properties create a New custom property. Click on a gear to edit. Change the Name from “prop” to “color”. Check Library Overridable.
In Bone Properties create a New custom property. Click on a gear to edit. Change the Name from “prop” to “color”. Check Library Overridable.
![]() Right click on property – Copy as New Driver.
Right click on property – Copy as New Driver.
![]() In Shader Editor right click on Fac of Color Ramp – Paste Driver.
In Shader Editor right click on Fac of Color Ramp – Paste Driver.
![]() In Pose Mode select the properties bone. Press N to see the menu on the right.
In Pose Mode select the properties bone. Press N to see the menu on the right.
![]() Drag the Color property for a smooth color transition. Drag with CTRL to jump from one color to another.
Drag the Color property for a smooth color transition. Drag with CTRL to jump from one color to another.
… … …
Grease Pencil color change ![]()

![]() Create different materials for GP object.
Create different materials for GP object.
![]() GP object has a key. Copy-paste it multiple times. Select vertices in Edit Mode,
GP object has a key. Copy-paste it multiple times. Select vertices in Edit Mode,
and assign new material for every key.
![]() In Modifier Properties add Time Offset. Choose Fixed Frame mode. Now Time Offset controls what keyframe (what color) of GP we see.
In Modifier Properties add Time Offset. Choose Fixed Frame mode. Now Time Offset controls what keyframe (what color) of GP we see.
![]() In Pose Mode select the bone that will control the color change.
In Pose Mode select the bone that will control the color change.
![]() In Bone Properties create a New custom property. Click on a gear on the right to edit.
In Bone Properties create a New custom property. Click on a gear on the right to edit.
![]() Choose Integer Type. Change the Name from “prop” to “GP_switch”. Adjust Min and Max according to the number of your GP keys. Check Library Overridable.
Choose Integer Type. Change the Name from “prop” to “GP_switch”. Adjust Min and Max according to the number of your GP keys. Check Library Overridable.
![]() Right click on property – Copy as New Driver.
Right click on property – Copy as New Driver.
![]() Right click on Frame of Time Offset – Paste Driver.
Right click on Frame of Time Offset – Paste Driver.
![]() In Pose Mode select the properties bone. Press N to see the menu on the right. Drag GP_switch property to jump from one color to another.
In Pose Mode select the properties bone. Press N to see the menu on the right. Drag GP_switch property to jump from one color to another.
If you read this far, I hope you enjoyed it and learned smth new! Have fun ![]()