Hello! For quick background, I’ve only ever animated a humanoid in Blender and it was using a skeleton I purchased to make Second Life animations. So I have never rigged a skeleton from scratch but I have been animating a human for years. Move bone, put in keyframe.
But I’ve never worked with a geometric prop like an umbrella.
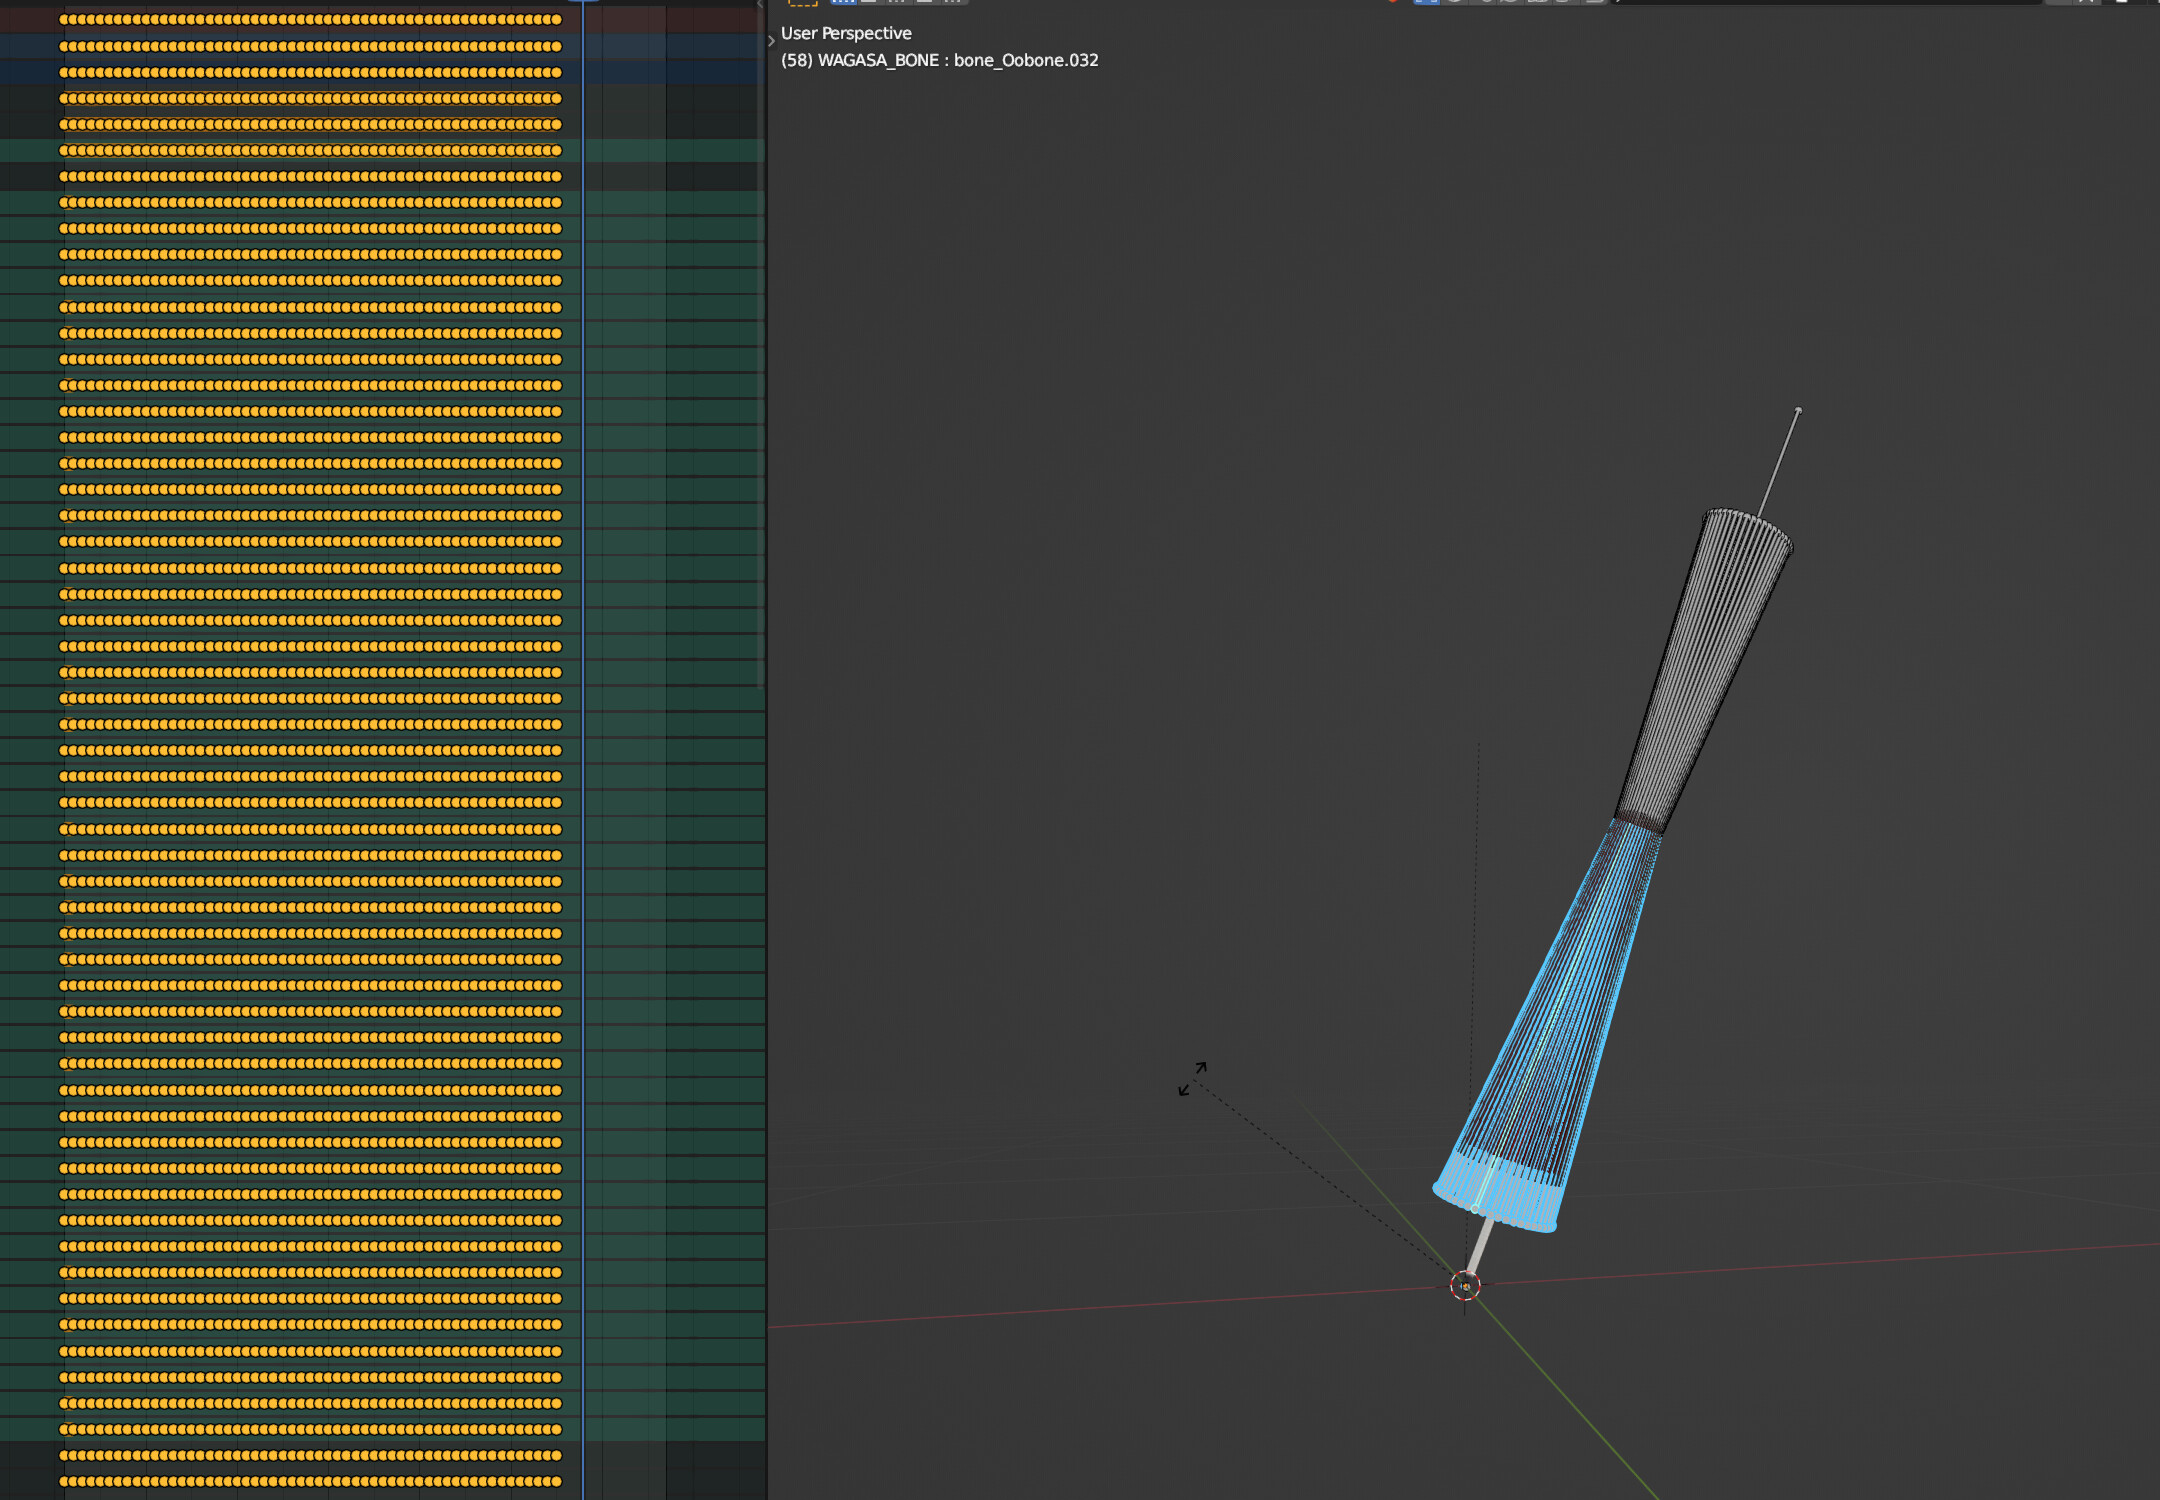
Recently I bought a very beautiful wagasa, a Japanese paper umbrella, animated prop for Blender. When I look at it in file I can see all the bones moving when I drag the timeline along or let the animation play. Here it is open:
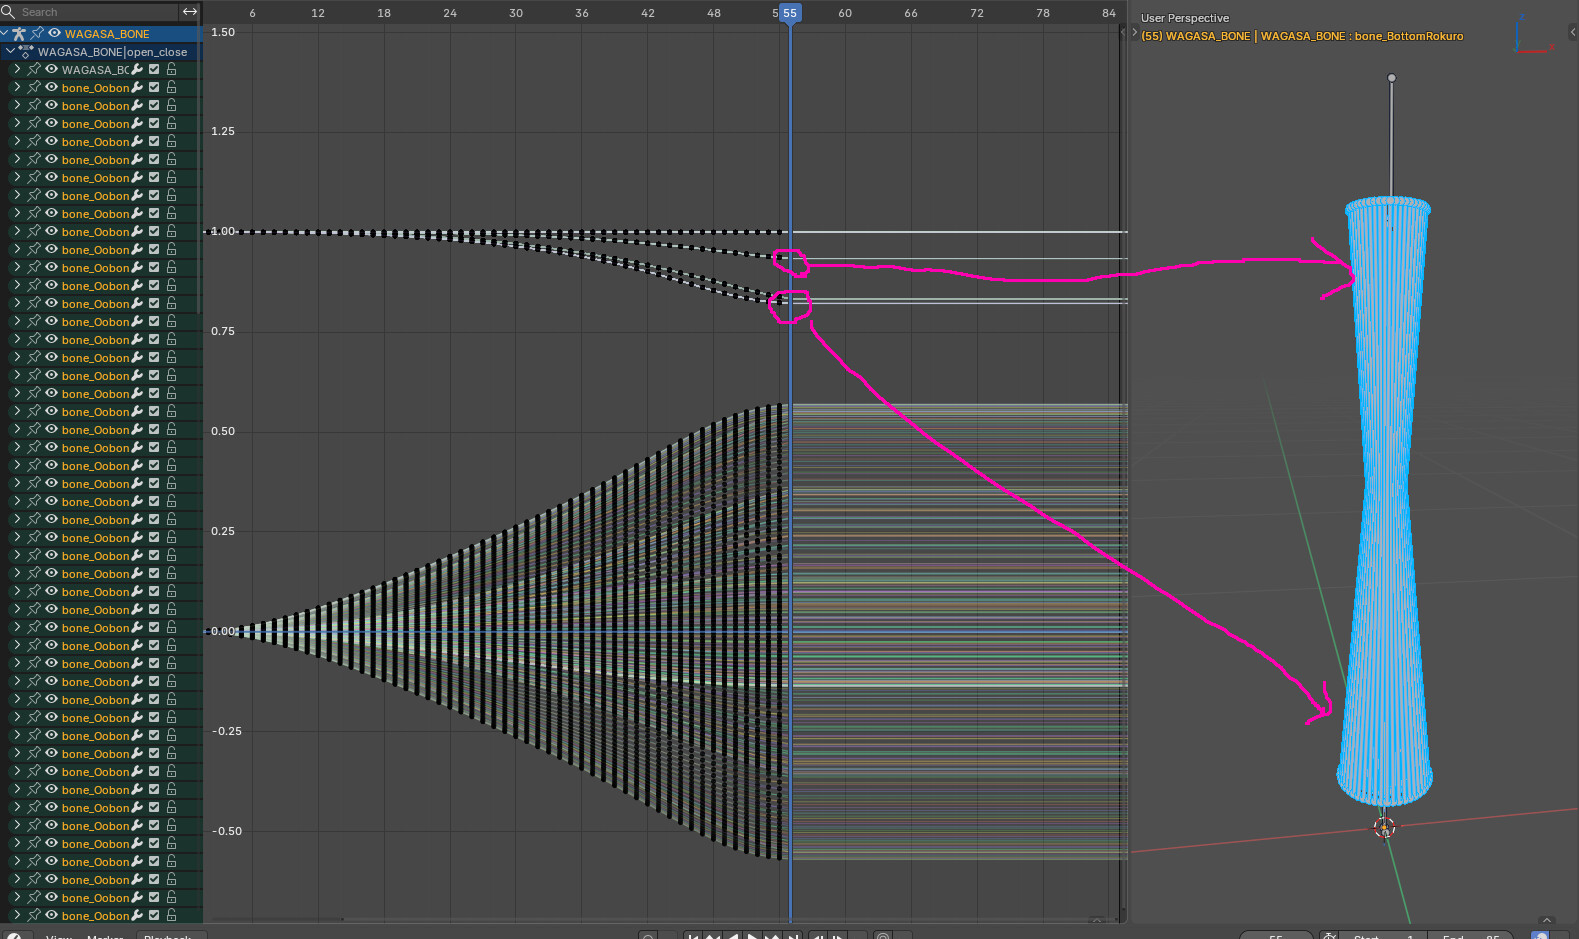
As you can see, at 55 frames it’s at its most closed point. However, I want to try to get it to close even more but… I have no clue how. I was thinking, I could just move the bones and add another keyframe, right? But the problem is, and I’m sorry if this is very newbie sounding, I have no idea how the original maker even made all these bones move so nicely and compact in the first place. I have no idea how this is done. Can someone give me some insight? As in real life these umbrellas can close even more than this and I want to try to emulate that.
Thank you for any help!
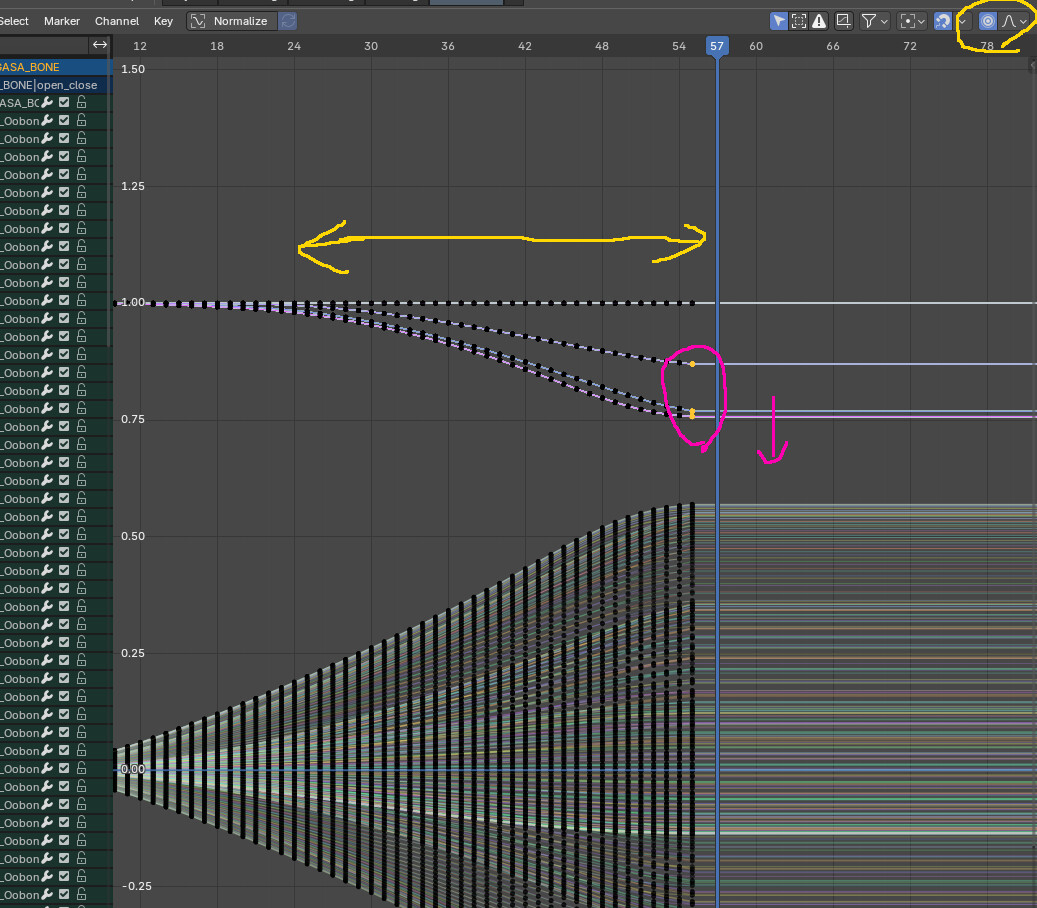
Edit: I should probably add that I just can’t figure out how to move all the bones the same amount, and inward, at the same time, cause I’m thinking there is no way one has to take the time and figure out how to move all the bones manually and evenly. I don’t know any tricks other than “select a bone, rotate it, keyframe it”.
The whole problem is that’s impossible. I cannot just select all the bottom bones, for example, and rotate them… rotate them where? If I rotate them to the left, the whole umbrella just tilts left.
How do I get them all to evenly go inward? As I said in my post, there is no way the original animator took each bone and moved it inward by a certain amount, and done so evenly with each bone. There has to be something I’m missing.
There might be some constraint on the bones for automation but without the files is hard to say, if you are not comfortable sharing the model you can just upload the bare armature.
Assuming the rig is all FK and hand keyed, have you try rotate the umbrella rib bones with local rotation on one axis?
Sorry, what is FK please? I am not familiar with short hand.
So yes I can rotate one bone at a time, but the problem is how to do them all symmetrically so I don’t end up with a mess? And is there a way to do them all at once and not only one at a time?
The download link is broken for me, you sure the armature it self is over 5MB?
you can try saving the armature itself in a new file and zip it or use google drive.
Cannot download file but looking at screenshot is seams one bone is main and other have constraints to copy rotation of that bone, this way you can easily control bunch of other bones to behave in the same way.
I am not experienced in animation or rigging, but I guess the animation and the rig is imported from some other software and so the animation is baked into all frames. I don’t think the rig is suitable for working with it so keeping in mind the object is quite simple, I think it might even be easier to remake it from scratch with a proper rig that does not need to be keyframed at every single frame.
Someone posted this when I inquired elsewhere and it worked for me!
“I was really hoping there was some kind of constraint at work, but the bones don’t even have their orientations consistent so you can’t just work with them all at once. Only thing I’ve got: go to the frame after the current final pose, select all the bones that you want to move, and go Pose>In-betweens>Blend Pose with Rest Pose. At positive values, this moves your current pose closer to the rest pose, but at negative values it moves it away from the rest pose and more closed. Around -7% it doesn’t look like it clips through itself too badly, but I can’t say for sure how it will work with the actual model.”