How to combine lighting while maintaining vibrant texture colours with toon shaders

I’m very new to creating materials in Blender and I’m trying an adaptive cel-shaded shader which allows me to change out material textures inspired by Borderlands 2 aesthetic.

I’m wondering if it’s possible to combine the lighting and hatching styles while also maintaining the colours of the materials?

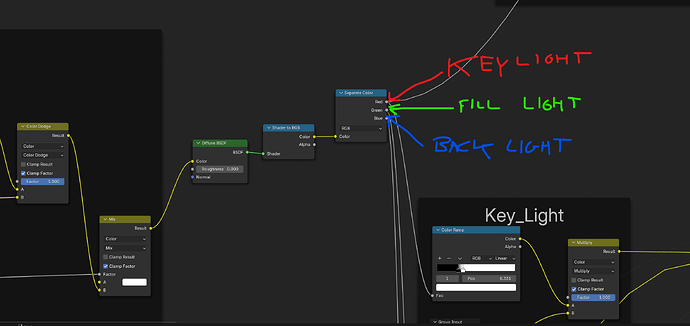
From my limited knowledge, I believe the issue is with how I set up the texture by separating the RGB to create a 3-point lighting scene. The colours of the stylised materials are tied to these lights (which I don’t want), as this doesn’t allow for any room for changing the colour of the surrounding lights. The other extreme removes all of the vibrant colours and details out of the texture image to achieve the neon lighting and hatching.

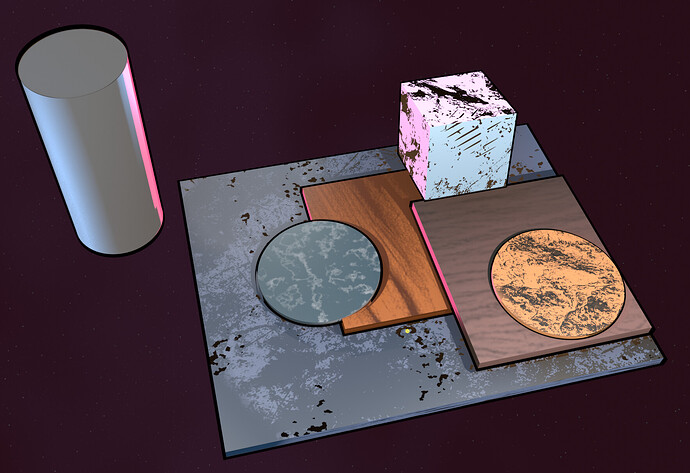
Vibrant materials, but no neon lighting and hatching details:

Unfortunately, as a new user, I can’t send over the blend file, and the material node is too large to be readable in the screenshot. But I’m open to suggestions to help communicate my issue!

Thanks

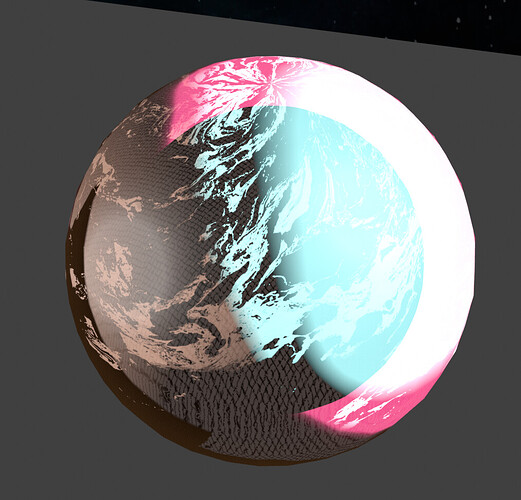
Neon lighting and hatching details, but no material colours and minimal details:

Both this image and the one above both use a marble texture seen in the first image in the top right

Separate RGB Node used for 3-point light:

You can’t directly link the file, but you can upload it to a file sharing site and share the link if you want.

1 Like

Ah, thank you for the suggstion! I didn’t know that’d work!

Blender File: https://drive.google.com/file/d/1G34Ka-BzVFS3-j5UVxLtlGMTIOGUfG6V/view?usp=sharing

1 Like

I am just checking in to see if anyone has any ideas. I’ve been looking around and can’t find a solution, sadly!

This is a very complicated material. There is no way I could understand how it works, not quickly anyway. That’s the problem with using other people’s content without knowing how to make it yourself, you will always be limited to what you get. If you are looking for a mix of the 2 images, I guess you could copy both nodes inside a single material and try to mix them using a mix rgb node. I am not sure if that would look good, though you could try different blending modes and different “fac” values to control the mixing.

2 Likes

Thanks for the suggestion, I also thought of mixing the node groups together, but the shader breaks completely and I worry it’ll make the calculation of the material too heavy when applied to scenes.

I’ll admit, I did need to look at a lot of difference resources to create this and splice everything together with the knowledge I have which is something I usually don’t do, as I like to understand the process entirely. But, unfortunately I’m on a tight deadline!

I’m just going to keep trying and experiment until I figure this out or someone a lot smarter than me with this finds the solution! :laughing:

2 Likes

Do I understand that you fully made this material yourself? This does changes my understanding of the situation. Looks like you made a setup too complex for yourself to understand and debug. You know which aspects of your material aren’t mixing properly, but can you even find the actual nodes that are failing in all that spaghetti?

It would surely be possible to label the setup better? If I understand correctly, you have made a bunch of blocks of nodes, each one doing one specific aspect of the material, and you have a big line of mixRGB nodes that combine all those blocks together. These mixRGB nodes are the part I find hard to follow: nothing is labeled and they take all their inputs from random distant places.

I would start by giving names to the mix nodes (select the node, then press F2), using those names to explain what the node does, what parts does it combine.

Then, I would add reroute nodes to the wires, close to their end point where they connect. Reroute nodes can be used to make wires that branch, but they can also be named, allowing you to label a wire. That way, you know what is plugged into each socket at a glance without having to follow each wire to its source every time to remember.

reroute_node

When that is done, you might be able to identify the exact point your node tree is failing much quicker. Maybe one of the mix nodes just needs a different blending mode? I would rather not have to guess by trial and error.


An other thing I might try if the first option isn’t useful is to test the setup in an incomplete form. Make a copy of the material for testing, then start deconstructing the node tree backwards, removing the last part of the chain and undoing the material in the opposite order you built it until you find the point where the problem disappears. Then, you will know anything before that point cannot be in cause.


I see you are doing lighting inside the material. Is there a reason it needed to be done inside the material and not directly with lights?

If I understand correctly, you light this material using only red, green and blue lights and the material re-colors the 3 channels to whatever you choose? But this also means that if any other light color is present, it will count for multiple channels, so you will get mixes of the colors you have chosen, limiting your lighting options.
2 Likes

I appreciate the advice, especially on how to clean up the nodes by naming and combining wires! I’m currently preparing a file to show why everything is set up this way to help answer all of the questions. It’s significantly easier to show rather than explain everything via text!

I’m also rebuilding the shader again to see if I can figure out where it went wrong!

It may take me some time to prepare the examples, but I’ll get back to you as soon as possible! :grin:

2 Likes