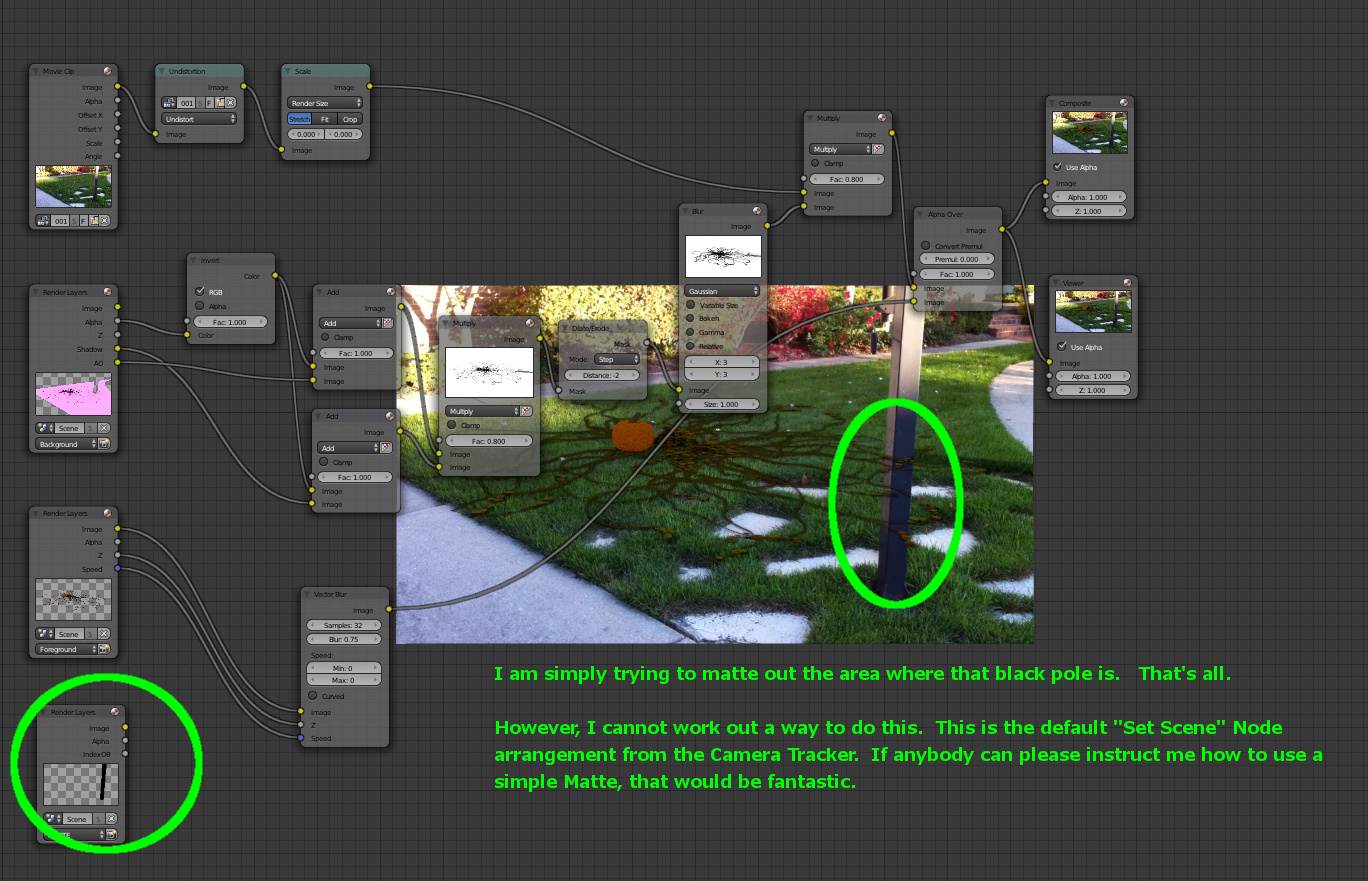
As shown in the screencap below, I have a seemingly simple issue that I always struggle with in Blender: simply turning a designated area into an alpha region (while also retaining the existing alpha data, too).
The Node setup here is the default setup that you get with the Camera Tracker. I’m just trying to block out a small region where there is a pole. So, I created a separate Render Layer and created a Cube for the pole. Unfortunately, it’s just not working.
Have you looked at making a mask in the UV Image Editor, and feeding that to your composite with a mask node?
Sorry, I didn’t see all of the nodes there - if your object is mean to be a mask, you don’t need to render the layer itself, but turn it on as a mask on the render layer you want to exclude from rendering
A Mask wouldn’t solve this issue, because the problem is how to apply the Matte. Here, the black bar in the Render Layer (which is circled in the screencap) can function just like a Mask. I just can’t get it to apply Alpha to the two other Render Layers (the pumpkin patch and the shadow).
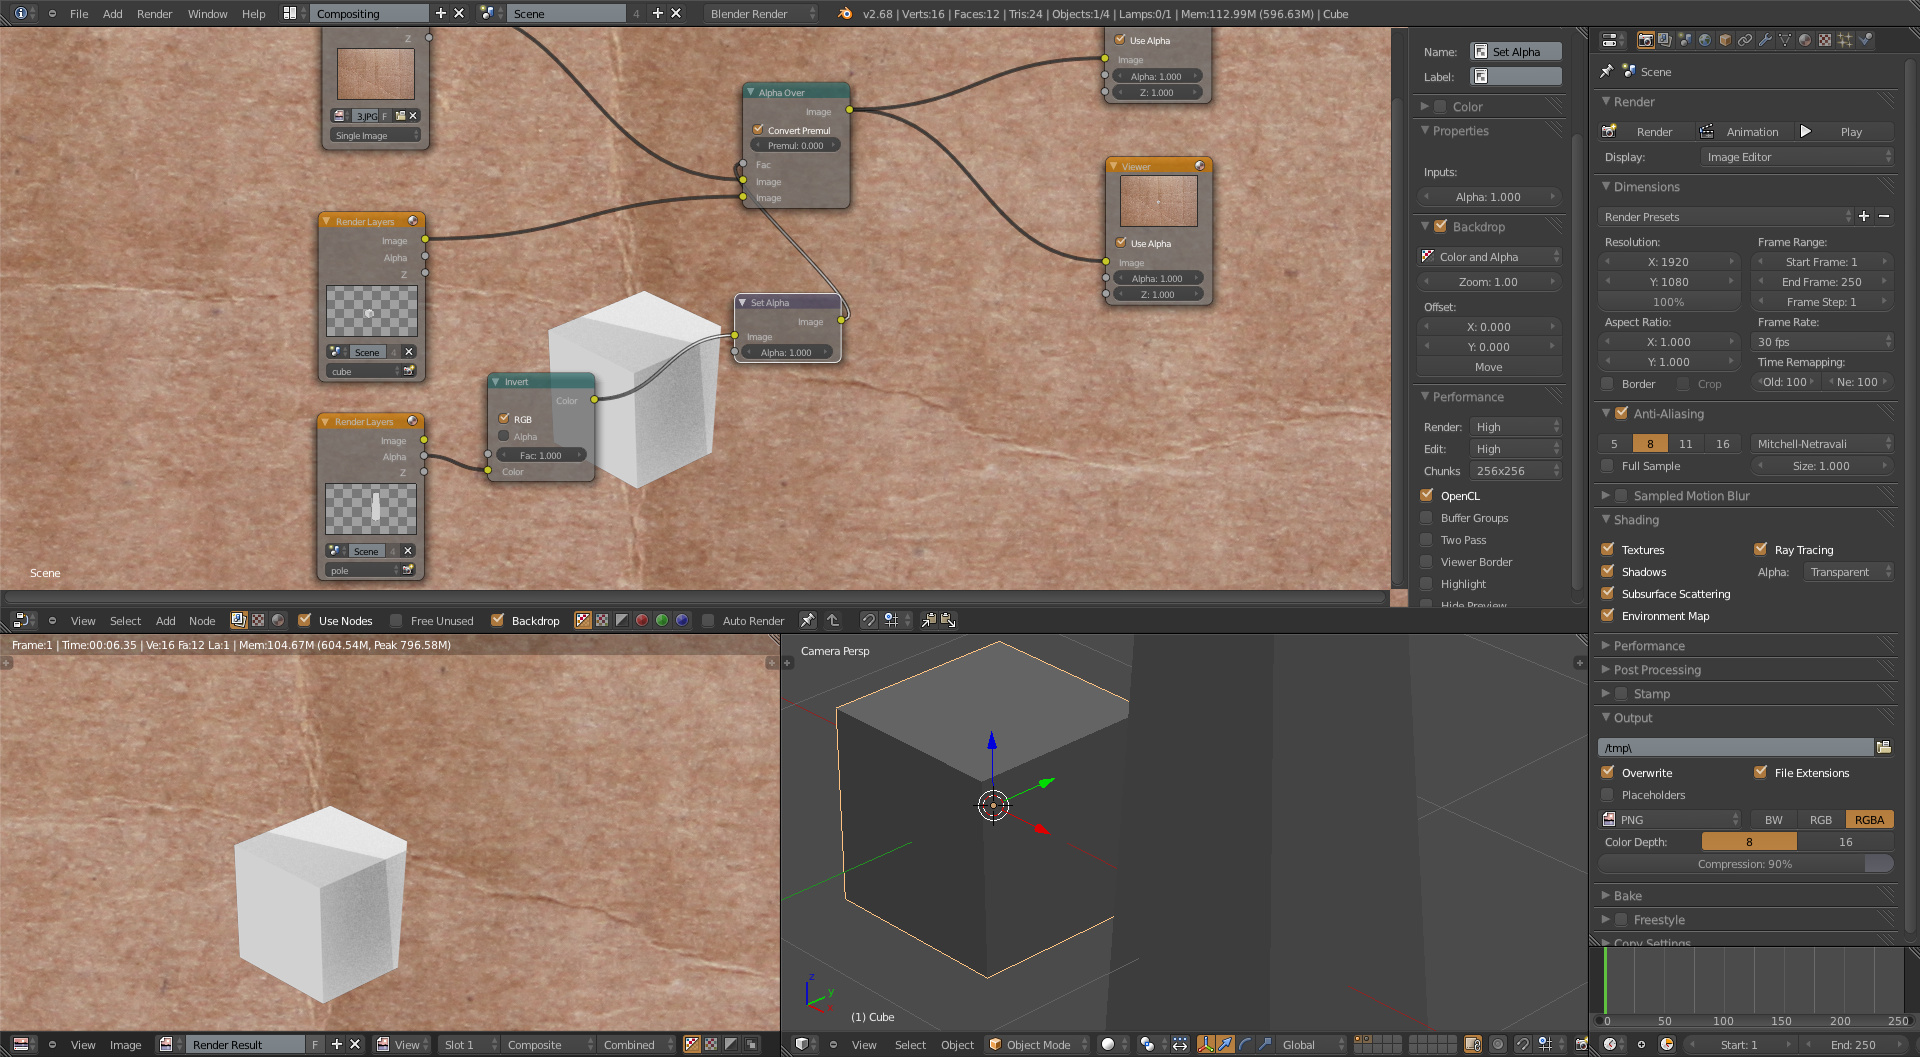
I edited my post - I will upload a pic in a second. You don’t need to include the render layer as a matte -f you can just reference the render layer as a mask in the affected render layers
Yes, I understand. However, even that doesn’t work for me. The reason is because the Matte Layer (the black cube) is, at points, beneath the plane in the shadow Render Layer. So, when it is applied as a Mask Layer for the “Foreground” and “Background” Render Layers, the portion that is beneath the shadow plane doesn’t mask it.
So, this is how I got here: I just have the black pole, isolated. I simply need to make that Alpha data on the other Render Layers (while also maintaining their alpha data).
Her eis a shot form the work I did on the latest - I used a render layer with a mask object that is between the camera and the hand object being masked, and in the render layer of the hand object I have this turned on as a mask layer. I only set the hand, character, and background to render, and the composite render layer node drew the mask to subtract from the hand layer before combining with the z combine node. My node structure isn’t exactly the same, but the idea of subtracting the mask layer should work.
maybe try plugging the same output from the set alpha to the fac of that multiply node, and put a color mix node just before that fac input to drive the amount to get your .80 power.
Didn’t look very closely at the problem and the node setups but once the pole is on its own render layer, why not just use that layer to mask out other render layers?
Also, the default node setup is very helpful for beginners but I often find that I need to set things up myself so that I can have more control over the process. If you have multiple objects spread over several layers the default setup will not take you very far.
The problem is very basic: combine alpha channels from numerous Render Layers. Then use that combined alpha area as the alpha in the second-to-last Node (before overlaying the render on the video).
It is frustrating because this is so simple to achieve in GIMP and other image programs. Yet I always have trouble dealing with alpha in Blender. Here is a .Blend: