I want to copy MATCAP skin as material
The most I could do
But this option doesn’t suit me
How to do it?
I’m not sure what you are asking here:
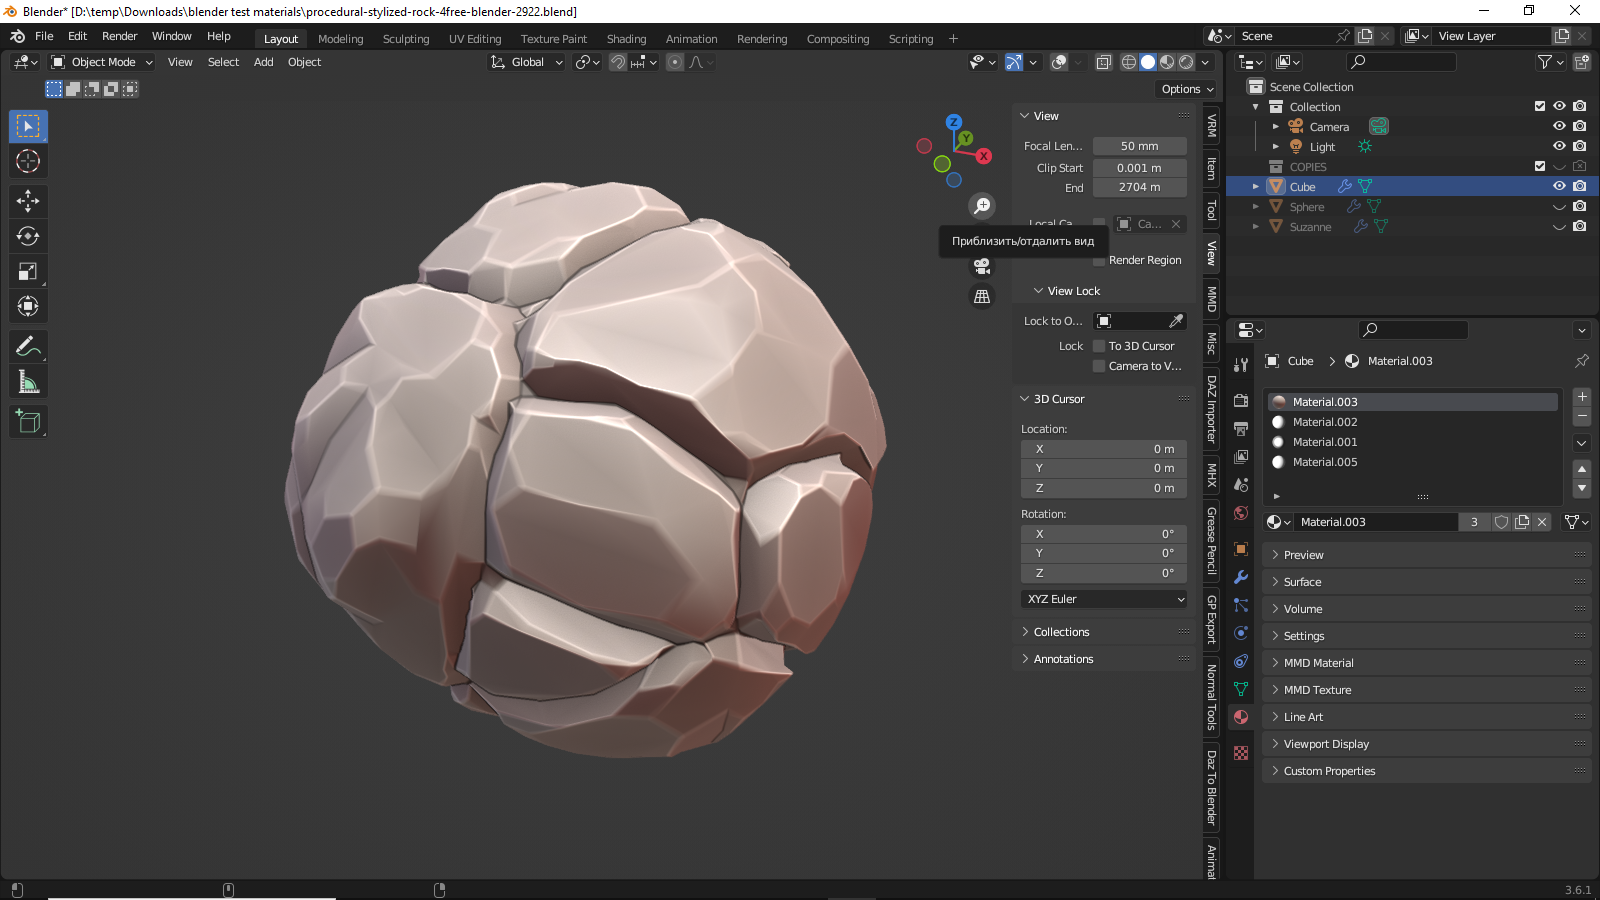
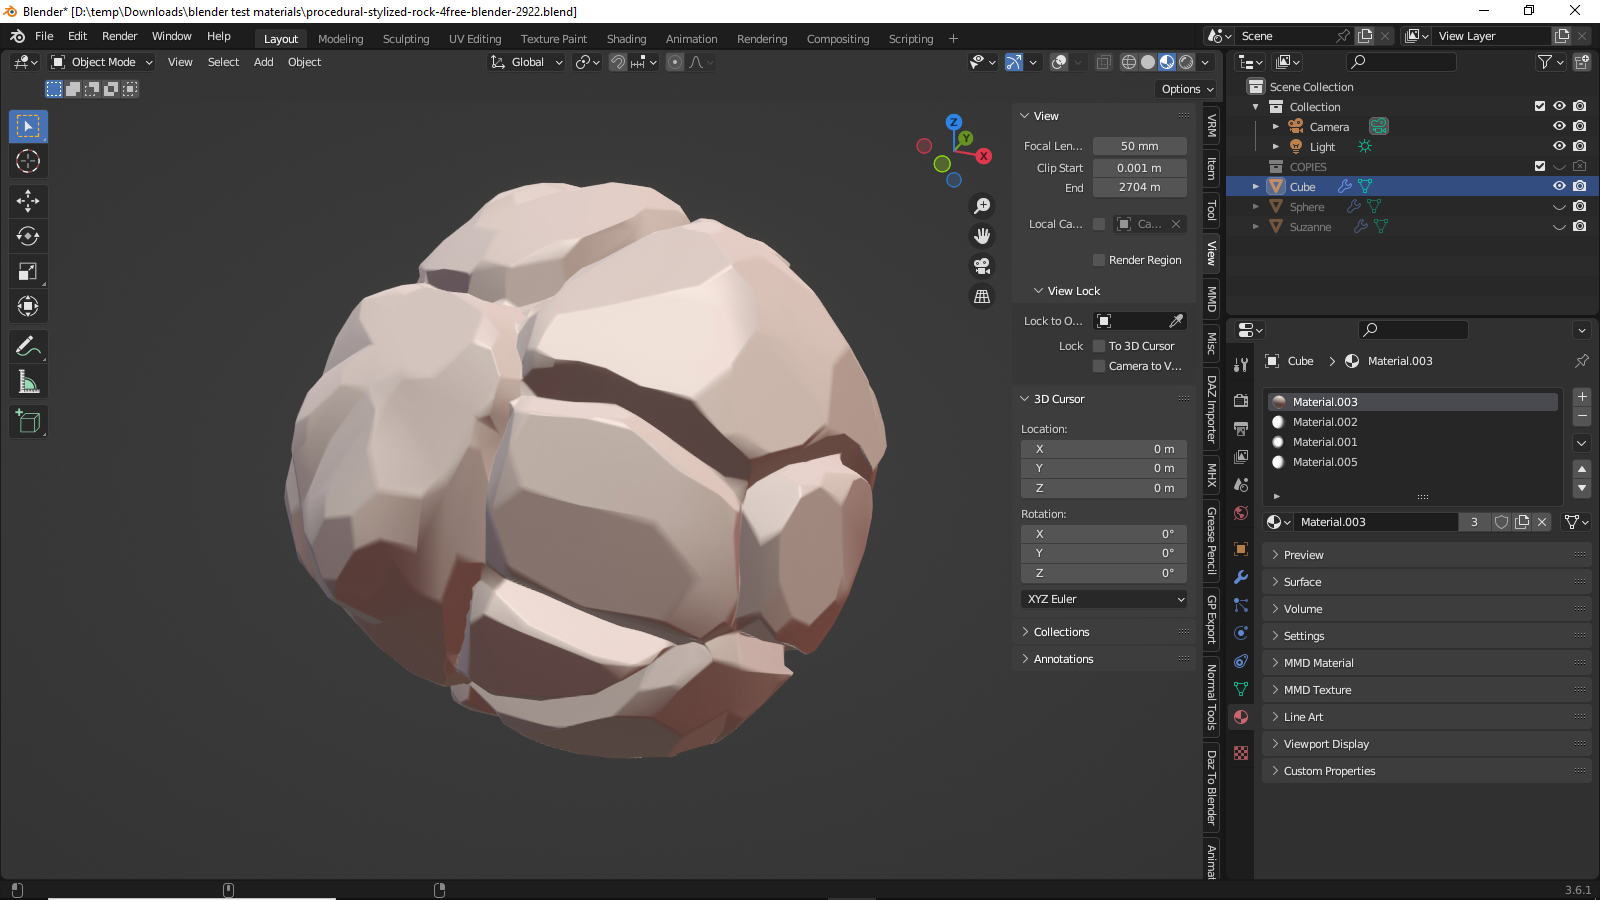
the first rock image looks like: Viewport Shading → Cavity is enabeld
and in the second rock… not…
But the you suzanne uses somethign totally different… !? At least colore-wise…
You may have to elaborate this to get a more suited answer.
1 Like
The first image shows MATCAP skin.
On the second one I used the material where the texture is from MATCAP skin
But my ribs don’t glow and the shadow doesn’t work
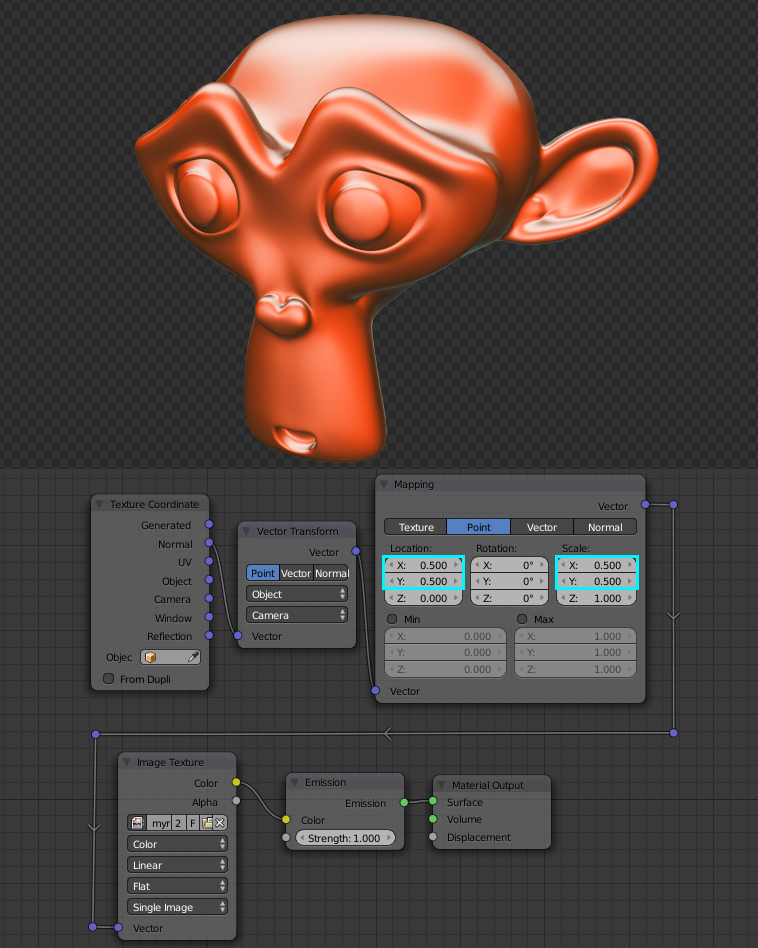
The third image shows a diagram of the material I used
I got all this material from this post
And I copied it completely, changing the texture
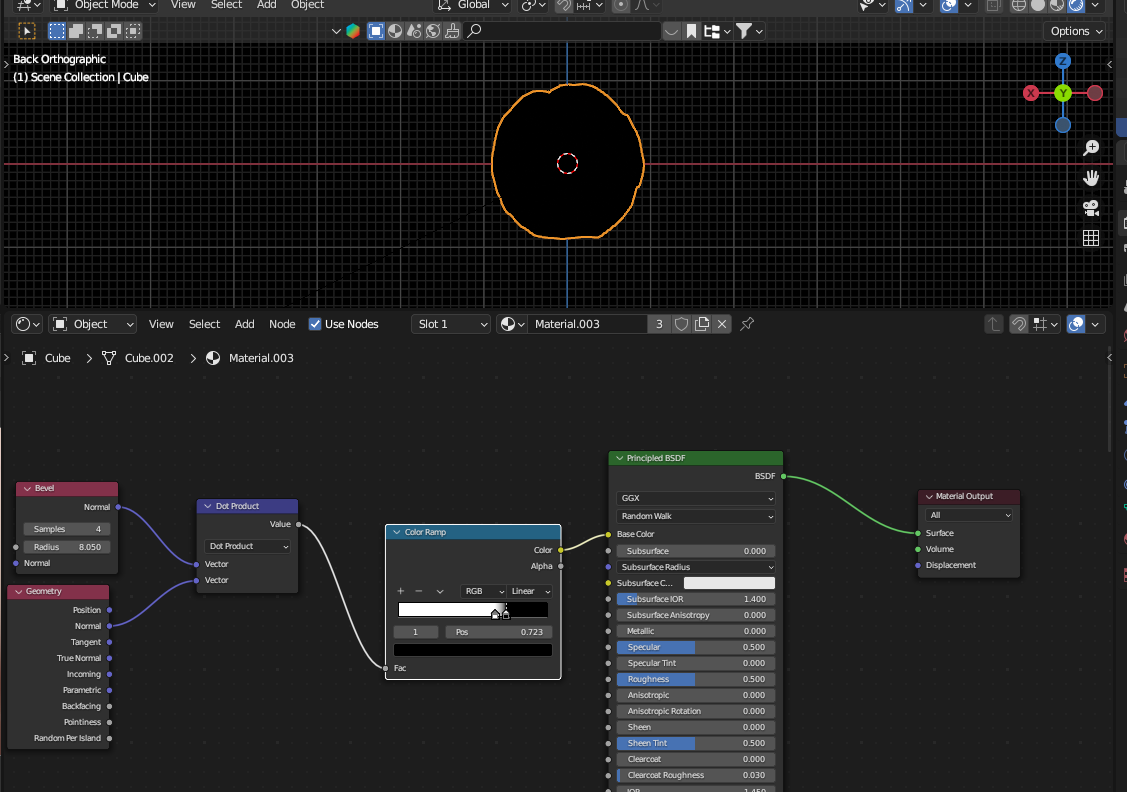
My updated version of the material
procedural-stylized-rock-4free-blender-2922.blend (1.2 MB)
I even used the edge mask
But still the material didn’t turn out the way I needed.
Have you tried the bevel edge wear trick?
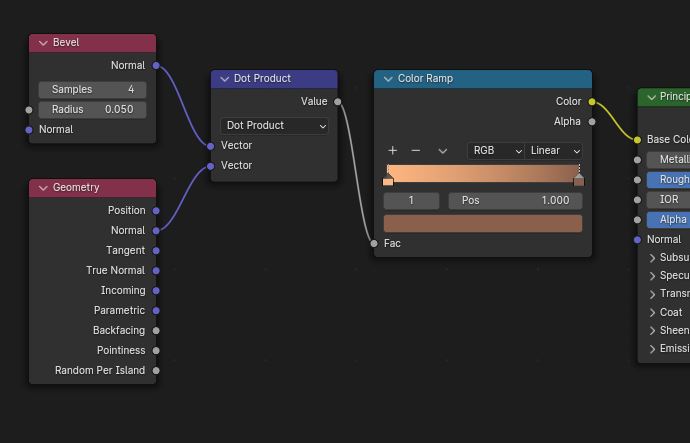
This should give you clean highlights on all sharp edges. The only potential problem (depending what you seek) is that it will also do it in crevices.
The structure of your nodes is correct, so it’s probably:
- the radius of the bevel is too big
- the color ramp’s layout is badly placed.
However, I am now looking at your file and I’m not sure if the bevel trick is the most appropriate solution. It would work really well on an object with sharp edges, but your object is mostly made of beveled edges.
Here is an alternate solution. My own attempt at matching the solid mode shader. It uses the ambient occlusion node instead.
ao_edges.blend (1.1 MB)
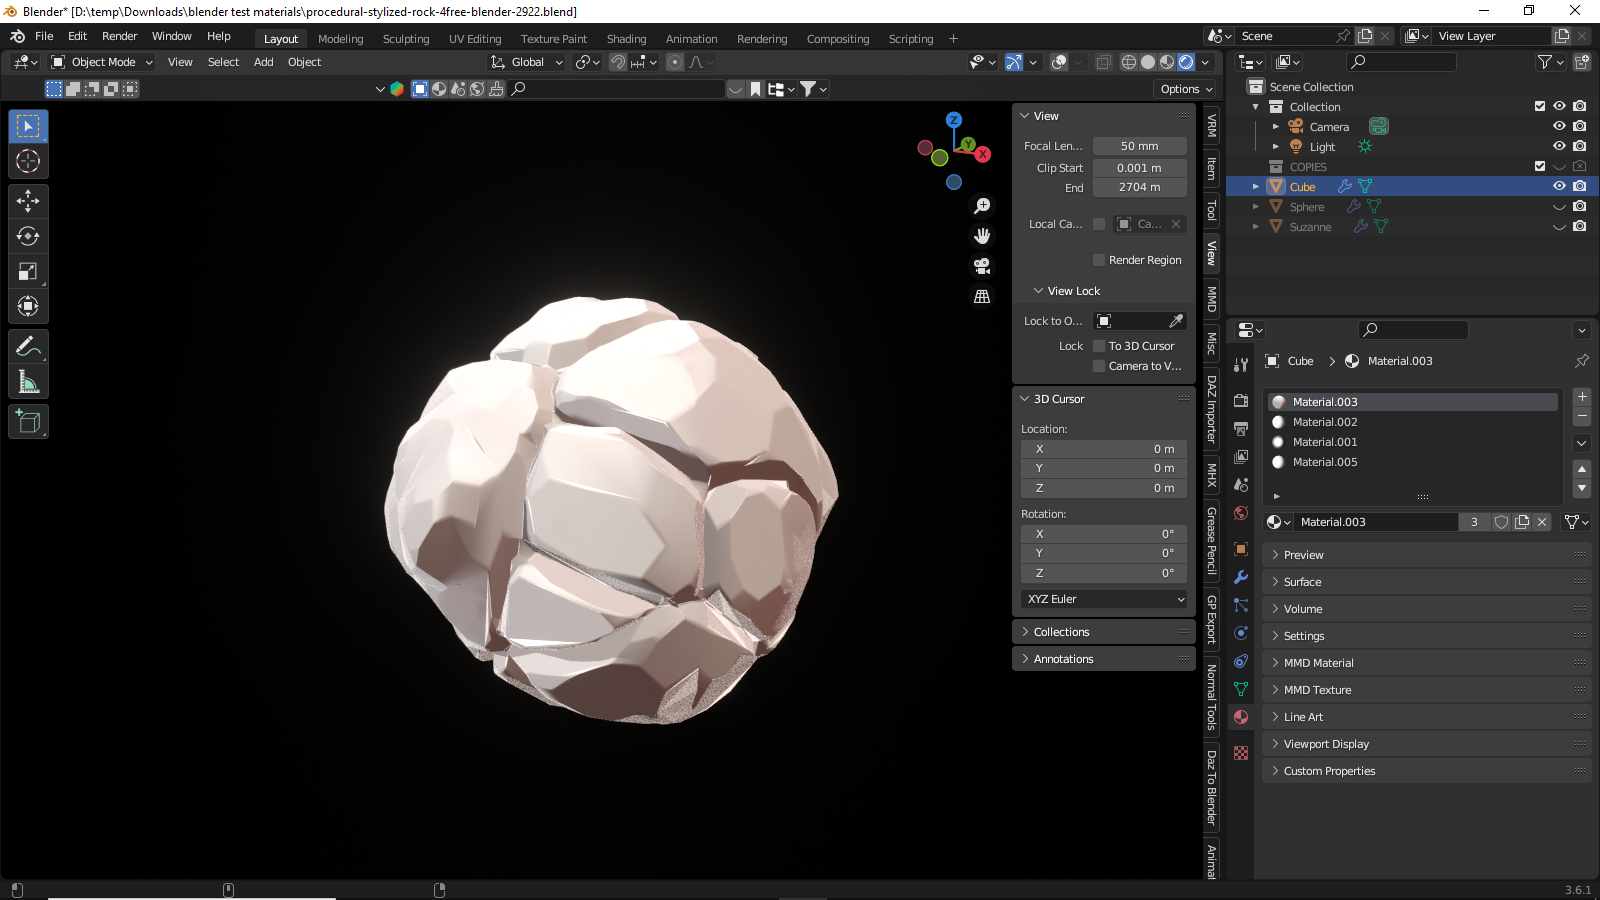
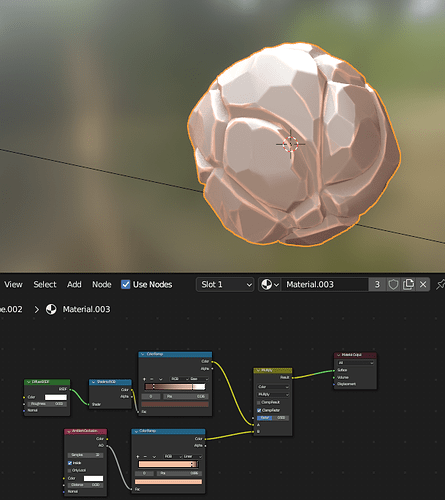
Thank you, it turned out to be a good option

Can you answer the last question?
I’m trying to find the right color
But for some reason, instead of a stone, I get cookies.

I tried using a pipette.
I put (Color ramp) at the end
I’ve been changing colors for several hours now and don’t understand what I’m doing wrong
You can’t really pick a color using this method, because of the shading and color management. You will likely need to get the color you want by eye.
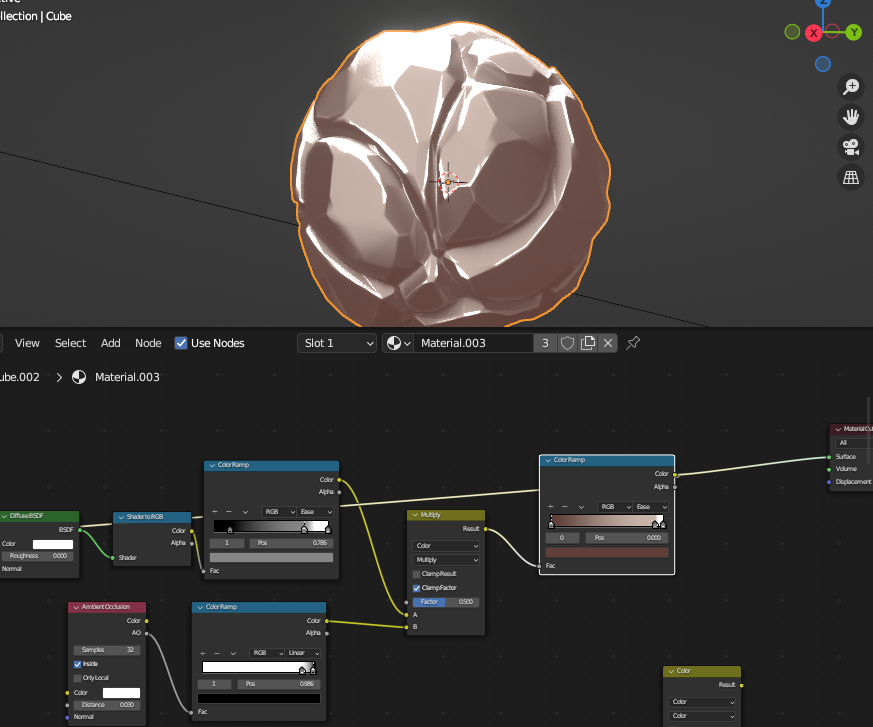
In this scene:
You are getting over-saturated highlights because:
- you made the AO’s color ramp very colorful.
- you are also multiplying it with the existing color, which is going to combine the 2 colors.
Here are the changes I would do for better control:
1- Make the AO’s color ramp completely grayscale.
2- Change the color mix node to “mix” instead of multiply.
3- Plug the AO’s color ramp in the “factor” instead of the “B” slot.
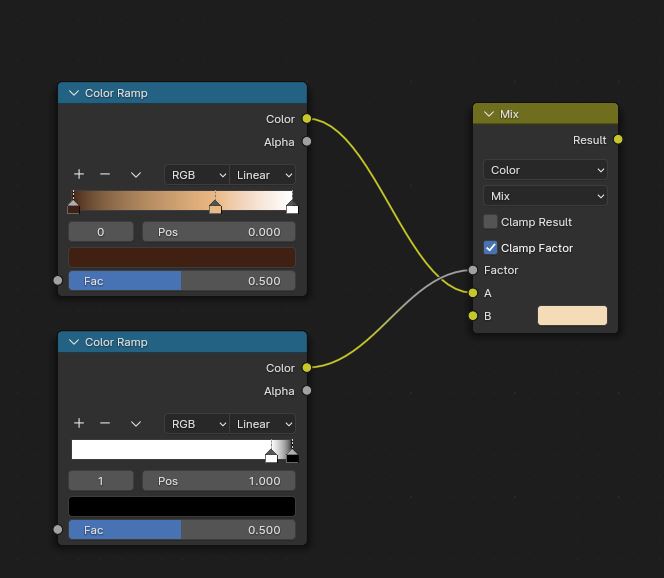
This will make the second color ramp act as a mask instead of being used directly as color. The B slot will now become the color of the highlights, and that color will appear only where the factor tells it to appear. (If the colors appear inverted, swap the black and white in the AO’s color ramp).
Edit: I realized you are doing a “shader to RGB” material. That means to color of the highlights (the B slot) should be a diffuse material too, or the highlights would glow in the dark.