So I just finished a architectural scene, which took up about 13GB. Which made everything slow as a snail. I never learned anything about optimizing my scenes, so Im going to try and learn this to make my scenes smaller in size. My first questions is about textures. At the moment im using 4k textures for everything than im texturing…which is obviously pretty stupid.
How can you know, what a good texture size is for your textures? So that it still looks good but is as small as possible in resolution? I know that if the object is just small or far away in my render…i wont need a big texture…
But how do I know how big? Do you measure the amount of pixels it will use on the final render? And that’s your texture size?
depends how close your camera is to the things you render
and the render size in pixels
normally let say that you render some UV texture
if you have 3 inches on your screen or render
that is about 3 X 100 pixels wide
so the UV texture should have about 2 X more pixels to render smoothly
So you’d want a texture that’s roughly twice as big as the final amount of pixels that will be using it? Depending on how far the camera is from the object that is?
My final render is usually just 1920x1080. So i dont think id ever need a texture bigger then that right?
Imagine a fly being the camera. If flying around in the room, the tiled floor texture doesn’t need much details. If he lands on the floor, that tiled texture better be huge (or procedural) because a lot more closeup detail is required.
So it’s very much scene and camera determined. Maybe there are some rules or general guidelines, but I don’t know about them. I often prefer procedural myself, or a mix between procedural and image based textures for variation.
It’s less memory intensive, but tends to be more costly in time depending on complexity and generator detail required. And, it takes a long time to learn.
Often, a (seamlessly tiled) texture needs to have variation when seen from afar, and have enough detail when viewed from up close. One trick is details that blend in when up close and fades away afar to hide the repetitions.
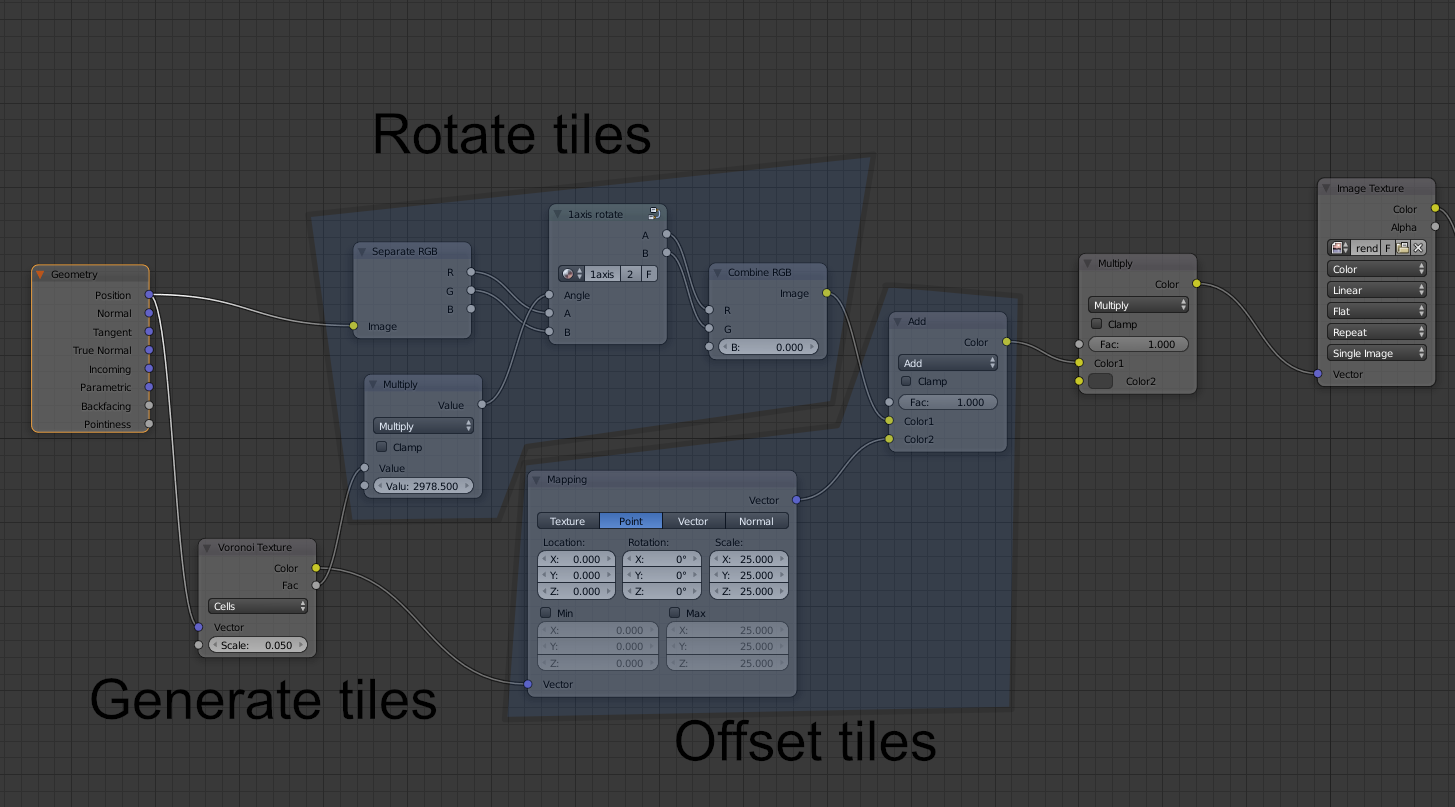
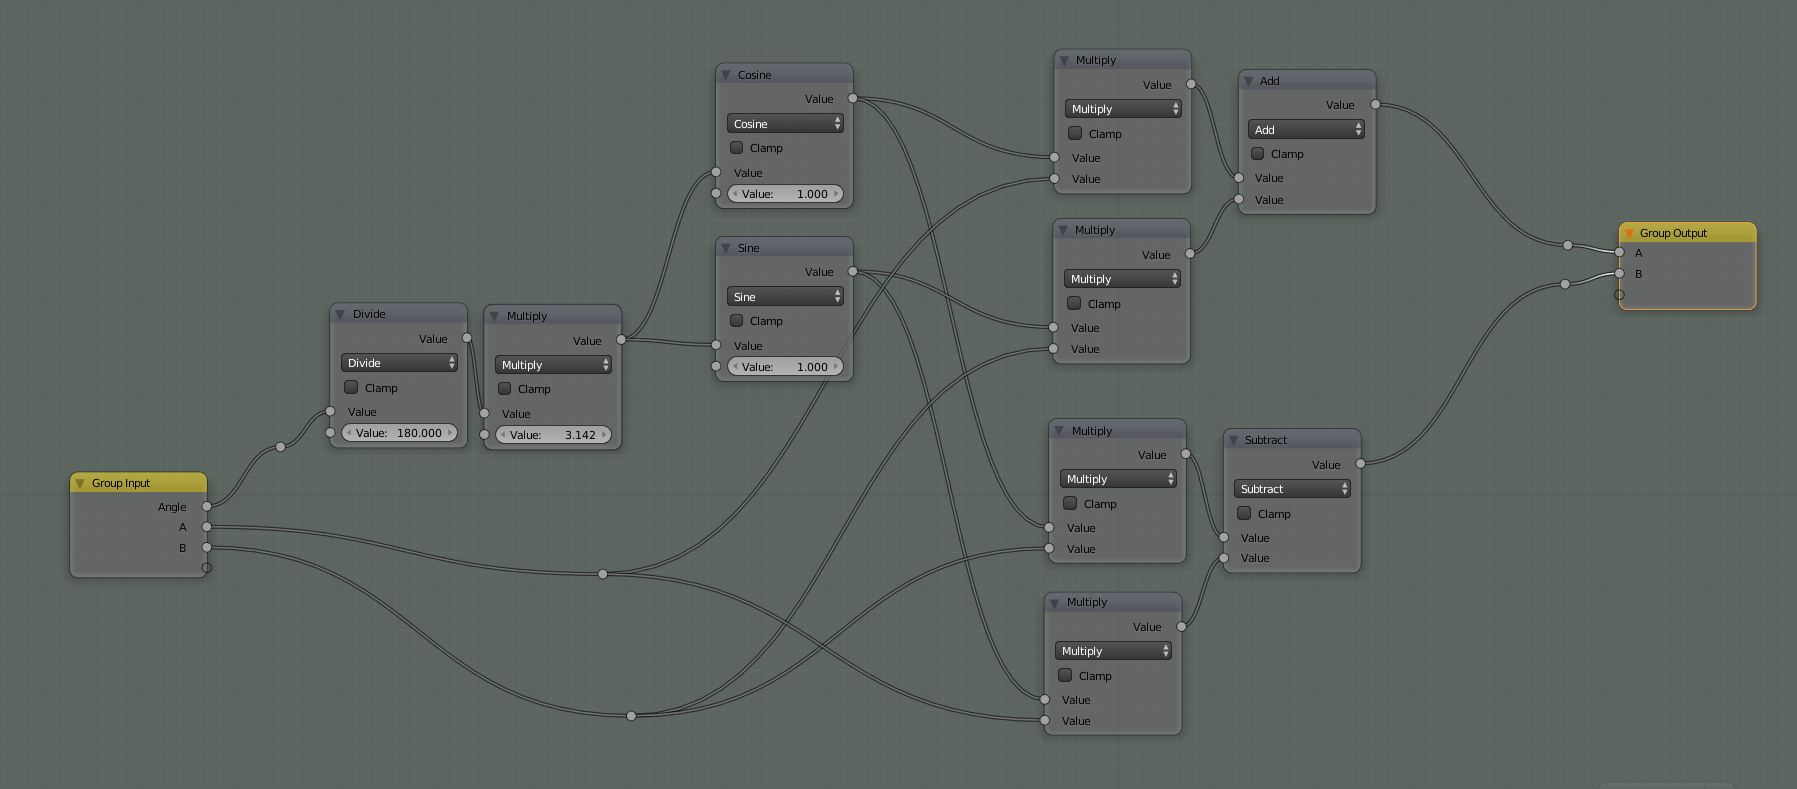
Here I use procedural to mangle the coordinates being fed into a blended box mapping setup:
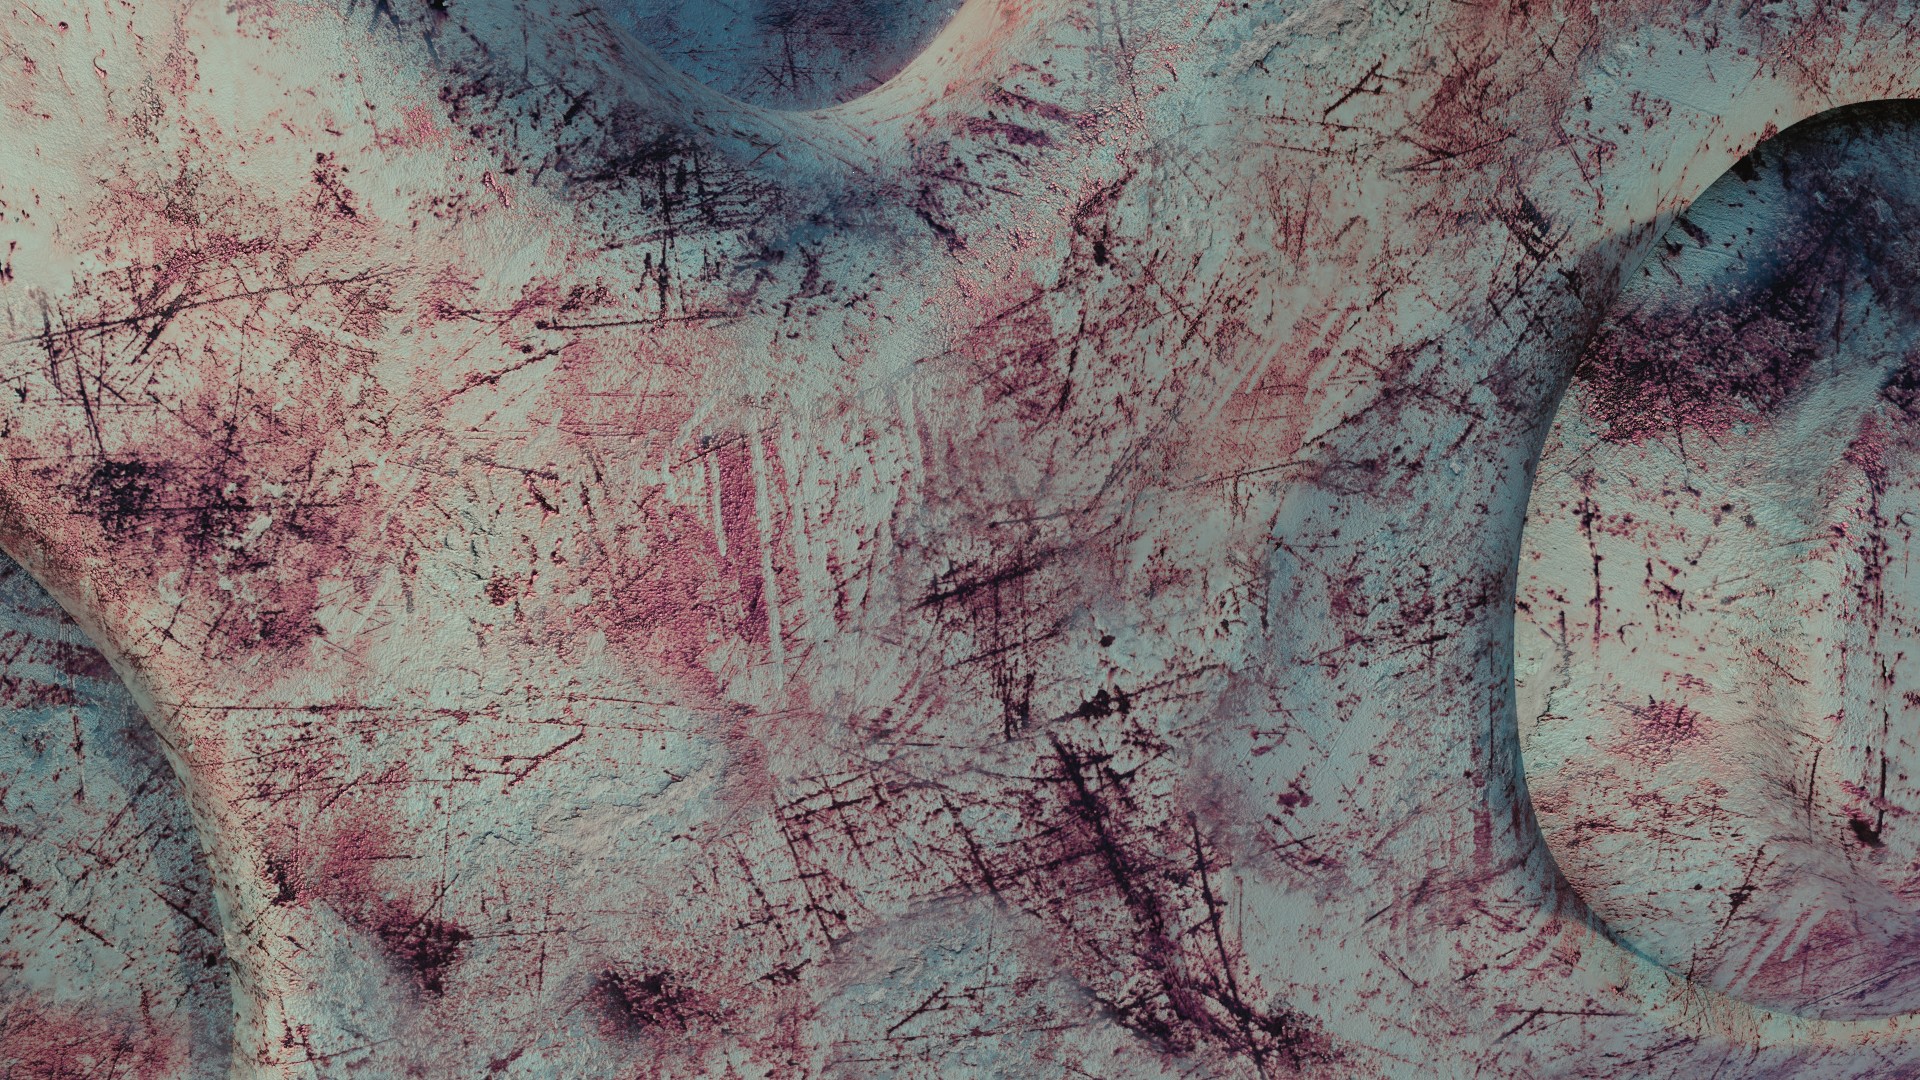
And here I’m mangling the coordinates for a big texture lookup for each tile in a tiled marble material - although you can spot equals/reused/similar parts if you look for them, it doesn’t slap you in the face as bad CG repeatable texture (image size is 7680x4320):
That looks completely random to my untrained eye. That’s awesome. I would love to learn how to do this, also because its less memory intensive.
But to get this straight… how does this work? Can you use any texture to create a procedural ? And is it a node setup or is there more to it? Im just used to using principled BDSF node setups…
Well, you can mix any image with a procedural, sure. But mangling coordinates to operate on an image is very selective and depends greatly on the type of image. For complete random’ish textures, you have to use a different approach if the image is seamlessly tileable or not. A seamless image you’re completely free. On an image with seams, you have to make sure the lookup can never exceed the bounds - which typically require a bigger image to sample from.
You can have random’ish images that have structure in one or more directions. That would prevent rotations from being utilized. Say i.e. wood grains; you can create a huge none tilable image using Skorupas wood generator, make it quasi tilable in photoshop, but it would look all wrong if you allowed rotations on various planks of a wooden floor as the grains are supposed to run in the length of the board.
And of course, you have images that you just can’t mix and mangle this way, such as those with an orderly structure to it. I.e. a pebble stone texture, where you would clearly see the blending happen - you shouldn’t be able to see the contours of one stone through another.
Lastly you have pure procedurals of mixed quality and complexity. Download some and see what they do. They are the most flexible, but the tools we have are quite limited; few useful generators require many of them and lots of time experimenting to get useful results, and disability to “expose anything” will require you to write a big library of functions in order to expose or drive values that can’t otherwise be exposed or driven (mapping node, color ramp, textures, and more). If you’re decent in maths, it will be easier to learn - I suck, so it’s taken me 30 years or so and often here it’s the maths I need help with, not the idea in my head.
you may want to look at the second answer in this post to calculate the memory cost for each textures :
If you have black and white images , converting them to BW instead of RGBA saves a 1/4 of memory usage.
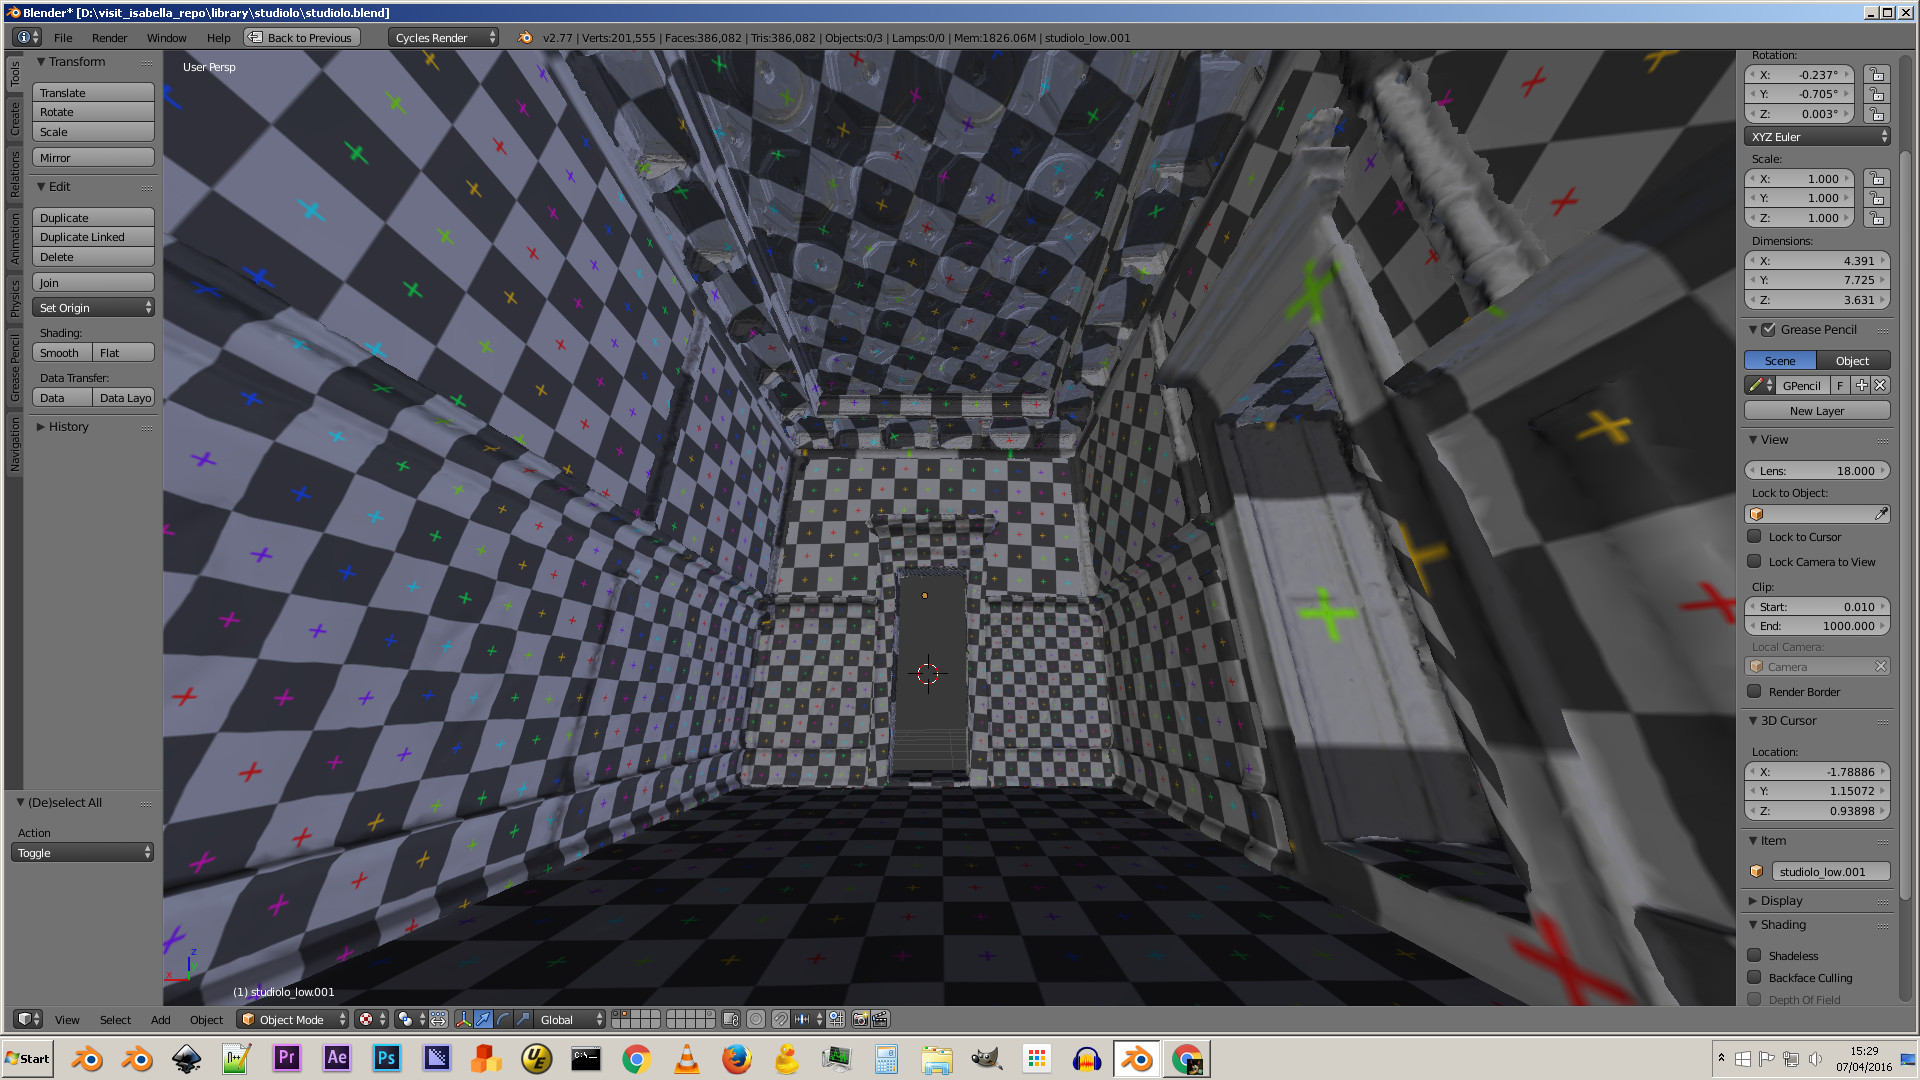
You can use a generated texture set to UVGrid to test the texture definition, the cross on the texture are 1 pixel , so if on screen they’re bigger than this you may want to make a higher image resolution.
This is especially useful if you have texture atlas or some unwrapped models.
You may also want to test your scene without any textures, to check the memory cost of the geometry only.
Maybe there are some mesh that got too much subsurf or some meshes that can be instanced.
Of course in general it’s on the texture side that you can save much of memory, but it can be good to know where you’re starting from.
I found it clear in the image I posted where the texture isn’t high res enough, and where it get’s ok.
It’s not super precise , but it give a good idea of the texture definition.
I don’t think so, but I guess this is why the UVGrid is made like this, I found that obvious when working with it.
The squares in the texture helps to see the distortions, and the cross give you an idea of pixel size.
You can just make a render using the texture
Anyway, I must admit it’s not perfect and it’s not ultra precise unless your start counting pixels , but IMO it give a good idea of the texture definition. It’s not a scientific way of calculating texture size but I found that more precise than just judging at the texture in the viewport or in the render.
Doing things like “my texture is 1024x1024 and in my render it’s in a 500px square so the resolution is ok”, works too.
This work well in many cases, but if you’ve unwrapped your mesh, at some point using the same logic doesn’t work anymore, especially if UV aren’t even.
I’ve never thought of the cross that way, neat. However, for a fixed camera shot, another way to think of it would be instead of just increasing the texture size you could redefine the UV layout such that more detail is preserved closer to camera, making the cross smaller (=better/denser texture definition) that way.
And I mean this for a fixed scene art stuff, not for making assets.