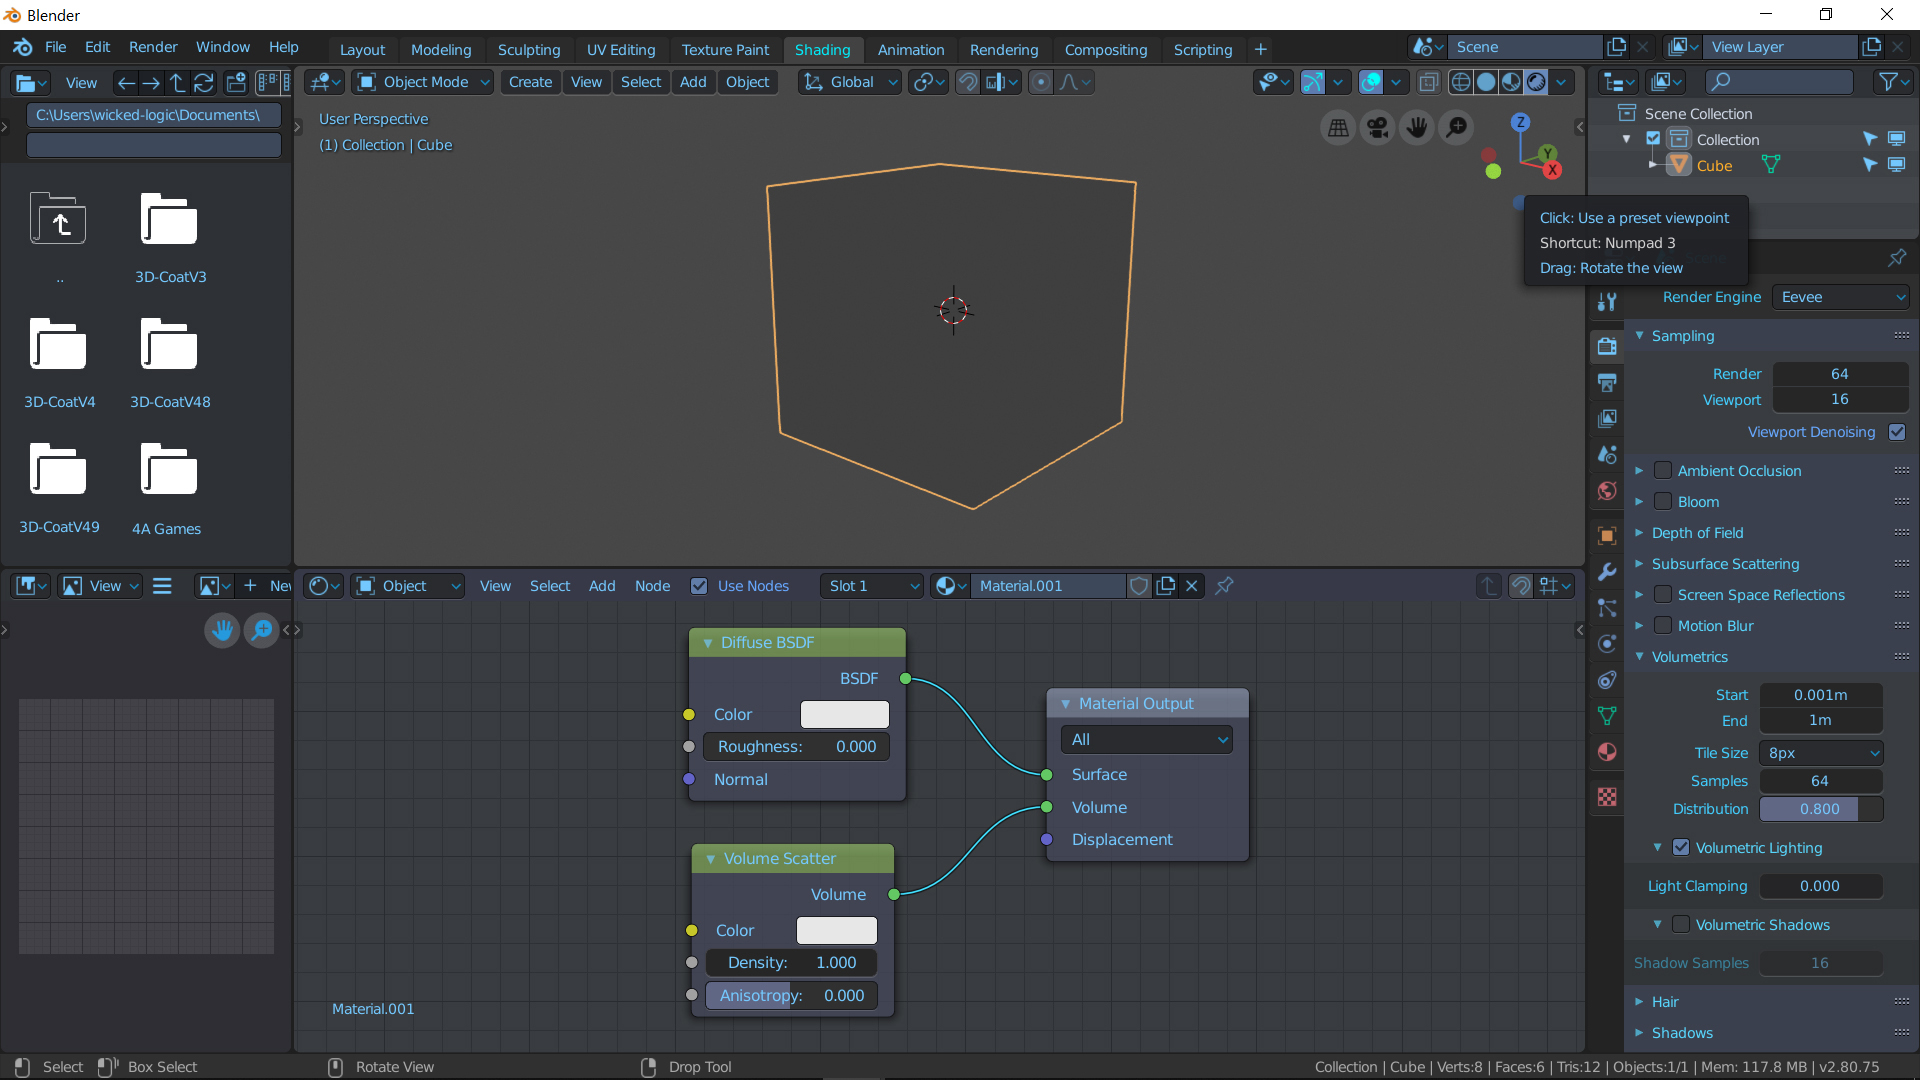
Trying to make a material and this is literally driving me nut(pun intended) since i tried every possible way with the mapping node turning x,y,z 90 degree but nothing seem to work for volumetric in a cube.
What i am trying to do is an ocean shader where the bottom is denser than the top layer and i want to be able to control it with a color ramp node.
Also i am not able to reproduce what this guy here is doing at 1:58 in this video so maybe they change the way volumetric work on object with latest RC ;
For some reason i tried a similar setup from stack exchange and it was not working as expected but with your simple setup it work fine so thank for this.
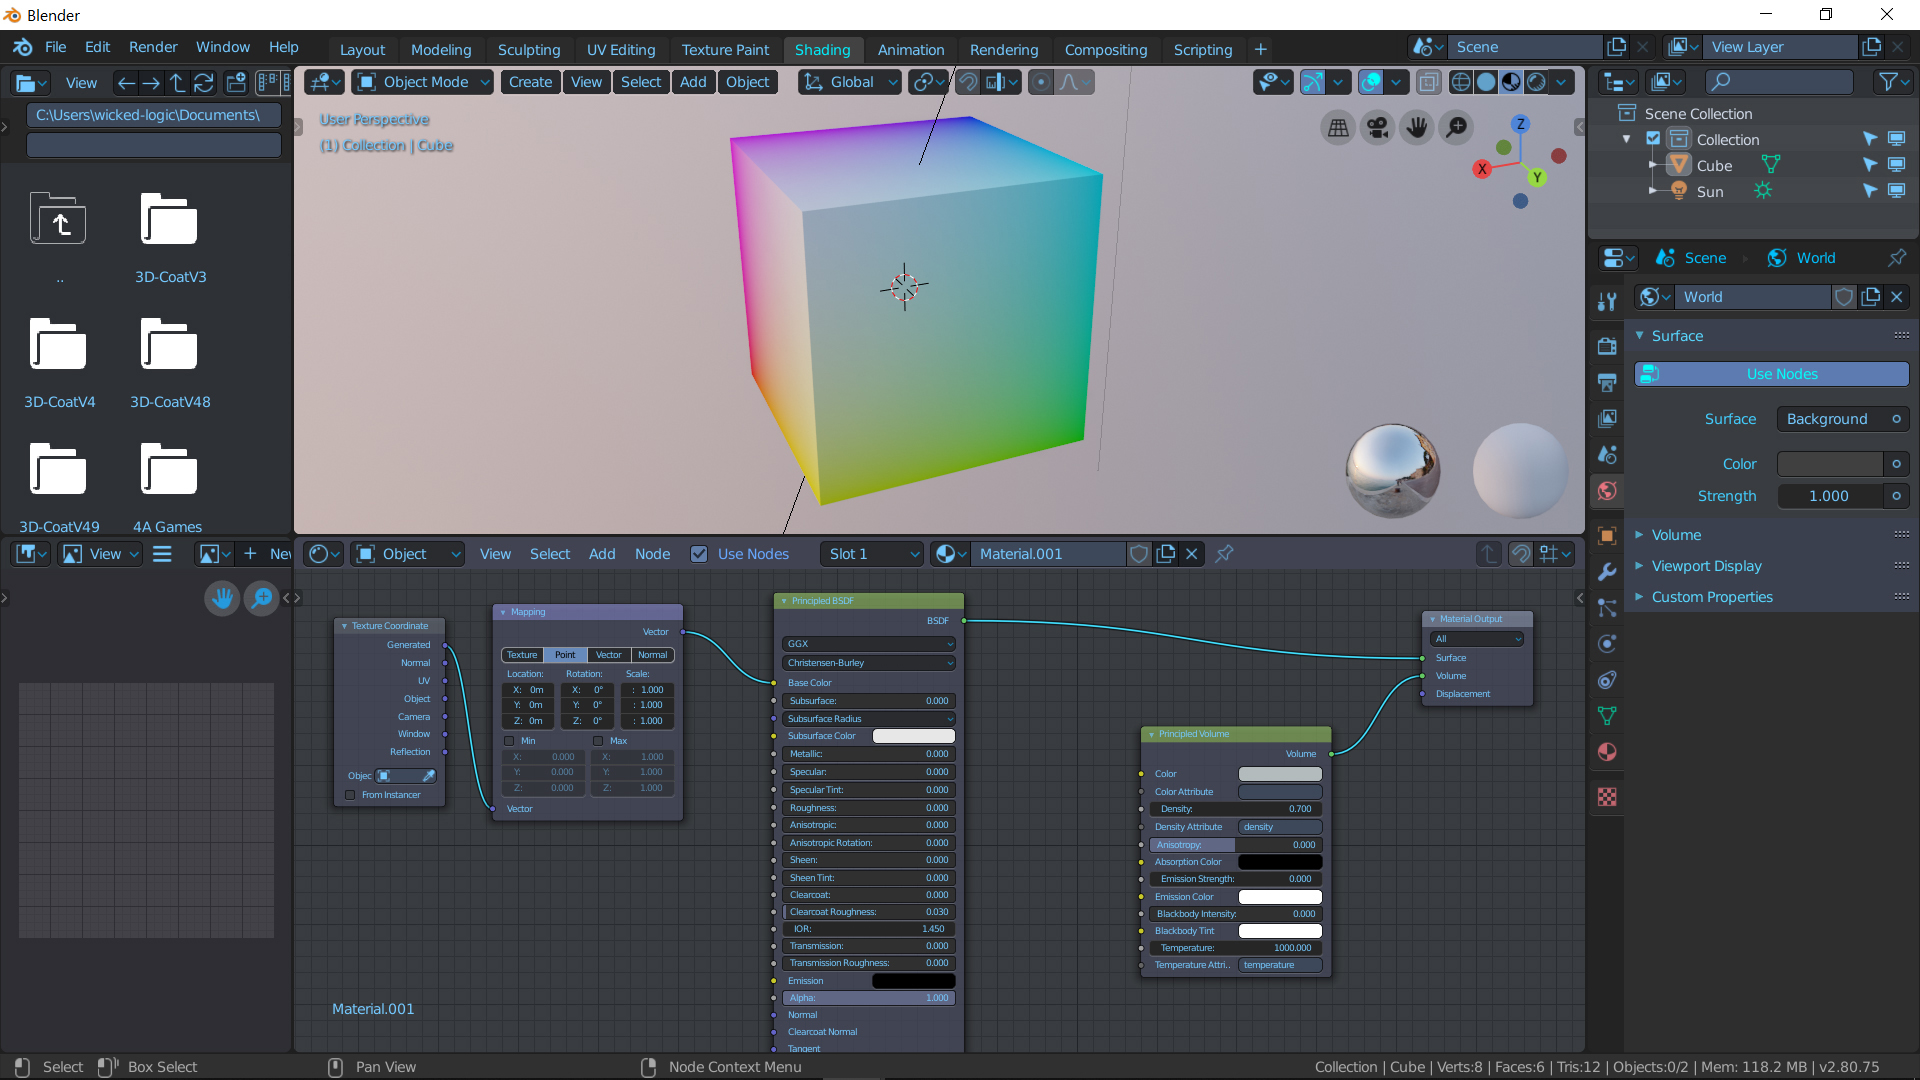
But i still have a lot of strange issues with volumetric that i don’t understand like why did the cube became a rainbow with that nodes setup? ;
In Cycles and Eevee, Color and Vector data is basically the same. When you use Vector data (purple sockets) in a color input (yellow sockets), XYZ gets mapped to RGB. In this case you use the texture coordinates returned by the Mapping Node as color for the Principled Shader.
This has some great advantages as it allows manipulating texture coordinates with Textures or - like in your example - visualize Vector Data as colors.
Generally for volumes you don’t need a principled bsdf Shader. Just leave the Surface input of the Material Output unconnected.
Because you’re feeding the albedo (color) socket of the principled shader node with coordinates.
Coordinates are vectors and if connected to color socket returns red for x values, green for y, and blue for z.
So there is a mix of those 3 colors for every pixel in relation to its x,y,z values.
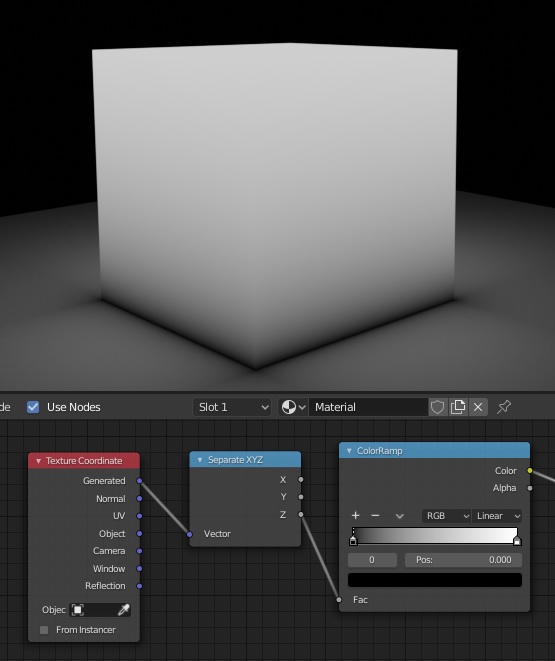
In the example I’ve posted I’ve just separated the coordinates, took z values (0 at the bottom, 1 at the top) and feed the color ramp (black at 0, white at 1).
You shouln’t use vector values to feed scalar inputs.
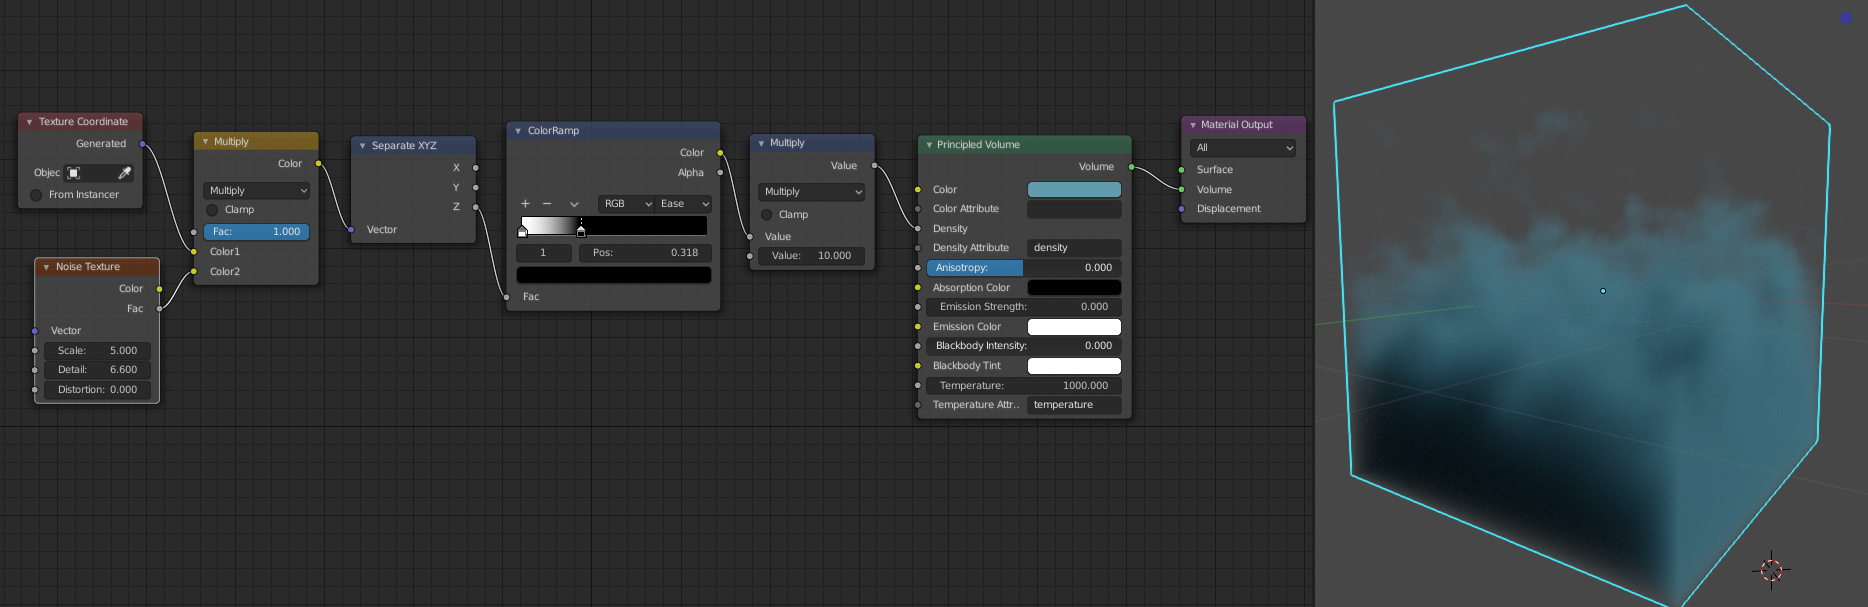
OK now it’s make sense and thank for clarifying the matter now my last remaining mystery is why i cannot do like the guy in the video since my volume is always dense and i have to enter the cube to see the volumetric effect?
In the video, he muted the diffuse shader (which results is the same as just deleting it). To drive the density of the volume, just feed the Ramps output into the density of the voluem shader. Then insert a multiply node inbetween to allow density values above 1.