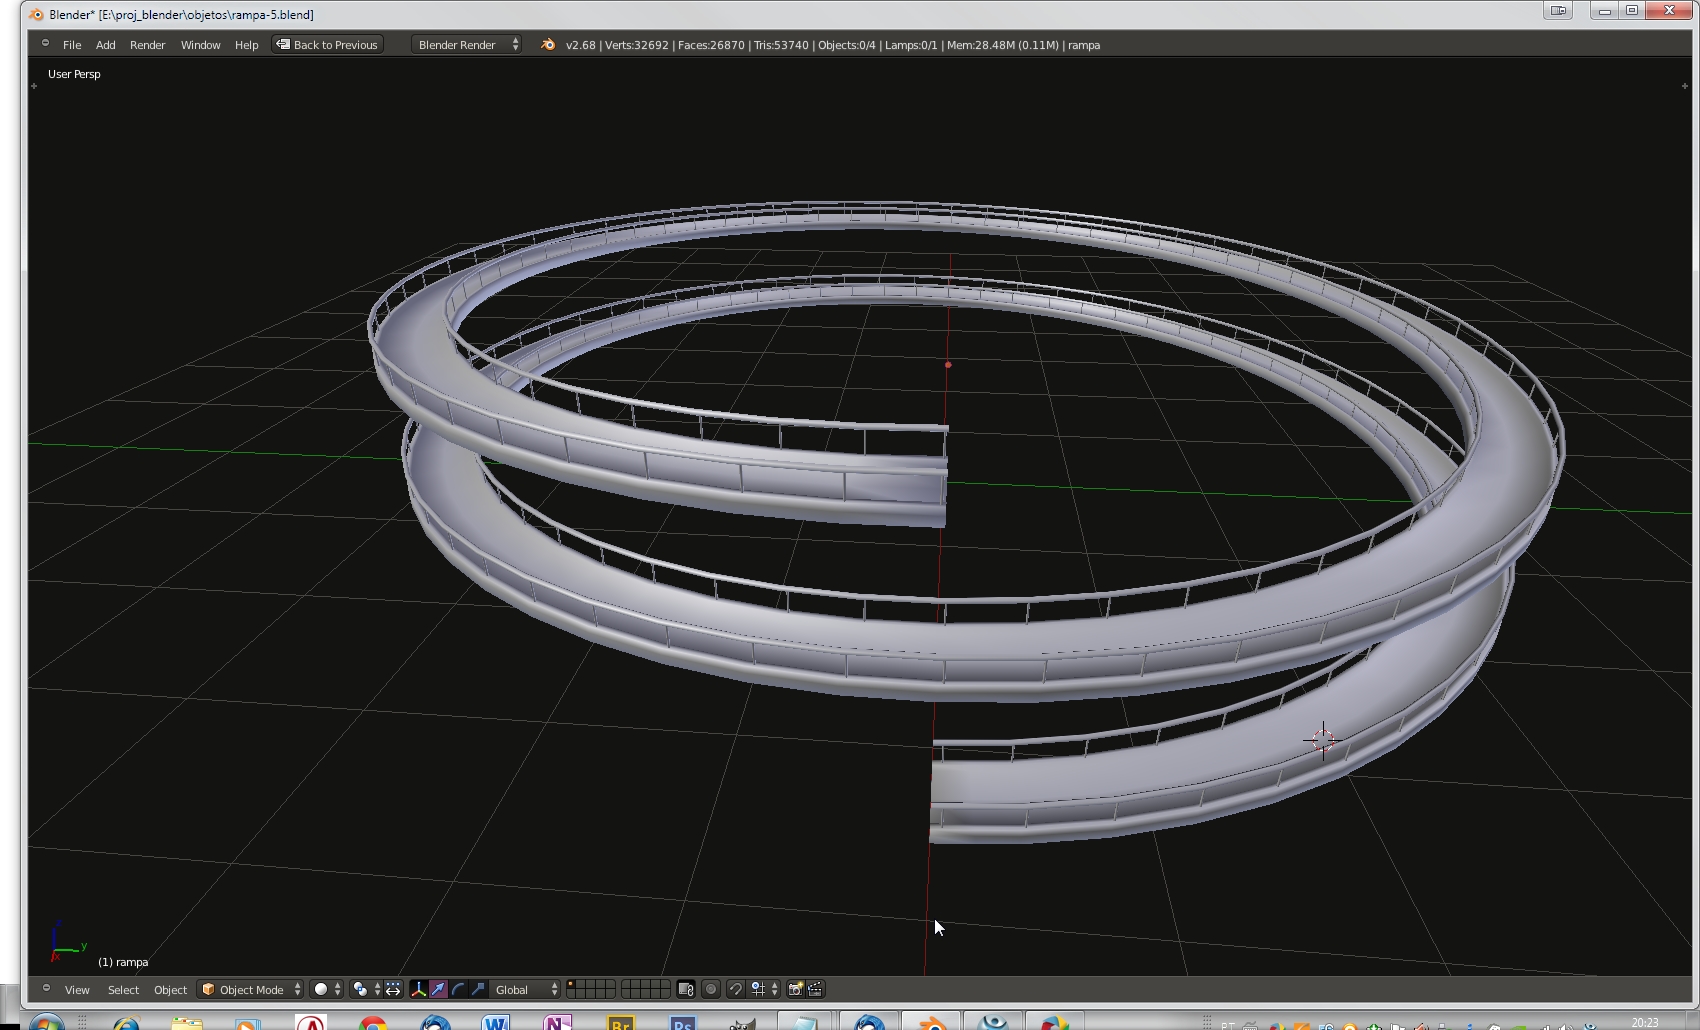
Hi The first image below is the ramp that did as learning exercise of Blender. As you can see, does not have the support of handrail balusters. What I want to know is how to put those balusters (banister).Tried two different things:a) Array with curve;b) Array with Empty.With neither of the two could not get the expected result (second image below that I made by hand, one by one the balusters).Maybe the solution is one of the two, or both, of the attempts that I made up, but which, due to lack of skill, has not achieved the desired effect.Someone could tell me a way to do what I want without having to make by hand?Thank you for your attention.

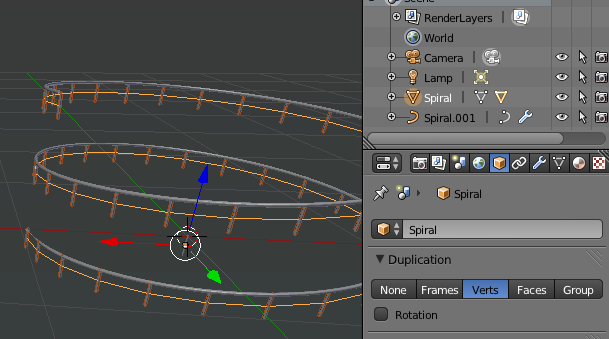
Pretty simple, actually. Make another spiral object, convert it to mesh and set it’s Duplication to vertices.
Parent whatever object you need to that helper - it will be duplicated.
Hi eppo
Thank you for your reply. But since I am not a smart person, I must say that I did not understand exactly what you meant. Which means: " Make another spiral object, convert it to mesh and set it’s Duplication to vertices.".? What should I do a spiral with Berzier or Nubr curves and convert it to Mesh? If so, how would this curve follow exactly the steps and handrail slope?
I did a Loop Cut on handrail, handrail object separates and delete the duplication of the line, getting, say, with the top, this official also as a spiral mesh?
Sorry for so many questions.
Thank you very much.
So you managed somehow to come up with spiral… Have not a clue how and is it a mesh object(s) or still a curve.
If that was an addon, Curve Tools, then probably this is a curve spiral. Anyway.
Duplicate something, handrail curve, or, if that is a mesh, select one loop of it and Shift-D duplicate selection into another object.
You want it to be a mesh, so if that was a curve - Alt-C convert to Mesh. On the Object Tab set Duplication - Vertices, like in the image above.
Create, what was that - banister, baluster? - in the center. While it is still selected, Shift select Spiral mesh you just created and Ctrl-P Parent baluster to spiral.
Selected spiral is a mesh in the image, which is set to duplicate banisters. Right above it is Curve - handrail.
There is no sense to add blend file i think - just experiment a lil bit. I might be rushing in explanations, also, well, English thing…might not be the best, so, if what - ask.
Hello
Again thanks for replying. We are getting there.
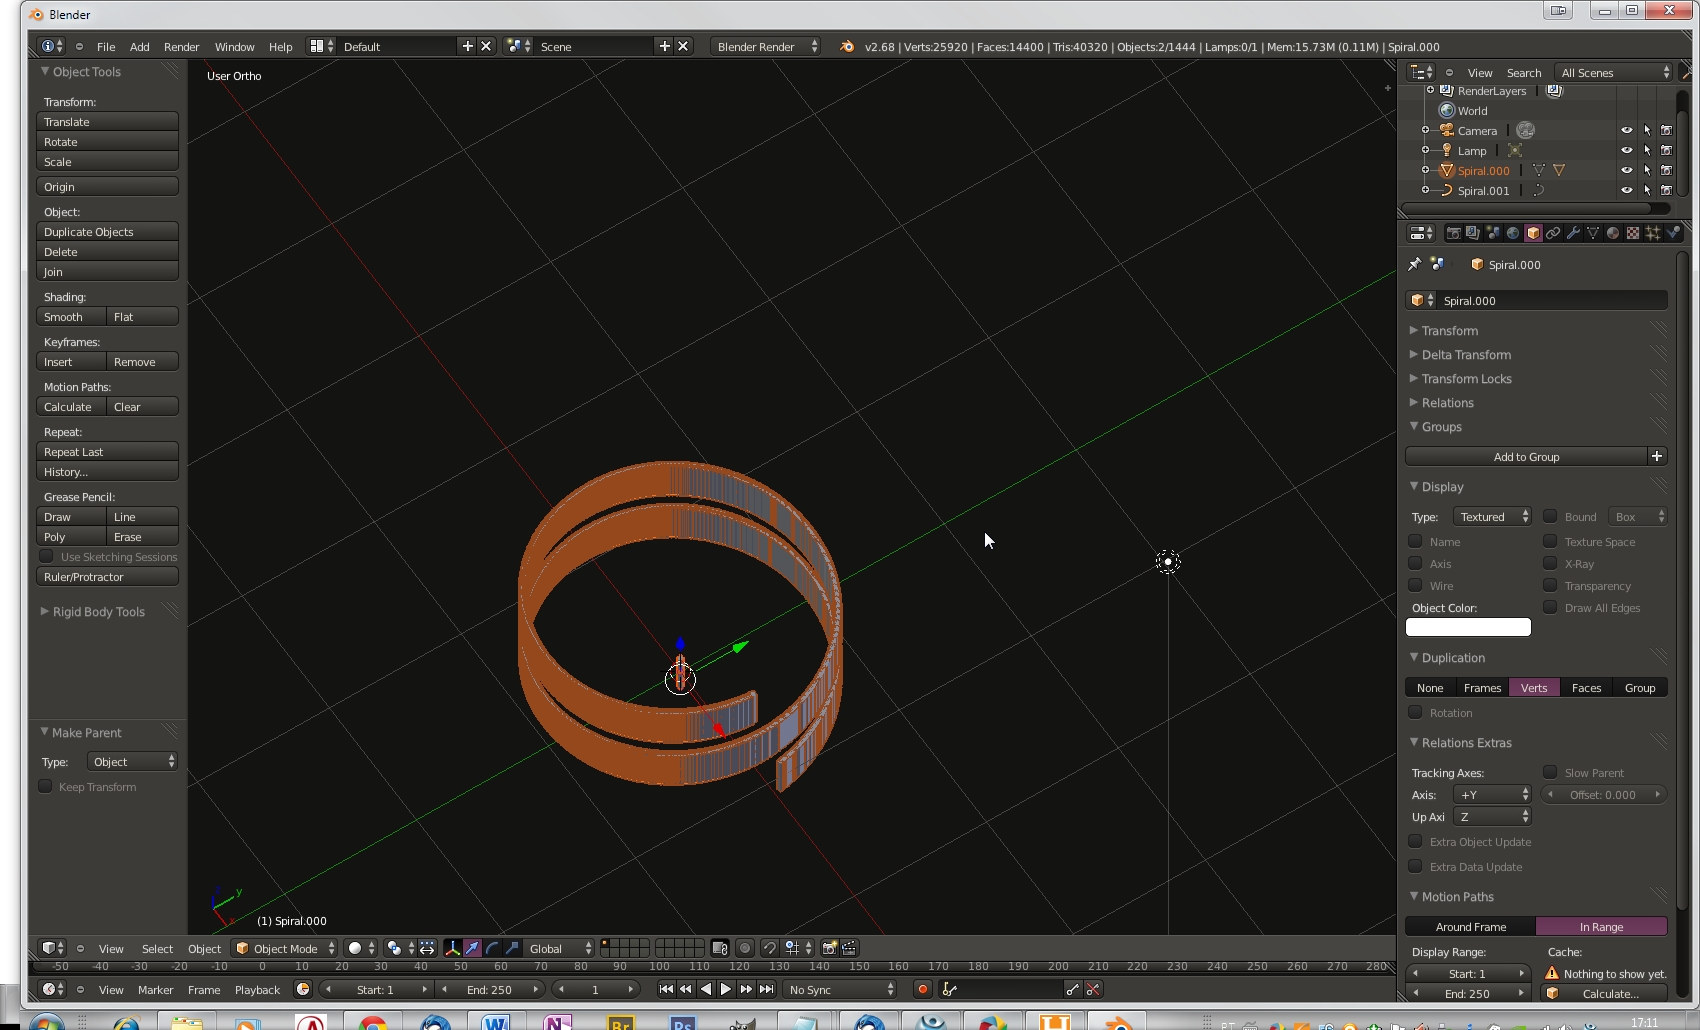
Here’s what I got trying to follow in his footsteps.
How to realize, not getting the same effect that you showed me in your image.
Lack something to which the cylinders are separated from each other, as in your picture. He would say what I may have done wrong?
The steps made were these:
1-Duplicate the curve (Shifth + D) in another object. [The curve I created with the Addon Curve Tools.]
2-Convert to Mesh with Alt + C.
3-In the Object Tab, with the selected curve, chose Verts in Duplication.
4-Create object to replicate in the Center. While selected, click with Shift + D on the curve and make relative Ctrl + P (relative spiral object).
Joagostini there are many people here who are more likely to provide you with help if you post a blend file instead of this back and forth questioning and misunderstanding and confusion. Eppo’s help is great and he is sticking with you but even his help would have been much more useful if you had attached your blend file, and then everyone would know if you are working with meshes or curves or converted curves etc.! Just a hint for the future! 
Alo DruBan
Thanks for the tip. However, I do not believe this to be the case. Because the original question was how to set rollers (balusters) on a ramp following the elevation and the steps of this ramp.
Eppo’s response showed how to do this using a curve cast to mesh. I followed the advice of it, created a curve with the Addon Curve Tools, made a copy and converted in mesh and cranked up the Verts in Duplication. In short, did what he suggested and I have not got the same result and I’m investigating why this happened.
My ramp, first message, is a mesh built with Screw. To insert the balusters tried using the combination curve (created this curve making an Edge loop in existing handrail, separated from the object with Ctrl + P, and as it was a mesh the converted in curve with Alt + C) and Array and it didn’t work. After I tried to Empty and Array and it didn’t work.
So I think my file. blend in nothing would serve to solve the problem of how to make the balusters up the ramp. My question is which method should I use to get these balusters on the ramp without being one by one by hand.
Again thank you very much for the tip. If you think that my argument is wrong and even put the file may be useful, please tell me.
Hi eppo
Found the problem. When the relationship between the object (cylinder) with the curve (mesh) with Ctrl + P, the option to be chosen is Object (Keep Transform). I had chosen only Object. Now everything went well.
It was great help.