For some sort of stylized infographic that I inted to create in Blender, I need to work a lot with curves.
One problem I now ran into is that it seems impossible to me to subdivide a curve while maintaining the same handle length, both of the old handles neighboring the subdivision as well as the new handles created.
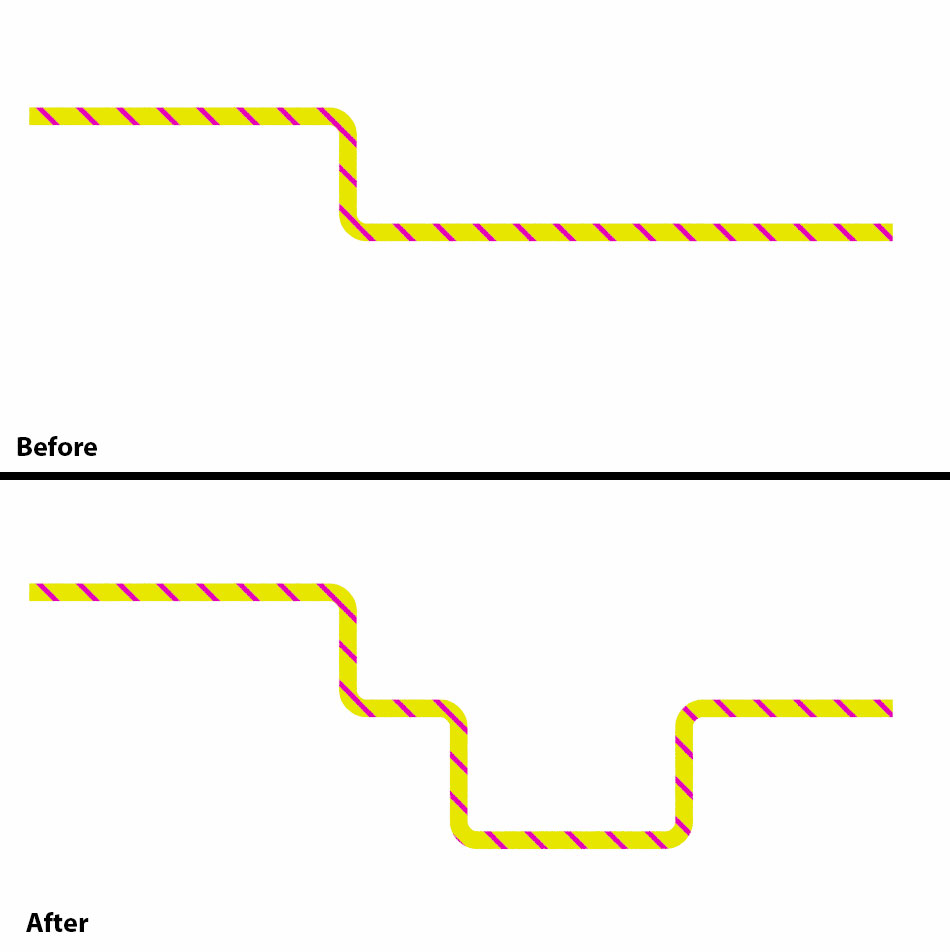
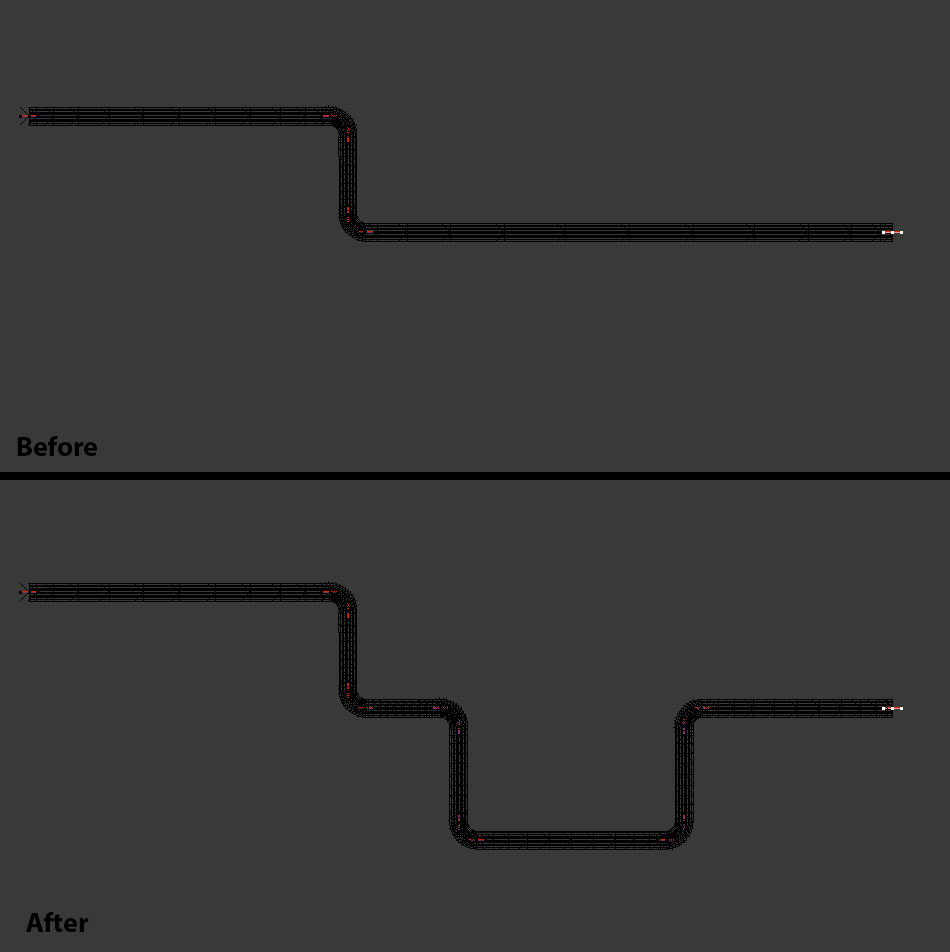
Here is what I need to do (a lot and repeatedly and in much more complicated curves than this simple example):
I need to turn the first state of the curve into the second state shown, so I need to “add geometry”.
The added handle(s) have a totally different size and even the size of the original, neighboring curves is altered, so that I cannot use this method at all.
Now my questions:
Is there are way to maintain the handle length while subdividing?
OR - is there a way to manually set the handle lenght somewhere numerically? I did not find this anywhere…
OR - is there some way to “rip” a curve, like is is possible with vertices in meshes? That would also help me since then I could just rip two points apart from where I need to add geometry and work with that.
You can numerically set control points. Hit ‘N’ for the transform properties panel, and under transform at the very top (With a point selected) you can set global and local coordinates for control and anchor points.
Also you may want to be working with snap enabled. It’s the red U shaped magnet next to proportional edit. Set the mode to ‘increment’ Now try moving the control points. It may make things easier for this particular task.
blenderallday, thanks for your answer. Apologies, I only saw it now.
Unfortunately setting all the control points manually is not feasible for me. In the above example I would - for a comparatively small change in geometry - have to set 16 control points manually which would take really long and I need to do this repeatedly, so this is not really going to work.
Snapping also will not work in my case, since it is all rather precise values at which I have to place the curve points.
So, my questions still stand.
Does anybody have any idea? All I would need to be able to do is set somewhere the handle length, but I don’t see that you can even see that numerically anywhere in Blender…
When you select control point, both handles are selected. Shift-Alt-S and digit (1 e.g) scales handles equal length. Now, S scales handles.
AFAIK there is no way to enter handle length.
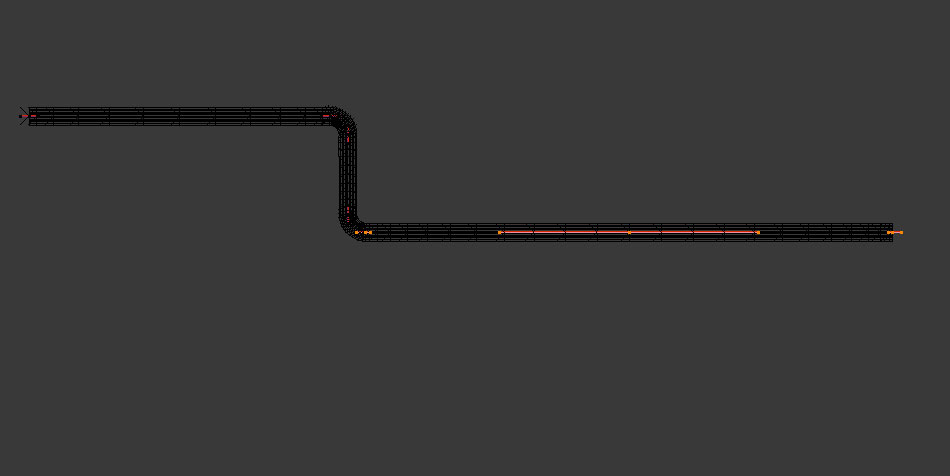
You can select two neighboring control points and Delete - Segment; that will “rip” curve.
I would suggest leaving curves for later and do construction using mesh edges and copied around/snapped circle. Convert mesh just at the end of work.
eppo, thanks for your answer.
Shift-Alt-S only invoked the “To Sphere” command when I tried, so I am not quite sure, what you mean with that.
However, deleting the segment seems to do the trick for me - not sure, why I didn’t find that earlier (or I think I did, but I thought it messes with the handles as well, which it doesn’t).
So it’s like you got selected control point and both handle ends spherical?
On the other hand - if the selected control point is a center… both handle ends are on the sphere surface, equal length.
Did not thought about it that way before. Just hit 1 then and scale after.
@eppo: Now, I understand how it works, you have to select each control point individually. I was trying to scale several ones at once earlier. But if you look at the lower left corner, this operation is actually called “To Sphere”. This way I now managed to get the handles the same length again, however since they all have a different scale from the handles I need, it is impossible for me to get them back to the correct size. But I will keep your trick in mind for when I need to make my handles the same length.
@RickyBlender: What do you mean by polys? Just poly meshes instead of curves? Or something else? I think poly meshes would be a bit complicated in my case, because my curve needs to become thicker and thinner at certain places and I think that would be really complicated with poly meshes. Or do you have another suggestion?
curves can use different ways to control the shape
like bezier wil handles
but in tool panel you can convert bezier curve to poly curve or to spline also!
with poly or spline you don’t have handles!
but it requires more points to define your shape !
also not certain here but may be you could use the skin modifier here where you can adjust widht at each node!
and not certain here what overall shape you need here !
Hi again RickyBlender,
I think I see now what you mean in the tool panel “Set Spline Type”. But when I set it to poly it is not “curvy” at all, it just interpolates linearly between all the points. Is there any way to get it curvy? Or does it only work with the Subsurf modifier?
Thanks a lot for these explanations, RickyBlender!
I think after considering all these options, I will go with regular bezier curves now and make use of the “delete-segment-ripping” that eppo described above. I think that should do the trick.