I’m still breaking my head over making a nice intro for some videos to come on our Youtube channel. I was thinking, one part of it could be a bunch of planes which are first ordered like a sphere and from which one breaks out and moves to cover the screen. The planes would show either photos or video clips.
How would I make such a sphere? Do I have to position and angle all of them by hand or could I create a sphere mesh and use that as a reference, maybe even somehow “lock” the planes to it, so a rotation animation would be easier to do?
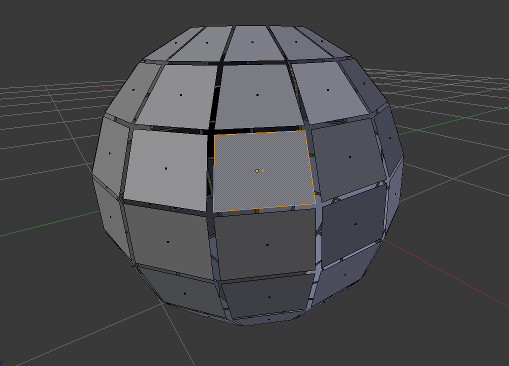
I’d use a sphere object, delete the faces you don’t want (or split the sphere into several parts), then animate those. Dunno how to animate, being a Blender n00b myself, but here’s the modeling part of it:
Played with it some more and found a way to animate the globe’s panel moving outwards / flattening / scaling up slightly. This is what I did:
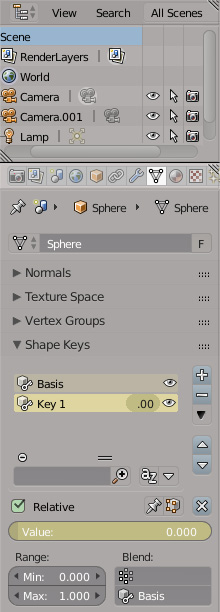
Add 2 so-called Shape Keys to the unmodified object (in object mode), see first picture.
Select the second Shape Key (called Key 1 by default)
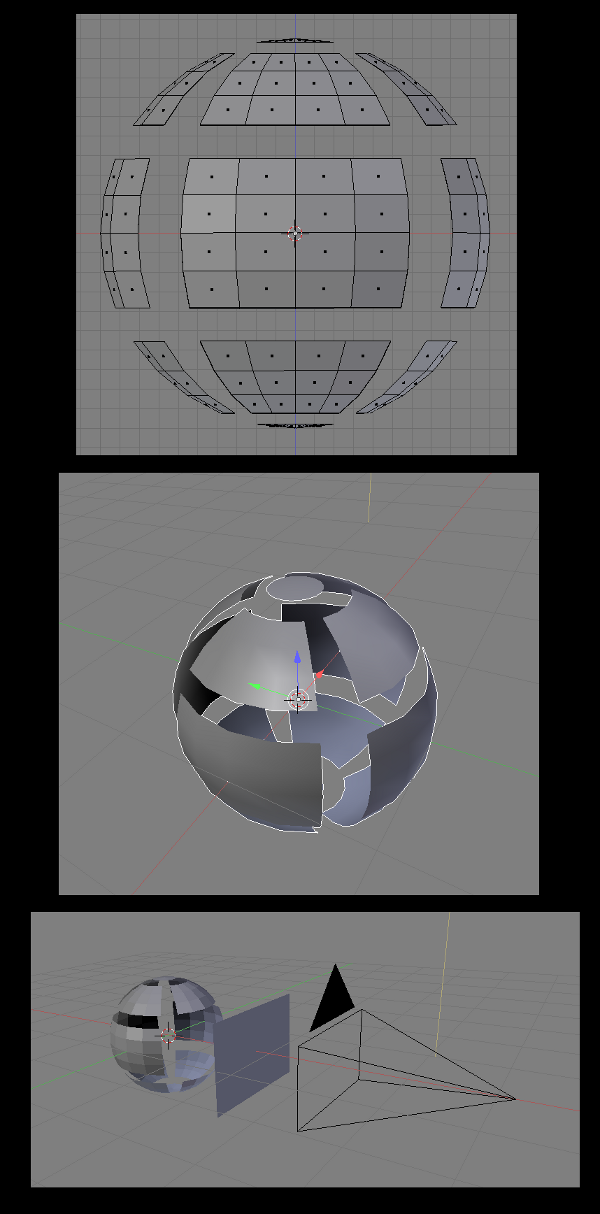
Go into edit mode and drag the faces you want to flatten outward, do your face/vertex magic until you’re satisfied.
Go back into object mode and play around with the “value” slider shown in the picture. You’ll see that a value of 0 shows the globe with all panels in place while a value of 1 shows the modified thing.
Now you can animate this value. For instance, put the value at 0, make sure the time bar is at frame 0, leftclick the value bar and choose “insert keyframe”. Go to the last frame of your animation, set the value to 1 and add another keyframe. Now you can render your animation.
I attached a blender file (at least, I try, dunno if I can with this few posts?) with these steps done (and a little rotation added to the whole object).
Actually, I have not yet UV unwrapped anything ^^. Until now, I always uder the “Import image as plane” addon… Something new for the learning-list, I guess…
I think the majority of this could be done with modifiers.
You could use a couple of planes which are themselves simple subdiv’d a bit such that they can be bent or curved or whatever for deformation. Then you could animate them flying to the location where they’ll form a sphere using a curve modifier (following and deforming to a bezier curve for a path), and later animate and shift from the path to a cast modifier to form the actual sphere shape. (Animating the influence of each modifer.) UV’ing the plane before animating it would allow you to put videos or whatever on it fairly easy. (Just a flat UV project, nothing fancy.)
It’s still going to be a bit technically challenging (particularly if you’re new at it), but I think it’s plenty possible.
—Edit—
Never mind the cast modifer, doesn’t quite work the way I thought it would. (Warps and stretches the whole plane out, instead of just conforming to a spheric shape. Interesting effect, but probably not what you’d want.) Instead use shrinkwrap to place the planes onto a sphere that remains hidden from the render.
Create a sphere and make the empty the parent. Edit: The sphere is additionally mapped and stuff to show a globe but I left that out here to concentrate on the planes
Create another empty
Make the first empty the parent for the second empty
Import one image as plane
Align the image to the sphere on X, Y and Z
Move the image on the Y axis to the desired distance from the plane
Import 9 more images as planes, align each of them on X, Y and Z to the first image
Make the second empty the parent for all images
Select an image, rotate it 36° on the Z axis. Because the second empty is the parent, it rotates relative to that
Repeat step 10 for all images
Create an animation which rotates the sphere on the Z axis CCW
Create an animation which rotates the second empty on the Z axis CW