I was wonderin’ - If i’m making a cylinder with eg. 15 sides, how do I make it better quality when I’m rendering? With that I mean how do I make it more “round” in a render?
Subsurf won’t work because then the sides of the cylinder will become rounded too. Or can you prevent that or something?
do you mean how to make it appear smooth? in the edit buttons, click on ‘set smooth’, and if it has both sharp edges, and smooth areas, click also on ‘auto-smooth’. you won’t see the difference in the 3D window, but you will se it in the render.
You can use subsurf. After subsurface modifier-ing, switch to edit mode, and edge-selection mode. Select the top and bottom outer-edge rings, but NOT the inner edges (That make the pie slice shapes).
With those selected, hit Shift+E (For Windows, at least). Now move your mouse away from the model, and it should cause it to become a cylinder again. This is called ‘Creasing’ and you have the ability to set it anywhere from smoothly rounded to fully creased.
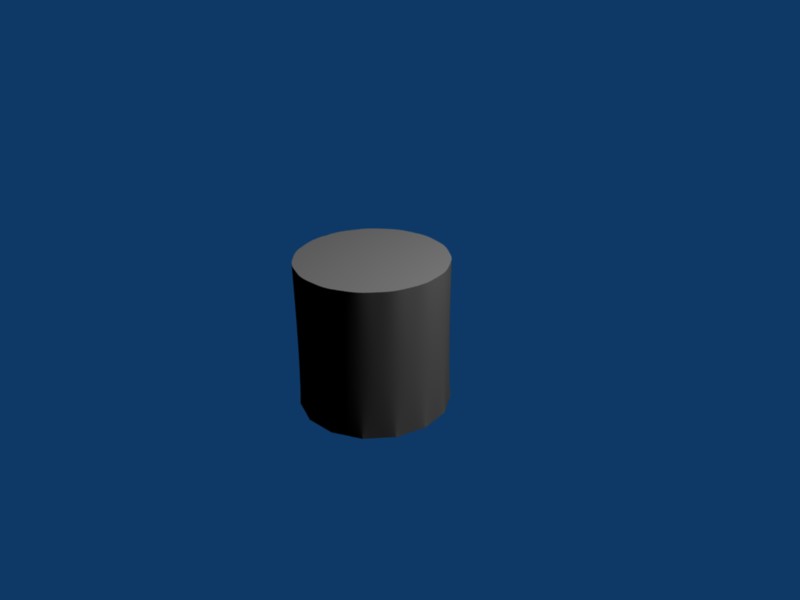
If you select the ‘pie’ edges as well, it will cause a little bit of a point at each spot where those edges connect to the outer rim. I’ve attached a render, with the top edge showing properly creased, and the bottom half showing what happens if you crease the ‘pie’ edges as well.
(Note that the attached render is a cyllinder of 15 sides, with a subsurf render-level of either 5 or 6. I can’t recall which)
I have actually done a bit of experimenting with the technology of edge sharpening and I have found the same results in LightWave as in Blender.
From my experience the edge sharp feature is not as efficient of a way to sharpen an edge as is creating simple sensible geometry on the mesh itself with attention to good use and placement of edge loops. In the attached .blend file is a side by side example. Both are eight-sided cylinders. One is controlled with edge loops, the other is controlled with the edge sharp feature. Both also have set smooth applied. On the edge sharp example with set smooth applied you need a level of 5 at render to get rid of smoothing errors on the faces. The problem here, is that now you have a level of 5 applied to the whole mesh. In LightWave you can control the placement of subdivision with weight maps. I am not sure how to do that in Blender. But in LightWave I choose not to use that method as it is another tedious step that to me takes longer than simply creating edge loops in the right places. This is a more or less hardwired aproach to controlling where the subdivision will be higher - in places between edge loops. This uses much less polygons at render time an is more efficent INHO. You can control the sharpness with edge slide.
I go into much theory about this in the tutorial in my signature. Not for Blender but the information applies to subsurf modeling very well.
The screen shot that I posted is from LightWave. (in LightWave you can change color of lines like you can a surface material - but for display only - edge render is something else. In Blender it is global AFAIK only in Themes) In Blender if you want a screen shot with lines, I am new to this so the only way I know is to go to Edit mode and apply subsurf. Take a screen grab with edge selection mode. Make sure and click the little box in the subsurf tab for the lines to show up as subsurf rather than base mesh.
Here is a Blender screen grab.
I see what you mean about set smooth. Good idea. Thanks.
The one I think I was mostly looking for was Amor_Inflexi’s post.
All the other posts were informative of coarse!
But since I’m really new to blender, I did not understand half of the text - so I couldn’t get help from that.