I found a few tutorials similar to: https://www.youtube.com/watch?v=4YY7XBpAeWE
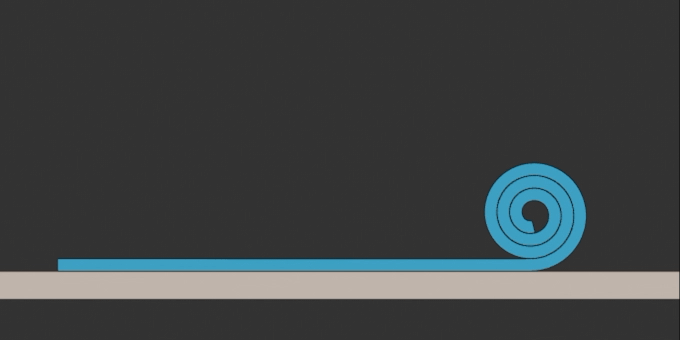
but these are totally wrong - the surface is not “rolling” but actually “sliding” along curve.
the quickest way is to animate the spiral and the carpet towards each other. However, since the distance the spiral moves must be equal to the length of the carpet but the carpet is technically inheriting the spirals translation, I needed to translate the carpet twice the distance the spiral moved.
Here’s my Blend file, which is probably easier to comprehend.
Thanks but it is not correct. I pointed it out in my post. Notice the ‘carpet’ in your project (and all Blender tutorials I found) has constant diameter. It should be small diameter at the beginning and large diameter when ‘carpet’ is rolled.
It seems Bend modifier in Blender is very limited unfortunately to make this in simple way.
I made it in primitive way (blend 2.8 attached):
…notice on your carpet, that the inner diameter increases as it gets rolled? That makes no sense, because it already has 2 full revolutions supporting the core. Considering the thickness and that you declare it to be a carpet, it is stiff and heavy, and shouldn’t behave like that.
Edit:… also the surface of a carpet and its backing behave different in terms of friction, this wont allow for sliding of the already rolled inner surface.
you’re are totally right, my carpet does indeed not trully ‘roll-up’, however, it is still possible
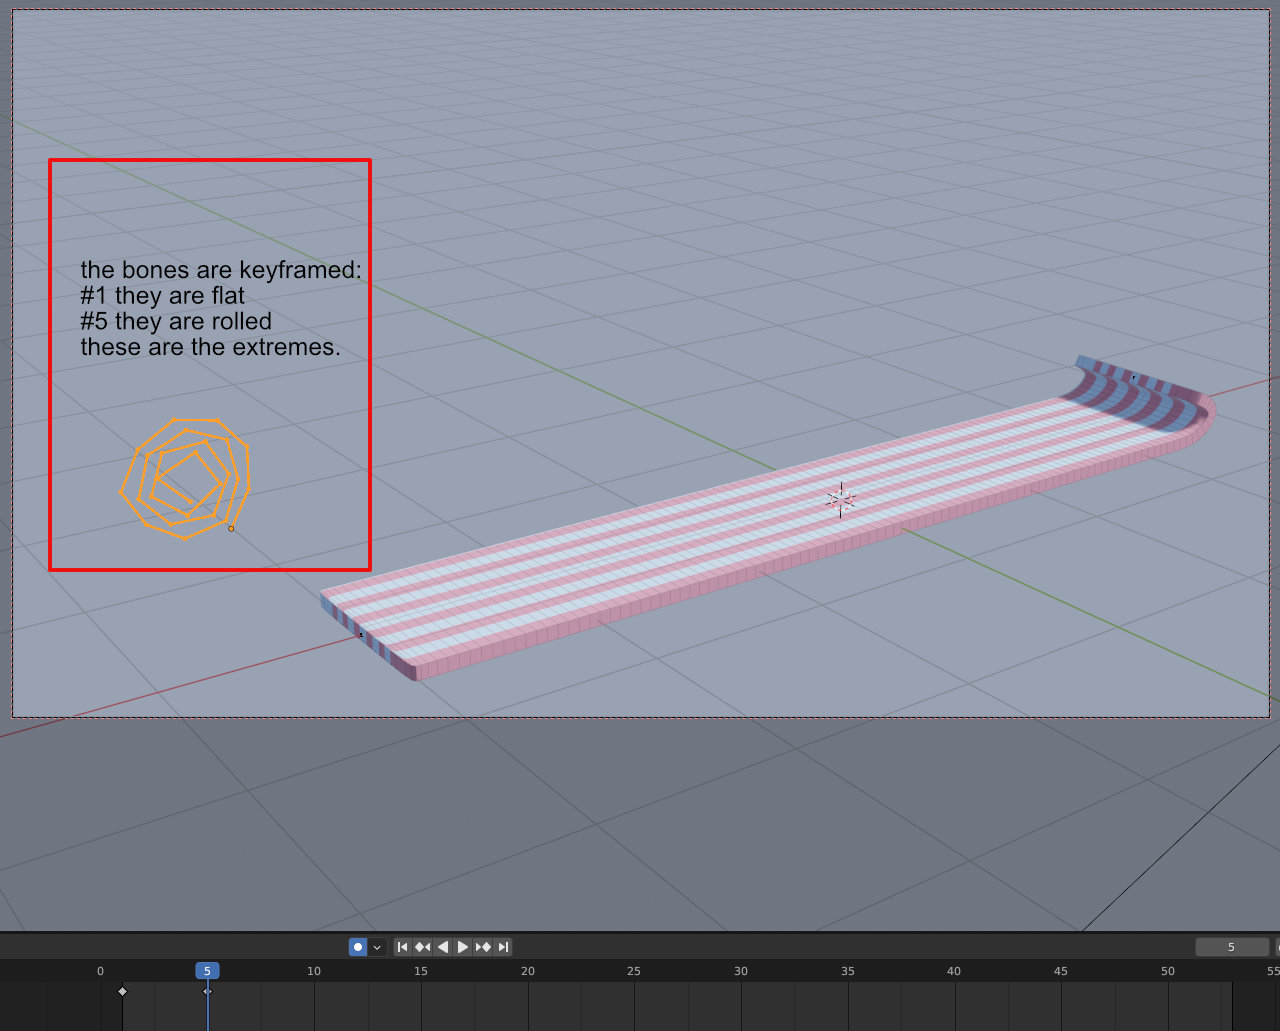
but it’s not ‘quick’. This uses a bone armature [ with BendyBones], and is hand keyed. The number of bones is low ( 15) ] and they don’t match sympathetically with the carpets vertices which means the weighting is not ideal, but it shows viability. How you proceed depends on what your intentions are for the final use, as your demo above may be completely valid, even if you feel it is not 100% accurate to reality.
anyone know of carpet or rugs that i can interact with. for example http://tested-curve.surge.sh/ open this in a browser (WARNING it will turn up your fans) and hit ‘5’ or any number on your keyboard and move your mouse across the webpage. the ‘carpet’ should interact. now im a blender noob ( i write code) but was just looking for inspiration of interactive rugs or carpets.
I don’t have the original file, but re-creating it was straighforward so . . .
Some notes:
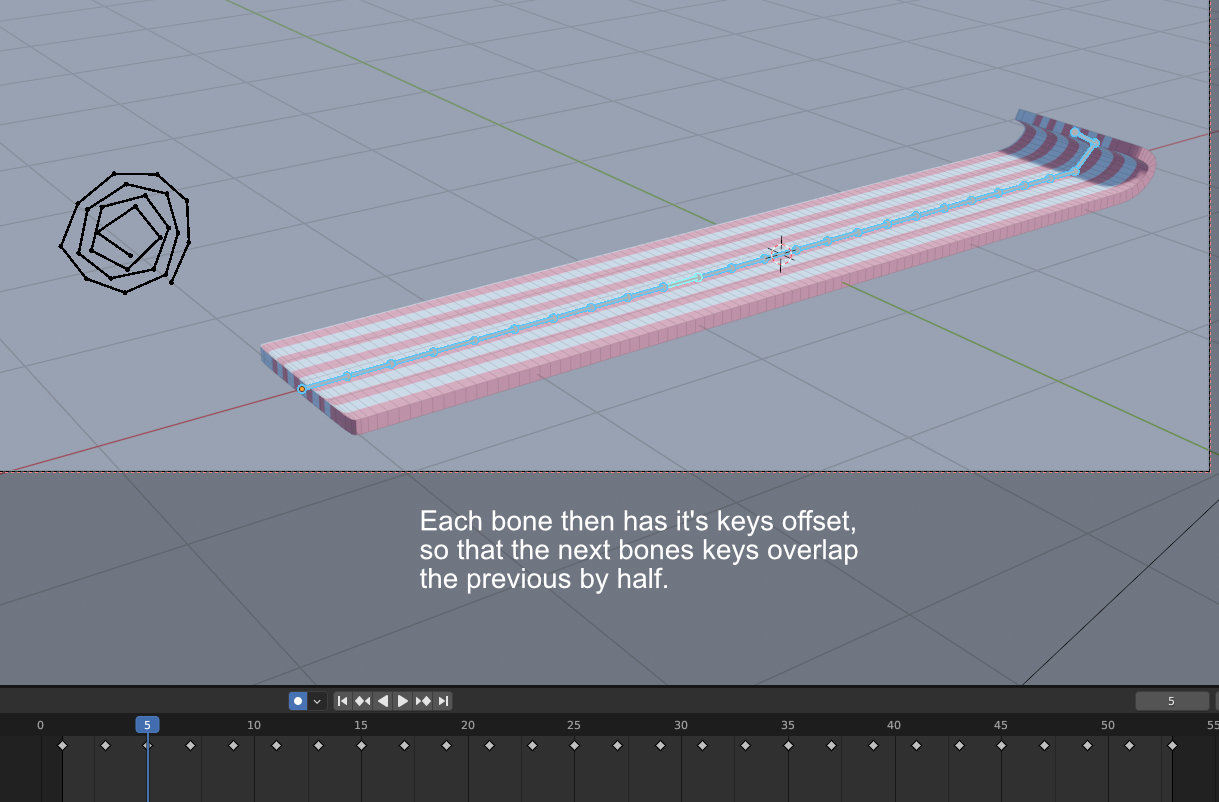
This method is very specific to the type of mesh being rolled, so the number of divisions in the rolled mesh is important for a clean skin to the bones - and the number of bones will directly effect the tighness that the roll can achieve. I’ve done this on a ‘mat’ [ using a solidify AFTER the bone armature] , which you’ll need to be able to see as you animate to avoid intersections. The number of bones [ I used 24 ] is equal to the number of internal edges across the mesh and aligned exactly for precise assignment
I then keyframed all the bones at frame 1 totally flat, then at frame 5 keyframed all the bones into a spiral so that the thickness of the object looked clean and the spiral was ‘even’ ( this is also dependent on the number of bones - more is smoother, but more work). Start at the end that will be ‘inside’ and do each bone in turn.
The floating armature in this image is this stage: