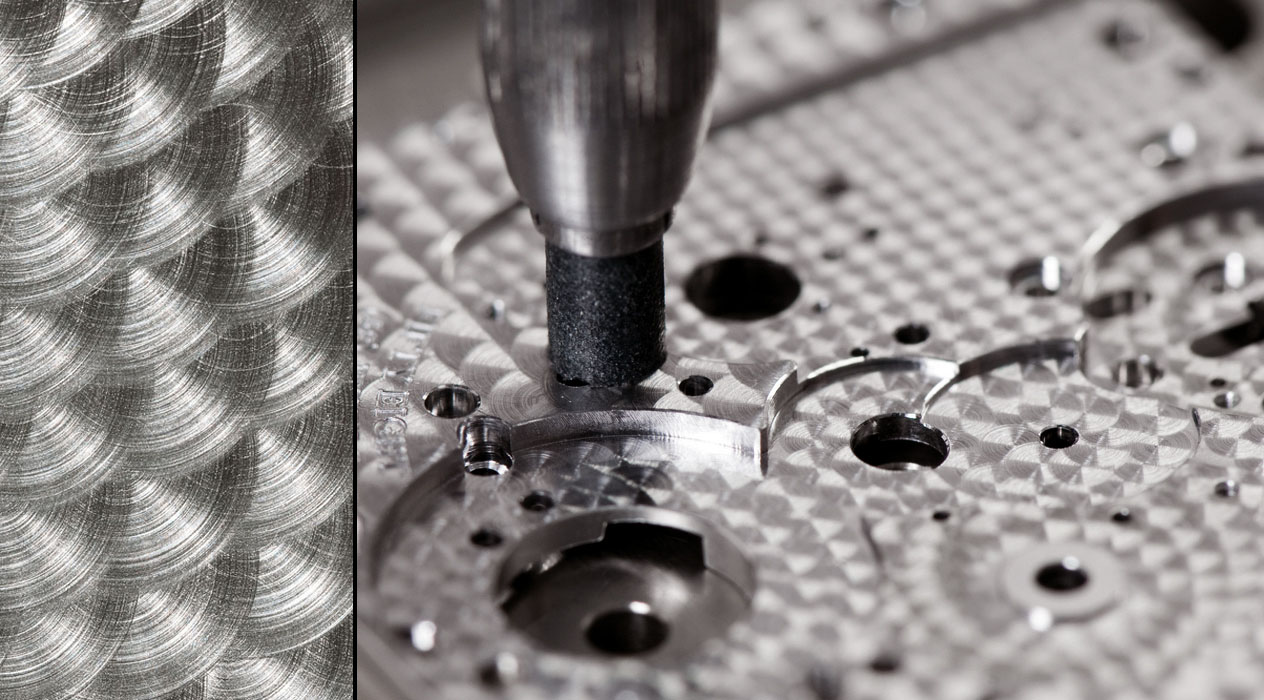
I am working on a mechanical watch model and I would like to finish some of the surfaces with the traditional perlage pattern, like the image below. Any ideas?
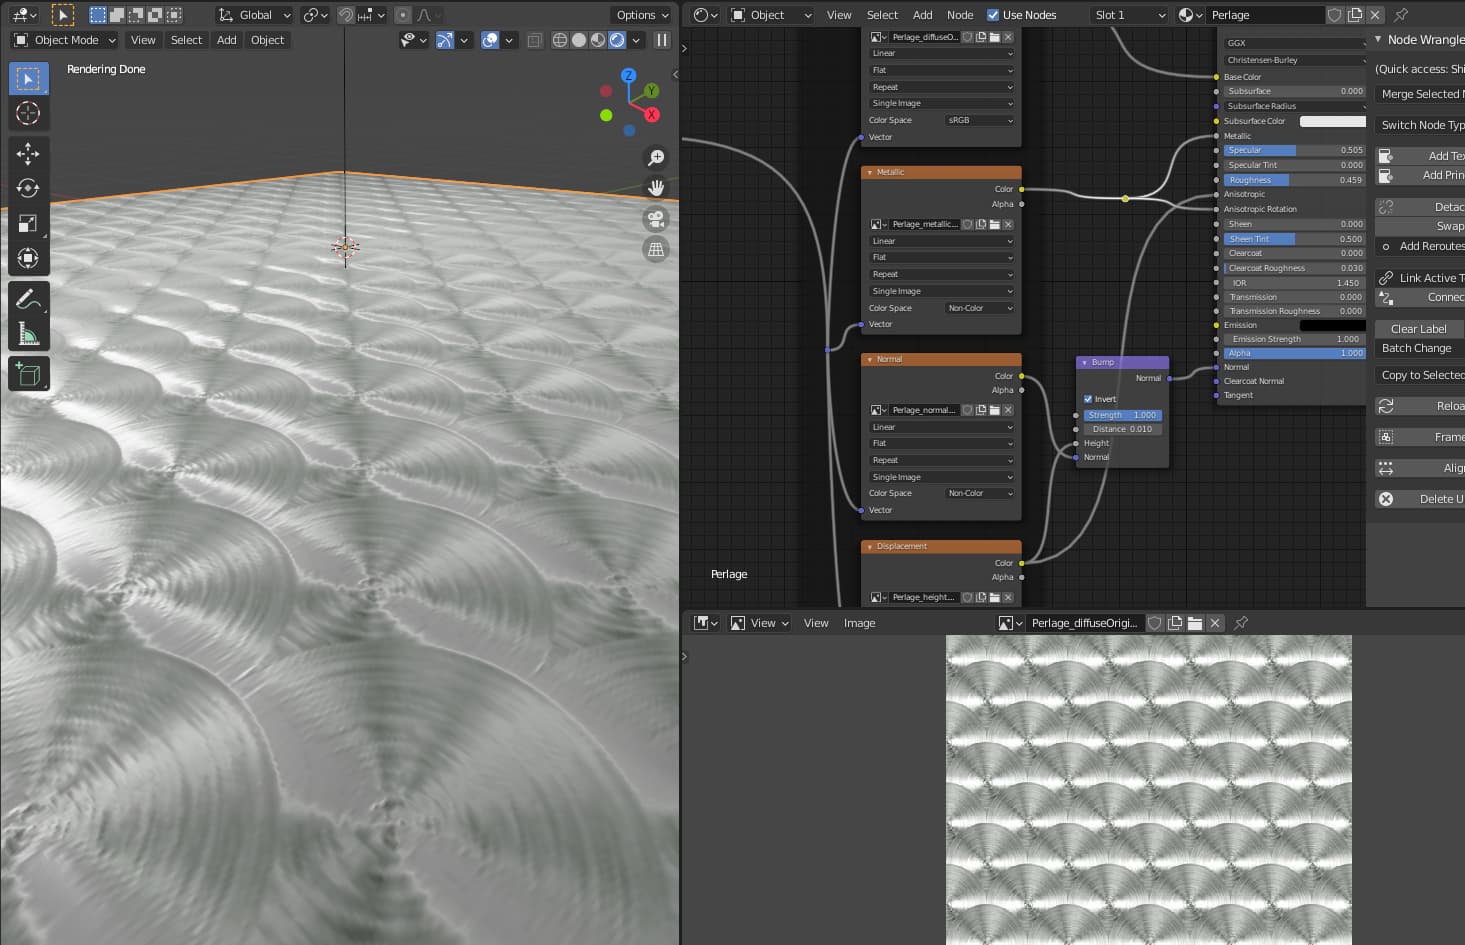
You probably be best just trying to achieve that with a bump or normal map. I only spent a couple of minutes in Photoshop so it’s a bit rough and ready.
Use filter>noise to generate some noise
Use blur>radial blur on it
Then use selection tools and feathering until you have a single “piece”… i.e. a feathered half circle with the radial pattern.
Scale appropriately and duplicate to give yourself the required overlapping pattern.
Obviously it would take a bit more time and effort to create a seamless pattern but it wouldn’t take much
I was wondering if this could be done procedurally in Blender. A Voronoi (Smooth F1, Random 0.00) plugged into a Principled BSDF’s Anisotropic Rotation maybe? If that made the right circular effect then some mix noding to get the layering . . .
I find that on things like this a quick grab of a texture image, and then run it through Materialize for the rest of the maps does a real good job…simple and quick…
I like it, but I’ve modified it to use voronoi → separate HVS.H → Subtract 0.5 → Multiply 0.02 to drive rotation. But same problem as I have with all my anisotropics, how do you manipulate/create tangents in such a way it conforms to orientation? All my stuff break apart when mapped (using UVs) to front and side faces.
Yeah, I think I’d have to update the tangent computation for my node setup to work. Normal cross product with coordinate minus center should work.
Edit: I just realized that the situation is more complicated: the anisotropic calculations requires normal vectors in global/object space, but if the texture is evaluated in UV coordinates, the connection to global coordinates is lost…
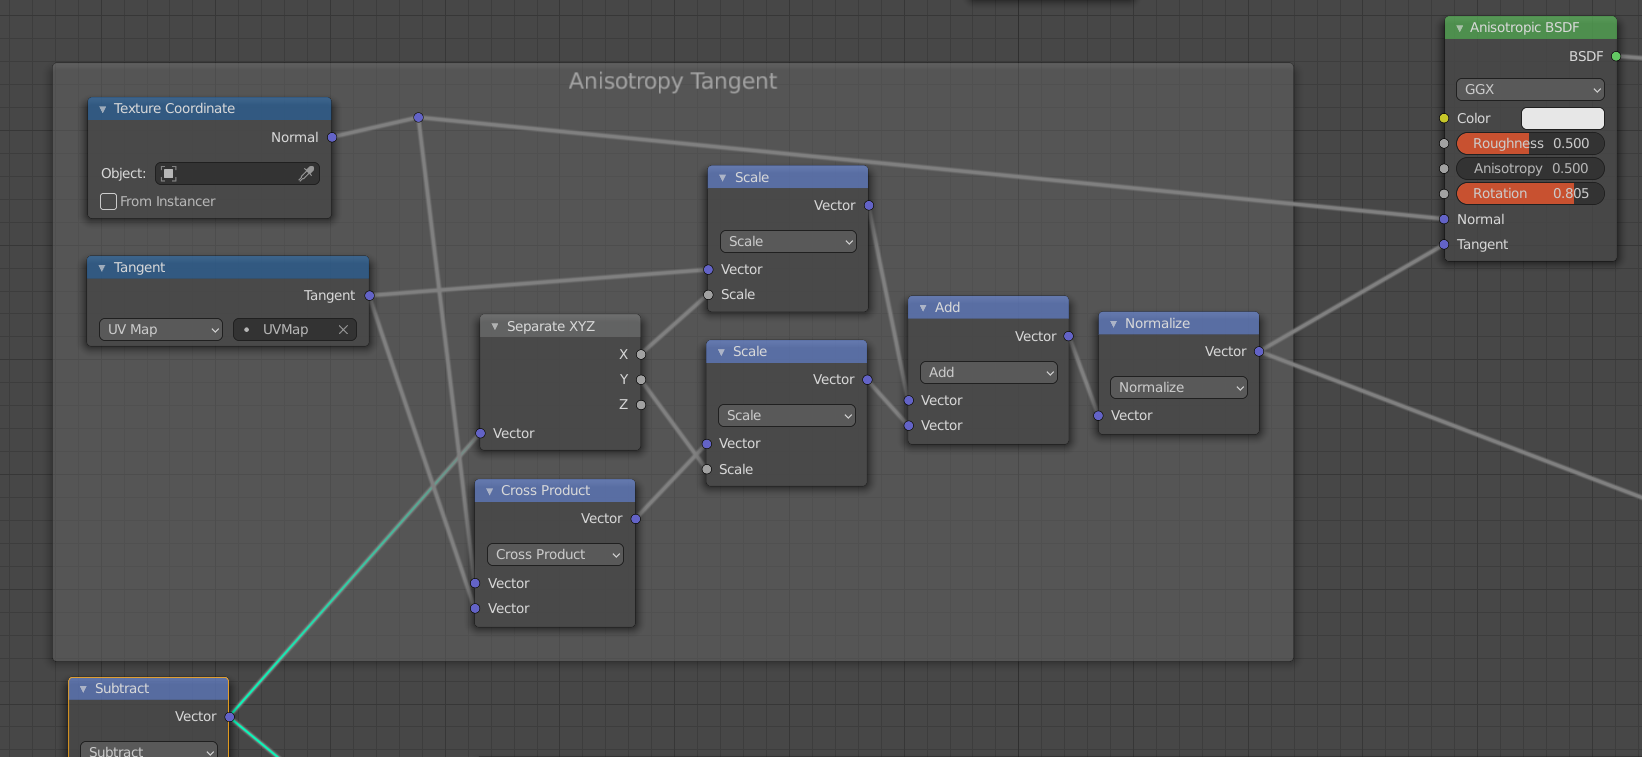
Edit 2: I think using the Tangent node set to UV makes it possible to compute a correct tangent in global coordinates. The output of the Subtract node in the lower left is the vector pointing from the perlage center to the surface point in UV coordinates I took the output of the tangent node to be one basis vector, the normal vector to be the second and computed the third basis vector with the cross product. I interpreted the UV coordinates to be the first and third coordinates in this coordinate system (the coordinate related to the normal direction being zero). I have no idea whether this is correct, but it works for anisotropy:
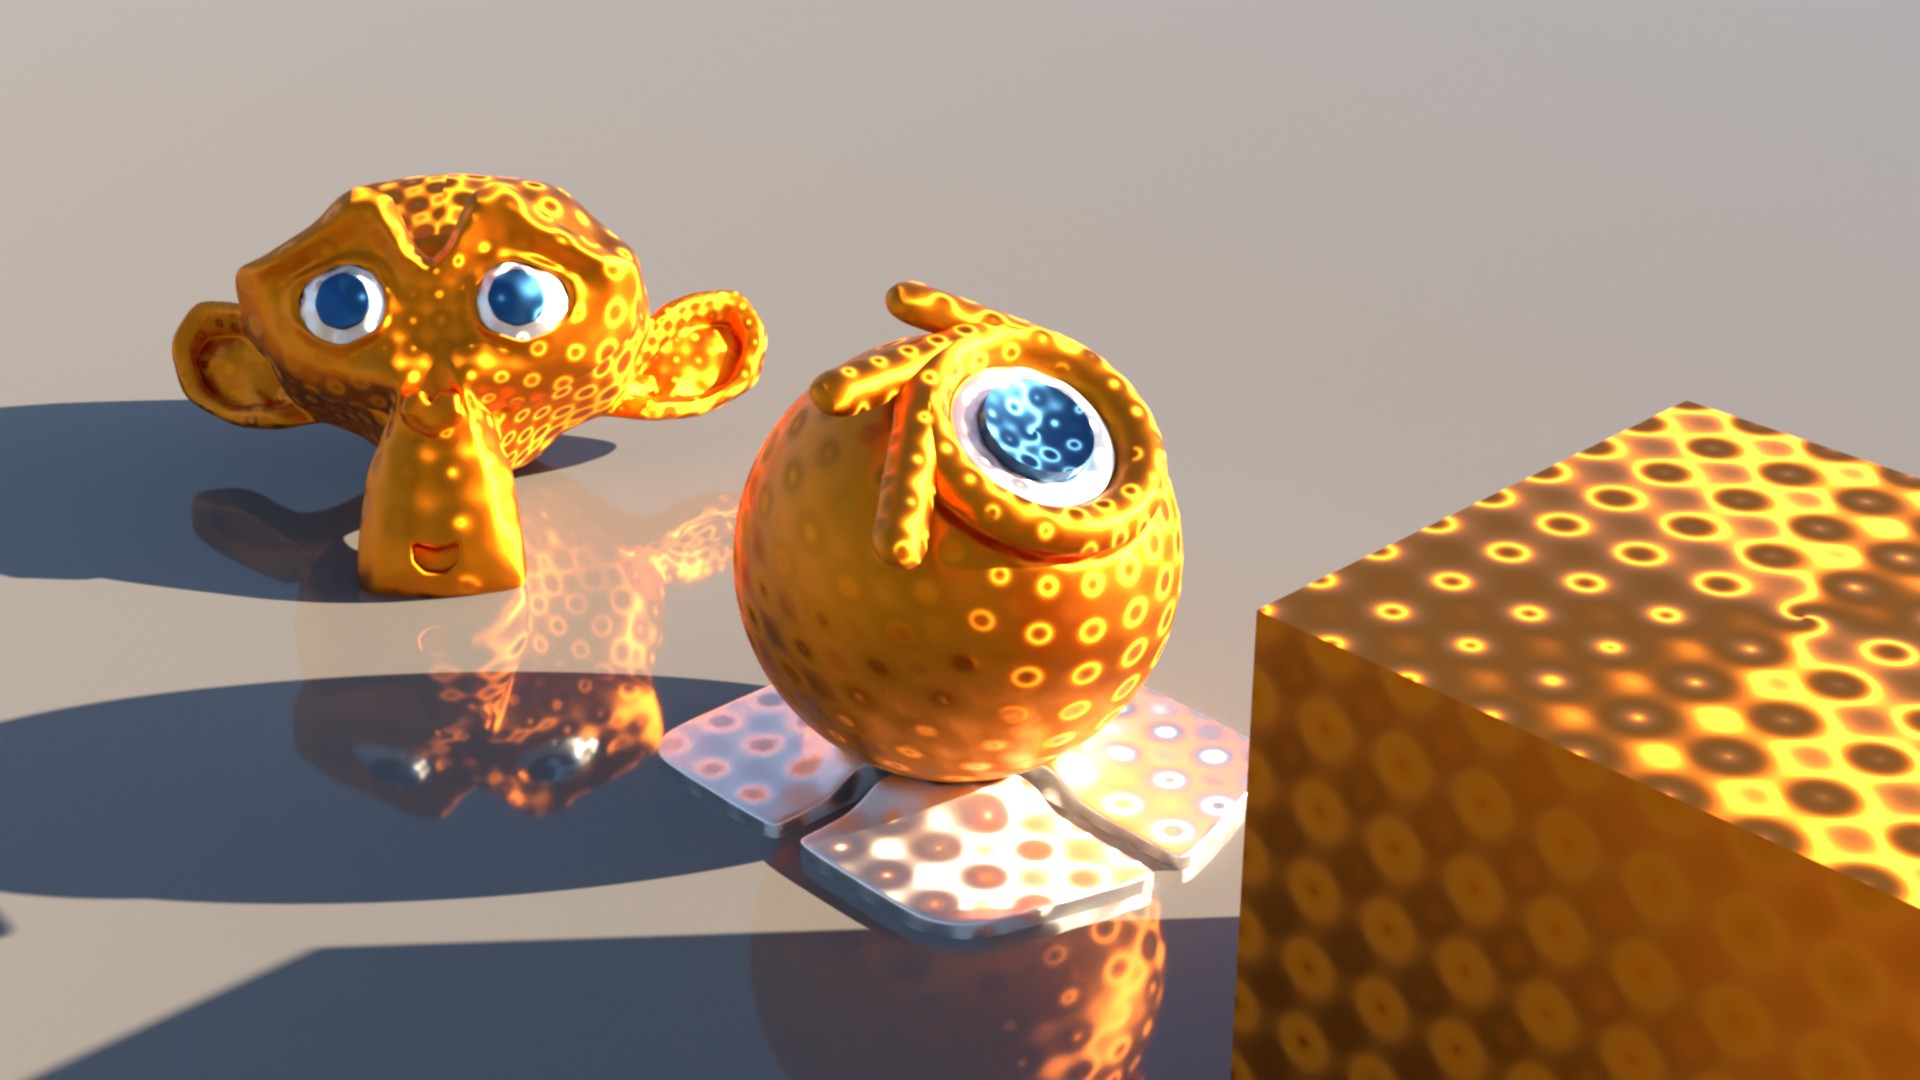
Oh wow. Yeah this is looking extremely promising. All objects in the same mesh.
Left - no bumps. Right - some bumps.
Top - no rotation modulation. Bottom - maximum rotation modulation (0, 0.02, 0.05 I think).
Added the tangent calculation to Secrop’s aniso material and it worked very well.
Hello, I post in this topic because, I have a question on this texture and I don’t want to duplicate a topic that already exist. Is it possible to have the same pattern but in circle like in this photo?
I’ve tried different solution but I don’t get it.


