Dear fellow Blender enthusiasts, I would like your help on a problem I’ve encountered on a new project.
I’m trying to unrwrap my mesh and map directional textures to it.
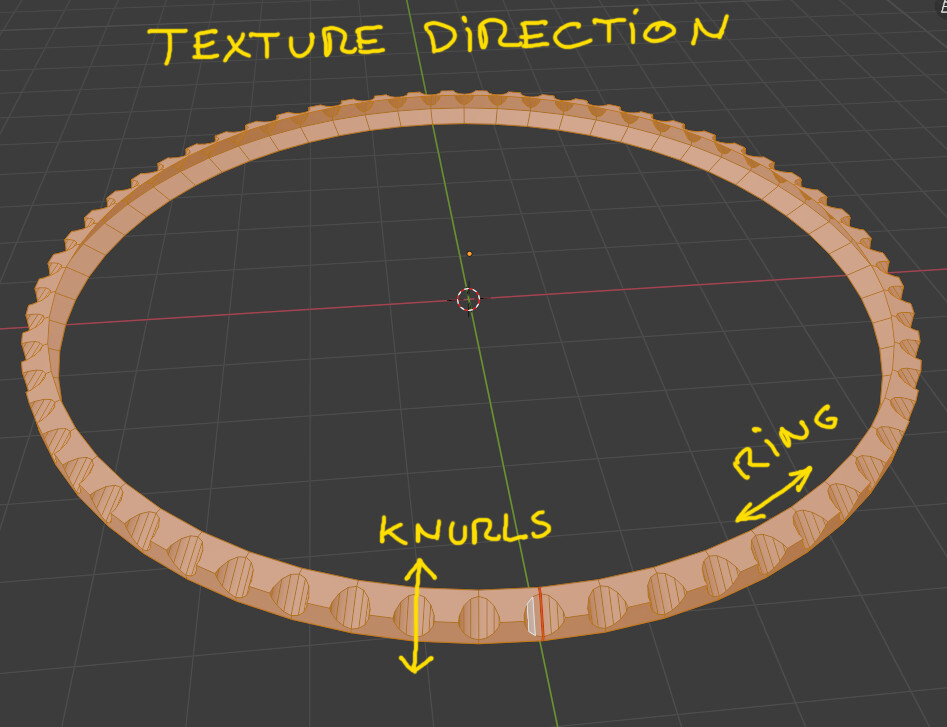
The object in question is a knurled ring, made out of brushed stainless steel.
The brush direction in the knurls is linear along the individual axis of each knurl.
The brush direction on the ring is radial along it’s circumference, as shown in the screenshot.
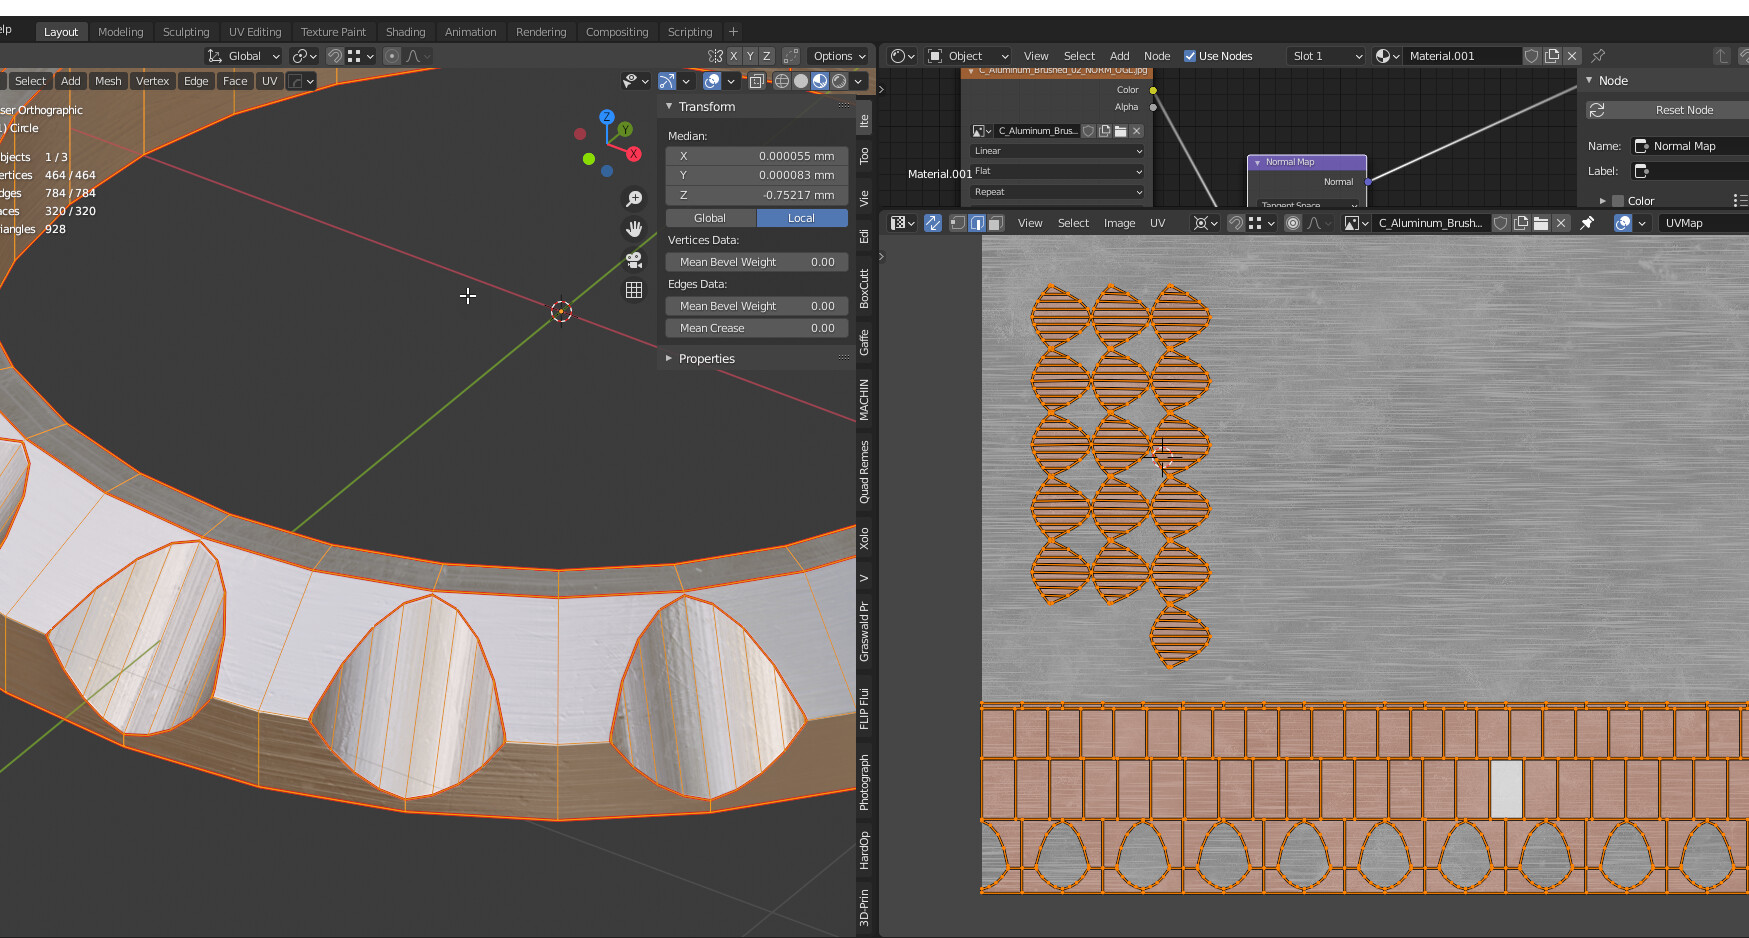
I’ve tried taking the mesh into Substance Painter and using spherical projection, which seems to solve the problem on the knurls, but doesn’t seem to work for the radial direction.
Any pointers, tips or tricks would be very much appreciated.
Trying to map the whole thing like that is going to lead to a lot of texture distortion. If you’re trying to do something procedural, consider using polar object coords (object coords run through math/atan2 and vector math/length) instead of UV, which will avoid distortion problems, and then bake to whatever UV you want, if needed.
Otherwise, I believe I see some quads there, so you could start with a follow-active quads mapping of the quad ring, pin those faces, then unwrap the rest around that. (With proper seaming of course. You’ll need a whole major axis edge loop circle seamed in addition to your existing minor axis slice-through. Just like a torus.)
Another way to do this would be make it out a curve deformed mesh object (optionally an arrayed object), which would be a perfectly straight bit that’d be easy to UV map, and would be both easier to make and easier to edit.
ahhhh I see you are making a Rolex. or at least it looks like it from the cut aways. Yeah what John said is on point and is very similar to what I did in mine that you can see on my profile photo (kinda, but hopefully the point is made that I have done it on this exact watch, submariner I am guessing) and it worked great. so even if this ring is NOT for a rolex, the technique is identical and works.
LOL, you guessed it. Almost.
As a Rolex enthusiast and collectioneur, I’m wary of low quality reproductions so I decided my model will be a “Relax Oldster Perceptual Supermariner”
I would love to see a glimpse of your wireframe though, I cannot begin to explain how much headaches the case and crown guards gave me…
https://www.thorntonstrolia.com/2020/08/27/watch-model/ About halfway down the page I have a before and after slider where you can see a very crappy wireframe bc I did it in maya and then back to blender and then back to maya and back to blender so by the end there wasn’t much hanging onto a clean low poly model for the wireframe… but if you can follow the edgeflow you can probably guess where my secondary topology is.
For Cycles, don’t forget to use anisotropic shader with JohnMalcolm1970’s UV layout above (should work) to drive the tangent, with 0.00 or 0.25 in the rotation as needed.