I’ve got a curve I’m using to set the profile of a bunch of other curves. I’d like to simplify this small curve to reduce the mesh density. Using ‘Decimate curve’ from the curve menu seems to delete points (what are these called? I know the little lines sticking out show the normals) that are important to the shape of the curve (2 in the screen shot) while leaving the unimportant ones alone (1 in the screen shot). Is there a way to delete specific ‘points’ on a curve?
Thanks for any help.

You can turn down the Resolution Preview U and Render U in the Curves panel, although it looks like it’s already set very low. 3?
The lower the resolution the less curved and more angular it’s going to be. Reduce it to 1 and you will just have a straight line from control point to control point and the handles will serve no purpose.
Thanks, yes, I should have mentioned that it was already set low. The problem is that I’d like to delete specific points, not the ones Blender figures should be deleted. I even tried making a shape from a circle then converting it to a curve. This didn’t work well at all.
If you want such low resolution you’d be better just drawing the shape out by extruding vertices in a mesh and then converting that to a Curve.
If you are using that curve as a profile for another curve, can you not convert the final object to a Mesh and remove some unwanted geometry at that point?
Thanks for the reply John.
The profile curve is used to set the profile on a bunch of other curves that all together make a fairly involved art-deco scrollwork. Selecting series after series after series of edges on many, many meshes is tedious.
One can only use a curve to set the profile or taper of another curve. Being able to use another object or shape would be great. As I mentioned, converting shapes to curves yields unpredictable (and mostly useless) results.
While browsing the list of addons that work with 2.8 I came across this little gem, ( https://github.com/crantisz/blender-curve-remove-doubles-addon )
I’ll give it a go and see if it does what I want.
Perhaps what you are looking for is dissolve vertices?
Select Vertex > Delete > Dissolve Vertices
This will delete the vertex and join its neighbors while trying to keep the overall shape of the curve.
The location of the points you have labelled both 1 and 2 in your screenshot are both determined only by the positions of the control points (the points you can select that normally have a handle coming out of each side) and the position of the handles. The curve is mathematically described. All you can do is lower the resolution or manipulate the control points and their handles.
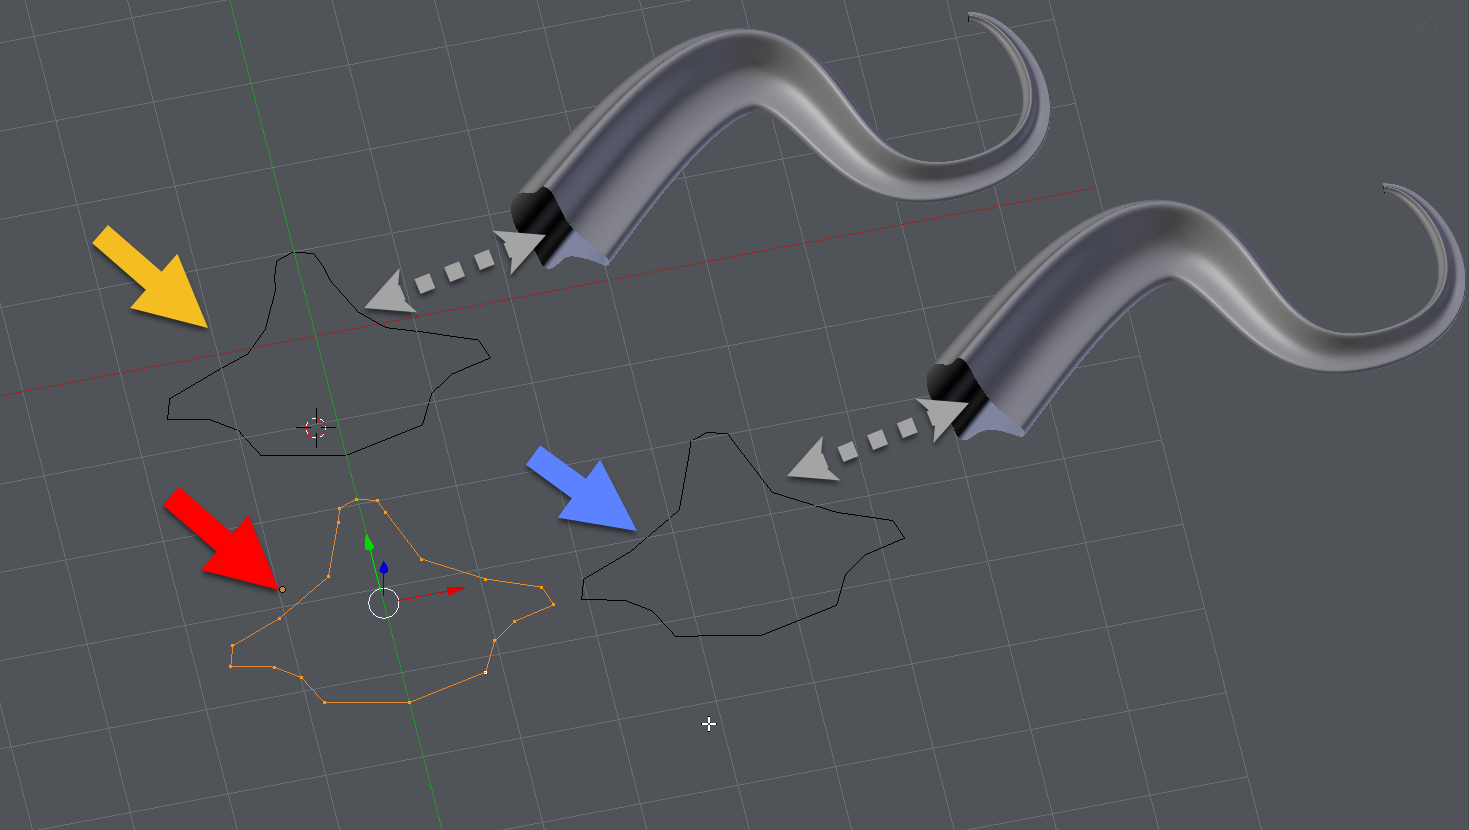
I quickly roughed out a shape vaguely similar to yours. It’s got the yellow arrow pointed to it. It would translate to being treated as 24 vertices if converted to a mesh. The red arrow points at a such a converted curve. It was converted to a mesh and then I dissolved the 4 points you’d classed as unwanted. It was then converted back into a curve so that it could be used as the bevel object on another curve. It obviously translates to only 20 vertices. Obviously that could be trimmed down further.
Thanks for taking the time to describe the process John.
I didn’t have much luck converting meshes (shapes) to curves but I’m obviously doing it wrong. Once I finish with the damn snowblower (Oh my stink we have snow this year!) I’ll try it again. THIS time I’ll make a better formed shape using a mirror modifier. Your description of the ‘points’ also cleared up one of my questions. I can now see WHY it’s necessary to use a curve to describe a profile or taper. A shape or mesh wouldn’t have the math descriptors (?) to designate where edges would go.
Thanks again.
Bob
1 Like