According to a video from new features of Blender 2.80 a long time ago, I saw that people can remove the texture seam’s artifact, they blur the seam alpha or something like that, I’m not sure, but I cannot find that video anymore, and I cannot find it on YouTube too, can you help me?
Edit: Let me explain again how the feature works: It blurs the edges of the seam’s alpha, so the otherside of the seams are faded in and out each other, it’s like a blured mask in Photoshop.
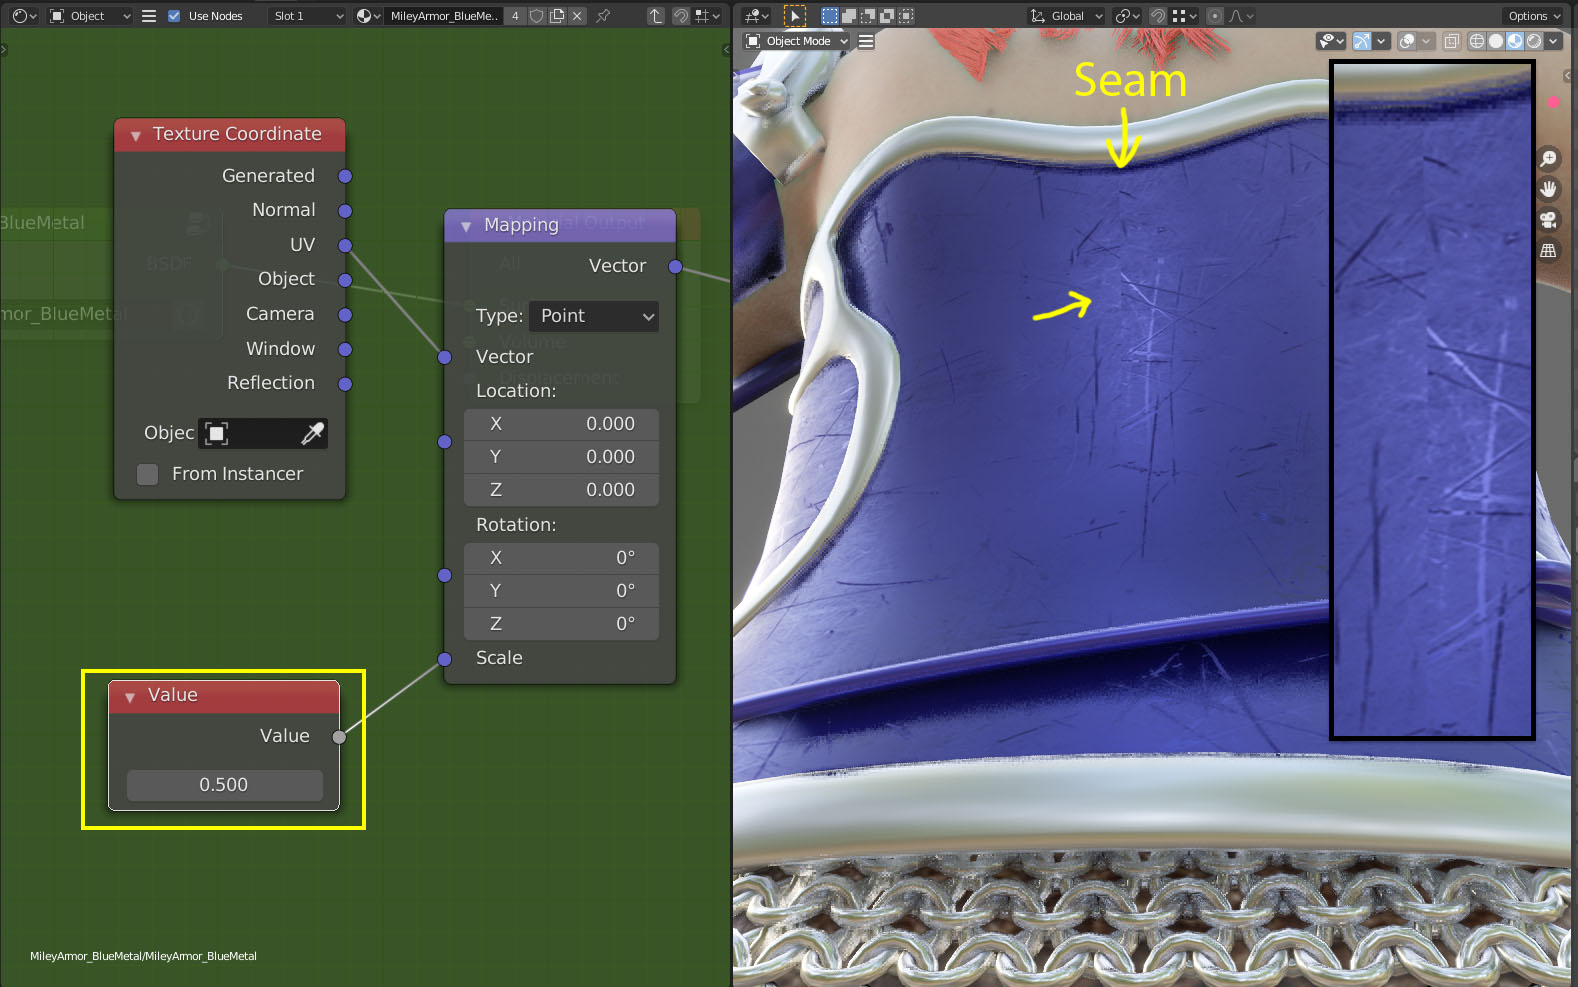
As you can see on the image on the left, I scaled the mapping to 0.5 because I want a bigger texture, but it makes the seam appears, if the scale is 1.0 then there is no visible seam but the texture is too small.
The reason I have the problem is because the unwrapping is Cylindrical, because I want a tiled texture accross the armor.
The problem is that you’re only using a quarter (half U * half V) of your texture, and your texture doesn’t tile when used like that.
But the texture kind of looks like you could find a place with a flat line. Some “location” in your mapping node might find you a place where the seam is unnoticeable.
Alternately, you might be able to find a different place for your seam. It looks like if you rotate the seam to the very front (?not sure from pic) of the model, there will only be a small seamed area, easier to work around, possibly no seamed area. Or there may be some other better place to put your seam.
For a model that really cannot be seamed invisibly, you could consider the use of multiple UV maps, making masks that represent “distance from seam for UV map x”, and mixing between multiple samples of your texture, using different UV maps, on the basis of how far the sample is from a seam in that UV map. This blends seamlessly, but it’s not necessarily what you want-- edges fade into each other, rather than having distinct features. It’s kind of like a 3D version of GIMP’s “make seamless.”
bandages:
Or there may be some other better place to put your seam.
There is no place to put the seam for this torso armor. And this problem happen multiple times, for the leg armor too for example.
As I said in the first post, there exists a hidden feature in Blender 2.8x, but I couldn’t find the demo video from Blender website anymore. It’s very sad that a cool feature like that is hidden.
Let me explain again how the feature works: It blurs the edges of the seam’s alpha, so the otherside of the seams are faded in and out each other, it’s like a blured mask in Photoshop. But remember that I don’t know where that feature located in Blender.
Make use of real seams, and hide the UV seams there if you demand to use UVs as a coordinate lookup for seamless textures.
Make a decent UV, and stencil paint the texture in.
Make a decent UV, and bake the texture in based on blended cube mapping. This can be further refined using different sizes of an image map blended with noise generators to hide repetitions.
@CarlG, I don’t know what do you mean by blended cube mapping with noise generators because I don’t know how to make it, the noise is interesting, and thank you for the reply.
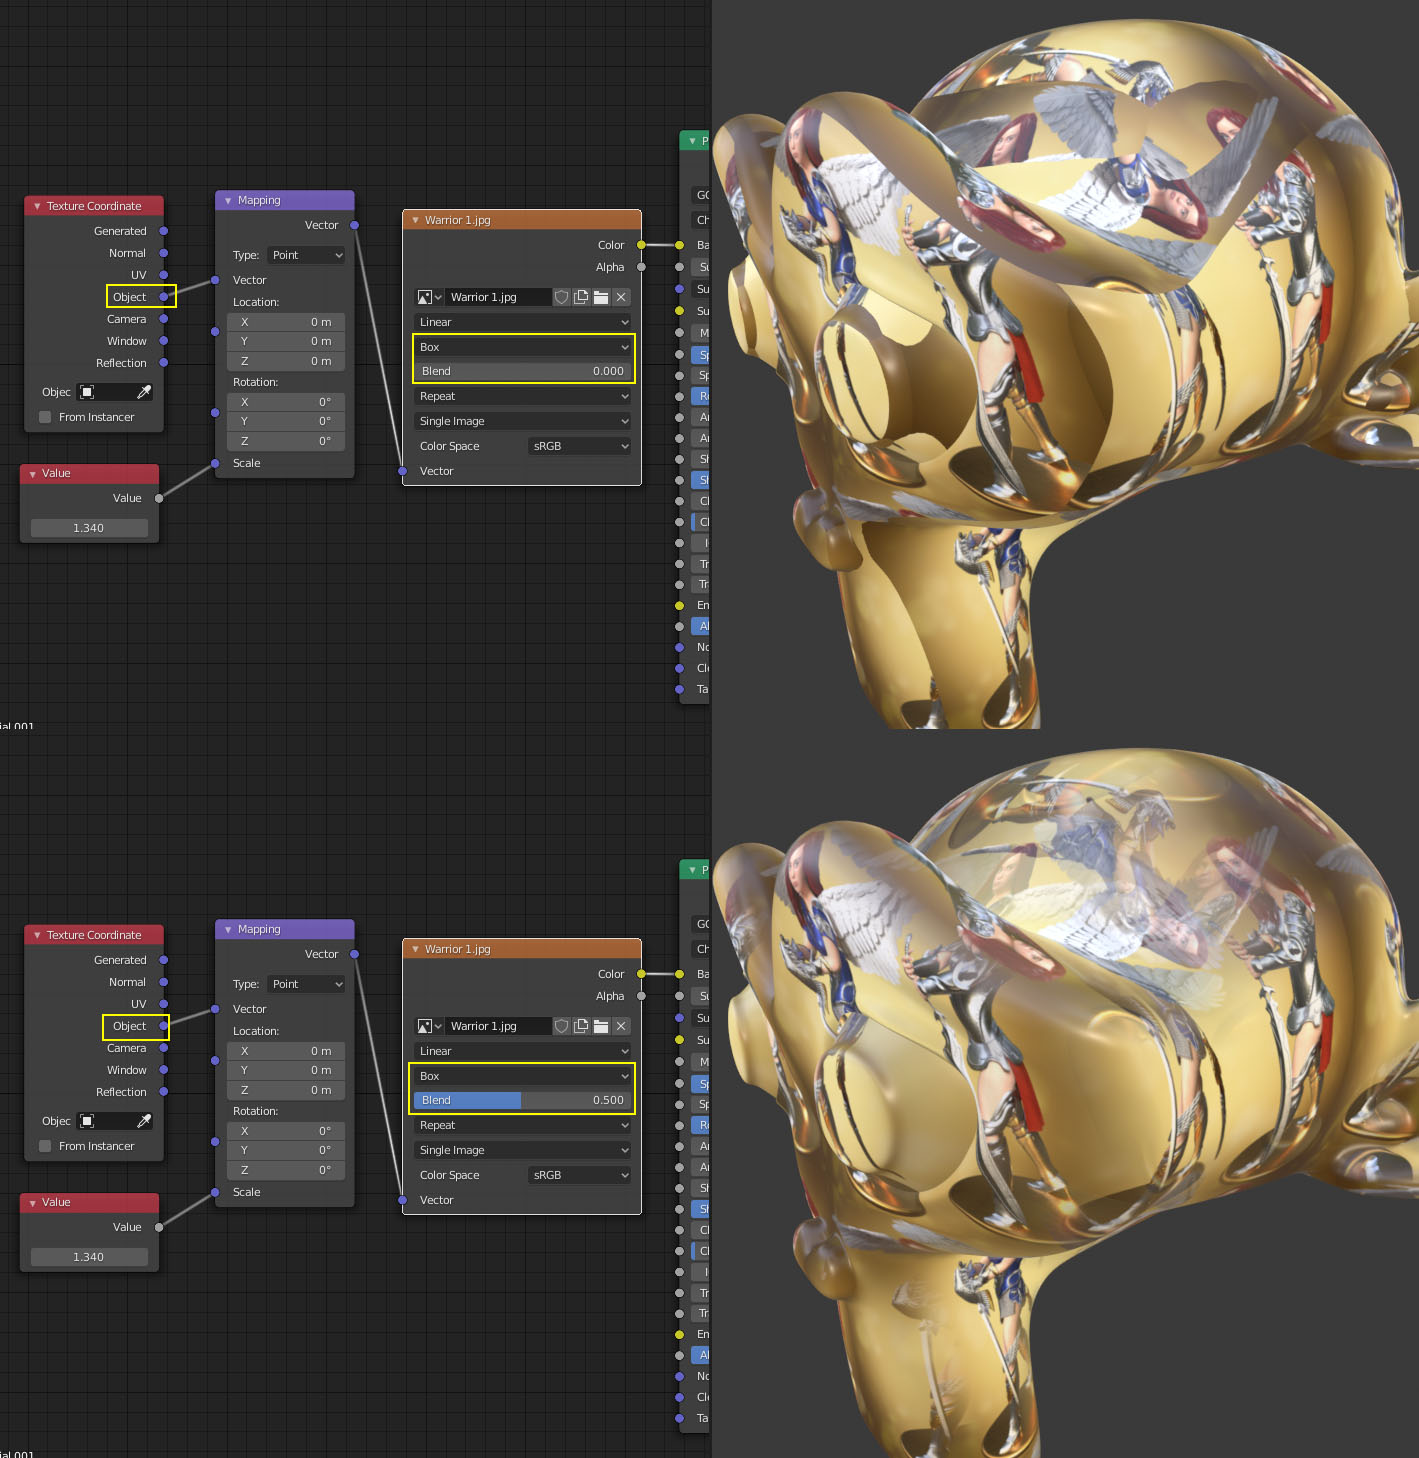
I finally found the solution yesterday, I searched it one by one without help of Google, I’m happy so I share the solution. I used a Box Blend as shown in the image below, but don’t forget to choose Texture Coordinate as Object instead of Generated, otherwise when you scale the object along Z axis only then the mapping is streched even if you apply the scale. And with Object node, don’t forget to apply all the scales of the objects with the texture if you want the same texture size across the objects.
Something like that, yes. However, this should only be a temporal step on character work. It seems you scratches go onto character armor that may conform to an animated and bending character. As this happens, if you use object coords, the image texture will slide across the surface. Therefore you should setup the box mapping, and then bake out the result to an image which is using UV mapping to drive the coords. The baked texture will follow the animation.
It is fine, however, if the character and armor is not supposed to have identical results through different poses, or if the model is static. Still, it’s something to keep in mind for character work (of which I do none though).
Thanks for the tip, I didn’t know that the texture will slide across the armor, for example the boots has an armature, it deforms, so I need to bake out the texture. Thanks, I will remember that.