Hello. I’m trying to set light to make my character more expressed, sexual, and less “flat”. How can I do it with lights? I only know about Rembrandt’s technique and basic triangle of lights (there is addon in Blender), but I heard that I shouldn’t use it for female characters. Can somebody share with me usefull techniques?
I don’t know what kind of atmosphere you want.
For more information on setting and analyzing lighting, look for materials or YouTube videos about lighting in photos or movies
The video is about the most used three-point lighting.

It depends, most of the time Rembrandt’s lighting uses a fairly hard light which accentuates skin texture, usually it is undesirable in portrait/beauty photography, but again, it depends.
it’s a good start that u already know what kind of atmosphere you are aiming for, but
Lighting isn’t the only thing that sets the atmosphere you want, your character design and gesture/pose also make a big contribution, for example, let’s say you want to set a light for a character Hello Kitty, no matter how moody or dark your lighting is, as long as the Hello Kitty is in her usual pose and design, the lighting won’t do that much, the opposite is also true if you are want to set a light for Batman with beauty lighting set.
It’s quite hard to give a specific technique, especially if you only know about Rembrandt’s light (it is just a variation of Side Lighting). If you only want a fast result, the easiest way to learn is by reconstructing the lighting from a reference image that you like, or you think is in line with the kind of atmosphere you aiming for, whether it is from a movie, a photograph, or even a painting or comic book.
It is also a good topic to learn about the basic role of each light in a lighting setup, 3-point lighting is most used when teaching someone new about lighting because it uses the 3 most common lights, a key light, a fill light and a rim light. But do remember that there is still a lot to learn besides that, there are light ratio, shadow ratio, light quality etc…
3 Likes
Hello. Thank you for your efforts. How can I do it if my reference is just a plain painting image? It doesn’t have a natural light at all.
Thank you. It’s usefull.
1 Like
You can’t be suggesting that a painting doesn’t have light sources? Seriously? Paintings are nothing more than an attempt to capture light on canvas. Find the light sources in your painting. Look for shadows and highlights
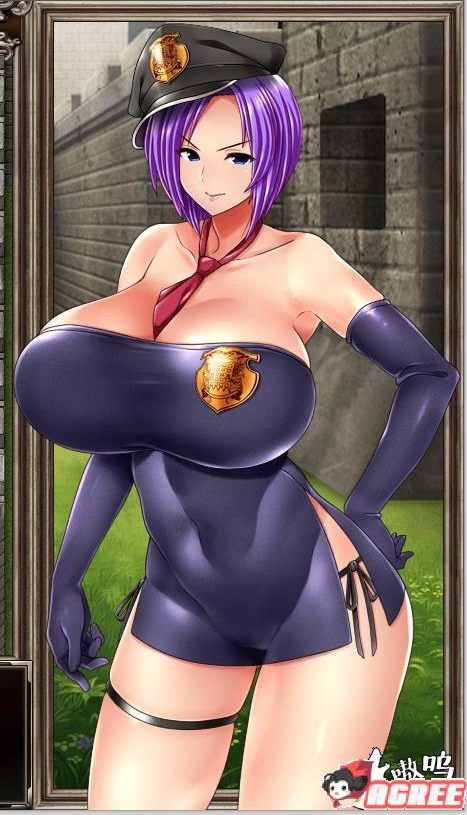
Of course, not. I mean, reference have only character with alpha channel, so there is no any shadows. If we talking about highlights, I suppose it’s a thing I’m looking for.
Can you share your reference?
Well, I’m not fully aware about nsfw stuff here. Should I add special tag for it or I can’t post it at all?
Sorry, I don’t know how to do this ![]() I suppose I need to edit question, but I don’t have the button for it…
I suppose I need to edit question, but I don’t have the button for it…
Added the tag for you ![]()
Thank you very much! ![]()
It doesn’t have to be natural light, most of my students, or someone new to lighting in general, often think that artificial light is only used when it is dark, in fact, most of the time, daylight scenes still need a combination of natural and artificial light.
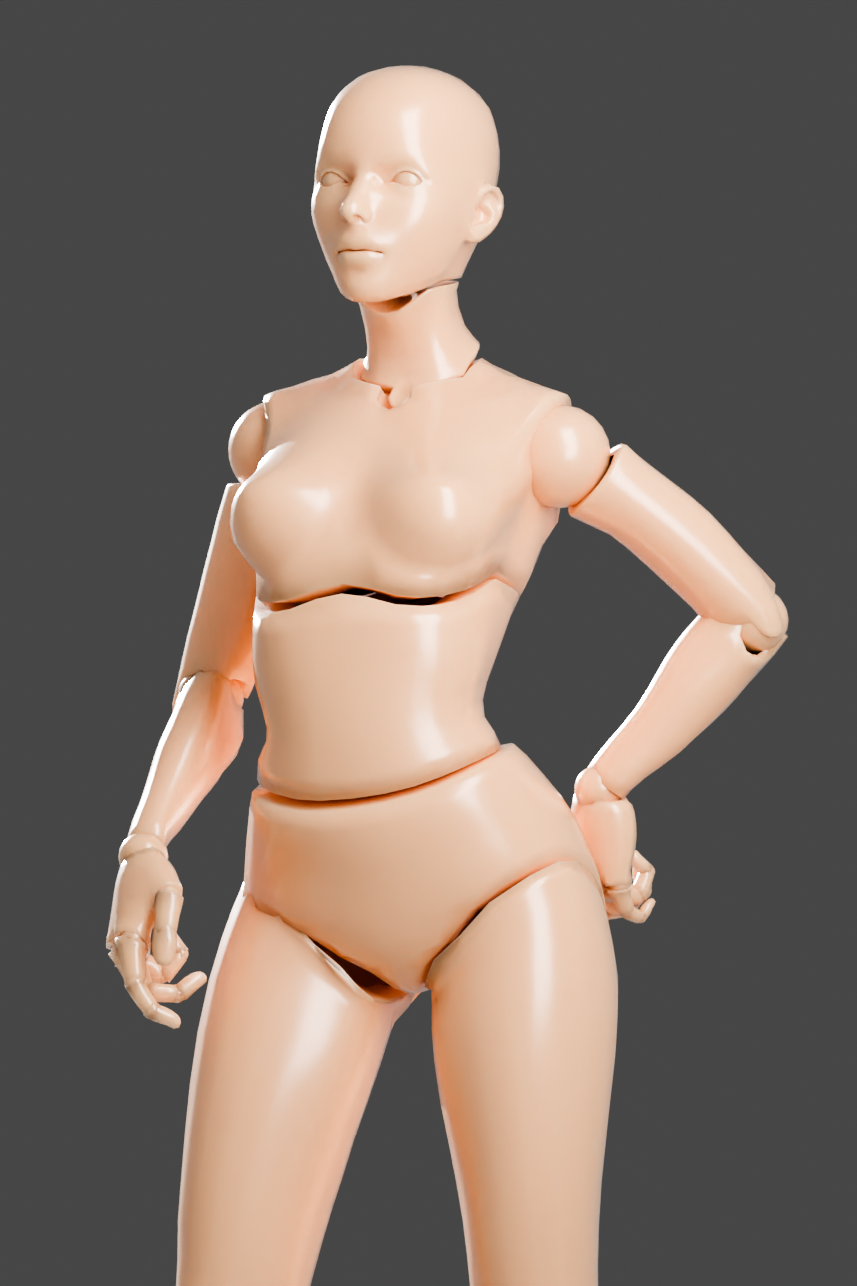
Here’s one of the possibilities of the lighting based on your preference, just remember that you have to make some compromises when using a drawing/painting as a reference, depends on the artist, most of the lights are approximations and often “stylized”.
But, as i already stated, for this reference, the atmosphere relies more on the character design and poses, light is only accentuates what is already there.
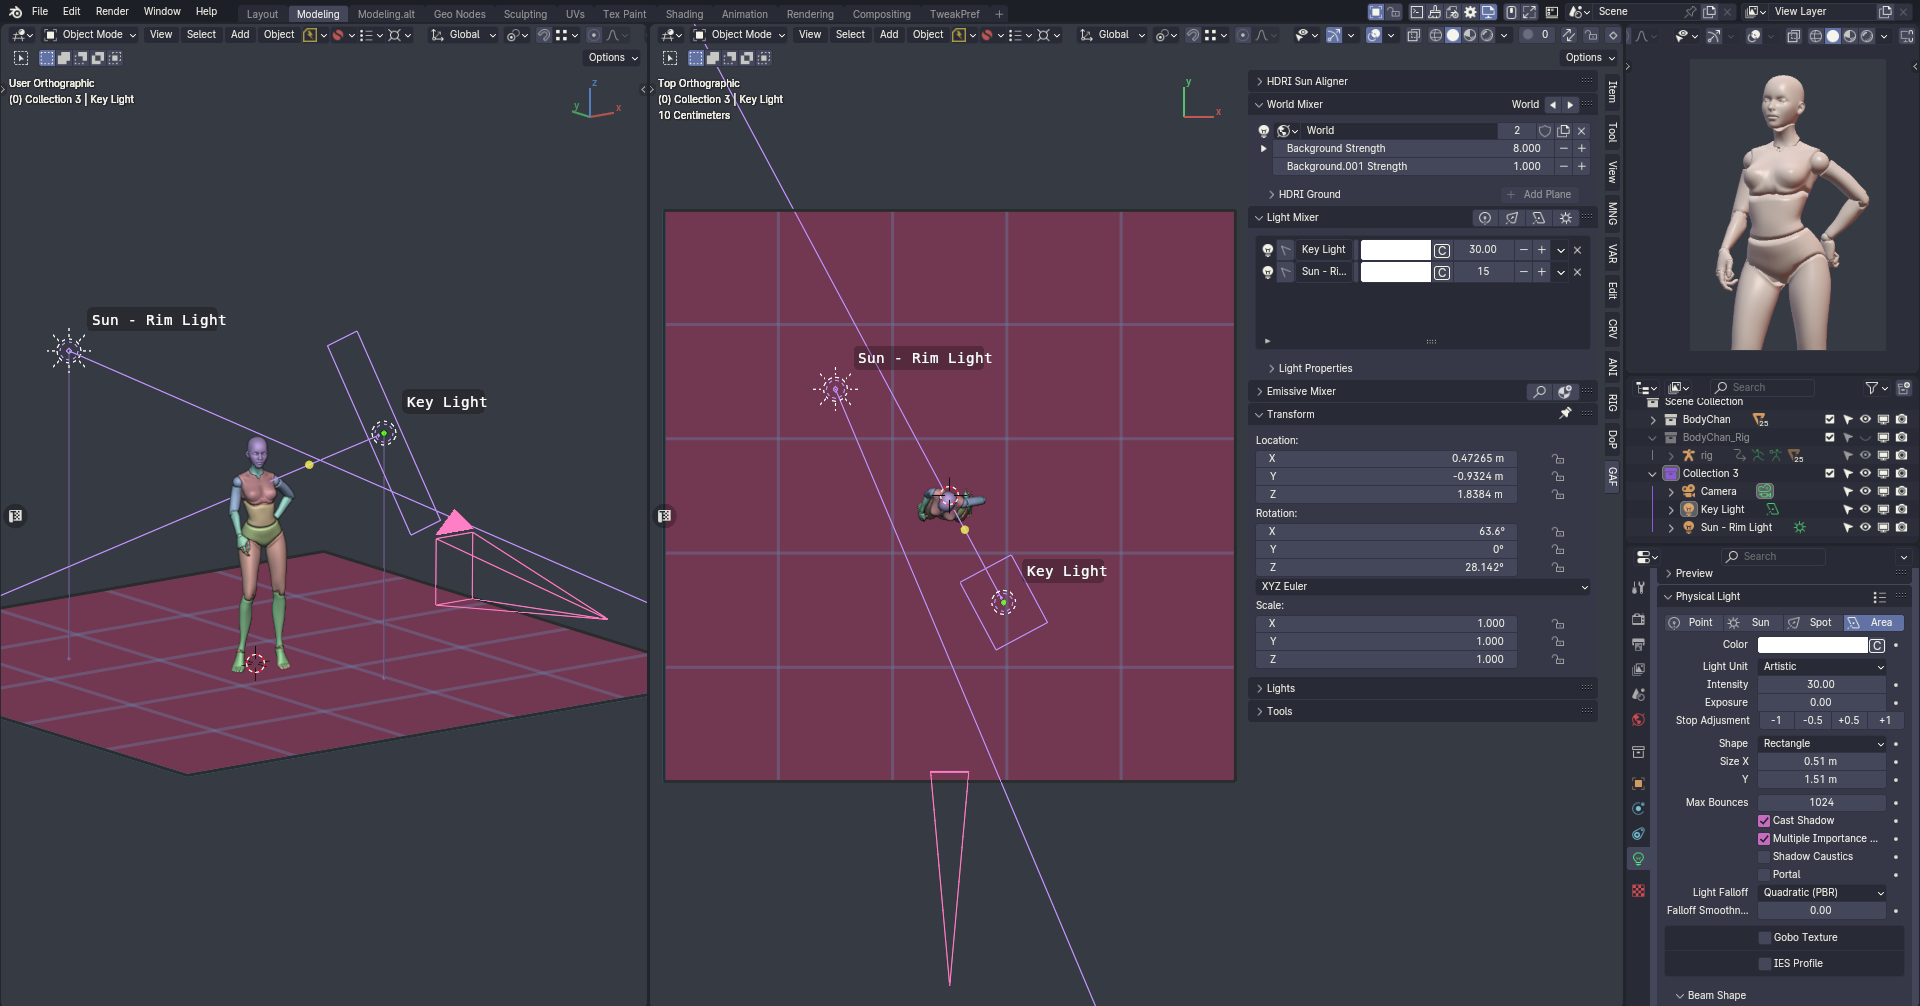
But here’s my lighting reconstruction/interpretation.
Here’s the light placements
And if you are interested in my thought process when reconstructing/interpreting these references, here it is
Thought Process
Like @joseph said, when you need to find the light source of the reference, you must look for the direction of the shadow and/or highlight, shadow is the easiest one because it doesn’t depend on your viewing angle/camera placement, but look at the highlight is not that hard either especially if you’re already used to analyzing a reference, just remember that highlight is sometimes depending on your viewing angle.
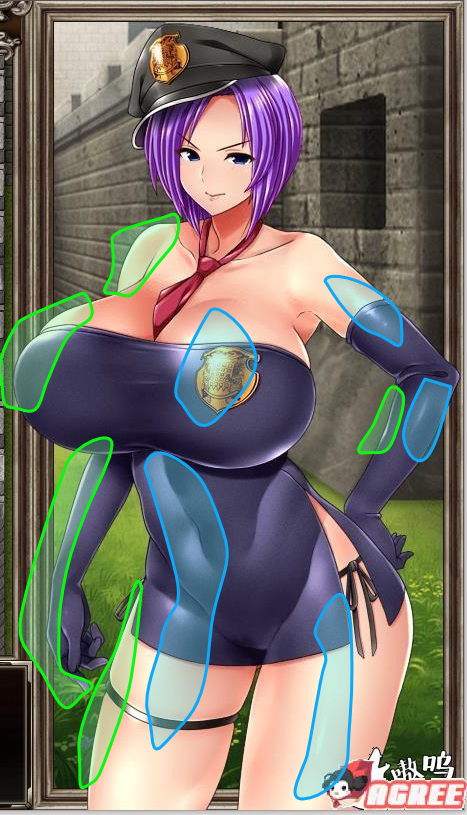
Blue Mark:
- Based on those highlights, we can predict where the light source is, in this case, it also served as the Key Light/Main Light.
- based on the hardness of the highlight, despite it inconsistencies, i guess it is a combination of slightly glossy material on top of more diffused material, so i shade my mannequin appropriately.
- to accentuate those materials, i used an area light, with moderate size, and tried to find the middle ground between sharp and soft highlights.
- based on my experience, this kind of light placement is used when you want to accentuate the body shape, so i placed it slightly farther from the reference to achieve that.
Green Mark: - This is more straightforward, a thin rim light to accentuate the character silhouette and separate it from the background, so i placed it behind and tried to find the rim thickness that i wanted.
Not Marked: - I use World Light as a Fill light just to lift the shadows, so the contrast ratio is closer to the references
I could set up another light to further achieve more closer visual to the references, but it’s enough in my opinion, i already achieved what i wanted, and a reference is just a reference, it’s not something you need to replicate 1:1.
Hope that helps!
2 Likes
Thank you very much for such detailed explanation!
1 Like