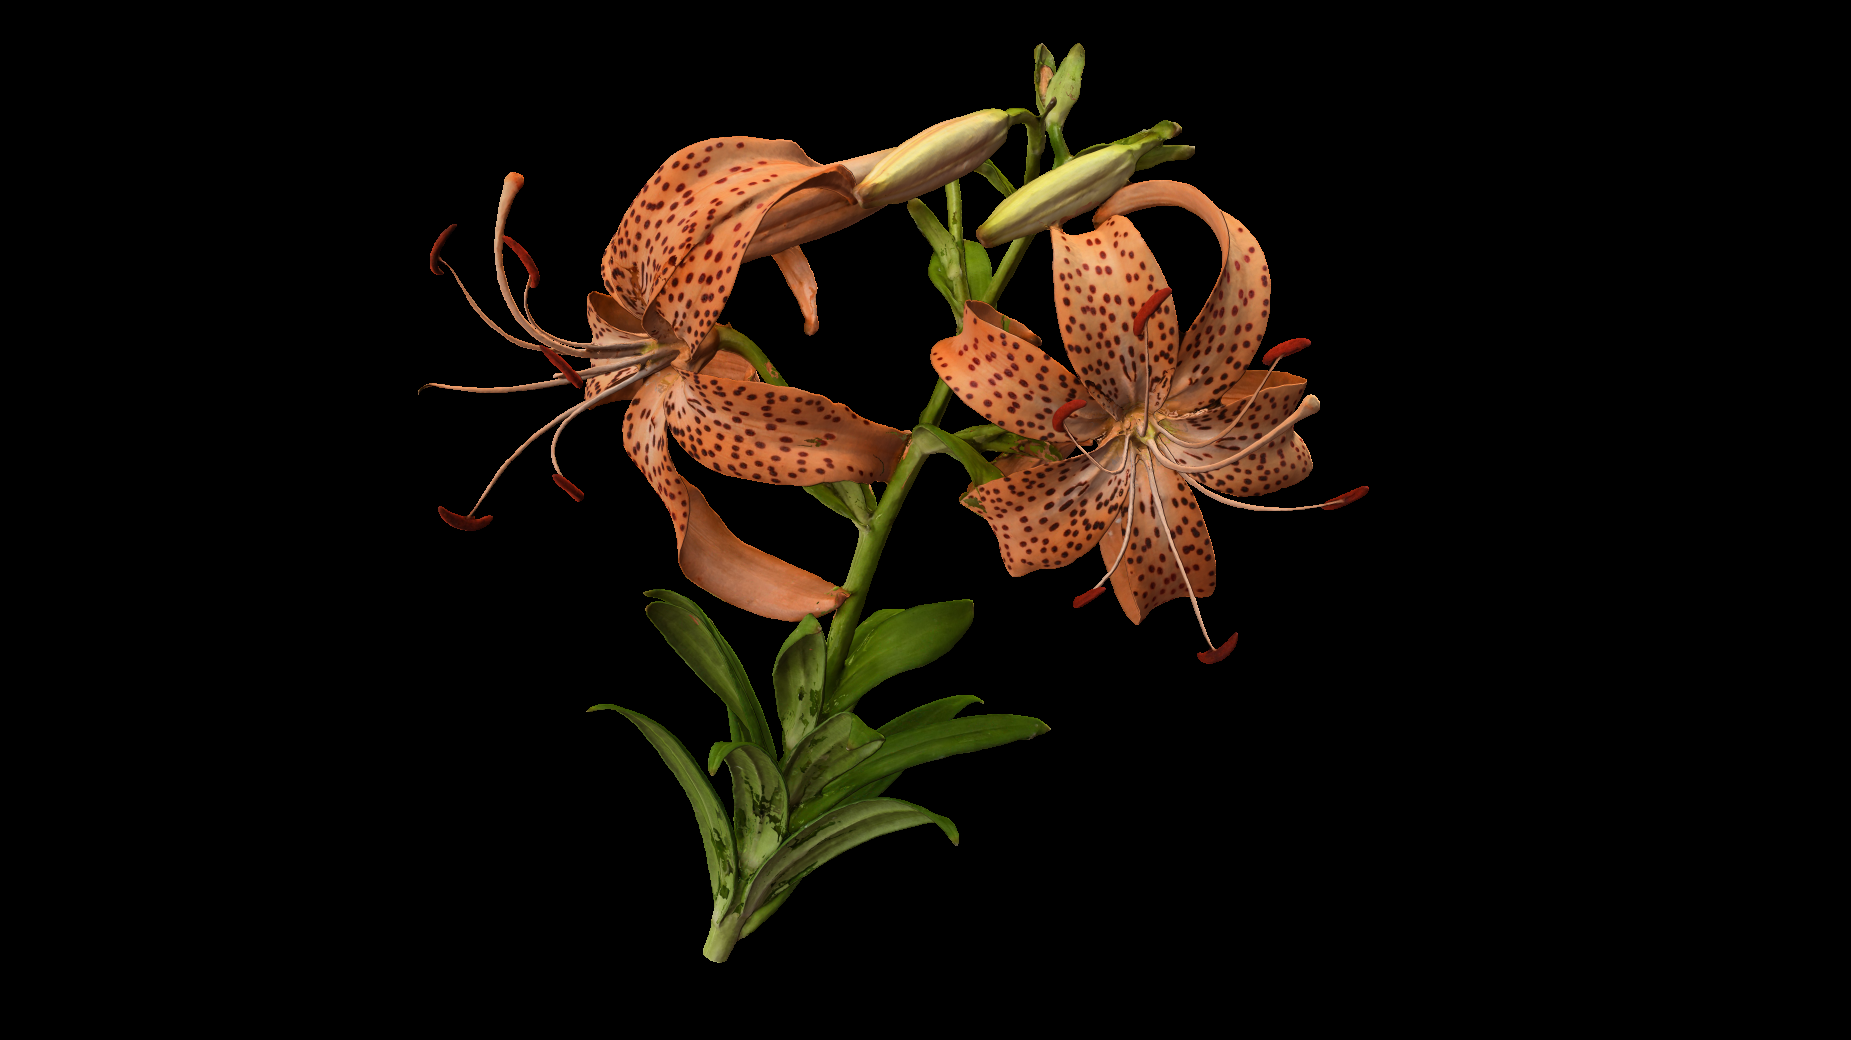
Hi, I want o create a render of a model in Blender that looks like the flat white silhouette below (not done in Blender). What is the easiest way to do this in Blender?
I would prefer not to delete the texture maps permanently.
The model is made out of multiple objects.
I thought maybe to some how turn off textures temporarily?
Then fill with a nonshaded white material?
Does that make sense or is there some easy way to do it altogether
But being total new to Blender could not figure this out.
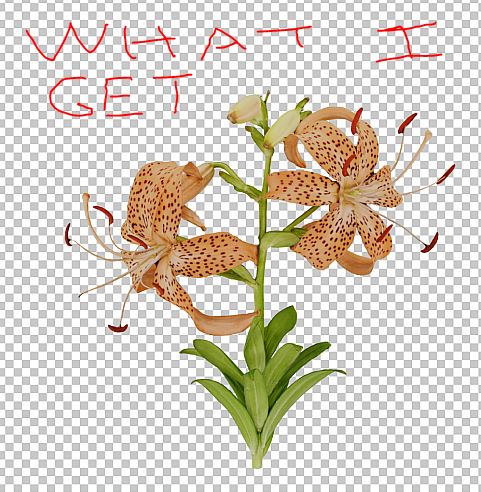
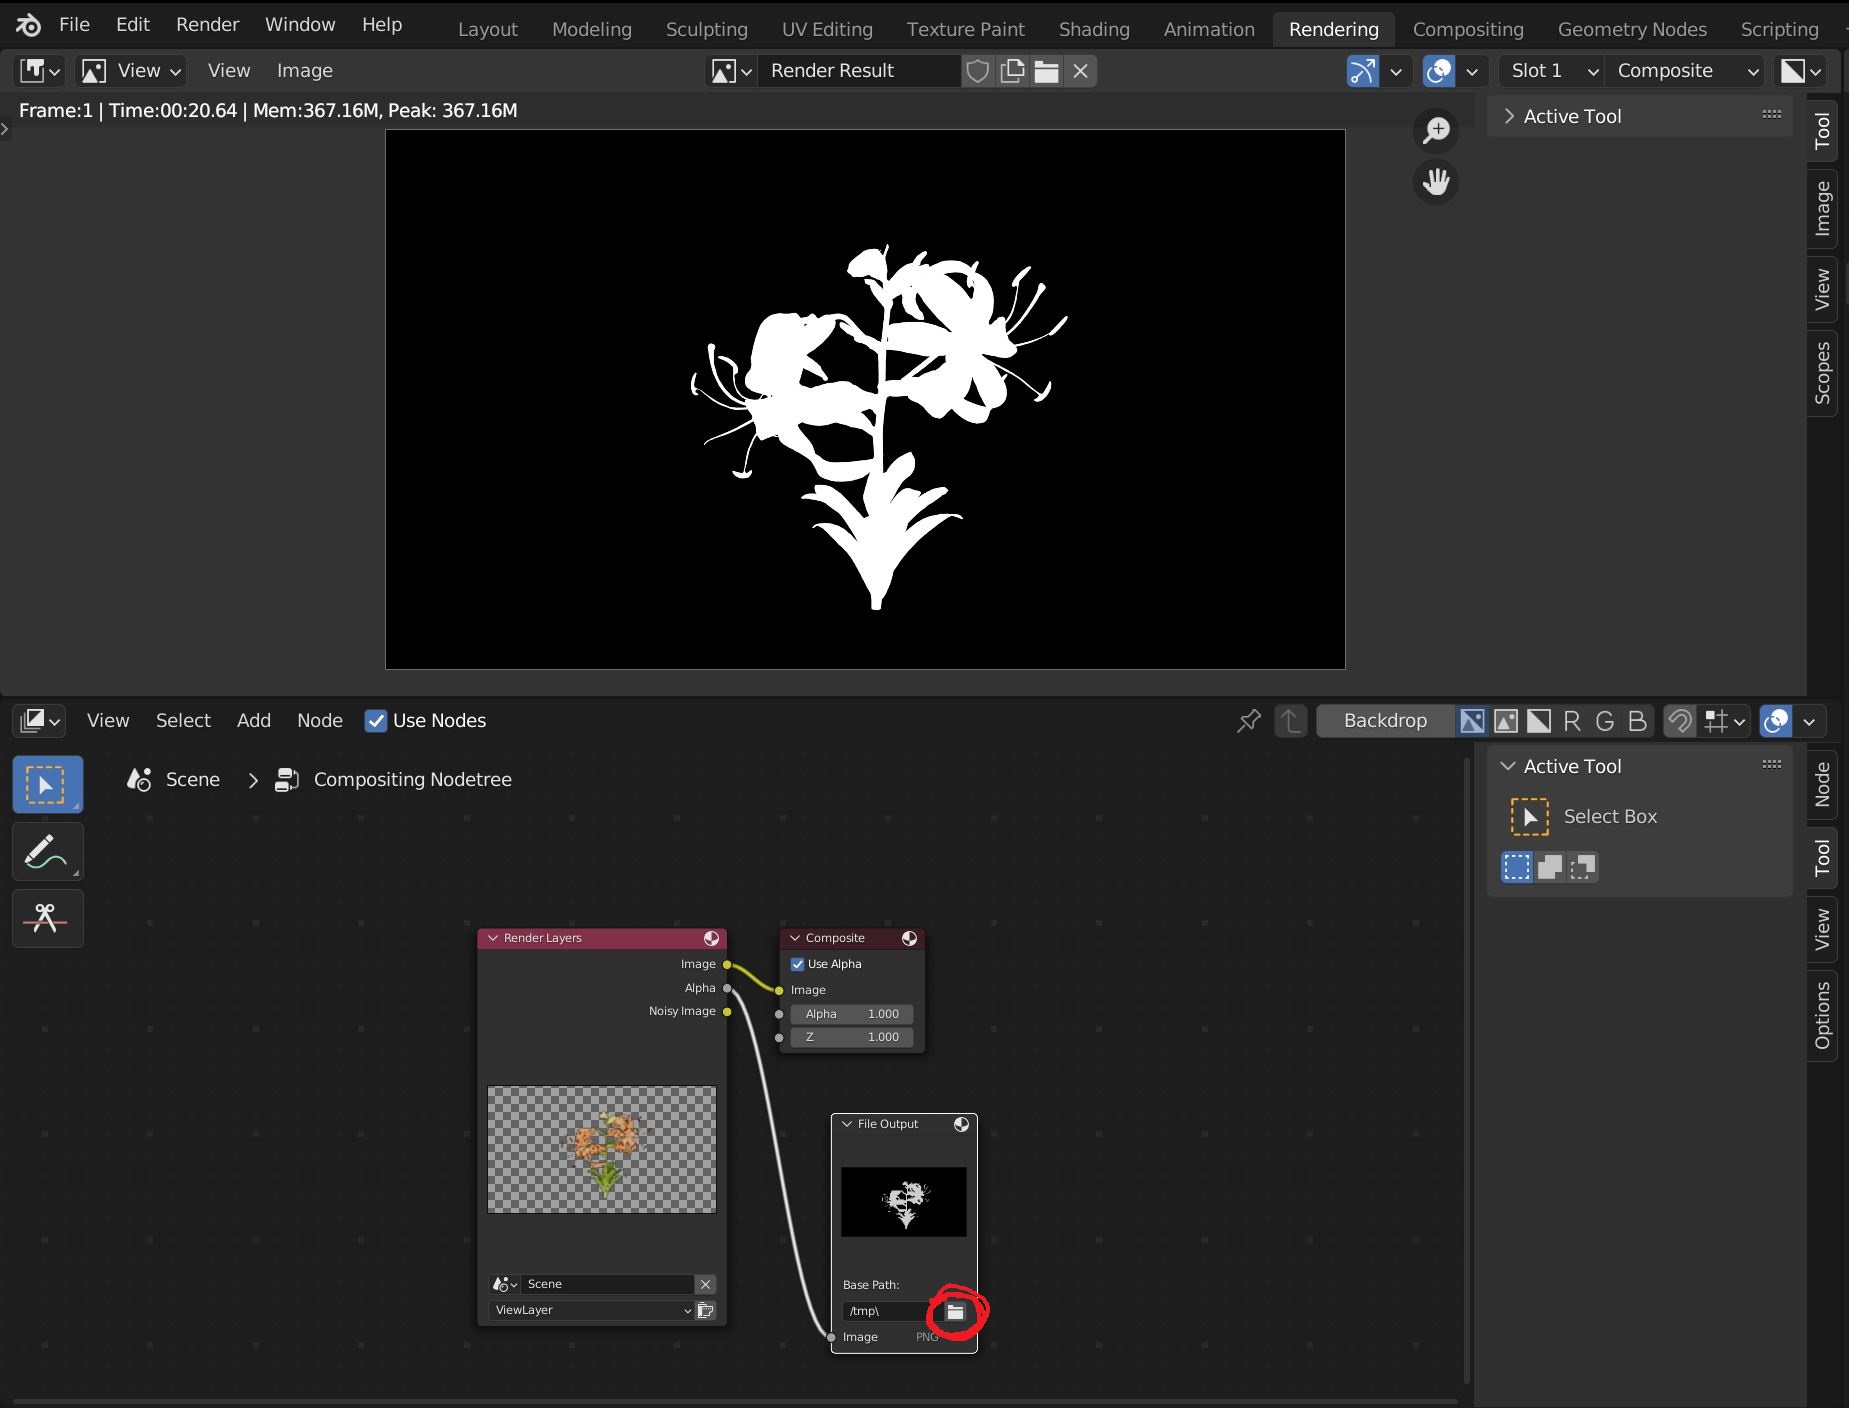
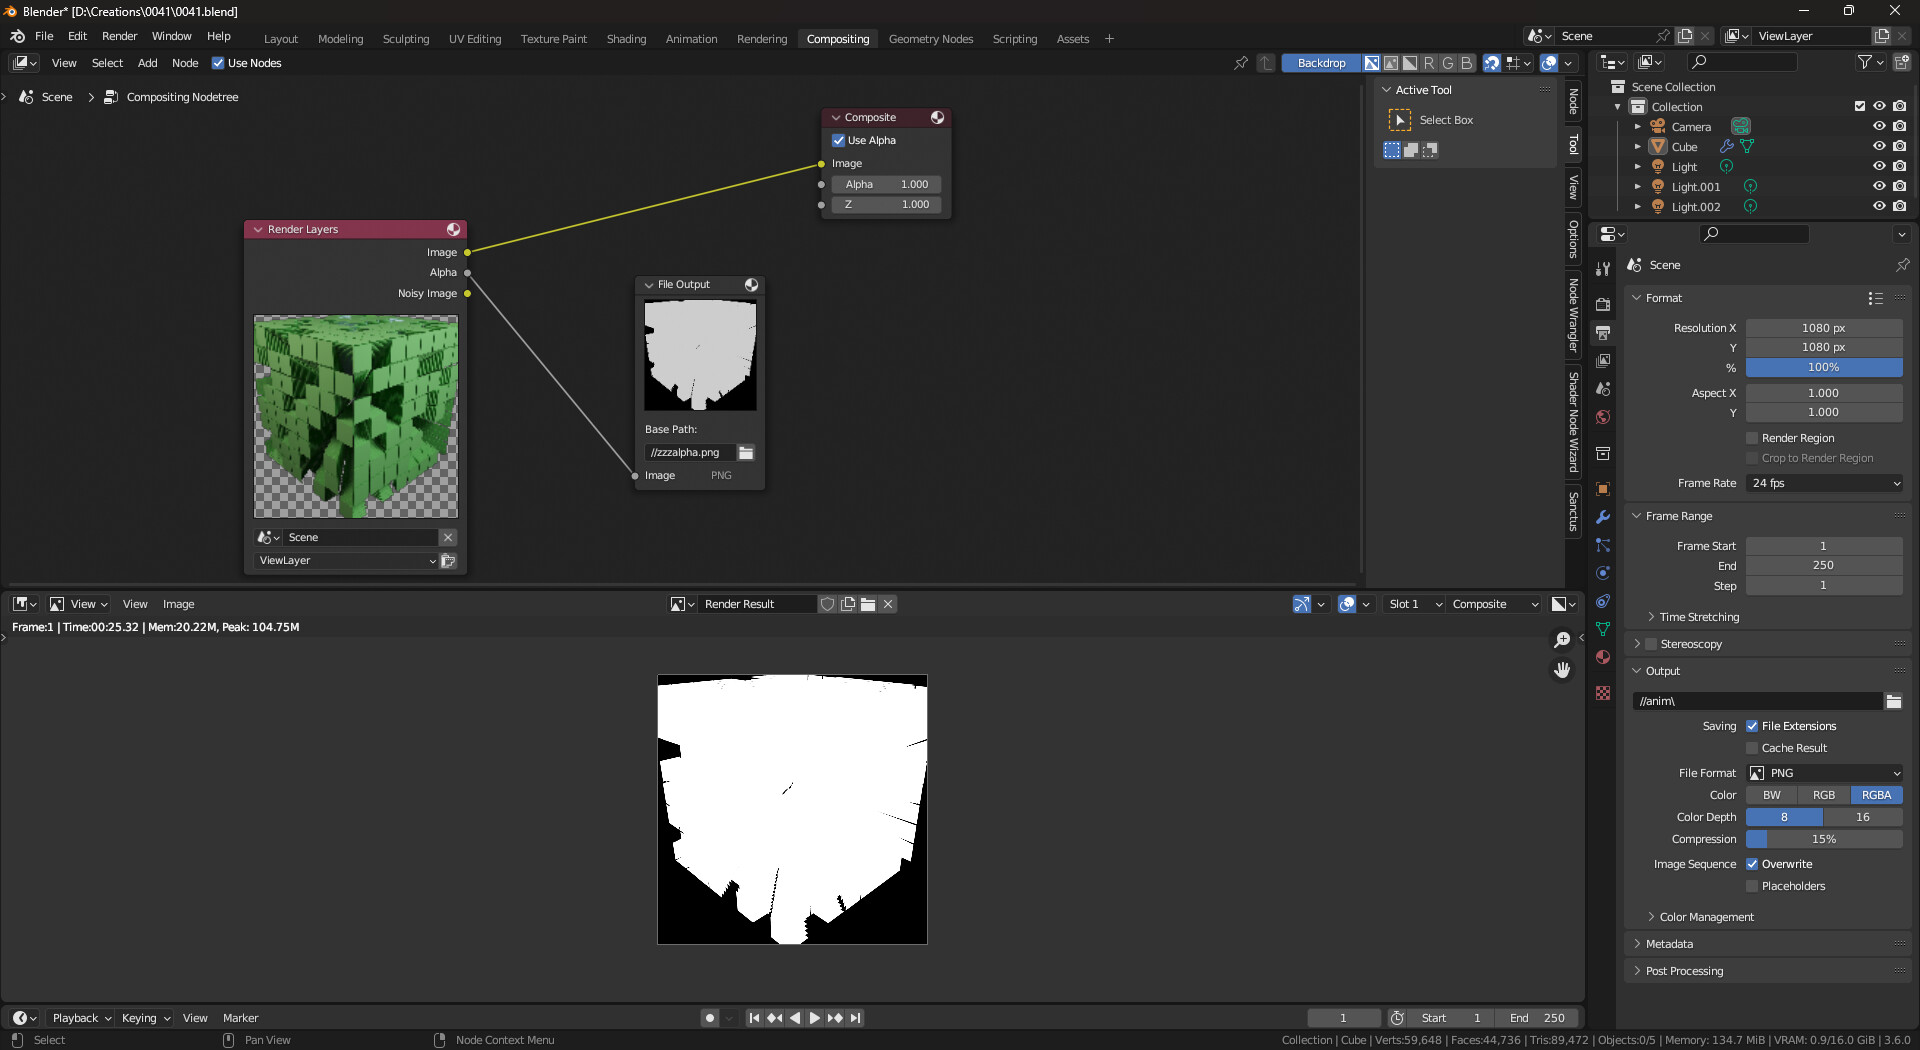
Hi Kelly, thanks for that , it worked to give me the alpha mask as one of the renders ,but I can not seem to save it . When I have it displaying as a render result and I save image I get a regular rendered image saved. I want to save both the colored render and the mask as separate images. How can i do that thanks?
the alternate solution, is take the image you got into your photo editor of choice, lock transparency, and just paint over the image in white (i use a giant pencil set to white on the off occasion i need to do that). but the linked method is probably better.
if you’ll be doing that regularly, mebbe even save that setup in your default file so it’s always ready to go.
Edit to add: after putting a name in that file output box (which it will treat as a folder name, despite me putting in a proper file name with no ending / ), i had to rerender my image, and it put the alpha png in that folder, which it autonames. it does that before you ‘save’ the render yourself, so if you don’t need the color render, no need to hit save.
I set that up, and clicked the folder icon circled in red to select a folder for the alpha to go in, then I rendered and found no alpha in that folder, then I saved image as before ans still no alpha? Any ideas how to get it to work? Thanks
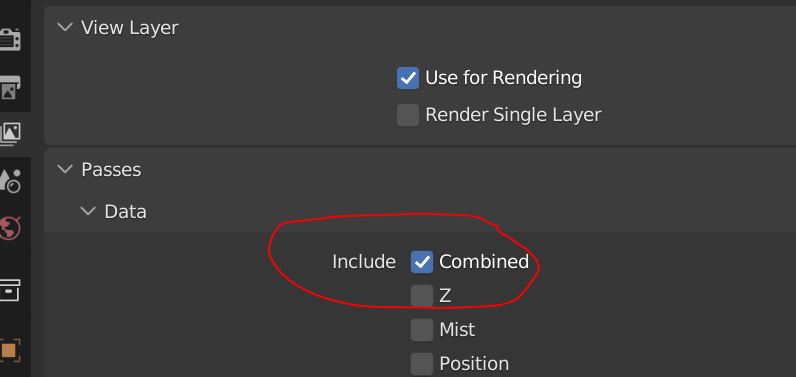
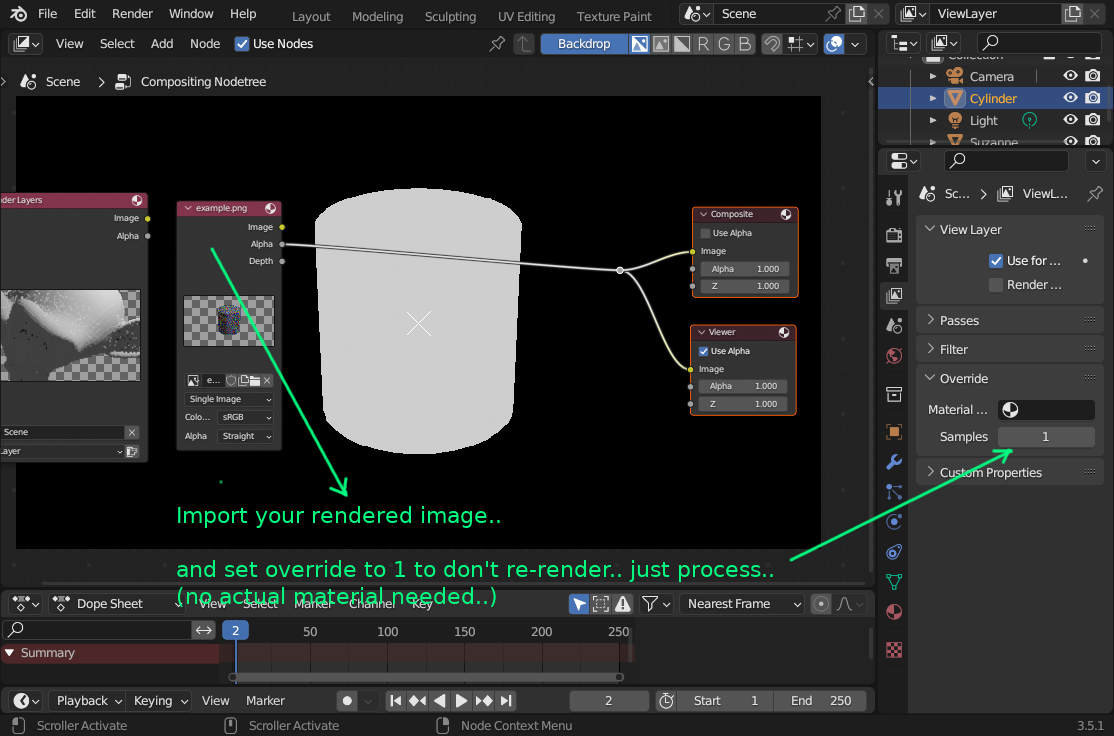
The image output node is a bit weird…it shows only the path in the node… and you have to set up the name in the N-panel … with possible mutliple outputs…
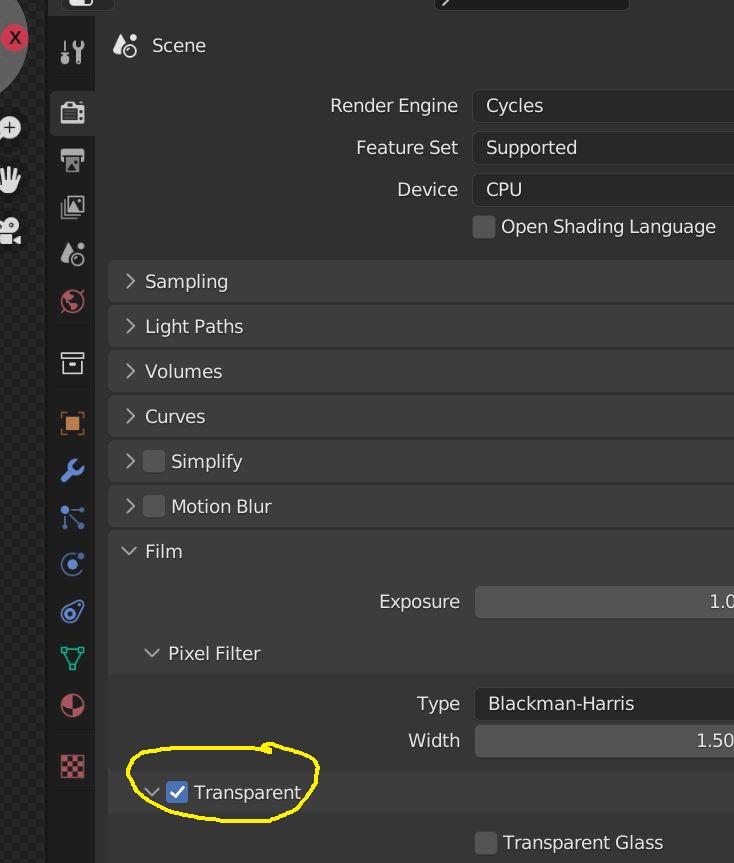
Anyway… no need to re-render… just use blender for the processing (same file same settings)… after you already rendered you image… use it as input and set override samples to 1 to not rerender it with full samples and just process you image… (and ignore the render layers)
:
Thanks for that Oki ,Being new to this I am not sure what you are saying there, “YOUhave to set up the name in the N-panel … with possible mutliple outputs…” and import my image into the node?
I was following The instructions in the link above.
I just clicked on the folder in the node to set the location where I wanted the file to go. so that is incorrect? I need to do that where you show? And then I have to put an image in there every time I do this process? It seems so complicated just to save this alpha rendered image! Why so much set up for this. I guess I’m used to other apps where its one click! I want to do many renders and I need an alpha mask for each. Is this the best solution? What about doing a flat white non shaded render?
Ohh yes for mutliple ones… thought only of one because…
a == one…
…maybe it would be easier to just extract the alpha… for example via ImageMagick… like so
convert example.png -set colorspace RGBA -channel a -separate -combine alphaMask.png
…
Or as suggested but then re-render using the image output node but not using /tmp/ but the actual working dir // and giving it a better name… like alphamask.png ?
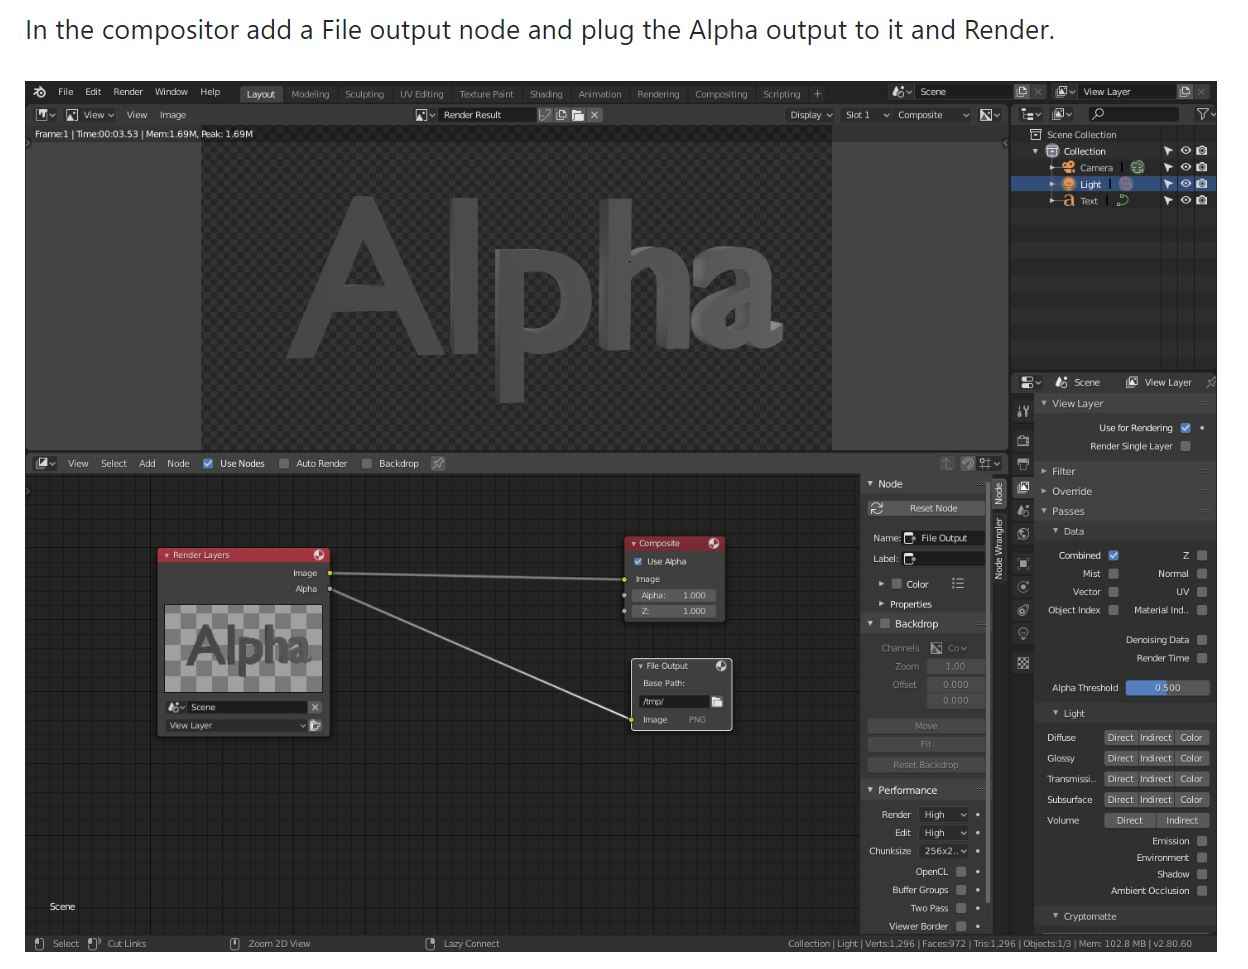
Hopefully the other posters got you the alpha the proper way. I’m still a newb myself, but I can show you what I did, which .sounds. like exactly what you did, but did get me an alpha:
so at this point it looks like we’re the same … i ended up typing a file name there as i didn’t realize it was only a path…
i then did the normal render frame (F12), and waited for that to complete…
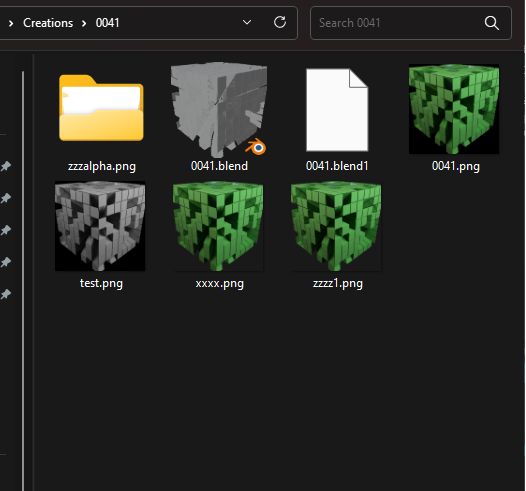
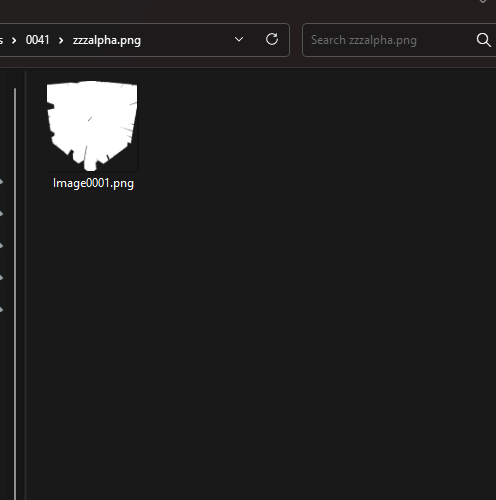
when i checked my file explorer, this is what i saw:
so that’s when i found out that that box wasn’t for file.names., just paths. i never did anything over in the side panel, but i left that showing in the screenshot just in case.
as to why this output the alpha (named Image0001.png) in my case, and didn’t on yours is a bit confusing to me. if it helps, i’m using blender 3.6, on windows11, if that’s where the difference lies.
Thanks for clarifying KD, I got this working. based on your suggestions. The only thing is,I have to rename the alpha in the folder after it is saved there (Blender always writes the alpha as image0001.png) or blender overwrites it when i do my next render . Do you know how I can fix this?
Thanks
Thanks, There is one last thing I am working on with this maybe you might know the answer to. This is probably just a beginner thing.
So I have this Blender project with just this one flower stem in it and I set up the few settings that you referred me to and I set up the node stuff in the link you provided in the link.
So I am guessing when I save this project it will save this set up and I could close it and reopen at a later time and do more renders of this particular object, and the setting will all be there.
Now if have another project that has a different object in it, that i want to do the same process with, do I have to go and manually set it up like the first one or is there some sort of preset I could use?
Or if I imported another object into the project that I already set up, do I have to also manually set up the changes I made to the imported object or is there some sort of preset function I can use?
well, the settings are all scene related, not object related, so they don’t really care what objects are in your scene, just how the render is processed. so what i would do is save the scene as something like “AlphaTemplate.blend”, then when you have your other object, import that into that .blend file (removing the original flower), and rerender. That should get you your alpha (& render if wanted) with the new object, without you having to set all those nodes up again.
you will (for now) have to make sure there’s not already an Image001.png in that folder though, until i can figure out a workaround for that.
Okay, after playing some, and googling some, there seems to be no built in way to auto-rename those alpha files, so you’d need to rename them manually to not overrite them next time you hit render.
I’ve tested it, and can confirm it works in 3.6, though I might need to make some changes to it, as I have a different idea in mind of how I’d like it to save for .my. use.