Hello Blender community!
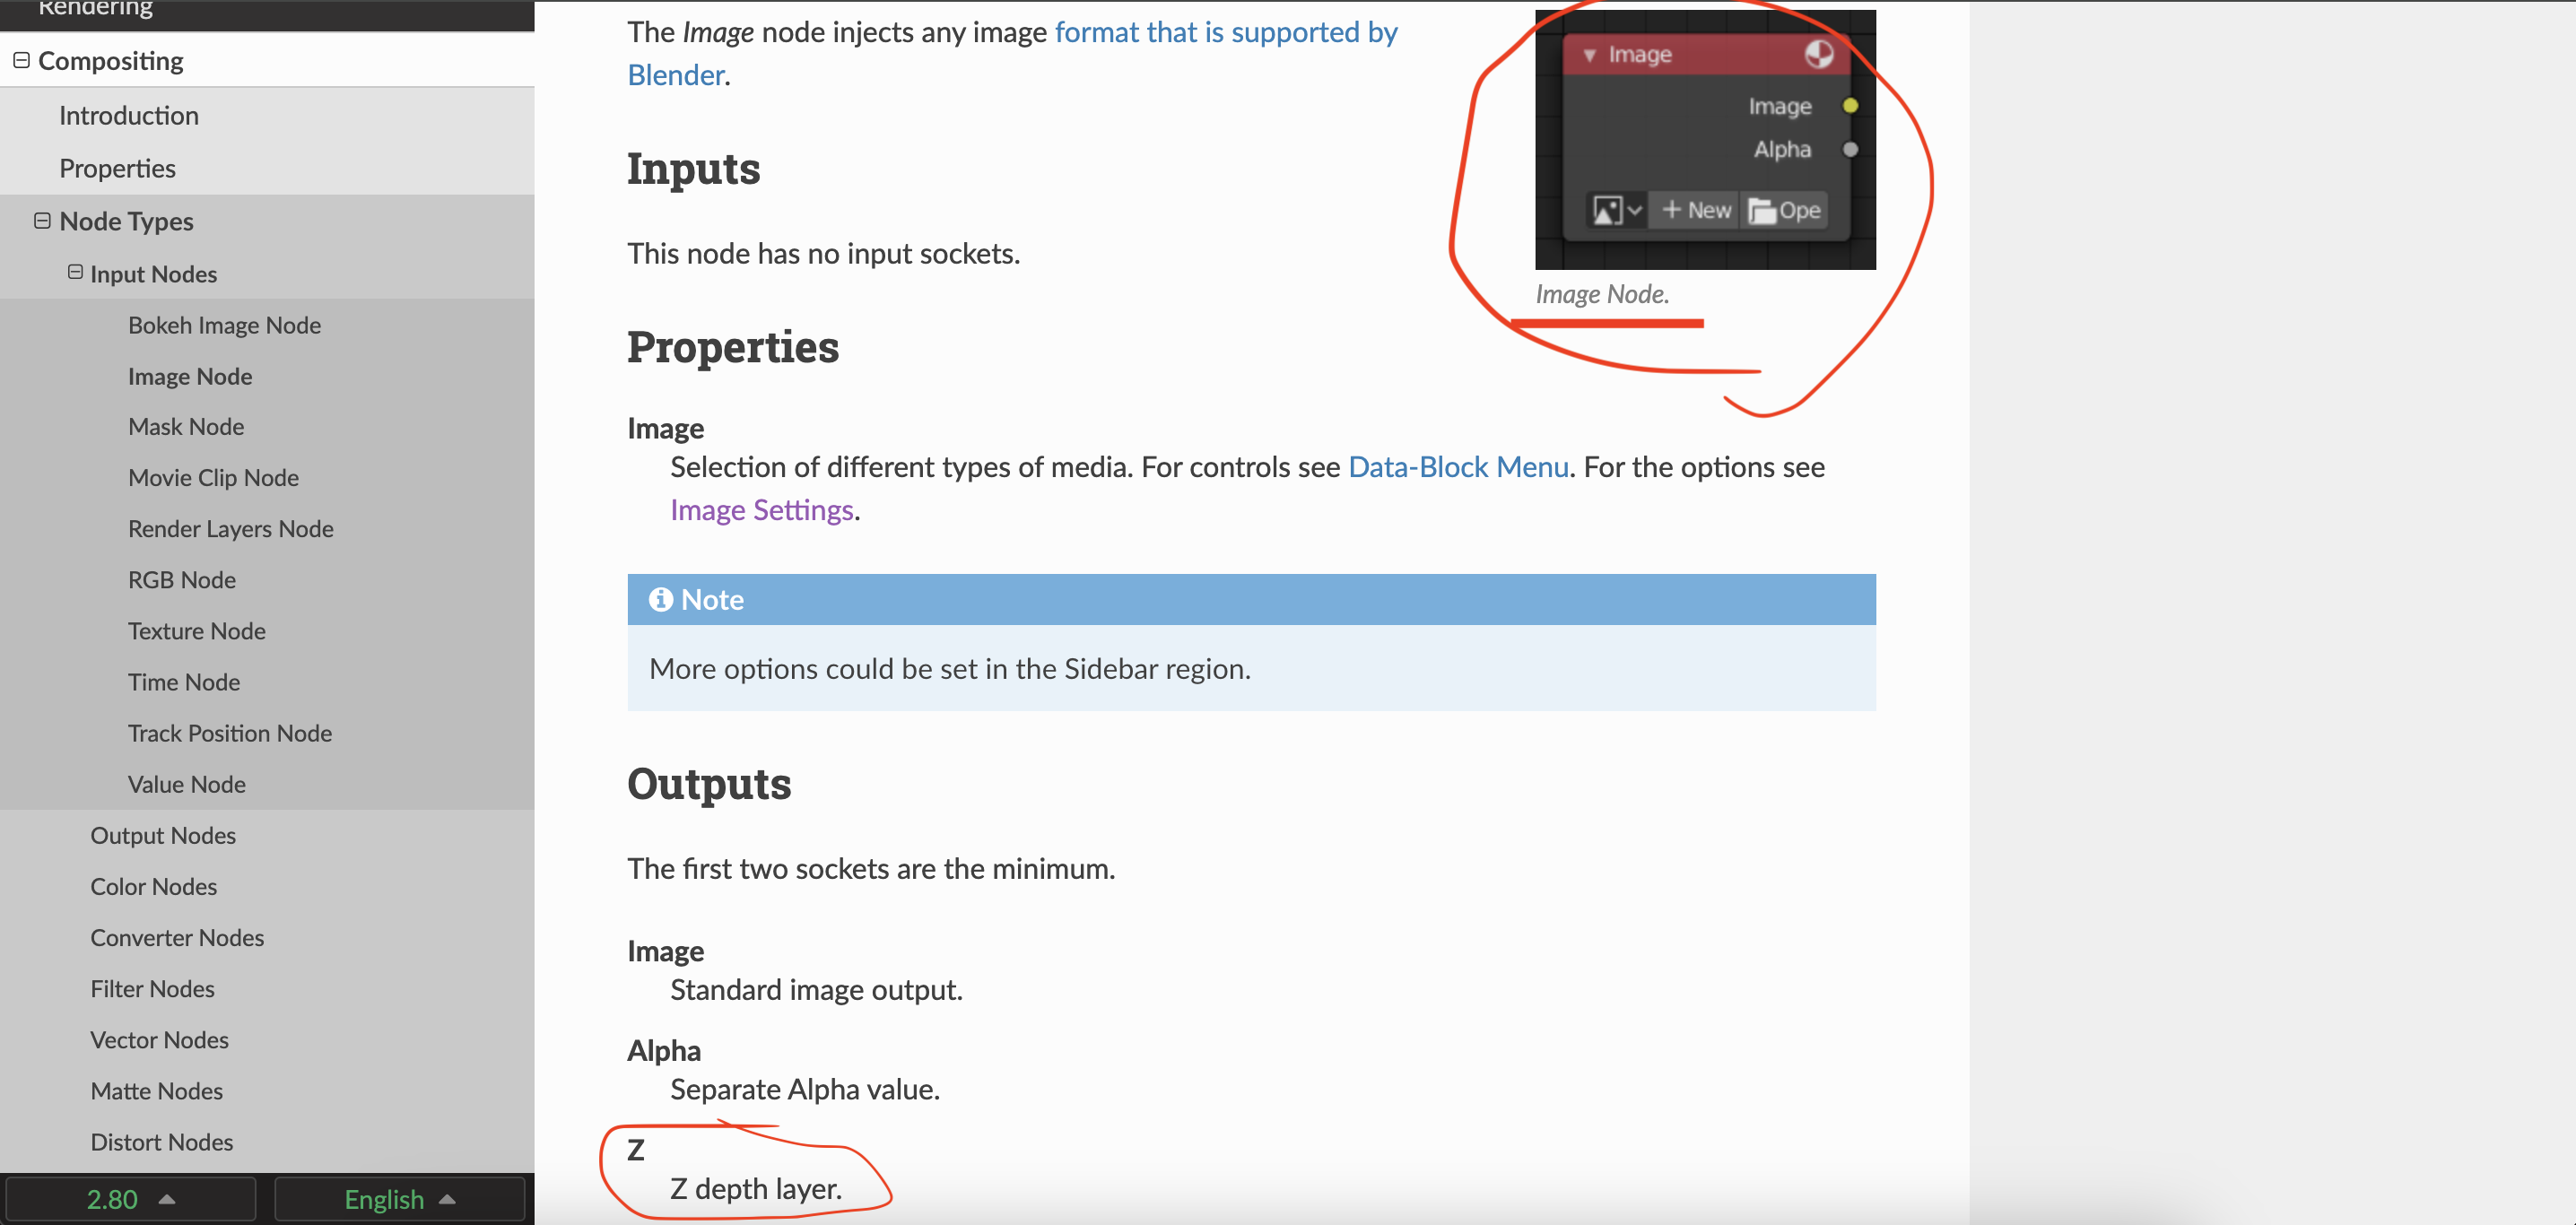
I want to use different amounts of samples for rendering my layers so I was thinking to render them one by one. But I also need to use the Z combine node to composite them, so I need to save the depth informations. There is any way to have a depth socket on an image node like they say on this Blender manual: https://docs.blender.org/manual/en/2.80/compositing/types/input/image.html
There is a better way to composite rendered images sequences using the Z combine node to avoid overlapping? Or there is a way to render different layers with different samples rates?
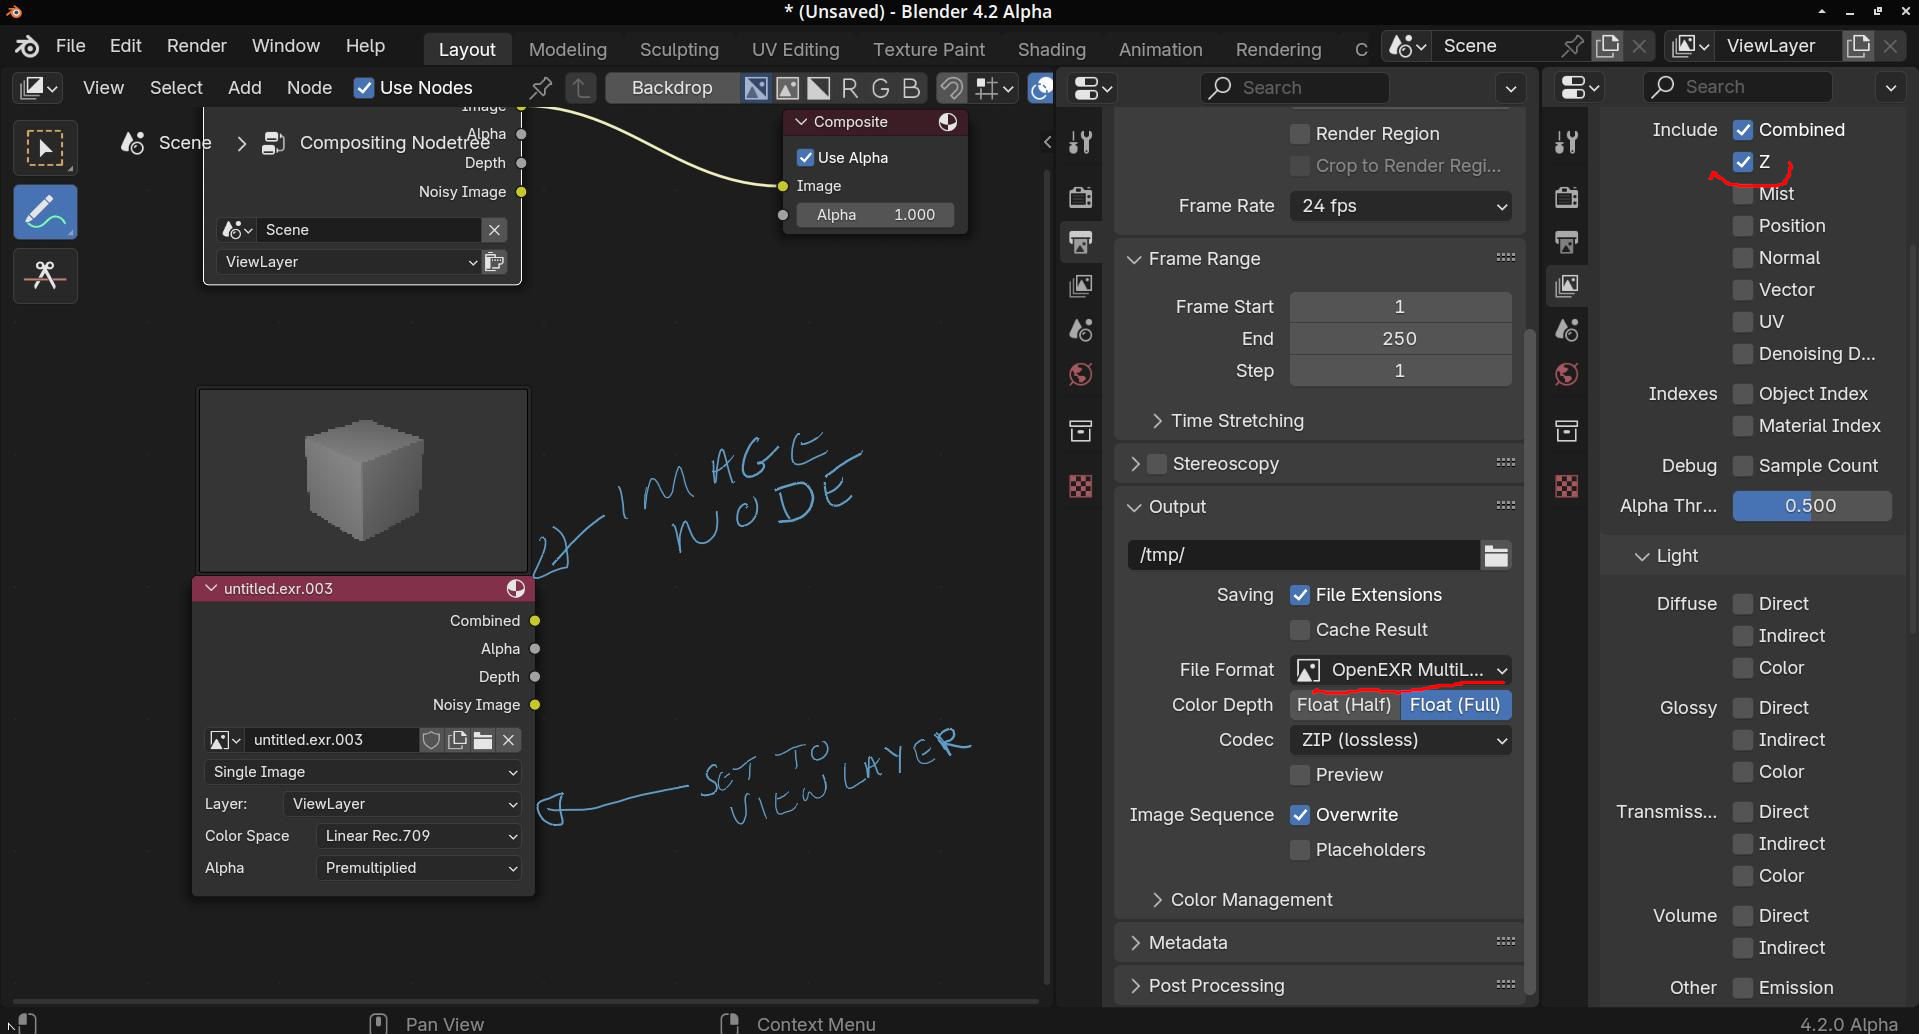
Thanks a lot for the quick response, you are very close to the solution but I still have a few problems. I’m running on Blender 4.1.1 and instead of ViewLayer I can only see the Composite option and the names of the layers in my project. In fact even if i check the “Render Single Layer” mark in the Scene tab, Blender renders every layer anyway and it seems to remove the denoise that i used before saving the images. Only if I choose Composite it keeps the denoise.
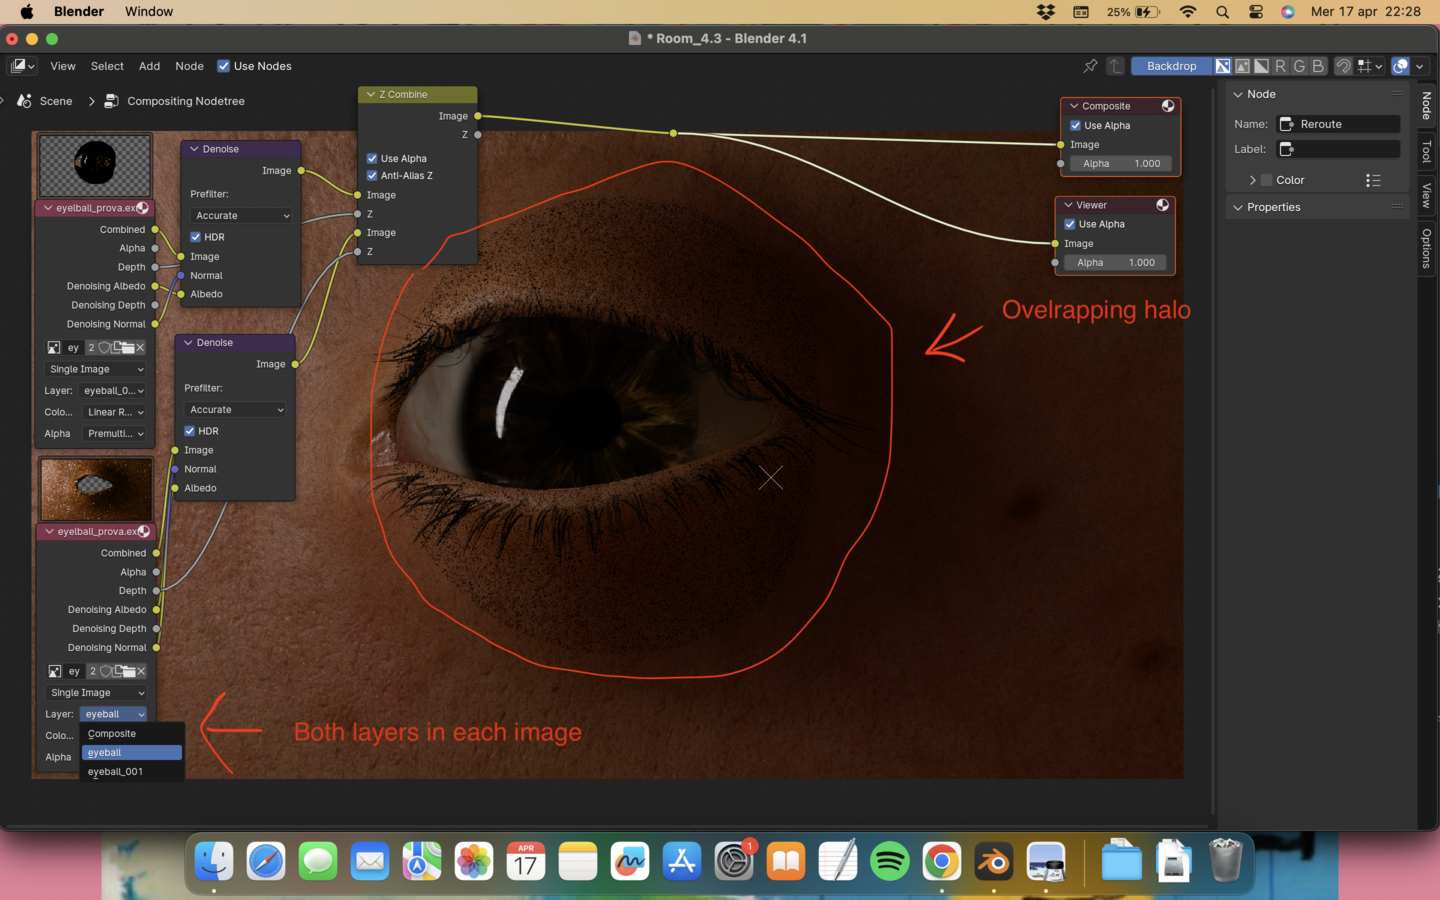
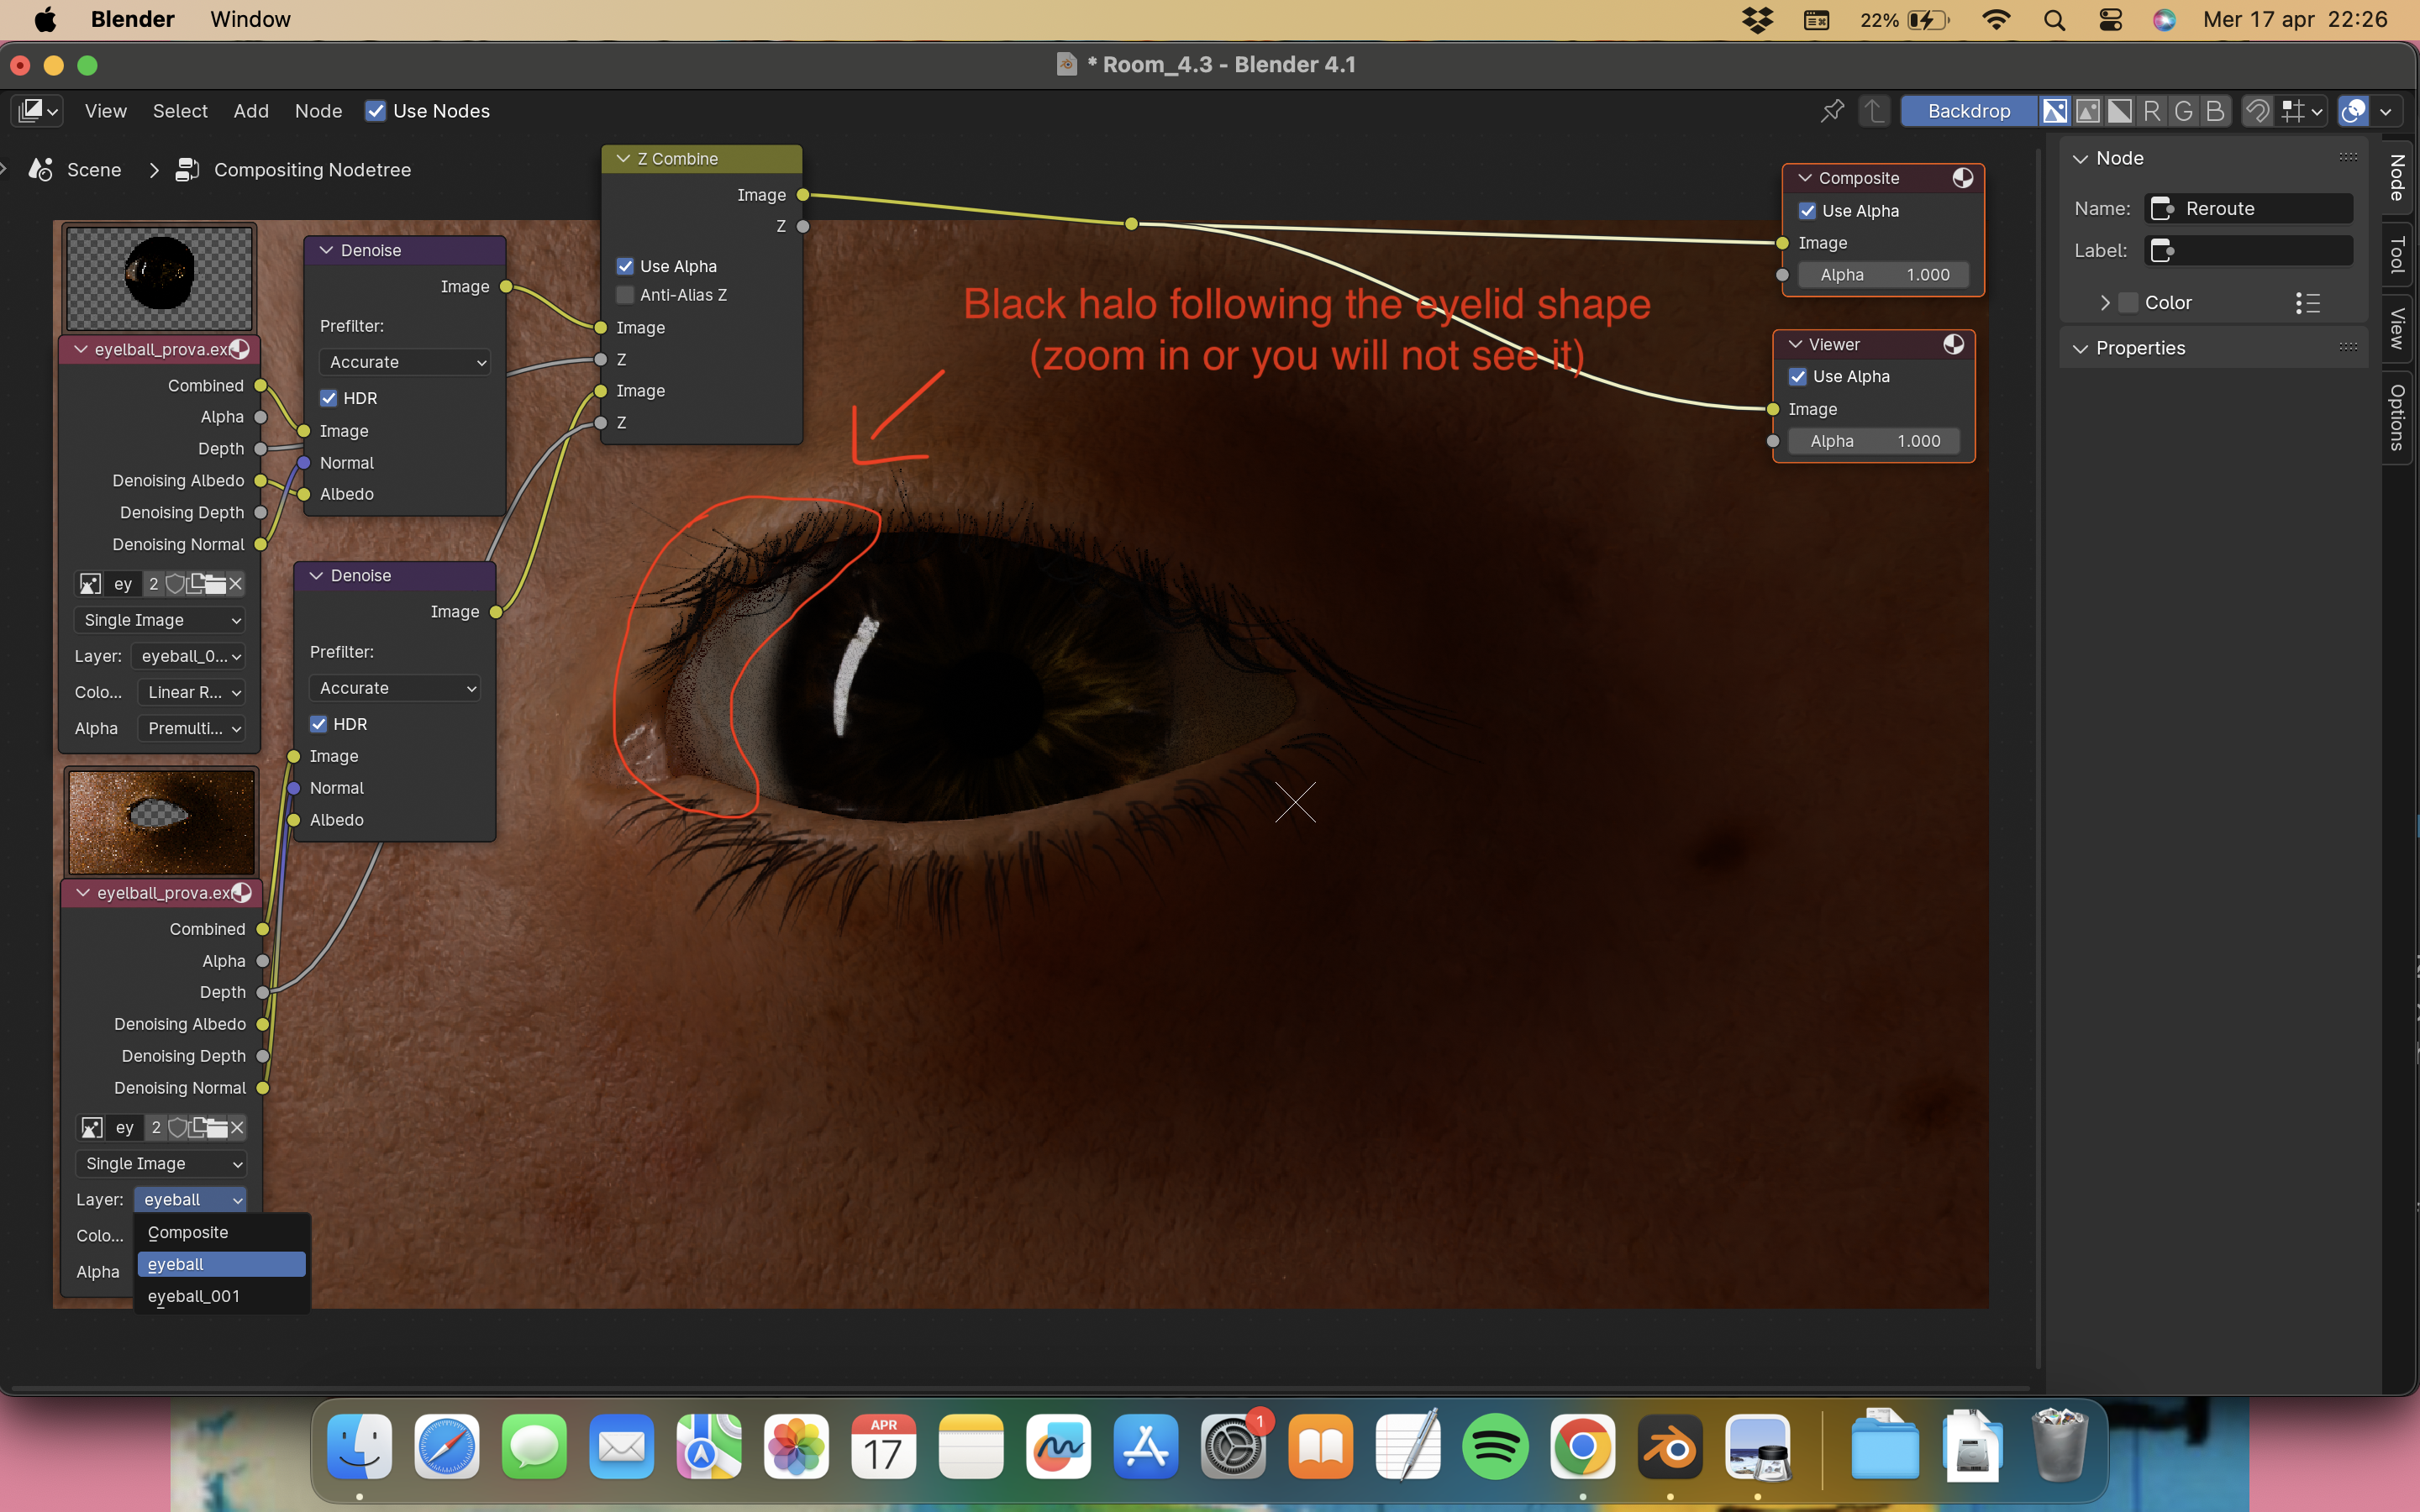
Anyway the problem is that when I put the 2 images together with Z combine it seems like they are overlapping making a strange halo. This happens only when I export them with Open EXR multi-layer, with normal Open EXR it works proper, but of course i don’t have the depth socket. If I check and un-check Use Alpha and Anti-Alias Z in the Z combine node the black halo changes following the overlapping shapes of one of the 2 layers. So how can I get rid of that? And there is any way to keep the images denoised when saving them or is better to denoise when i put them together?
I’m pretty new with compositing so i’m sorry if I have been too confusing and please let me know if I haven’t been clear. Thanks again for your help.
In my example I only had one layer (with the default name “View Layer”) but you have named the layers that is why you have to chose the layers you named.
As for the halo I am not sure why that is happening, but it looks like a Z fight. The black surrounding in the top (eye) image is creeping through the skin, the second image where it is less noticeable could be something similar. It looks like there are parts where the Z passes “overlap” in a similar Z value.
I am not sure how accurate Z passes are so maybe the surfaces are too close together in those parts and have the same Z values.
Anti Alias in the Z pass in that case could make it worse because it is blending the pixels of the Z pass a bit.
How to fix it?
I would try moving the eye back a little further away from the skin.
Ok, I understand. Unfortunately I can’t move the objects for aesthetic reasons, so i guess the only solution is to render all together the 2 layers. Thanks a lot anyway!