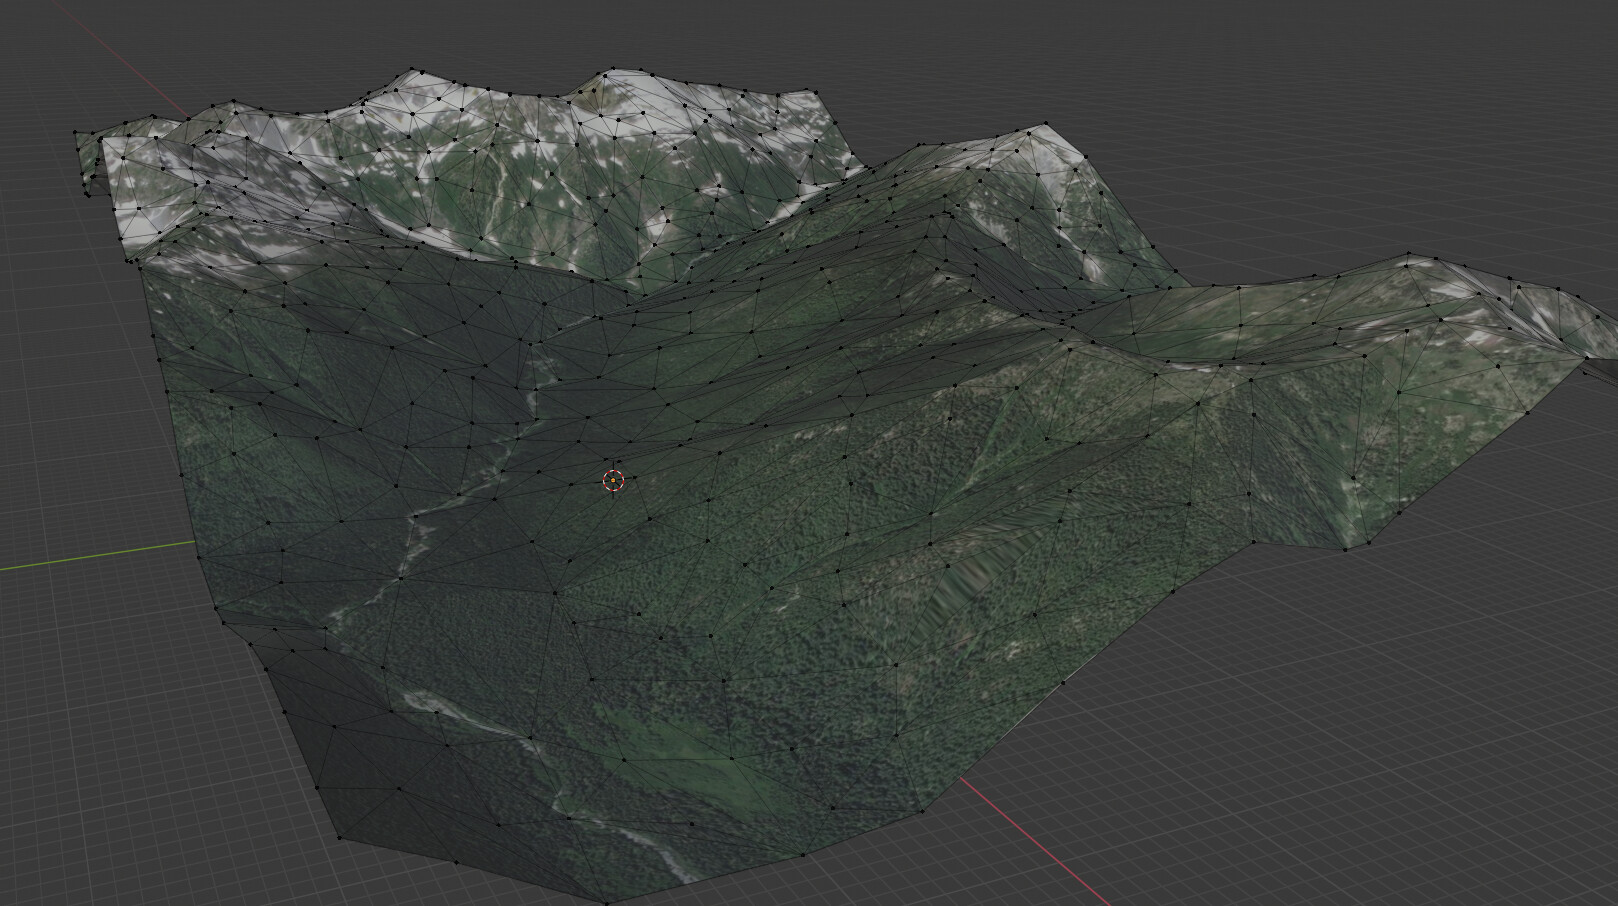
So I have a terrain I have created using the Blender GIS plugin. I would like to use this terrain to create a low poly art style terrain from it. What I would like to do is ideally take the average color of all the pixels on a single face and apply that average color as one solid color on that entire face. Here is the terrain I have:
Below is the low poly art style I am trying to achieve using the detailed satellite texture from above. Can anyone point me in the right direction about how I could do that? Thank you in advance for any help provided!
Not sure,have not tested.I would try to use the texture map as vertexcolor map.
Since you have many space between the vertecies (at least on the screenshot).Maybe it could work.
After i have seen this method for texturing lowpoly,i had a idea based of this video
This is the idea…
select your lowpoly mesh in edit mode and mark all sharp.(yes all)so we get all seperate polyfaces.And then press U and unwrap project from view (maybe top orthographic).
Now the part i am not sure if it is possible.In the UV editor ,if the uv parts fits over the texturemap (you maybe have to fit the uv mesh a bit) scale the individual parts to pixel size.so that all scaled down polys fit on one pixel.
You have to select the transform pivot point to individual origins.So that all parts has its own scaling,and not all parts at once.
Or pixelate your texture like here at min 4.00,Maybe it is possible somehow for the polyshape.
With the 3.0 Alpha and Geometry Nodes you can make your own little modifier that takes average position of each face and writes it to a Vertex Color, that you then can use as texture coordinates in you shader:
You can rebuild the node group from the screenshot or append it to your project from the attached .blend file.
To use it add a new Geometry Nodes modifier to your terrain object and choose the appended node group.
If you wanna use the UV-map as coordinates type “UVMap” in the Attribute field (writing “position” will basically give you the object coordinates).
Then add a new vertex color to your object and type the name of the vertex color in the Vertex Color field of the Geometry Nodes modifier. You can now use this vertex color as texture coordinates in your shader via the Vertex Color node.
I just checked and the 2.93 Beta works, as well. I wasn’t sure, if the nodes I used, were already included.
In general, I’ve had a good experience with the experimental builds in the last couple month. Only had one crash, that was fixed within a few days. But I’ve used them very focused on Geometry Nodes so I guess your YMMV.