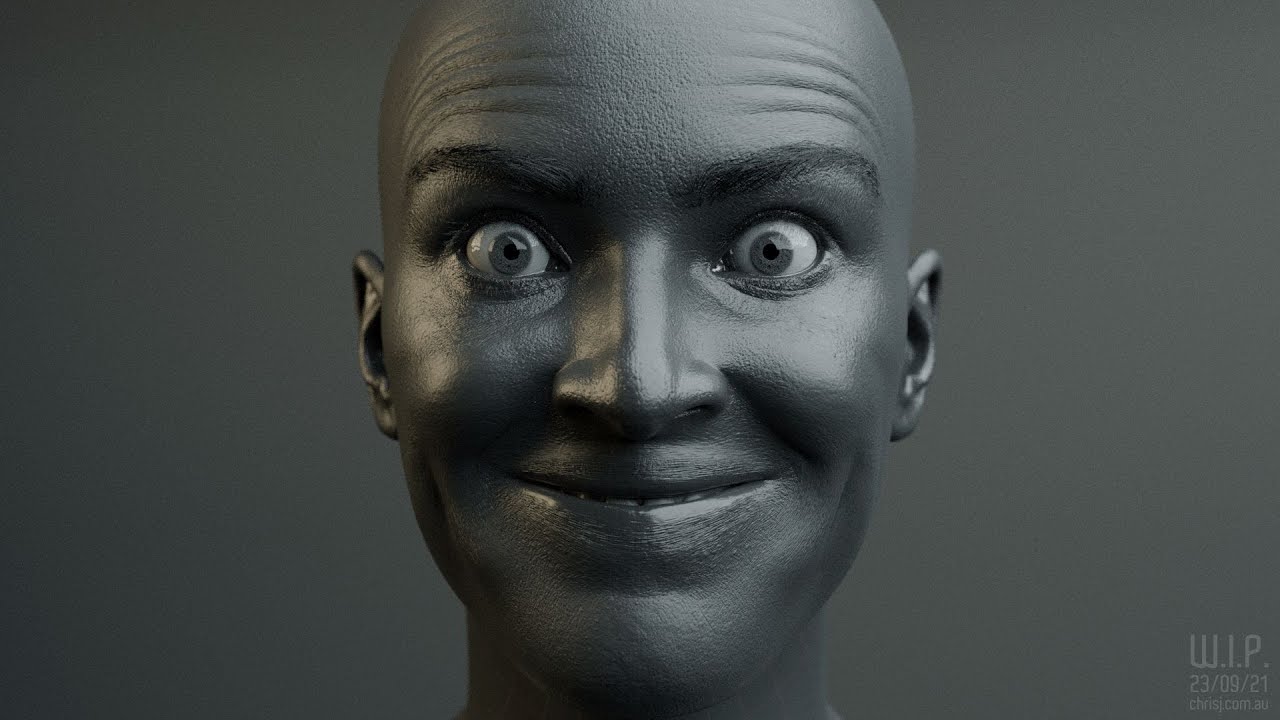
hey so you re-sculpted the all head razes based in pictures, but how you blend them together at the end?, you used shape keys perhaps? and joined them into one object and then combining all of them with a low strength in the sliders and then add a new shape from mix?
@Nanoglyph True, although getting people to read the instructions is another matter… Having separate UV files available for appending might be a better idea, but yeah some poor soul would have to make (and maintain) them in the first place. I did actually start making an alternative one a while back, with the idea that textures with similar configurations could be warped to match.
@calanir Yeah I think the banding was a separate issue. The creases followed the topology when using subsurf, hence why I presumed it was being caused by the weights. It was most obvious with multi-directional deformations (rather than e.g. a bending cylinder), so expression wrinkles are a good way to highlight the problem. There are also demo files in my other thread if they’re of any use.
@MichaelBenDavid The heads are all shape keys, mixed with Blend from Shape with “Add” unchecked. Sliders/New Shape from Mix is additive, which is not what you want.
On that note, if it were possible to blend shapes with the sliders in a non-additive way as well, that would be extraordinarily useful I think.
What kind of horsepower would one need to control this tension add-on effectively/efficiently with something like the Chris’ face/body models here? Looking to build a rig to specifically make this highly editable in a normal animation workflow along with simming muscle, loose skin and fat.
Congrats on your first post @Linkfx , welcome to the community!
I’ve been playing with only face models with expression animations (not Chris’ ones here) with my tension add-on, and it seems to work well enough for me with an GTX 1080 on a machine with an i7 cpu + 16 GB ram. Although, do note that I’m not running many other sims in parallel. This is of course budget dependent, but hopefully this gives you some context.
u may not know me but can u please make a model for my game
probably not
i dont think he does freelance work
so yeah
Well, I wouldn’t say that necessarily… I sometimes do if the funds are running low (even for people I don’t know), but it happens that they’re not at the moment (un)fortunately.
oh ok
i stand corrected
huh
Hey Chris, is there any update on the project? I keep revisiting the site specifically for this project 
I’m currently in the process of doing - and redoing - the bumps and wrinkle maps properly, until I finally get them right. Getting close now I think. 
hey, any updates ?
Not as such, still working wrinkles and related improvements.
alright, cool !
Approximately how many hours per day and days per week do you dedicate to this project?
Usually around 30-60 hours per week scattered across 6 days. Some weeks I hardly get anything done on it at all. It varies a lot.
Oh…, same thing happen to me. Sometimes i get a lot done and sometimes hardly anything. I though that i was the only one. 
Nope. You’re not the only one. 
The two wrinkle maps have been redone, with “stretched” versions of the high detail static bump/displacement map incorporated into them. The masked portion of the wrinkle map now dissolves into the static map instead of adding on top, to create the impression of stretching pores/microstructure.
I leveraged this for the sculpted soft tissue detail as well by baking the sculpt and adding it to the static map instead of using Multires directly. Not only does this save memory, it allows the lips in particular to change out of their sculpted shape when stretching.
Now all I need is a way to have a third map activate only when two controls are moved together, so I can add dedicated “worry” wrinkles along with some other missing wrinkles/distortions.
thank you for sharing this. The model looks AAA+ perfect.
Are you going to post any of the shader setups regarding the blending maps?
This is leaps and bounds ahead of everything I’ve ever seen. The fact that there are missing wrinkles surprises me. Also, your workflow in creating this perfect face is so unique it almost feels proprietary.
