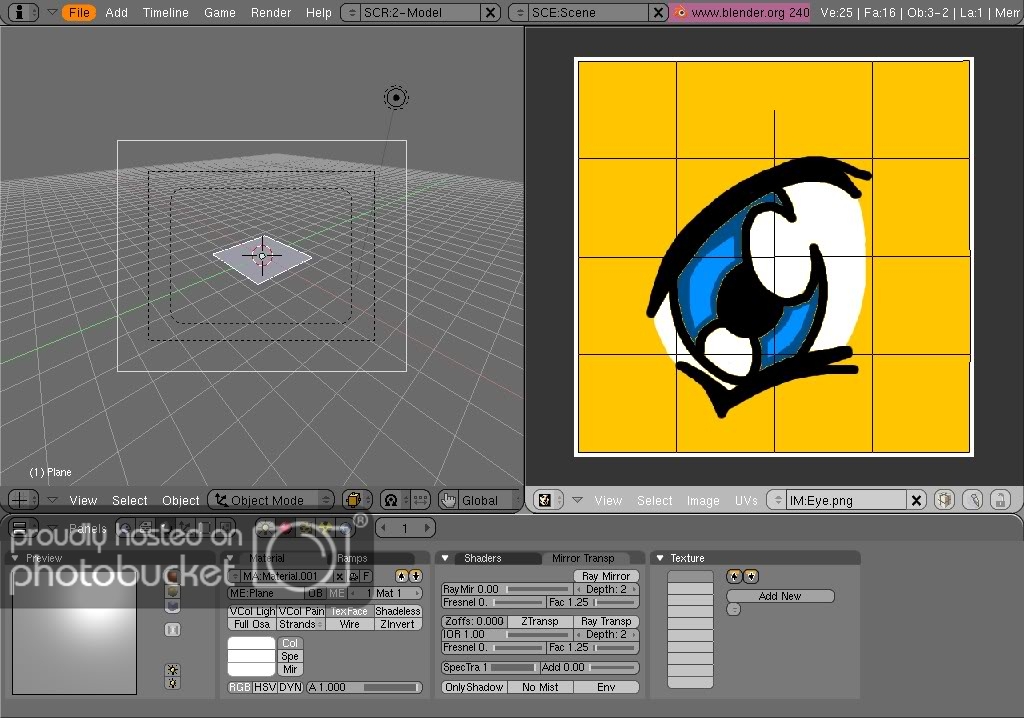
Yeah, that happened when I was trying to texture the eye of my Meowth head. The eye got a grid effect going, turned out that the top layer has 125% opacity. LOL, it was showing through when I png’d it.
im not sure about gimp as i use macromedia fireworks, but it should just be a case of selecting the layer that the black lines are on and hiding them, or just deleting them once the eye shape has been drawn.
Oh yes, I see, when I open the UV map in Gimp, I have a background layer. I’ll just add an Alpha map to that, after I’ve created my texture, and turn the alpha down to 0%.
Then I’ll save the texture I just painted, this way, the black lines will be invisible once I use the image in Blender!
Heuuu…
Try this way
You open your UV layout in the gimp ( the bigger, the better, at least 1024x1024)
This will be the background
Make a copy of the layer, change the layer Mode to Multiply ( this way the UV lines
will be always visible when you work) and make sure that this layer is always
the first in the stack
The background can now be removed/erased or hide ( the eye icon)
Now add a transparent layer ( or even a white one) and work in it
When your work is done, save this state as a Gimp file ( XCF extension)
When done, remove/hide the UV layout and other layers you don’t need and
flat the image
Now save in JPG or PNG format to use in Blender
Bye