I need a way for the material to read the scale of the object to be able to adjust values on the fly.
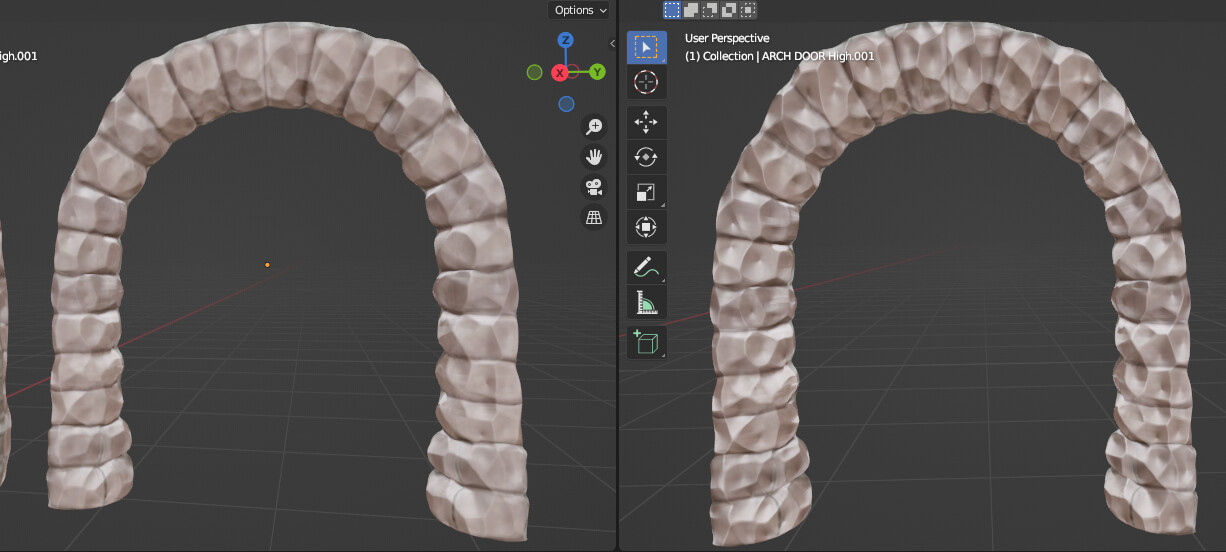
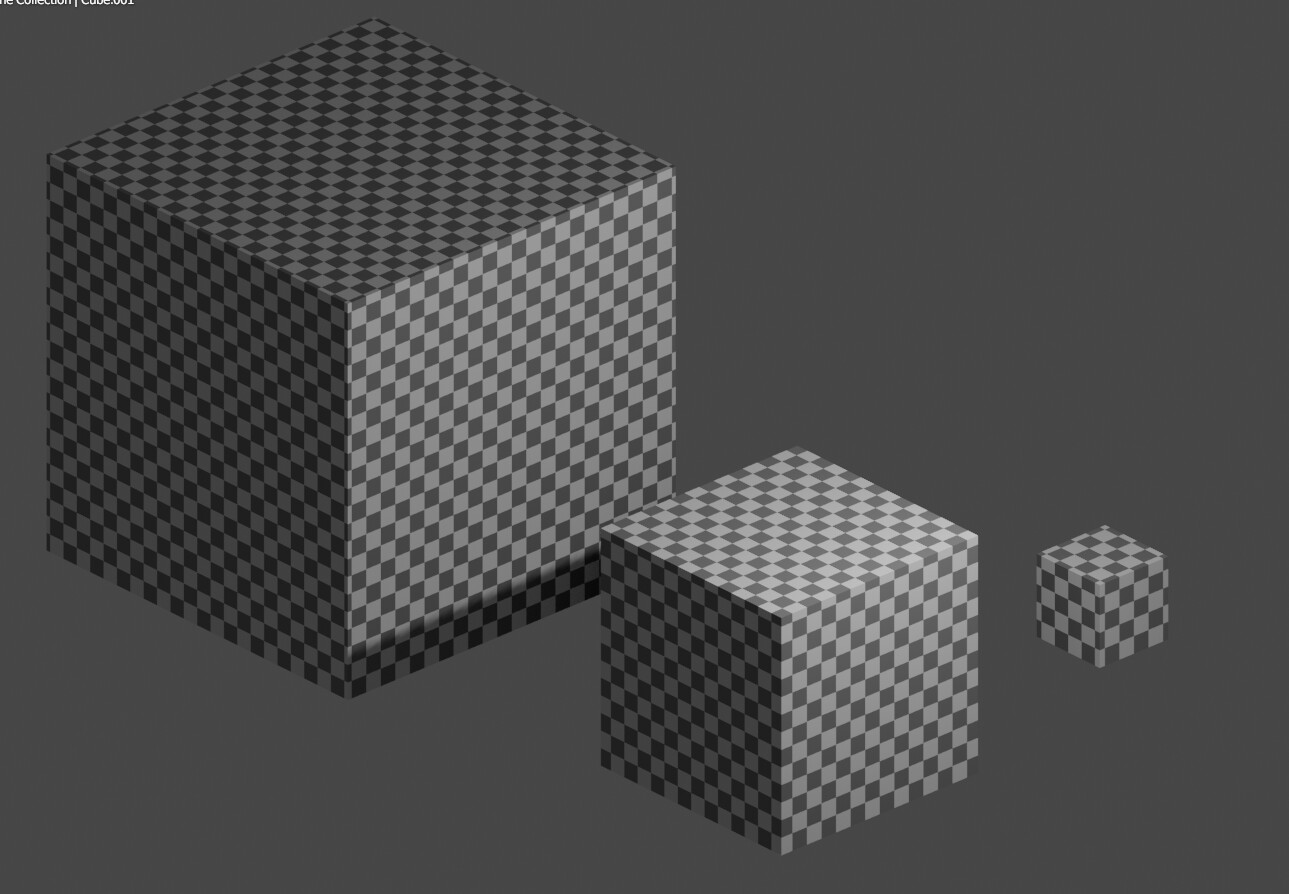
On the left is an object at 100% that will be used for doorways.
On the right is supposed to be an instance of the original object that is 40% of the original size and will be used for windows.
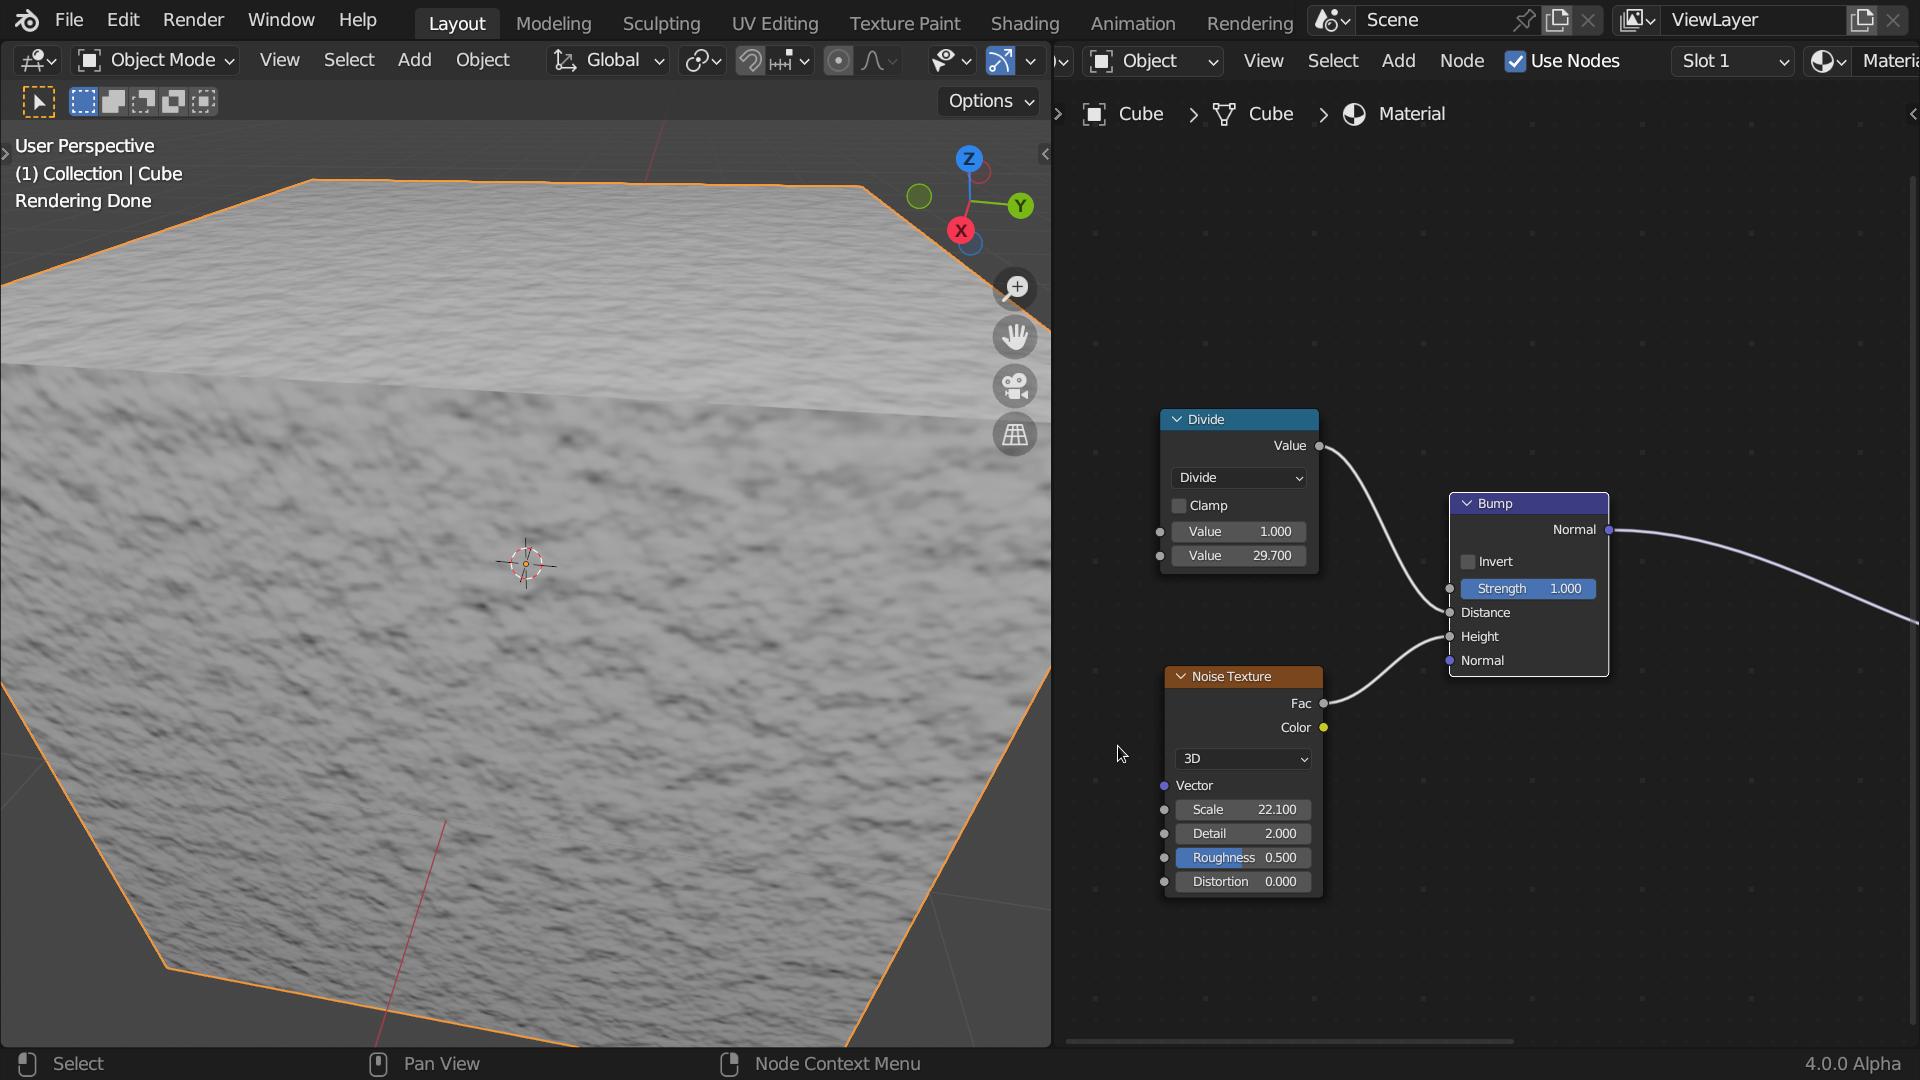
In this screenshot they look identical because the smaller object is using a different material that has bump strength set to 40% of the original value, matching the 40% object size.
I tried that.
Used Generated, and UV. Tweaked each via the mapping node to look close enough to the original version that used Object Texture Coordinates. When I scaled the object the Bump Strength looked stronger the smaller the object got. Don’t want that.
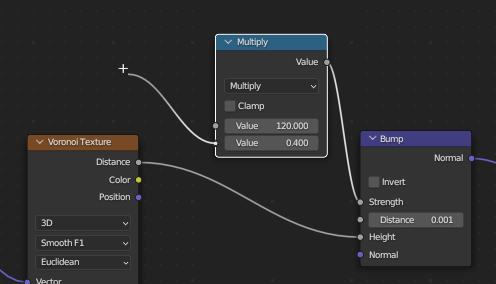
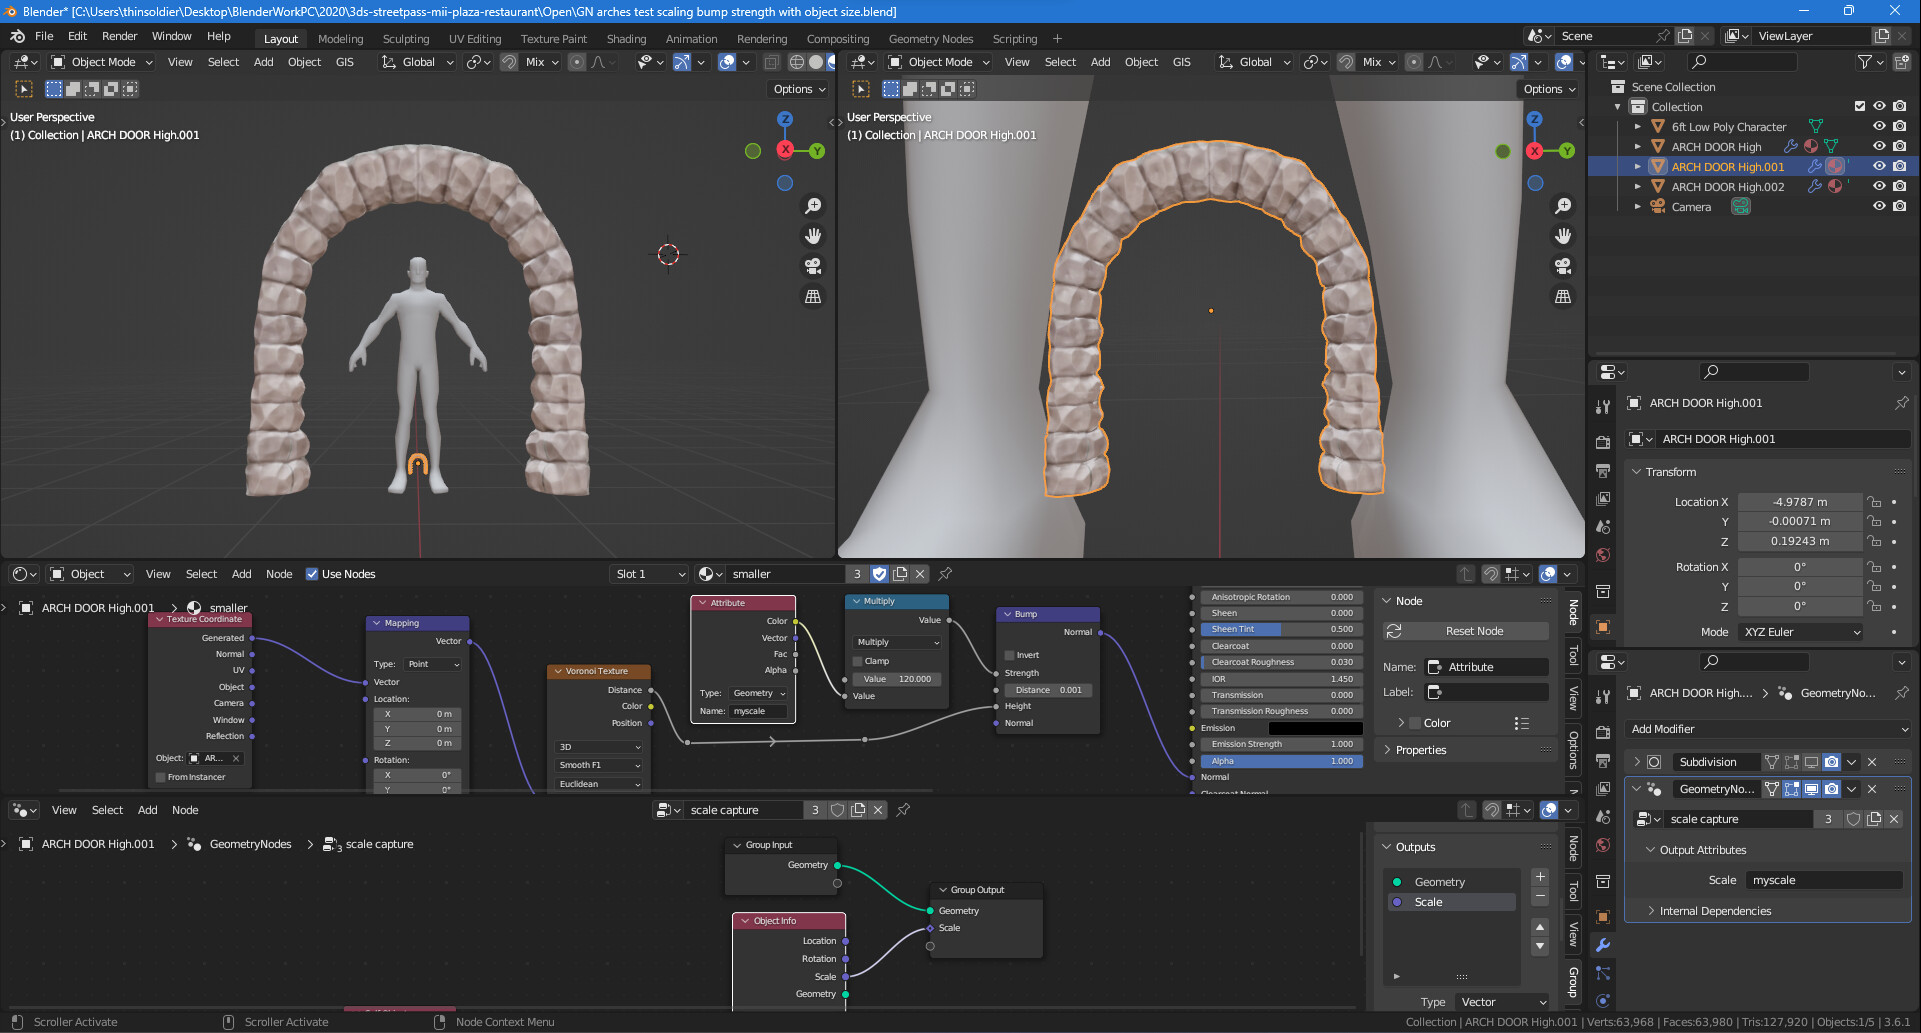
Used geometry nodes to get the object scale and passed that through to an attribute that can be read from the material. Only works with Generated Texture Coordinates. Perhaps I could plug this same value into the mapping node somehow to have it work with Object coordinates also.
\2020\3ds-streetpass-mii-plaza-restaurant\Open\GN arches test scaling bump strength with object size.blend
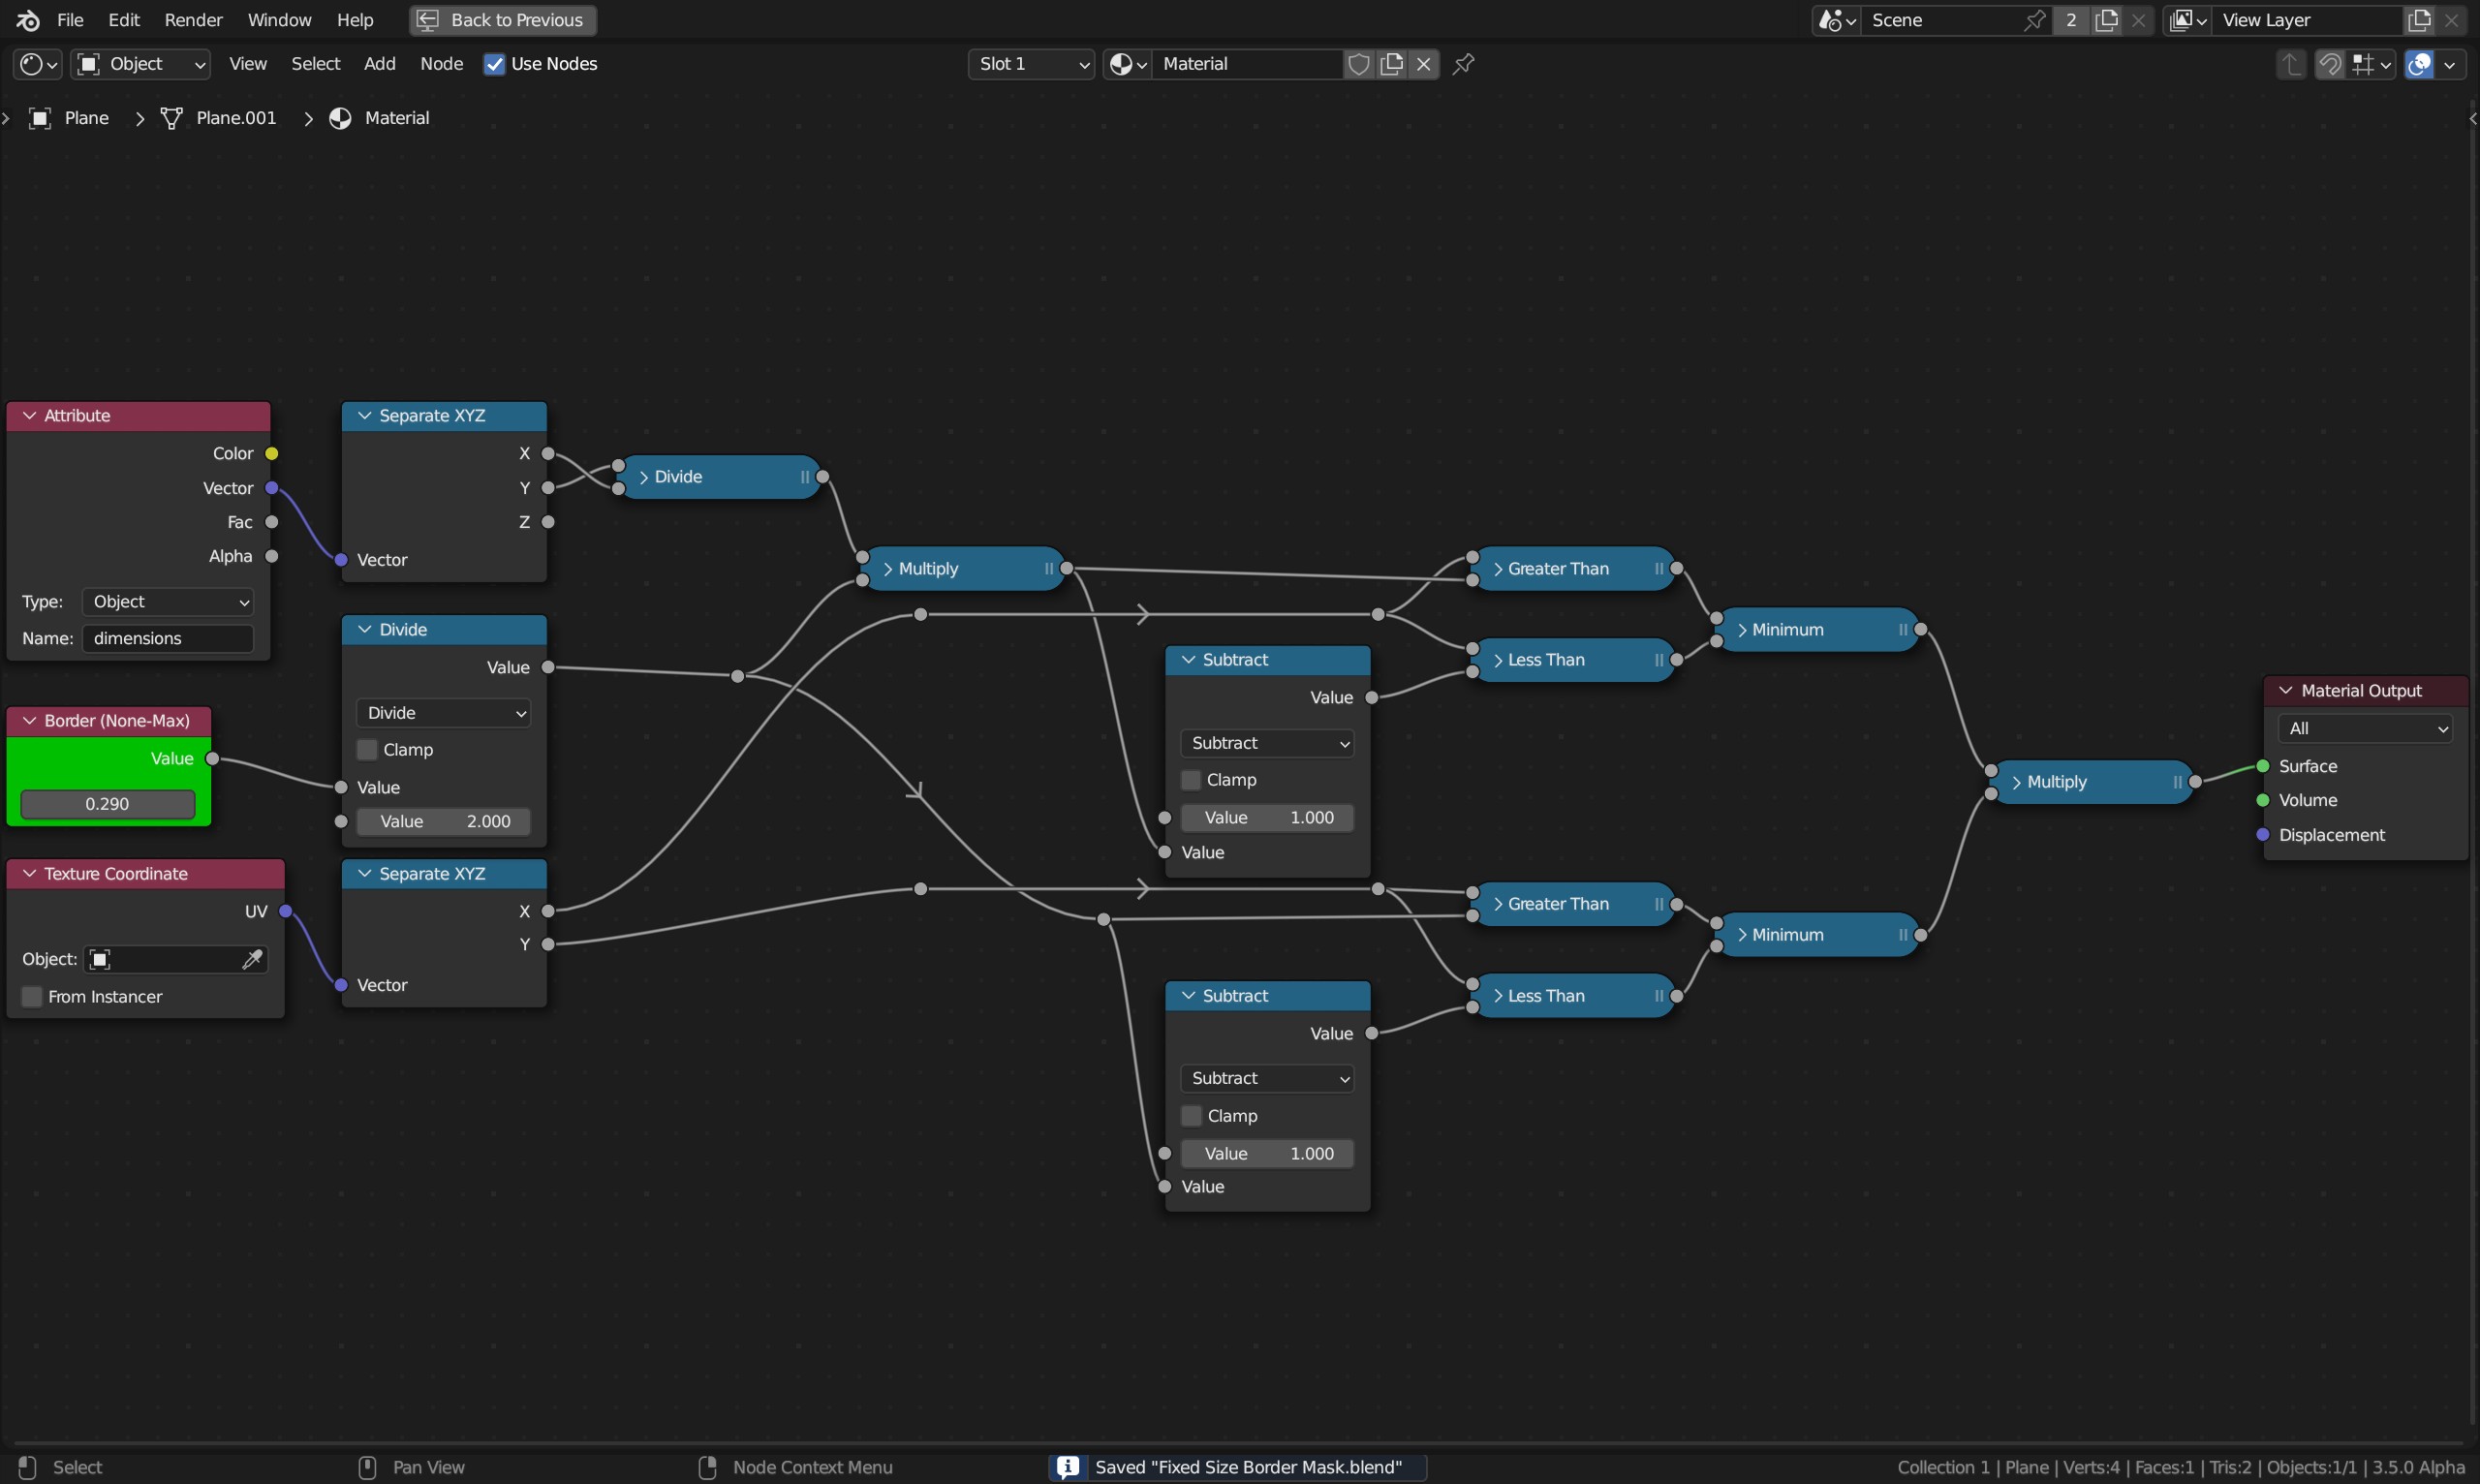
Here is what I use to create a border mask independent on axis scale. It uses Attribute/Object/Vector set to “dimensions” but maybe “scale” works too? Doesn’t use geometry nodes. Is this of use?
Think fixed size border around an image in an image frame that remains constant ratio instead of reacting to aspect. Create the setup and use on a plane you scale up and down on x/y direction.
No. Bump distance is. Leave strength to 1. I hate how they only made the strength slider easy to control accurately, I often have to use a math node (n/1000) to allow decent inputs and control for the scales I’m usually operating in. If microdisplacement is considered ground truth, then no manipulation of strength is going to produce the same normal modifications. Whatever goes into displacement scale should be used for bump distance. Disregarding self reflection, masking and shadowing effects only displacement can do, the normals will be consistent if manipulating distance instead.
Can’t say I fully understand myself. I made another post somewhere showing the difference. For me, it’s about using microdisplacement to make sure math is correct with no sharp discontinuities. Considering the normals match (for me at least) if using the mentioned approach, I lean towards 0 meaning baseline, 1 meaning top, and there being 1 meter distance between baseline and top if distance parameter is set to 1. If you’re using 0.001 I believe you have 1mm from baseline to top is a 0-1 input interval. A noise will never reach that range unless you manually normalize it to that range (using map range).
Render out a plane using microdisplacement using a sharp glossy to see what parts of the HDR it reflects. Keep it around. Then render using bump node instead and compare. Adjusting distance produces the same normals (for me in my experiments), whereas adjusting strength does something but the normals differ. Strength 0.1/Distance 0.01 doesn’t produce the same as Strength 0.1/Distance 0.1. If you find that you have to adjust strength to obtain the same results as microdisplacement, then go for it. If you’re already using 0.001 as distance you’re likely already in the ballpark of what I would consider a normal use case. It’s when the default distance 1 with lowered strength that bugs me out.
(the only thing I changed was that to get a similar bump intensity distance needs to be a much smaller number.)
This reminds me of the map range node. If you change the map from values it clips, changing the map to values squashes the range.
Edit: to be clear i mean when using values from 0 to 1 in the map range.
(Just an observation I do not know the technical reasons)
IIRC then there a basicly two normals used with textures.
The generated Textures have normalized normals from 0-1.
And the object based textures have normal values from -1 to 1
For this reason,if you have this strange normal bump look,you should try a strength of 50%
because a range of -1 to 1 is 2.And a strength of 50% gives you range of 1 then like the generated texture range.
Its been a while since i tested this out,however i think its still the same,I could be confuse with normal map vs bump map though,where you can use a blue value of 1 to your normal mapping to avoid inverted normal direction.
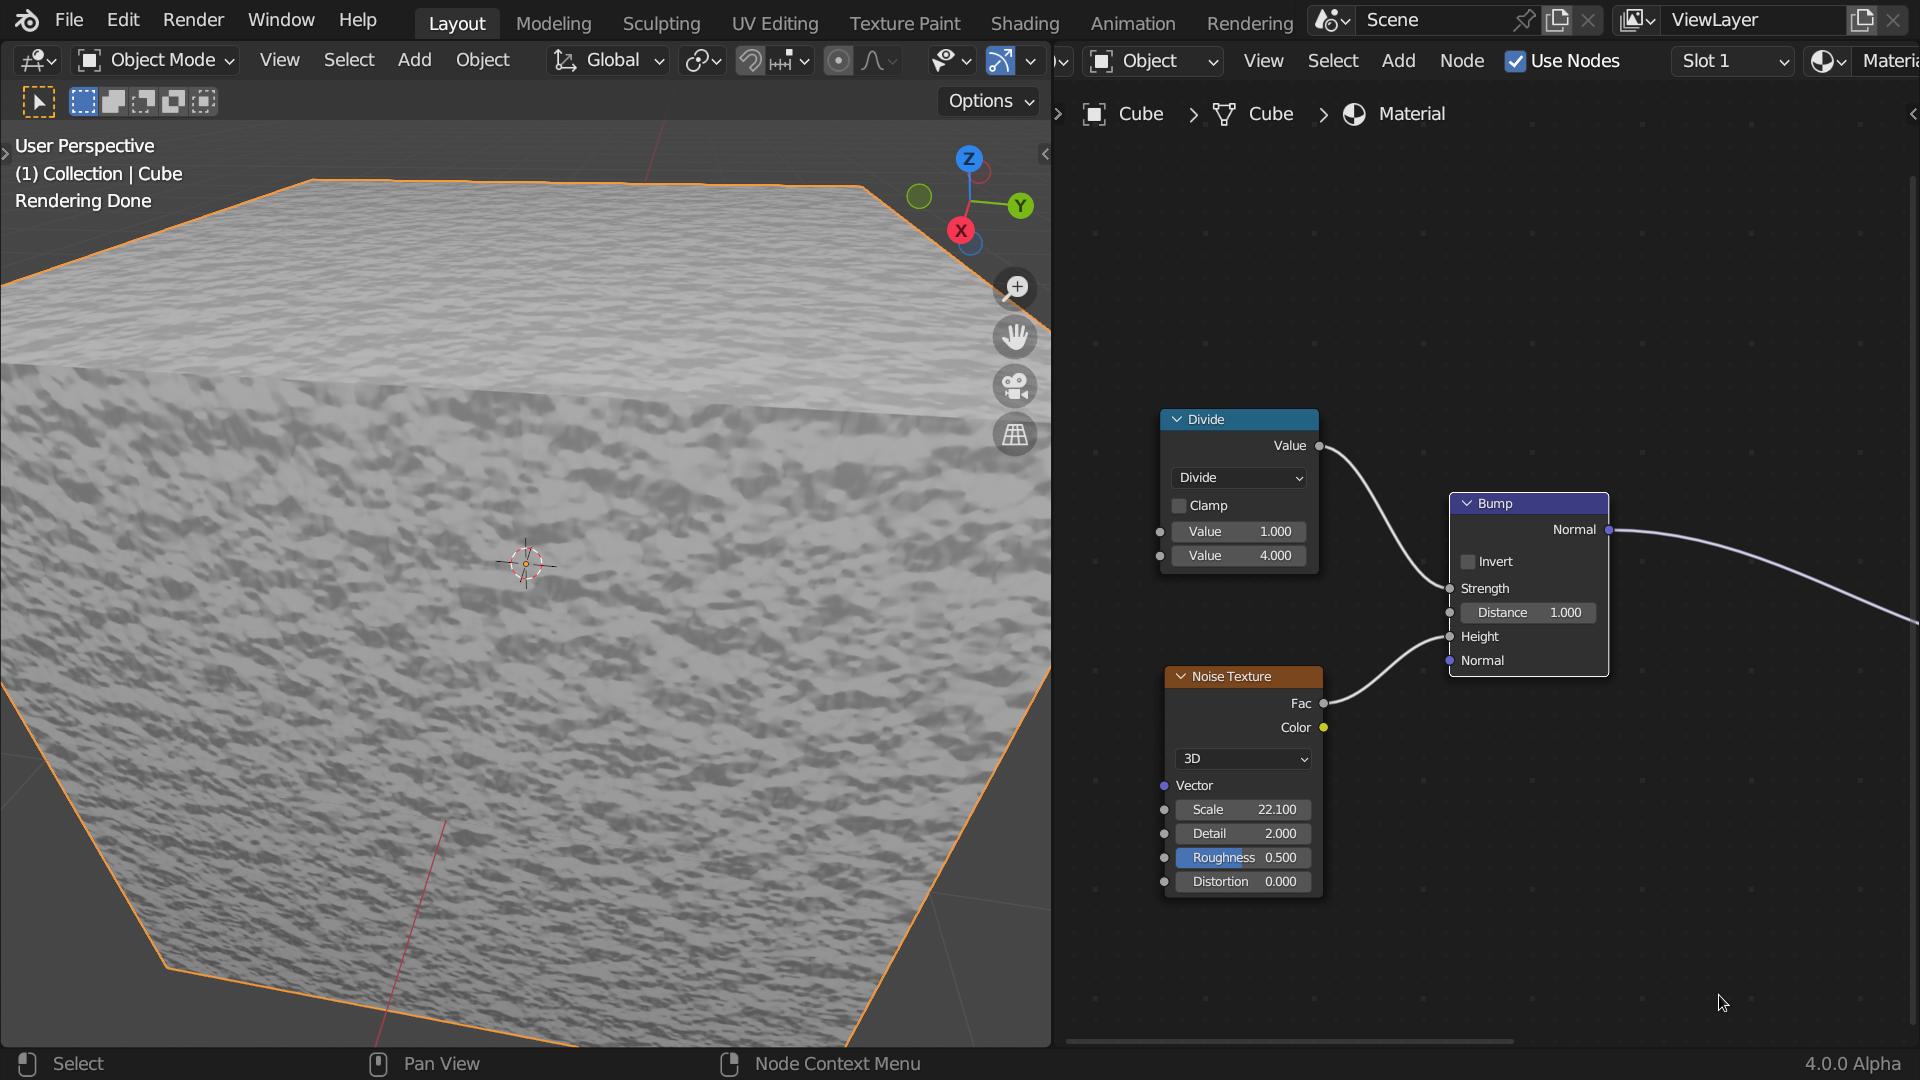
I think maybe you are, For the height input I used the factor of the noise texture, it is a simple range of values from 0 to 1. and does not contain normal information.
Hi,
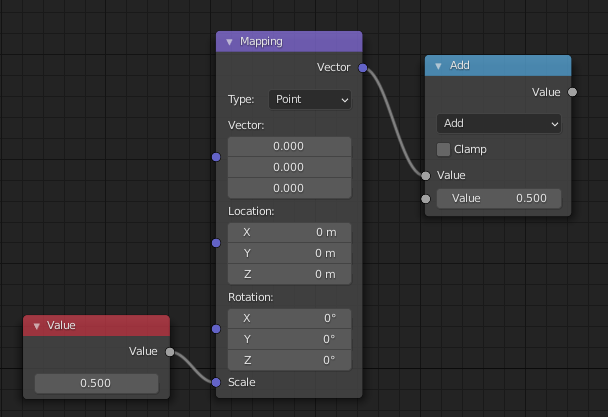
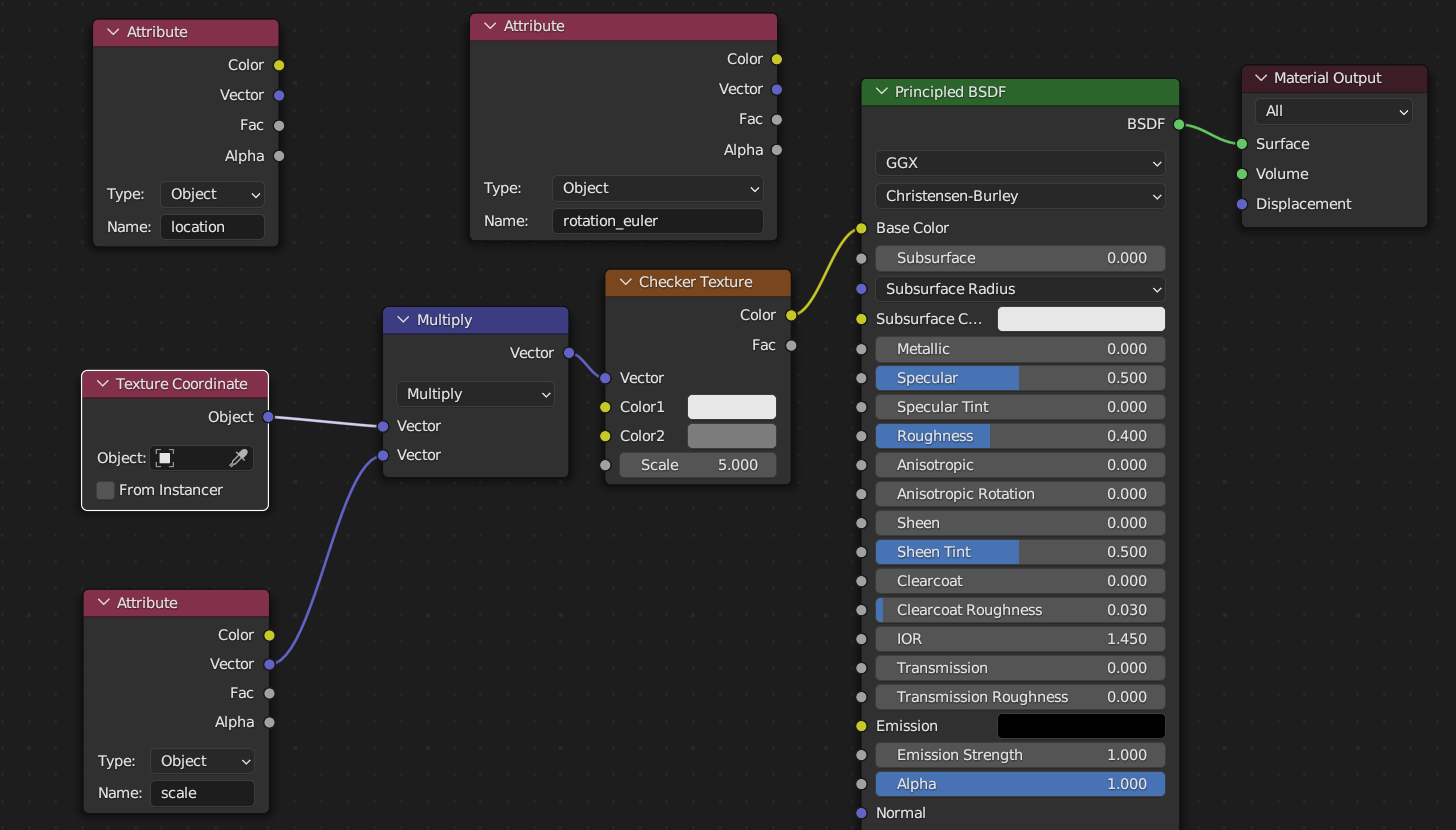
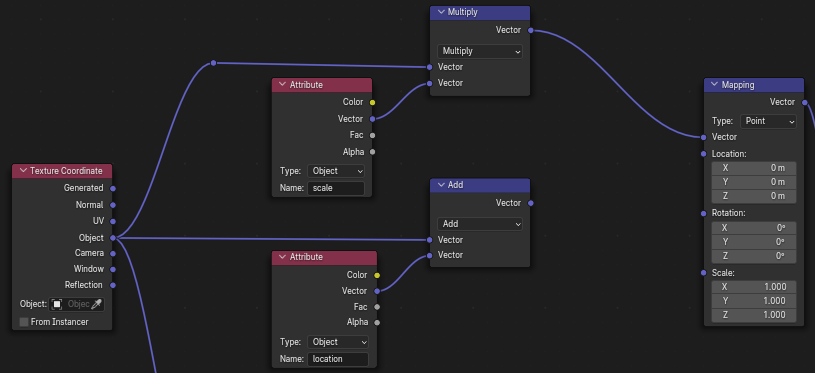
I know it has been a little while, but I am glad I stumbled across this thread and your answer, which was exactly what I was looking for. Thanks fo that! I managed to get the setup working with scale (with the vector math node set to multiply, as stated in your sceenshot) and location (v math set to add). But unfortunatelly I am struggeling to get the rotation_euler to work in the desired way. The Checker Texture should stay fixed in space, only the object should rotate. Therefor I’d kindly ask for your help again. Which node setup is needed to combine the euler_rotation attribute with the object’s texture coordinate?
And, bonus question, is there even a way to combine all 3 transforms to stay fixed in one node tree/material?
Thanks
there might be some trial and errors to do, like this will give different result depending on if it’s before or after the translate operation…
If it doesn’t work maybe provide some test scene so we can test something !
I’m not sure to understand, do you mean to do everything with only one “transform” node ?
I don’t think so, but it should at least be easy to build a nodegroup for reuse.
Hi, sorry for getting back to this so late. I was stuck in another deadlined project.
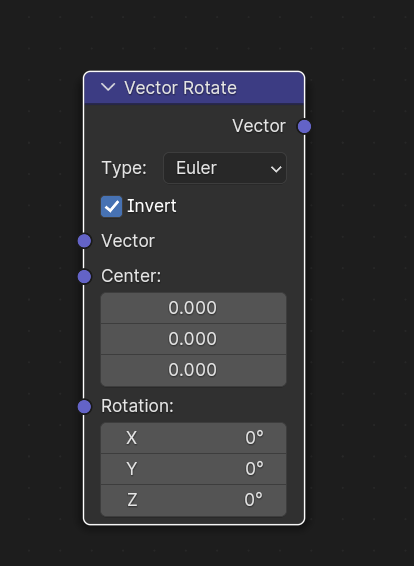
I’ve tried messing around with the vector rotate node, as you’ve suggested. Unfortunatelly I don’t get the math to successfully weave it into the existing node tree.
For better understanding I’ve uploaded my test node tree blend file here:
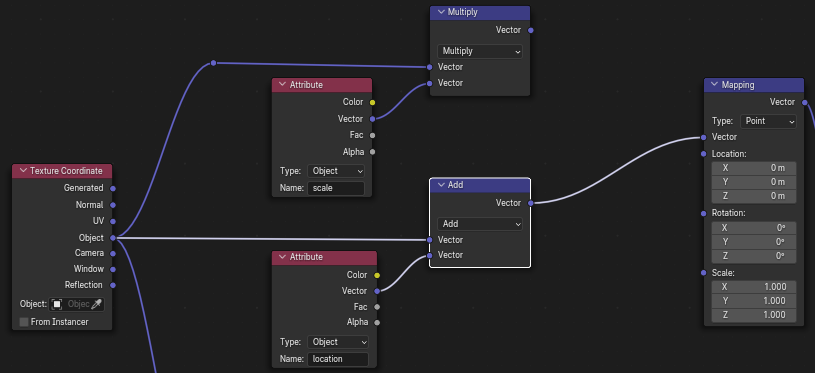
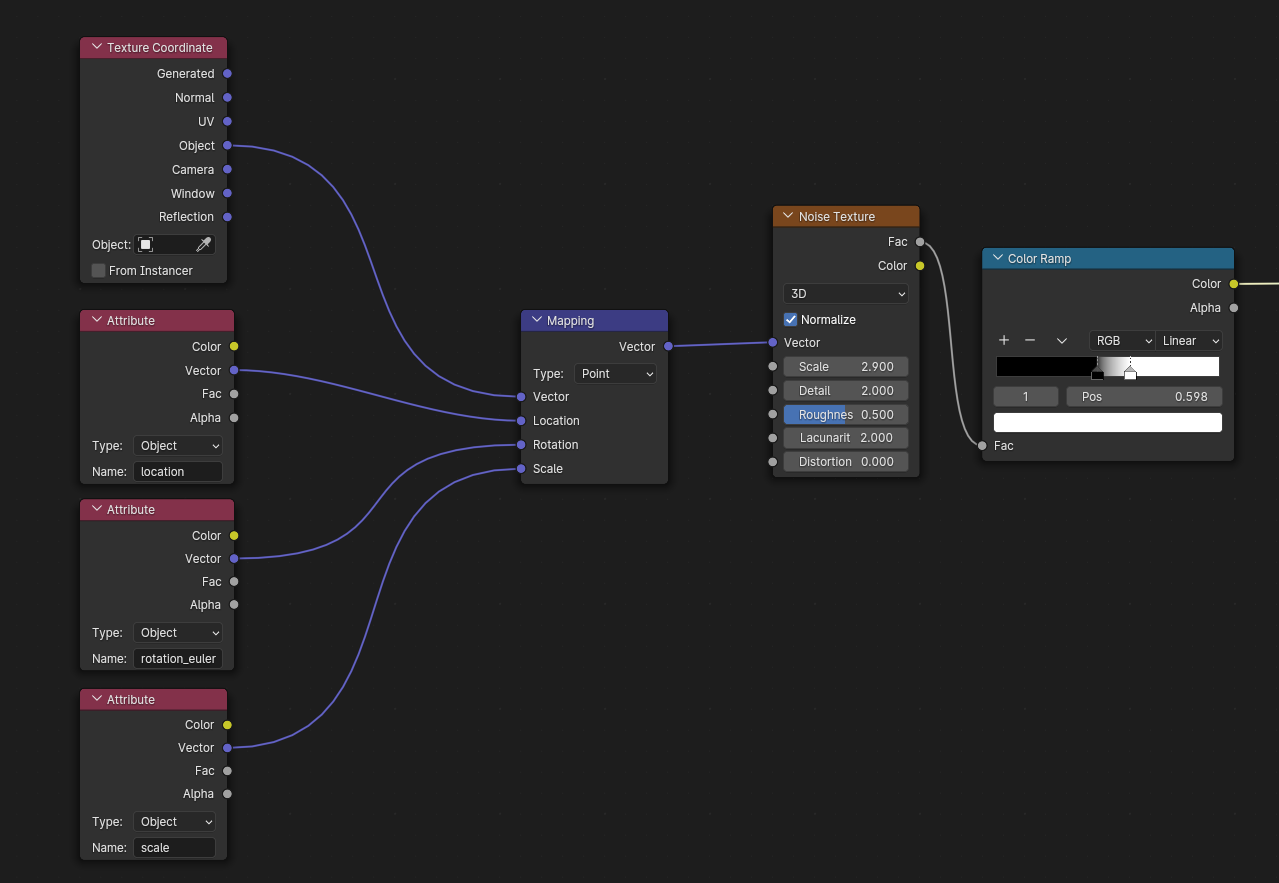
So, in the GN node tree you can plug the scale setup into the mapping node and it works. When scaling the object, the noise scale stays untouched.
But unfortunatelly I still can’t get the rotation setup to work. I’ve tried some smart combinations (at least I thought, they were smart ), but the noise does not behave the right way, which is staying in place, while the cube is rotated. Any hints for the needed setup? I’d be very gratful.
And the bonus question was: How do I combine the three functions (when the rotation is finally working) in the given GN node tree? So, no matter, if I scale, move or rotate the cube, the noise should stay locked in place. Shader - Keep generated Texture Transform WIP.blend (903.7 KB)