I guess it’s because .exr files have a higher range and the blend modes just break. Is there any way to make it work? Are there other, more Blender friendly techniques to replace this one?
I really want to ditch Photoshop, but I’m way too used to this method
4 Likes
Renzatic
(Professor Emeritus Billy H. Wafflesmith XIV Esq.)
2
I don’t know the answer to this. I’m only posting to state that, because of this post, I learned something new today.
Yeah, but that doesn’t produce the effect that Overlay or Soft Light produce.
The problem seems to be Filmic, as it gets applied at the very end of the process, and the blend modes like Overlay or Soft Light seem to screw it up. I wonder if there is a way to modify the image after Filmic does it’s thing?
My workflow right now is:
render as multilayer EXR
do the heavy-duty adjustments to the EXR in the compositor
save it as a 16-bit PNG
go to Photoshop and apply this “Instant Sex” method + some light curve adjustments
save as final JPG
I’m looking to eliminate the Photoshop part and do it all in Blender.
Did you try it out? I’ve been using this method for a looong time, and it’s been like a “I win” button for me Instantly makes renders look nicer.
3 Likes
Renzatic
(Professor Emeritus Billy H. Wafflesmith XIV Esq.)
5
I don’t have a solution, but I wanted to drop in and say- surprisingly, this effect is essential for cel shading as well. In that context, it’s often called a diffuse glow, but it makes a huge difference and makes CGI look a lot more like photographed cels. It really is the magic secret to making everything look better
Side note: it’s not just Filmic, I’ve had the same problem with Standard sometimes
Hello !
Damn, I was expecting something better from such a name
I think these color artifacts appends on some of the blending modes when the value goes below 1.
Screen has a mechanism to not blow away the image. If you ADD two white (1,1,1), you end up with a value of 2.
But screen is built in a way that you never go below 1 , but !! if you already have brighter values in your layers then the algorithm is confused.
Same with soft light, but overlay should be fine.
Add, Overlay, multiply are ok, I suppose Linear light too…
If that’s really a problem you can clamp layers before mixing them , but this isn’t working very well with filmic as it expect a higher value range to work with.
Hey, knowing that name of the effect is something! At least I can google it properly (you can imagine “Instant Sex” did not give the best results). For example: a while back I didn’t know the word “posterization”, I knew what the effect did but not the name of it… very frustrating.
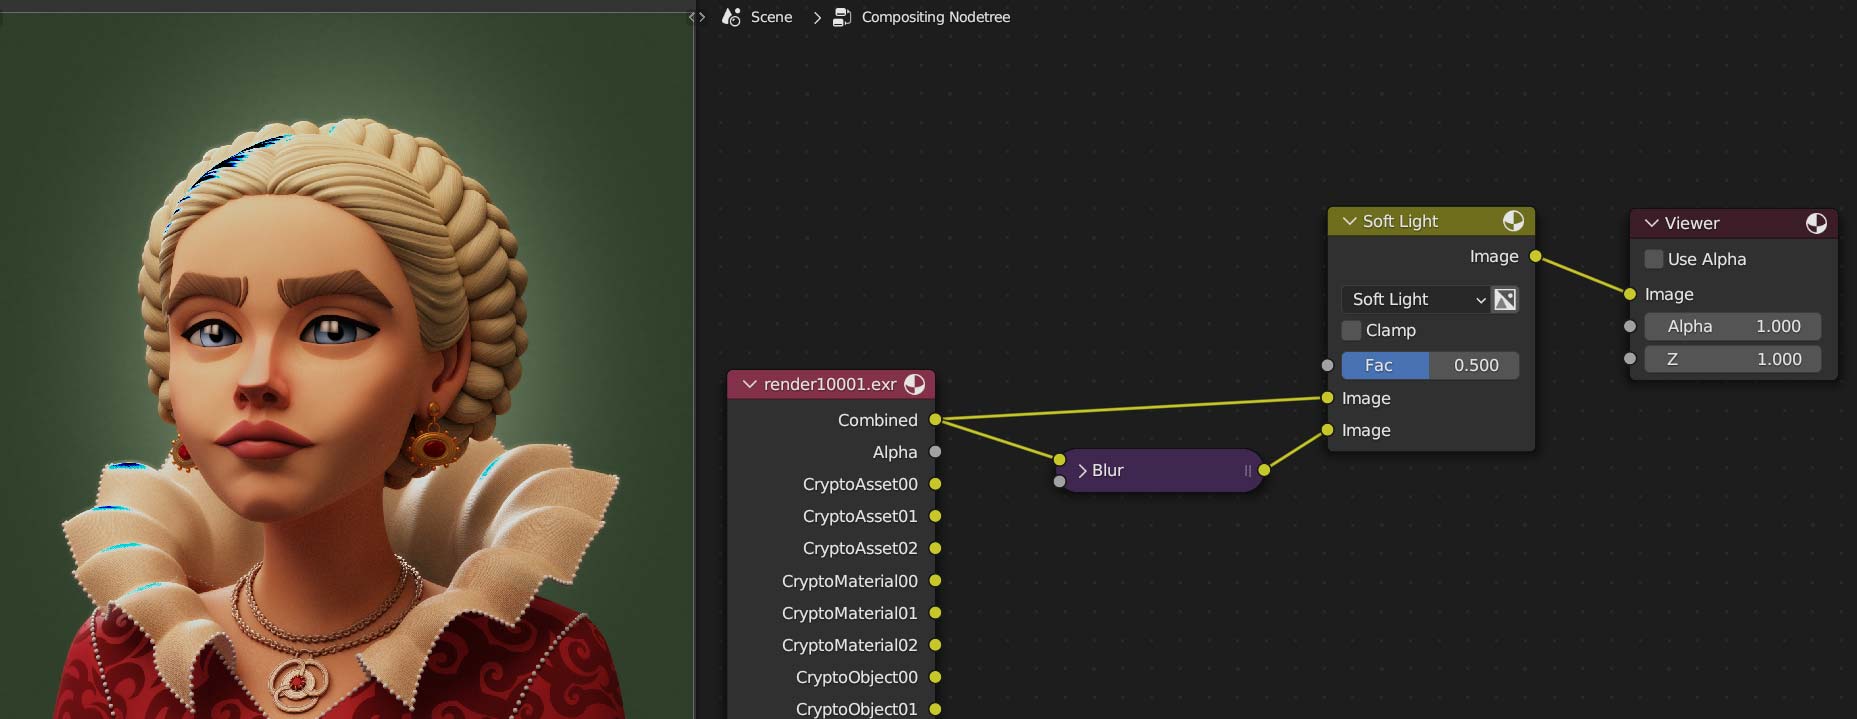
I’ve tried clamping (there’s really is not clamp node, huh?), but like you said, it screws up filmic completely.
The only way I got it to work was to save the whole thing as a 16-bit PNG, throw that file back into the compositor, disable filmic, then do the effect to it. Might as well throw the png into PS at that point
Seems like blending modes just don’t work well when the image range isn’t a simple 0 to 1. I’ve found a post by the guy who made fiilmic saying just that:
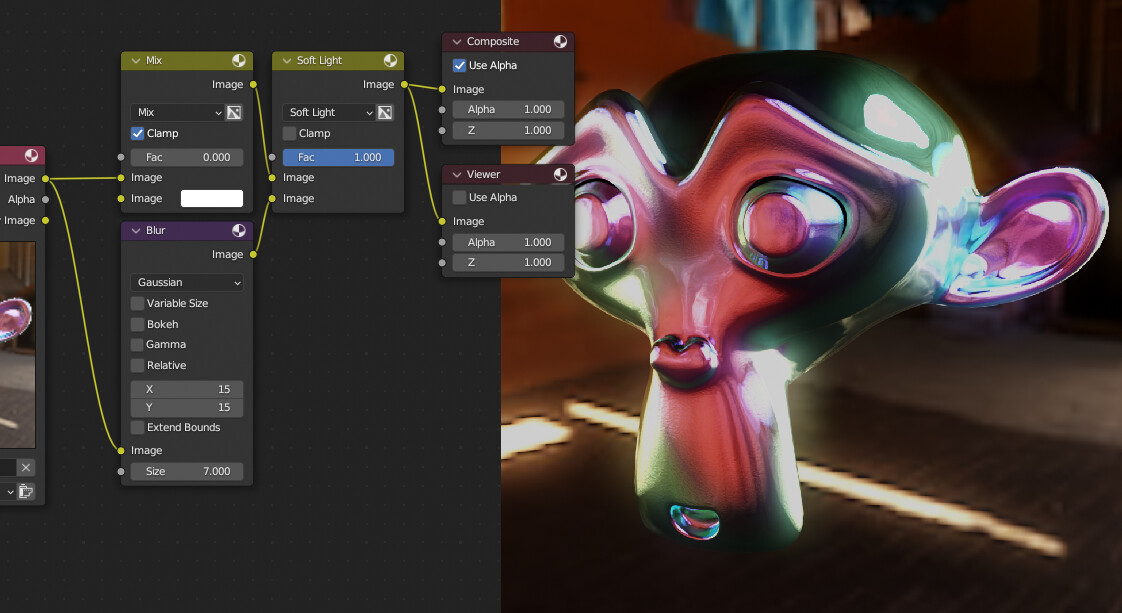
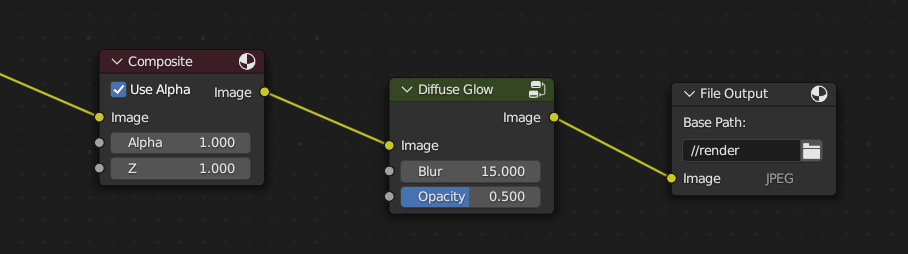
Yes, I don’t think there is one, but using a mix node work ! Try my last screenshot setup,
it’s clamping only the blurry parts, so the overall luminance of the image is unaffected therefore it will work with filmic.
Well, first part is a convoluted way of clamping, the trick with the mix node will do exactly the same thing.
And after that, yeah, if you want to have instant sex will all the blending modes it’s better to use PS or something else, but from my quick test the only one that doesn’t work with the clamping I did in my last screenshot is soft light. That leaves still a lot of possibilities !
I’ve also personally added it to my default Blender file, factor set to 0, so I can just turn it on with one click if and when I need it (which I always do)
4 Likes
Renzatic
(Professor Emeritus Billy H. Wafflesmith XIV Esq.)
15
Probably isn’t any worse than what you get looking up cream pie recipes.
It’s surprisingly difficult to find any information about this effect from a non-digital perspective- I’ve learned, however, that this effect is done with real photography by using a “soft diffusion filter” in front of a lens. This is a slight divergence from what I was talking about with cel shading; in that case, the diffuse glow or “instant sex” effect is a result of the light table underneath the painted cell being photographed.
For that reason, technically speaking, there should probably be some kind of difference in how the effect is applied in NPR vs non-NPR work, but in my experiments, this technique looks equally good with both. Photographers may wish for an additional level of diffusion in photorealistic works to match the effect of a physical diffusion filter, but YMMV
Looks like a wacky name for a value boost (can be done with Hue Saturation Value node) with blur or attempt to reinvent unsharp mask (it also produces halo effect when used in moderation).
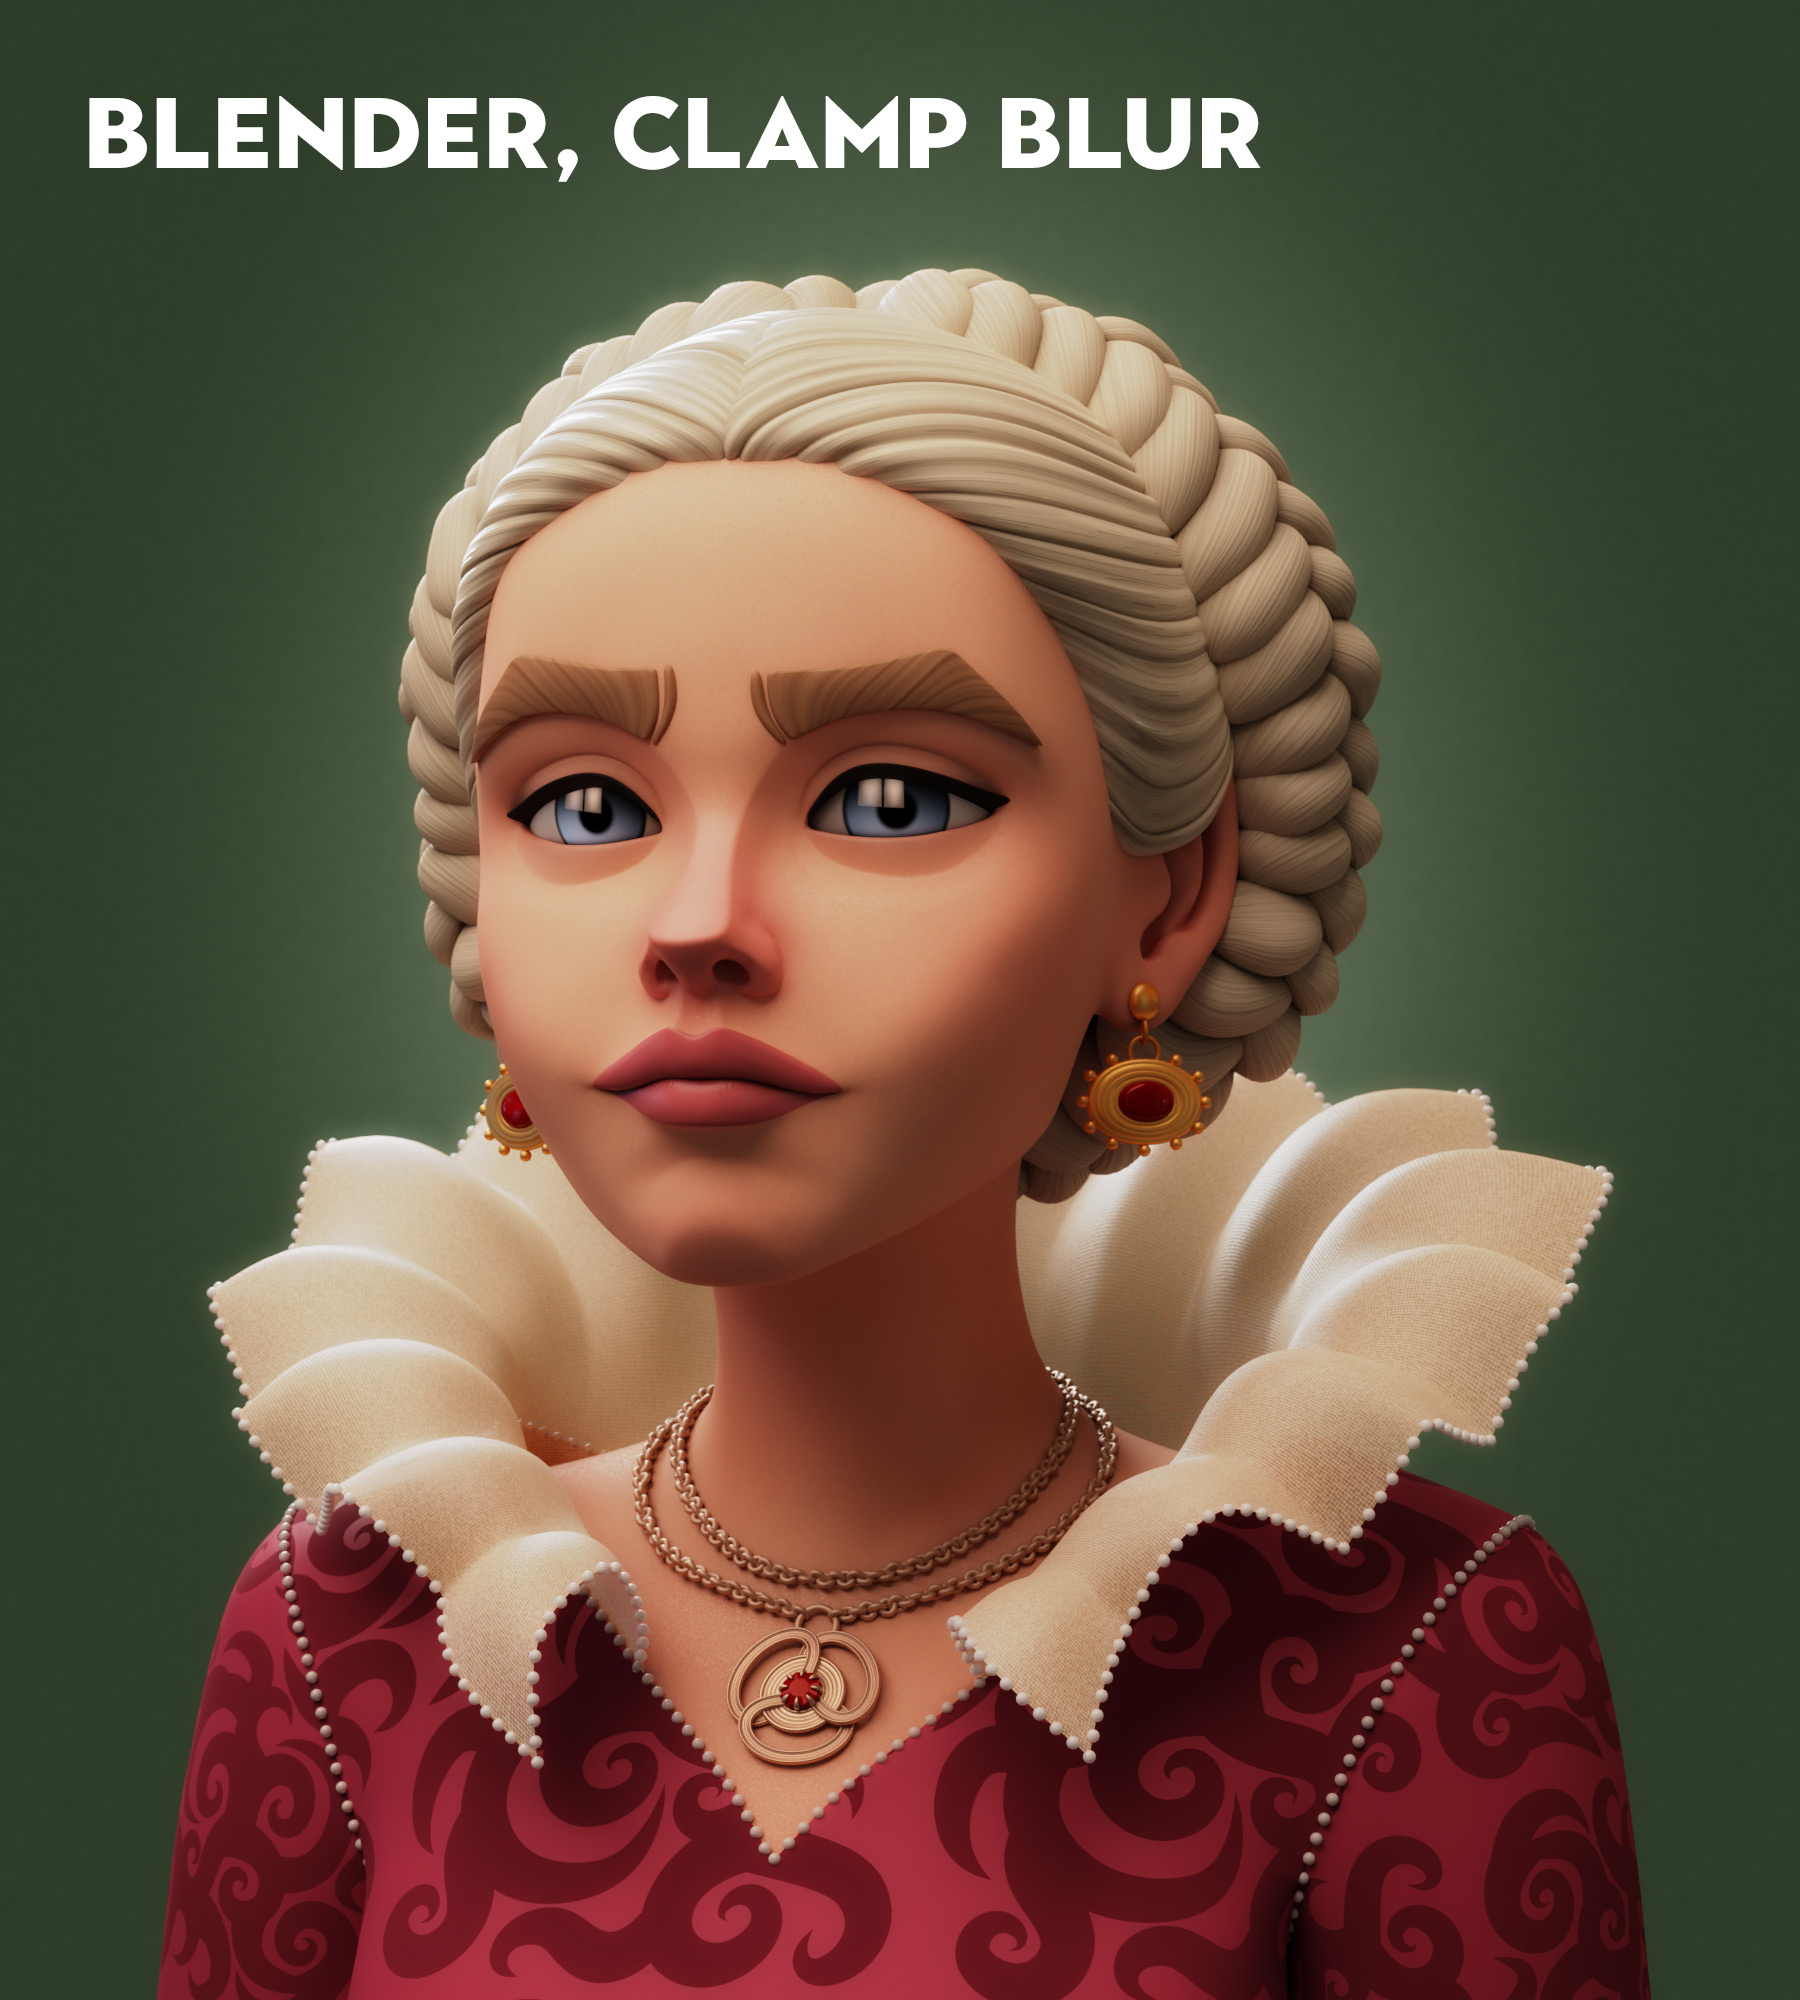
Clamping the original image doesn’t look good. it turns the highlights in the hair into a gray mush.
Clamping the blurred image looks better, but doesn’t work with all blending modes (Soft Light), and also doesn’t look quite like the photoshop version (less glow, darker).
All the clamped versions look darker overall compared to the photoshop version, probably Filmic doing it’s work.
The lesson I got is don’t clamp anything before Filmic does it’s thing, and since Filmic is applied at the very end in the Composite/Viewer node, there’s isn’t much to do. Unless someone invents something like this:
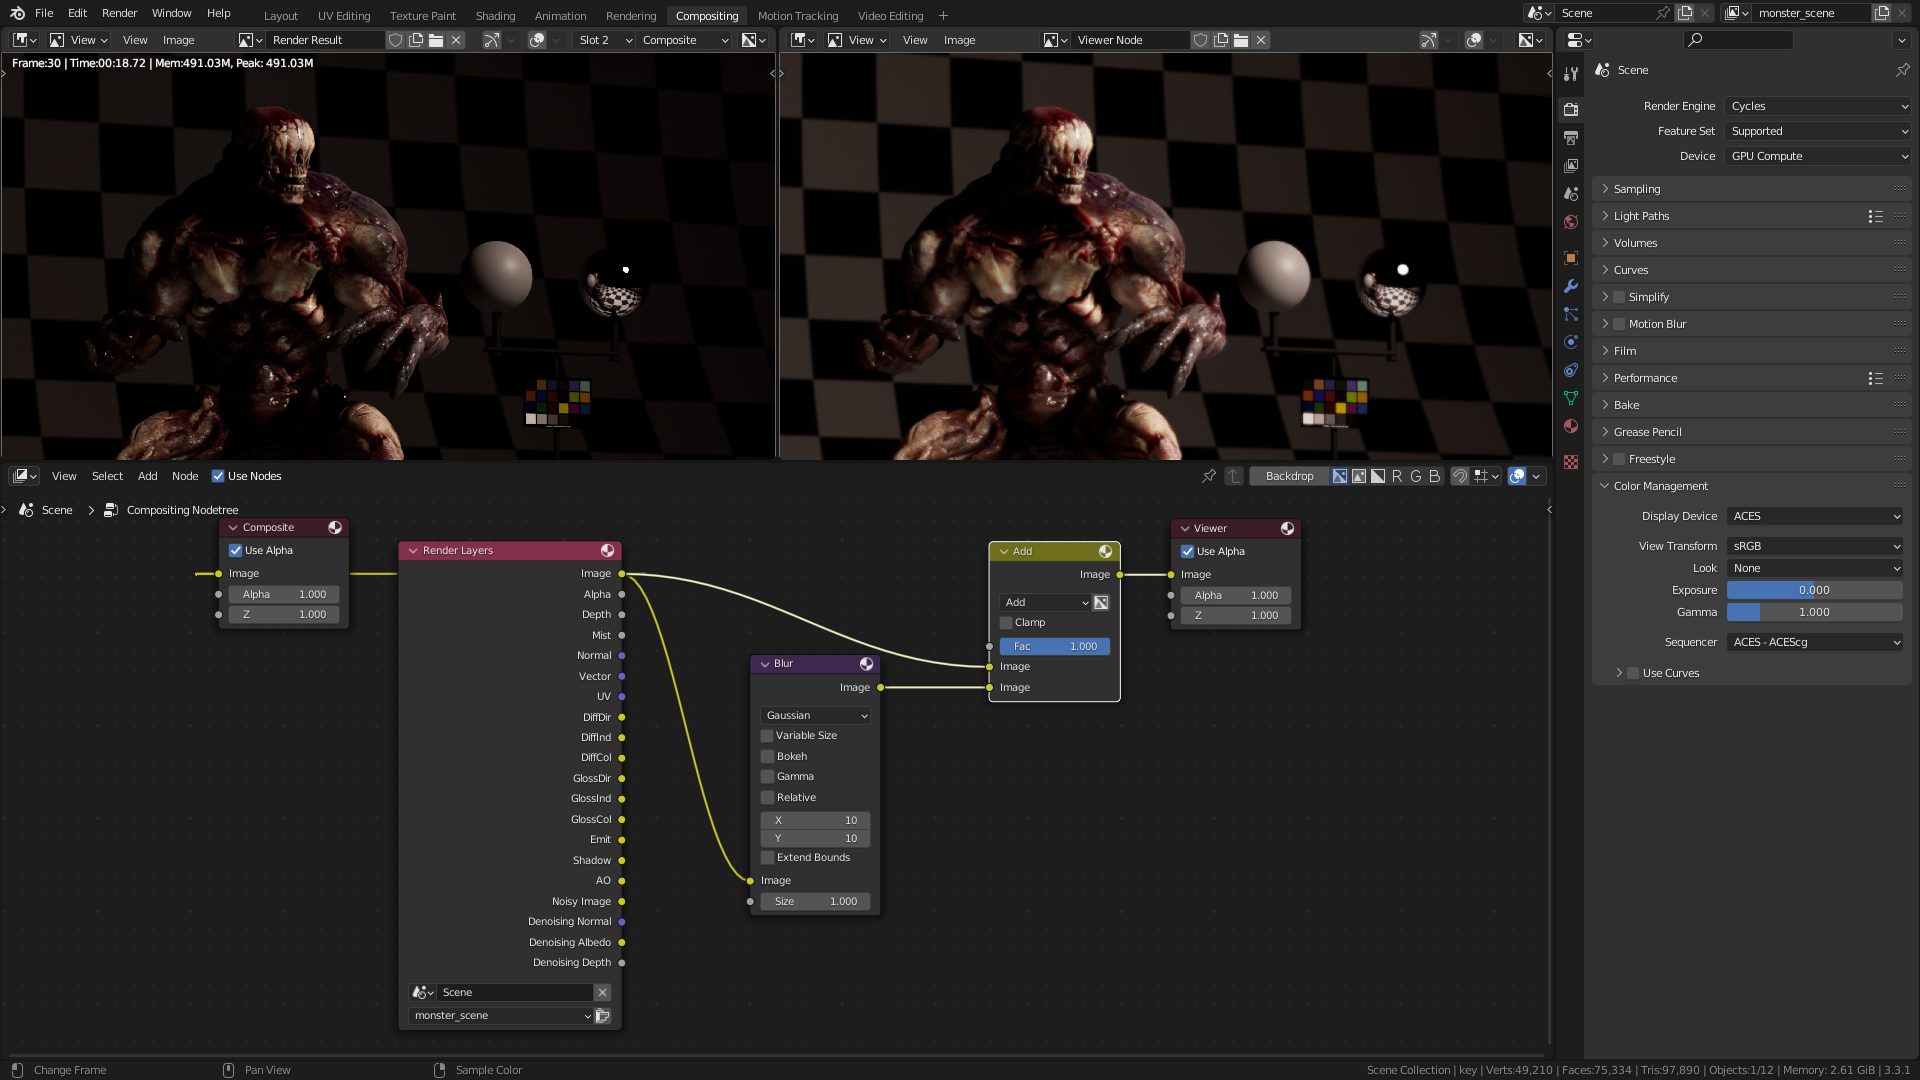
The testing was done using these settings in both Blender and Photoshop:
Filmic, Medium High Contrast
15px gauss blur (in blender the visual equivalent is ~30px, no idea why)
Overlay blending mode with 50% opacity/factor
If you really feel like wasting some time, here’s the exr file: Google Drive (10MB)
It’s basically right before I save it as a PNG in Blender and send it to Photoshop.
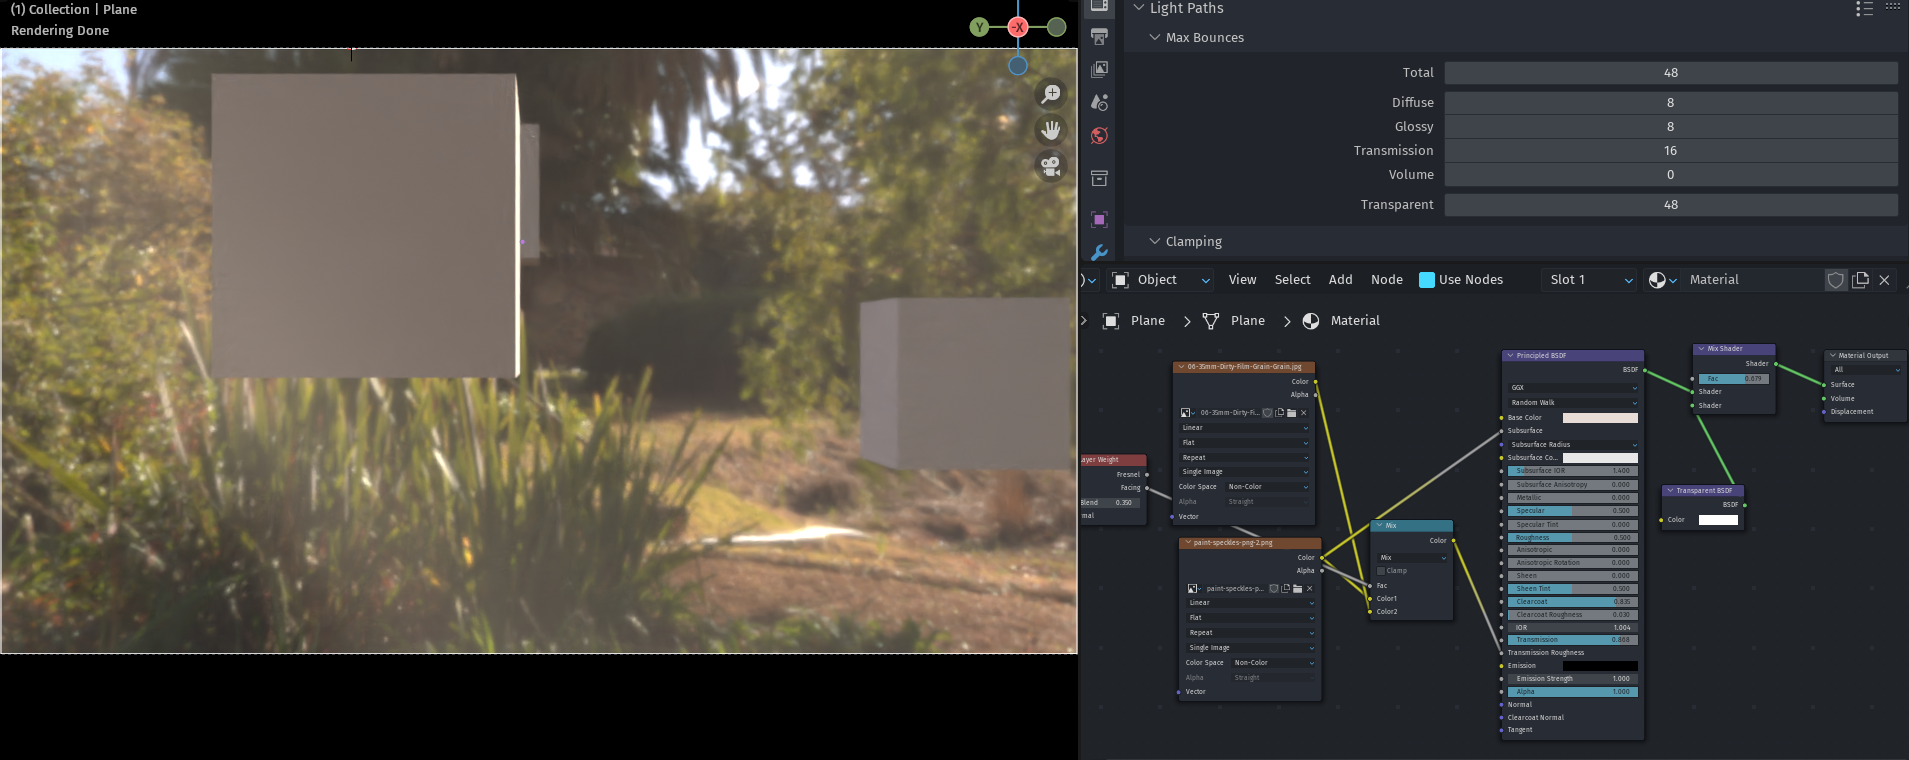
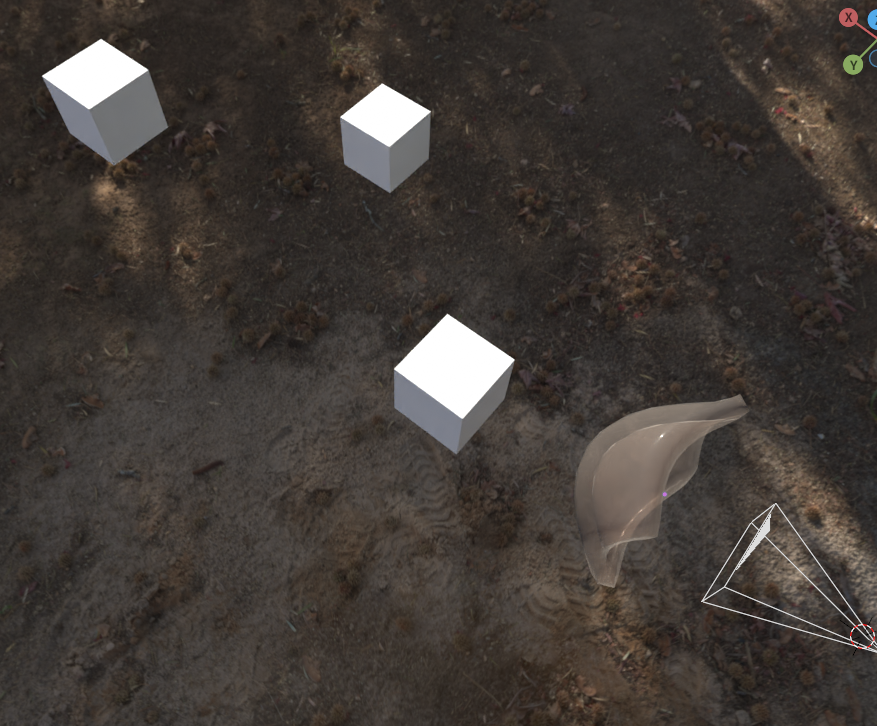
Dang, that’s too bad- I was having really good results with @zeroskilz 's setup. I’m going to keep using it personally, it works incredibly well for cel-shading, but it’s a shame it’s not also working for this partially stylized style. I wonder if it might be worth trying actually making a soft diffusion filter in the 3D space and putting it in front of the camera. Here’s my go, the theory behind this is to replicate a physical soft diffusion filter that the digital effect is based on:
This combined with a simple blur overlay might work? You can really see it on the lower right grass highlight, that’s a diffuse glow if I’ve ever seen one.
The camera has a very short focal length and high f-stop.
This is the first time I’ve heard it called that! I always called it “soft glow” but don’t recall whether that was the name in the DeviantArt tutorial I learned it from way back when DeviantArt was awesome and the source of virtually all my art tutorials.
I’ve never learned to use the compositor properly because I find it easier to throw the image into photoshop or Affinity for postwork, but even if the nodes here don’t copy the effect exactly, they still look useful enough to save for later.