I´m working on a model of my Fieldy Signature bass. It´s a lot of fun! I´m aming for realistic.
looks good…I could give it a better critique though, with a wireframe render. the texture seems a bit busy, imo, the painted metal and knobs materials look good though.
Modron:
This is the material I´m trying to achieve:
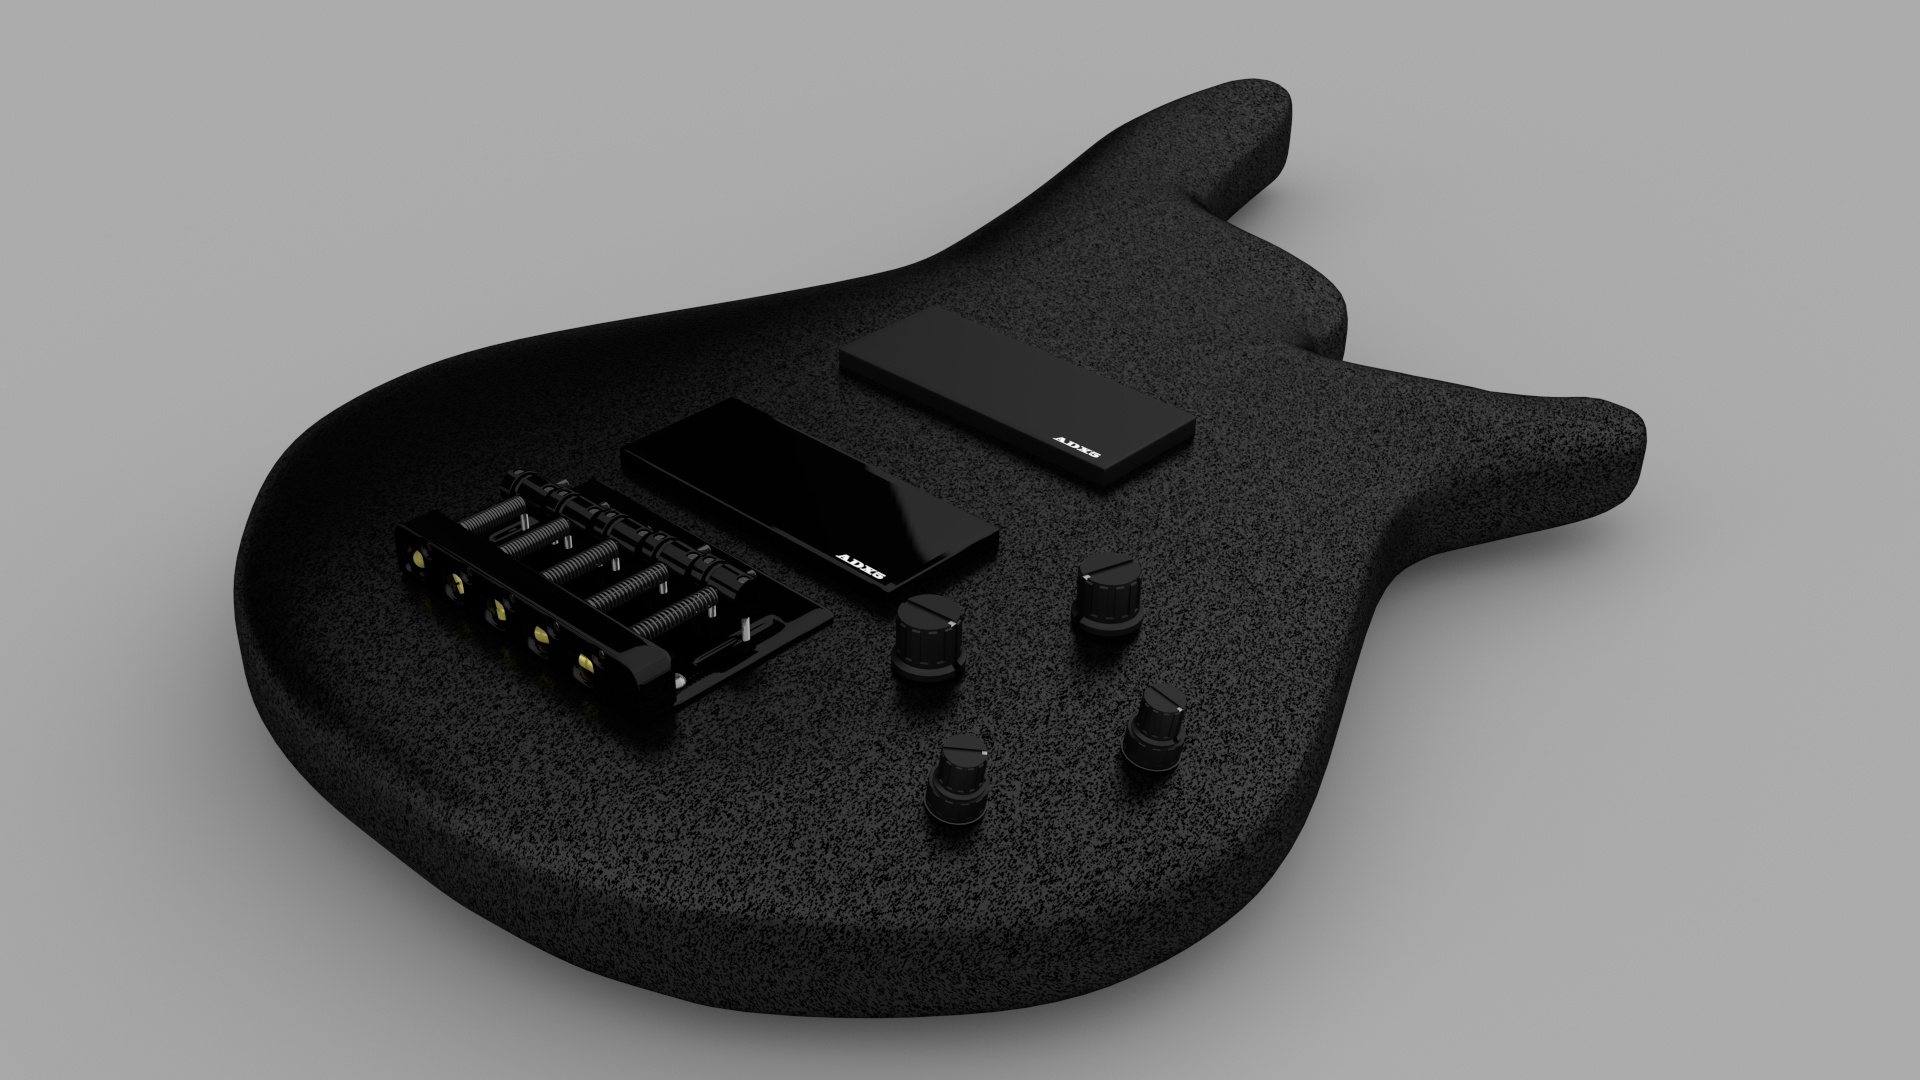
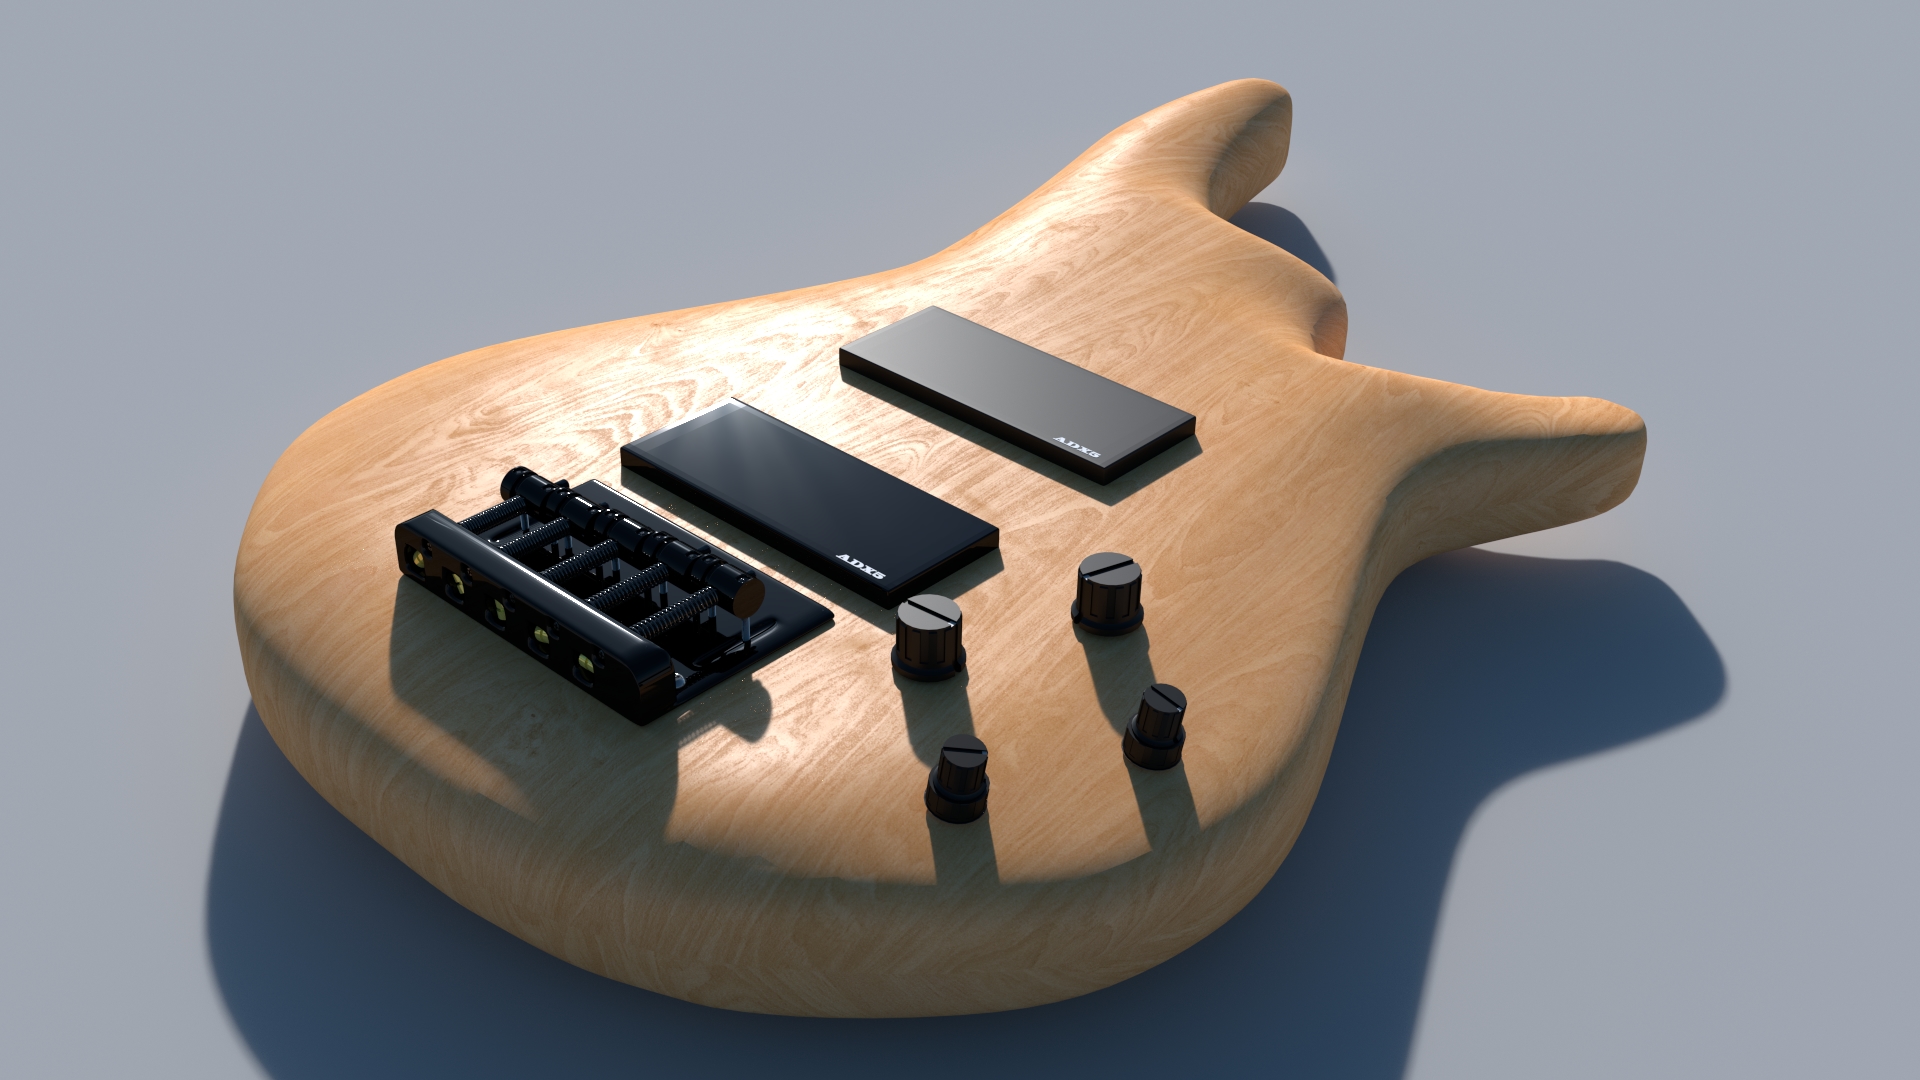
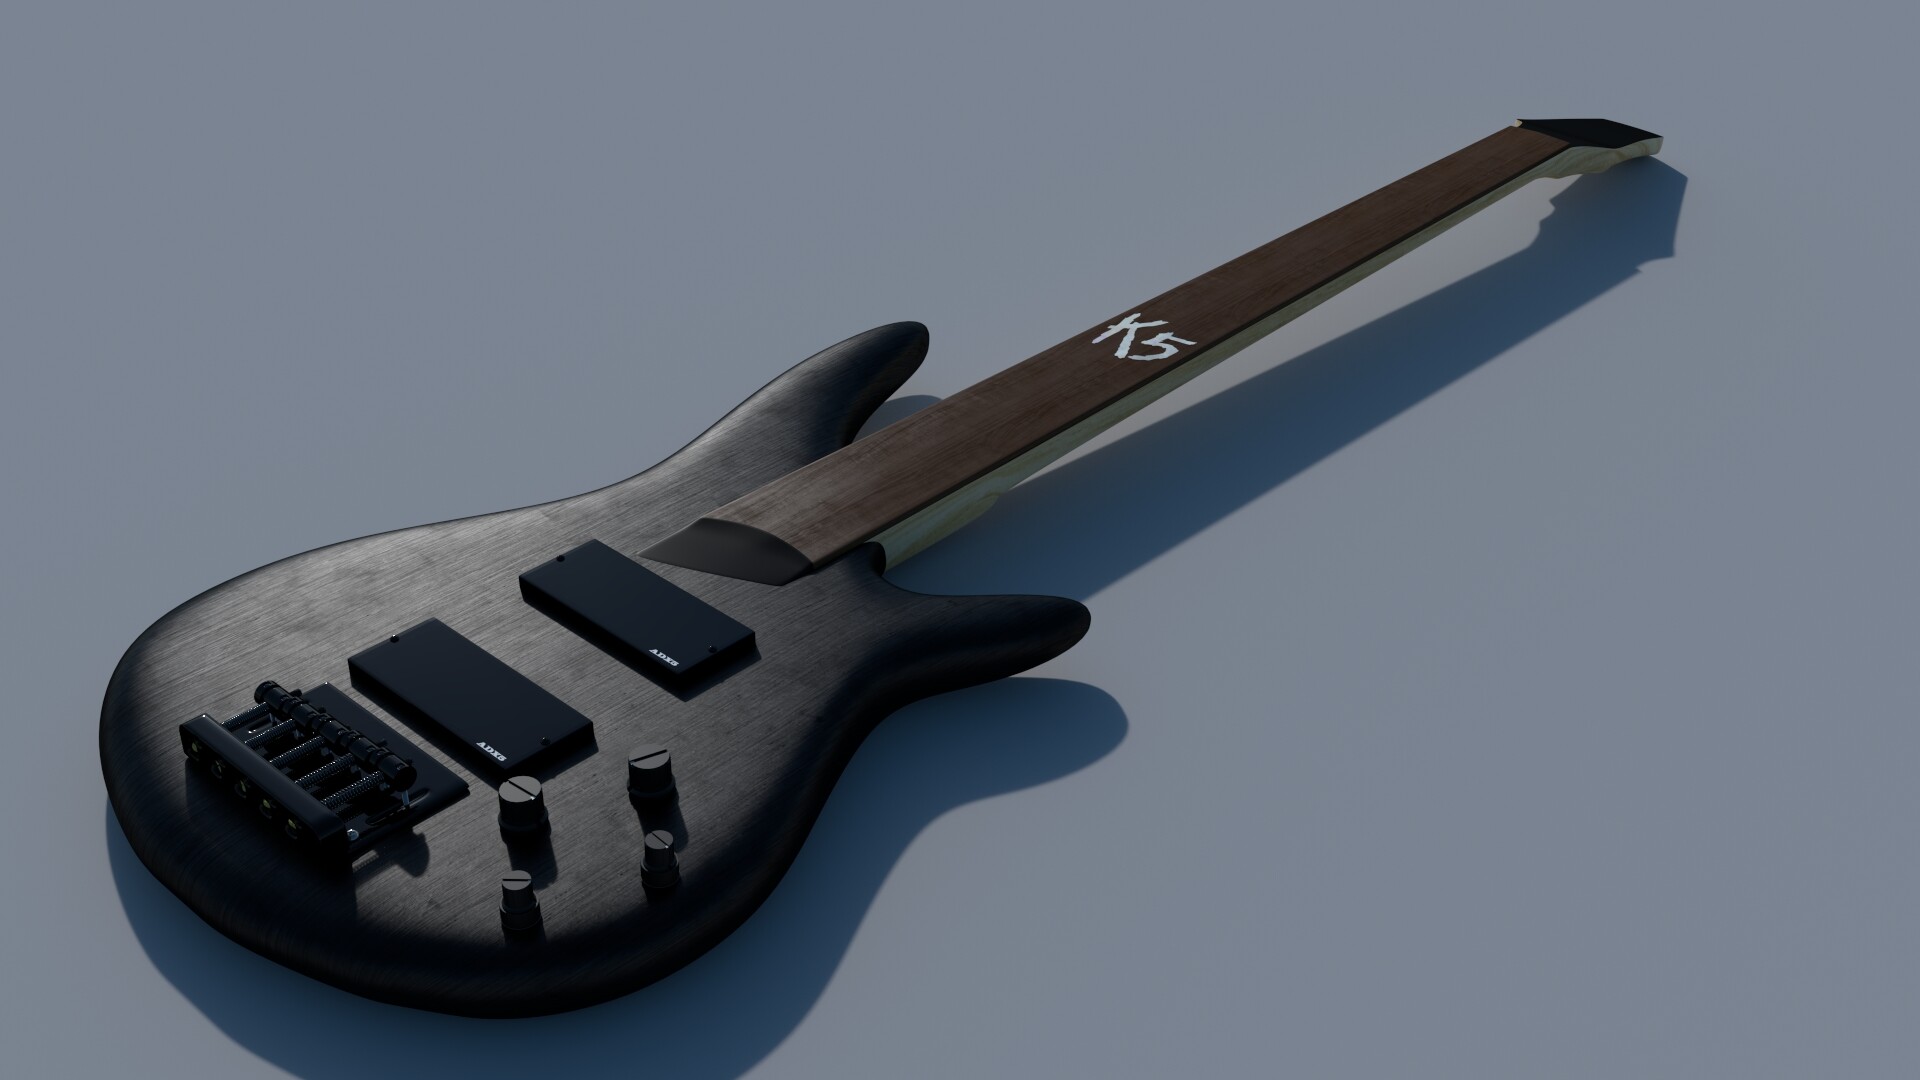
Is this a better result?:
I´m really struggling to make it perfekt, this is the ninth version of the material. I still think the groove pattern is to dense but I don´t know how too fix it.
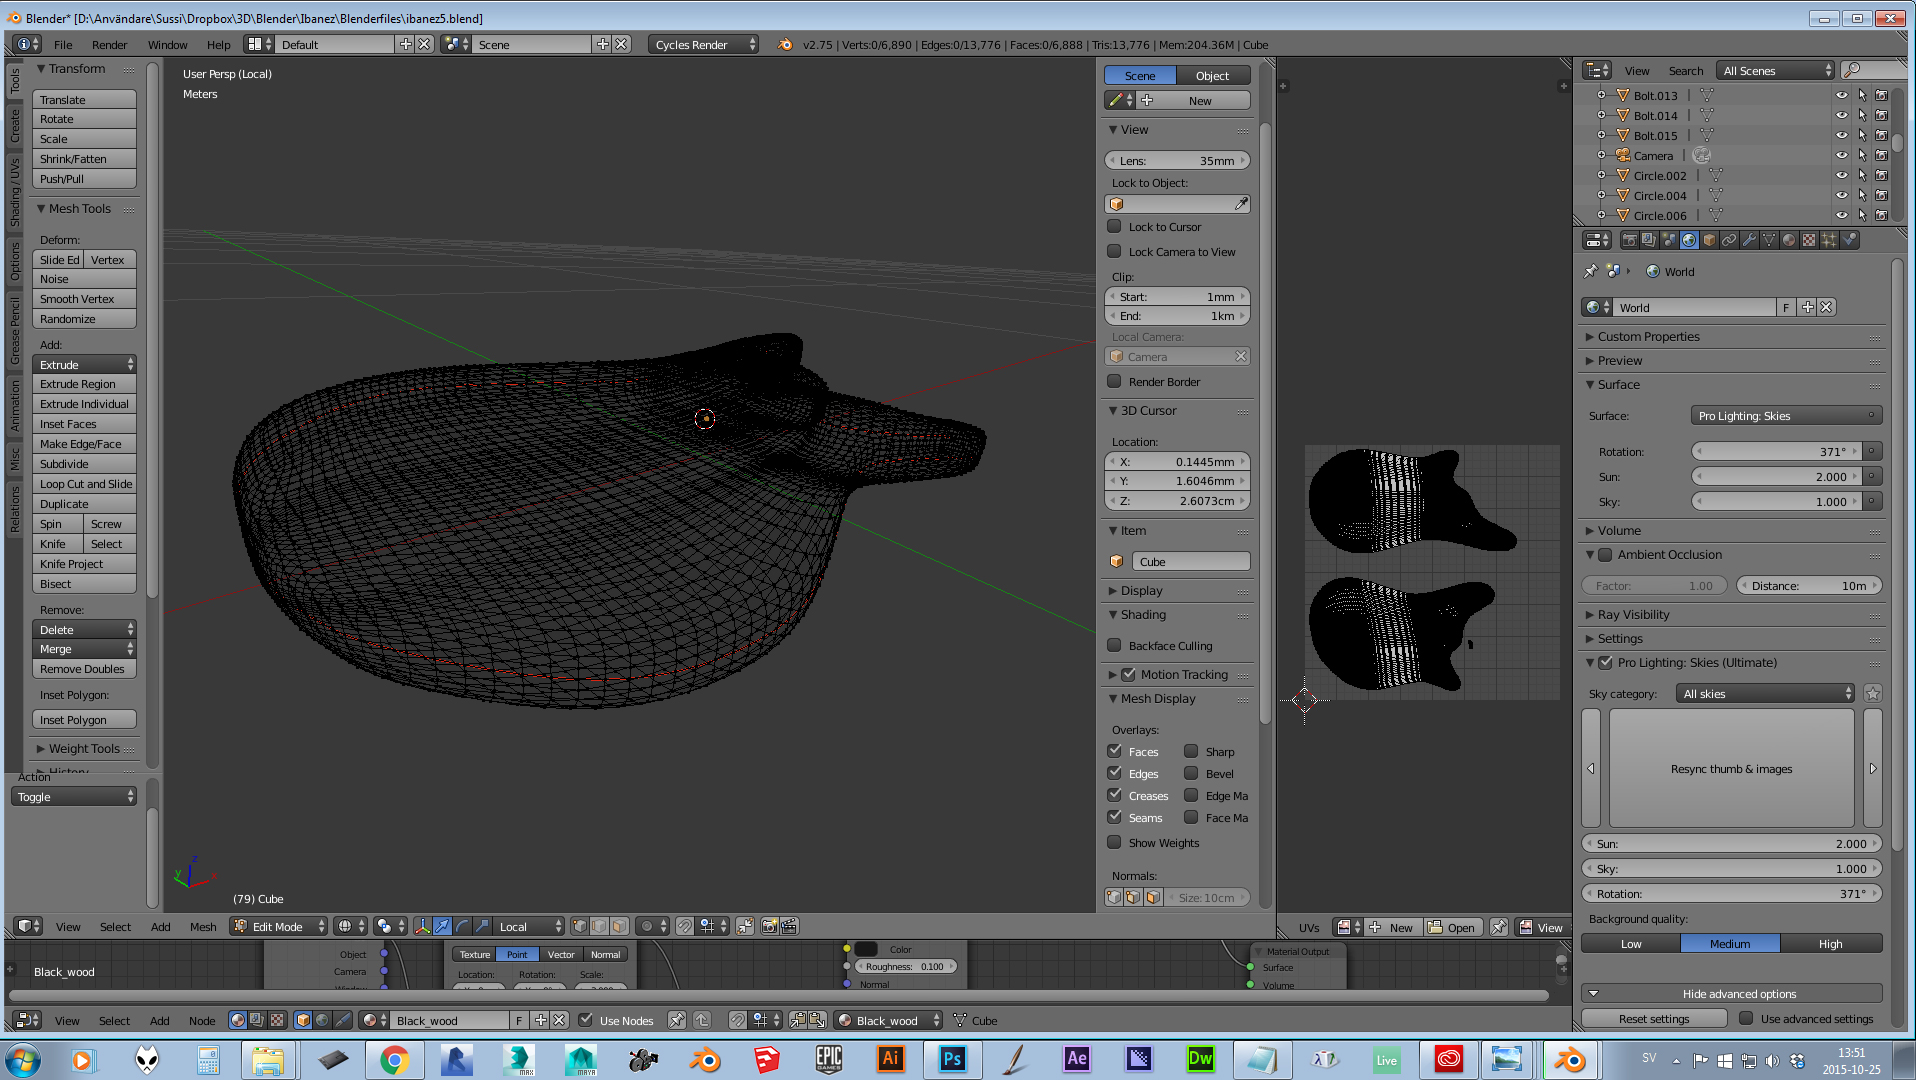
Here´s a wireframe render:

Best regards
Sussi
Maybe try using the image you have posted as your image texture/bump map. You may need to modify the colours - even re-colour it. Can you post your node setup, just a screen grab image will do. Alternatively you may need to find a woodgrain image that will give you the same kind of surface finish and use this as a texture/bump map. You may also need to look at your lighting, particularly to use an HDR Environment texture to get better light reflections.
Modelling looks very nice with evenly distributed vertices, nice work. Was this a fretless or fretted guitar, if it is fretted, do you know the formula for calculating the fret positions, if not let me know as I can help here.
Keep up the good work!
Cheers, Clock.
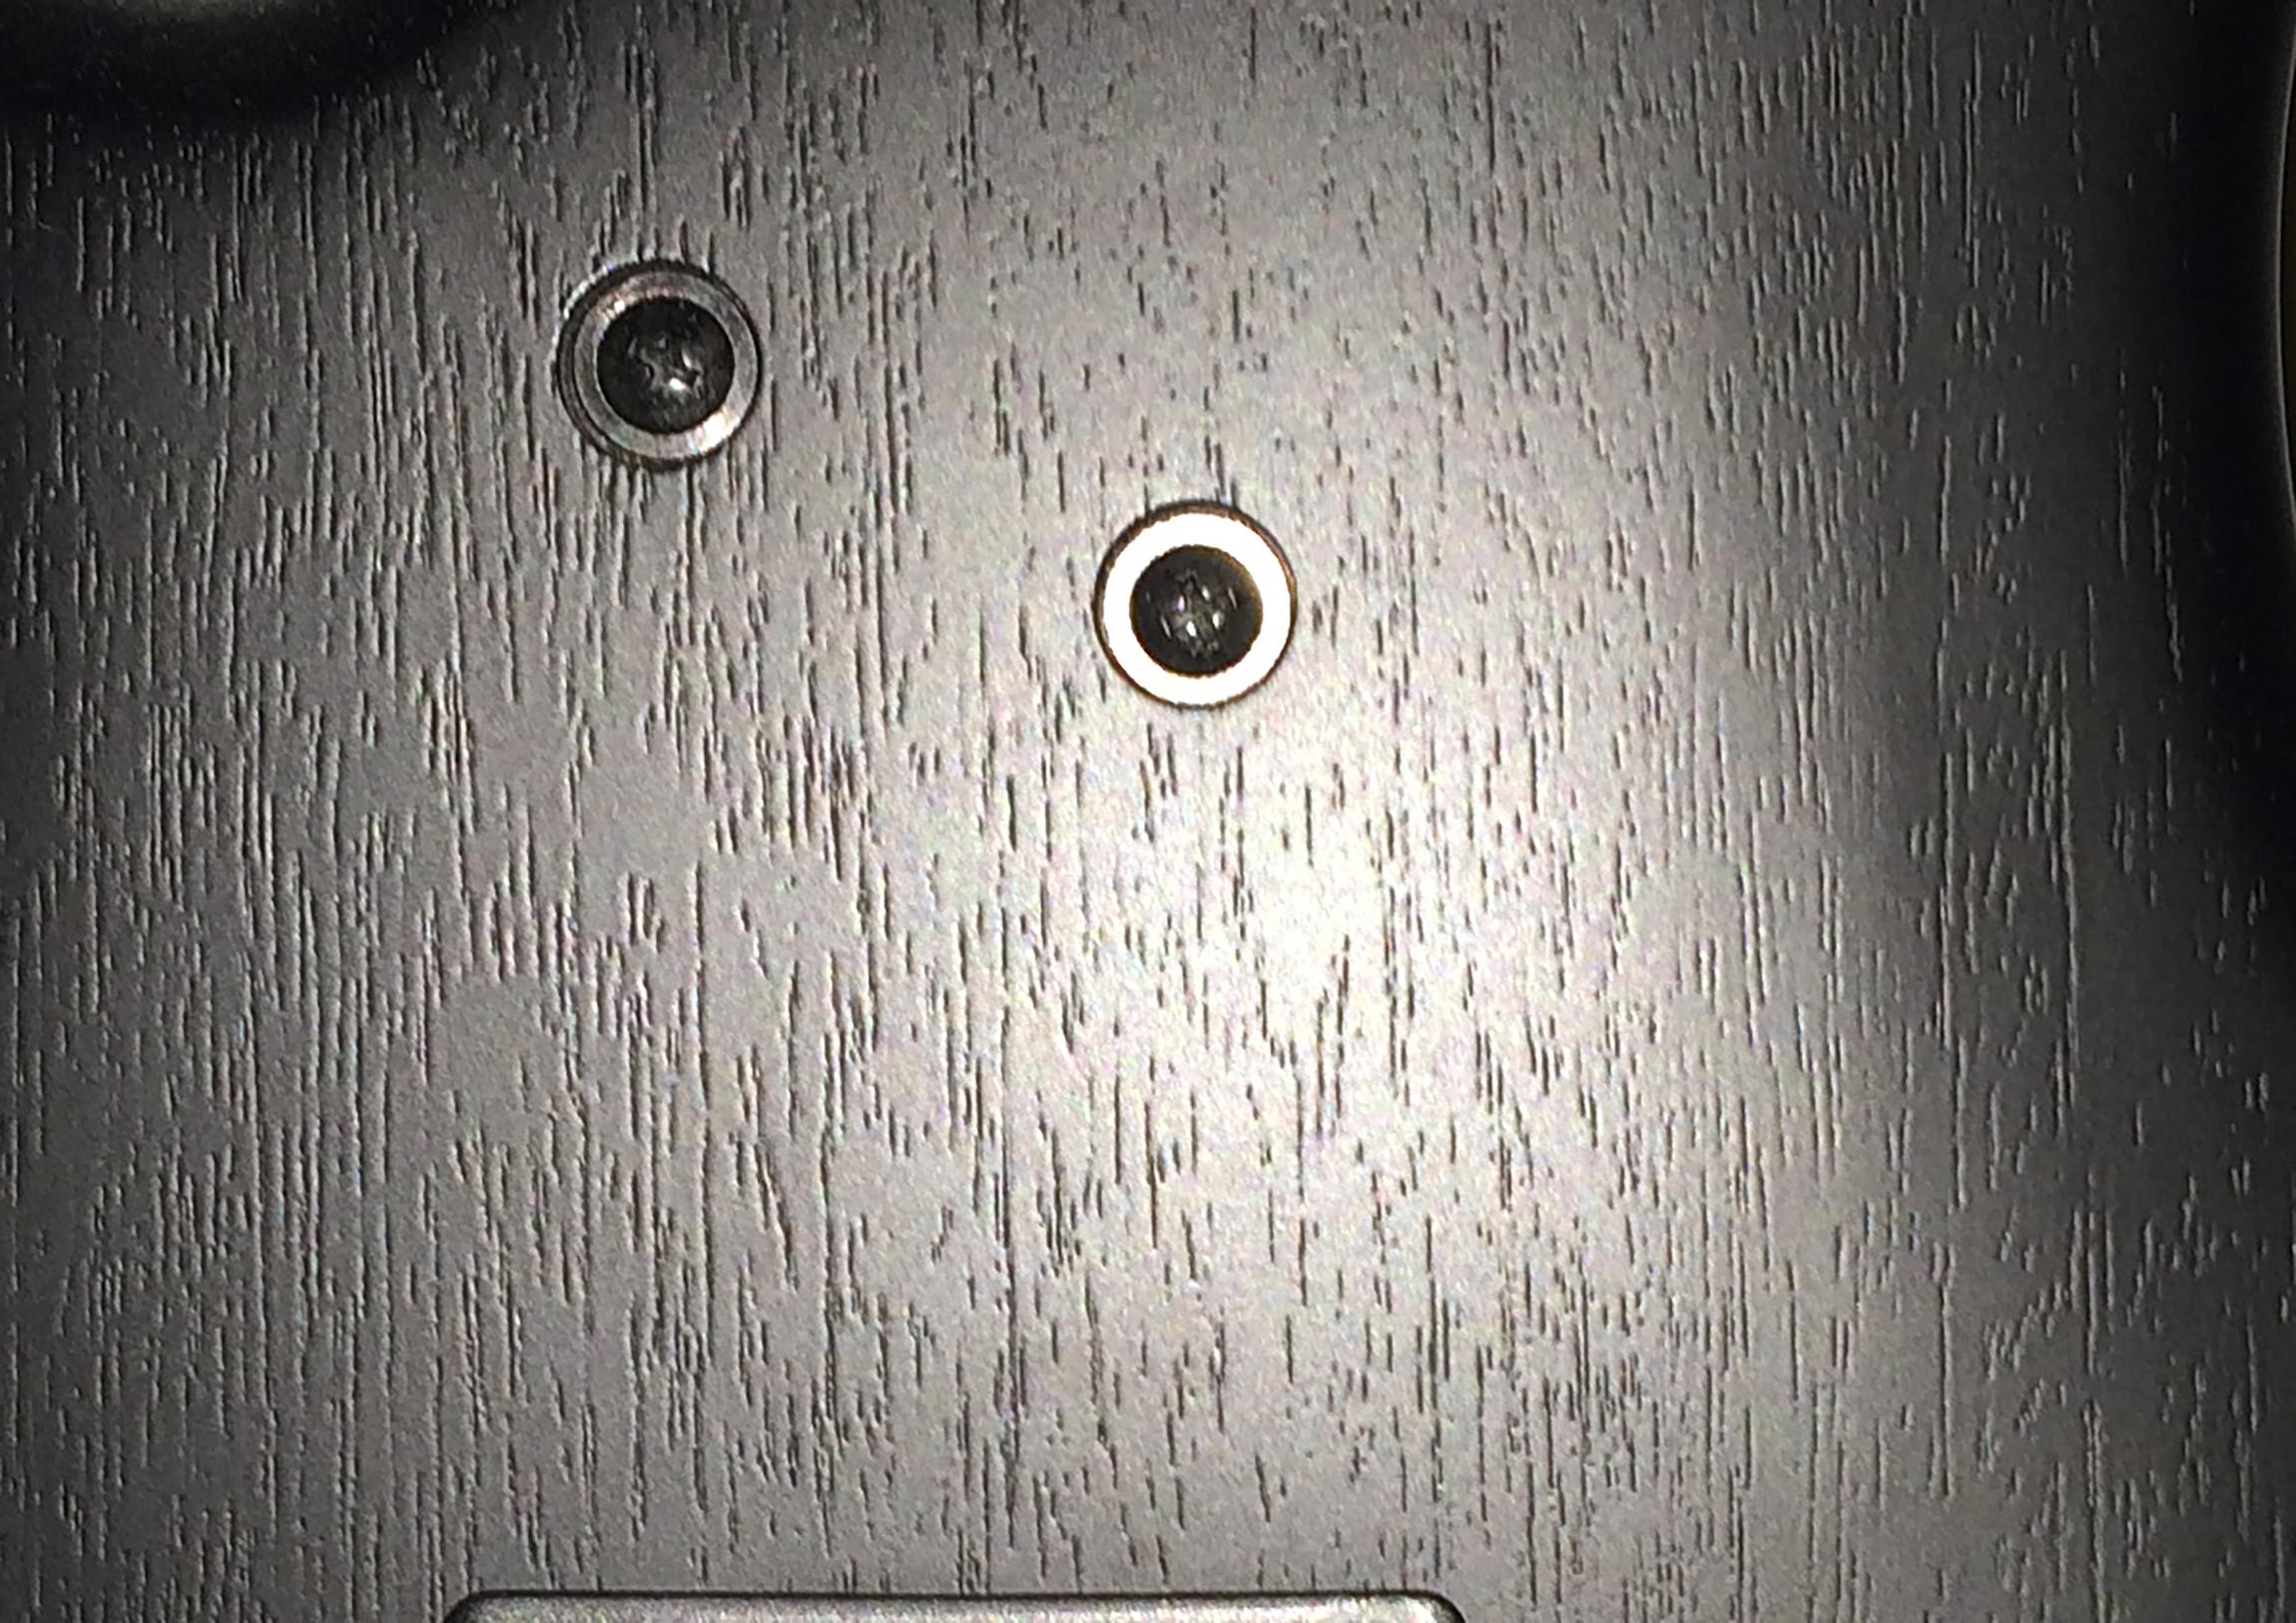
I started out by taking a piece of the real material, and it worked really well, BUT I couldn´t get rid of the repetitiveness.
The .png:

The result:

The node setup for the material:
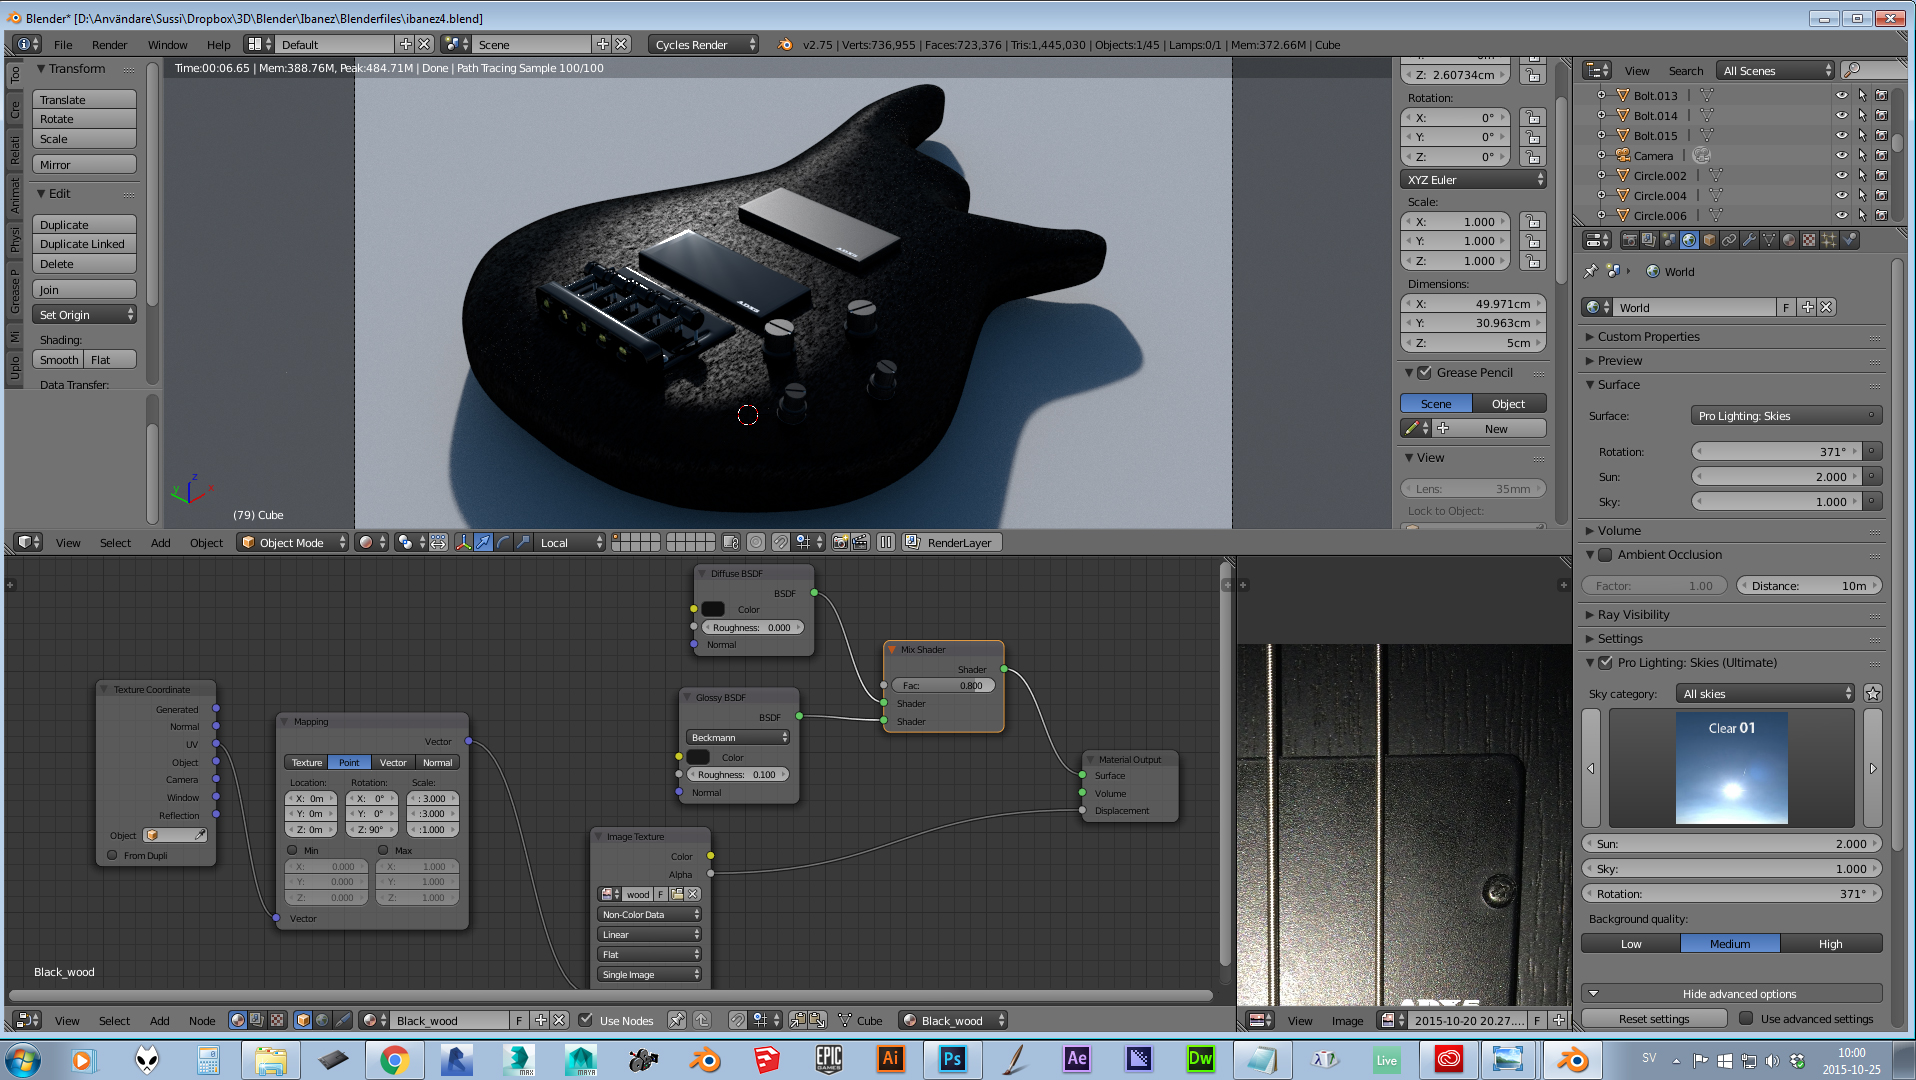
I did use a .hdr texture in the earlier post but it was a studio one. Changed it to Pro lighting skies.
It´s a fretted bass and I do have the real thing to measure but please tell me the formula as it will probably be much easier 
And thank you, I´m trying to keep the vertice count down but enough to give the right look and smoothness.
Best regards
Sussi
Hi
I think that you need to work on the modeling as the edges around the guitar are not smooth as a real one would be, either this or there is just too much bump.
Getting to the texture, I would take clocks advice and find an image texture (there are various sites on the web that offer big free ones) for the guitar and unwrap it properly, I am no expert on nodes, but I think that the node setup is wrong, you need to feed the image texture into a normal node and then from there into the normal of the diffuse, glossy etc and not into the displacement.
Andrew price has a nice tutorial ‘’ the secrets of realistic texturing ‘’ the setup he uses will be perfect for what you are trying to do here.
Looking forward to updates.
Shaun
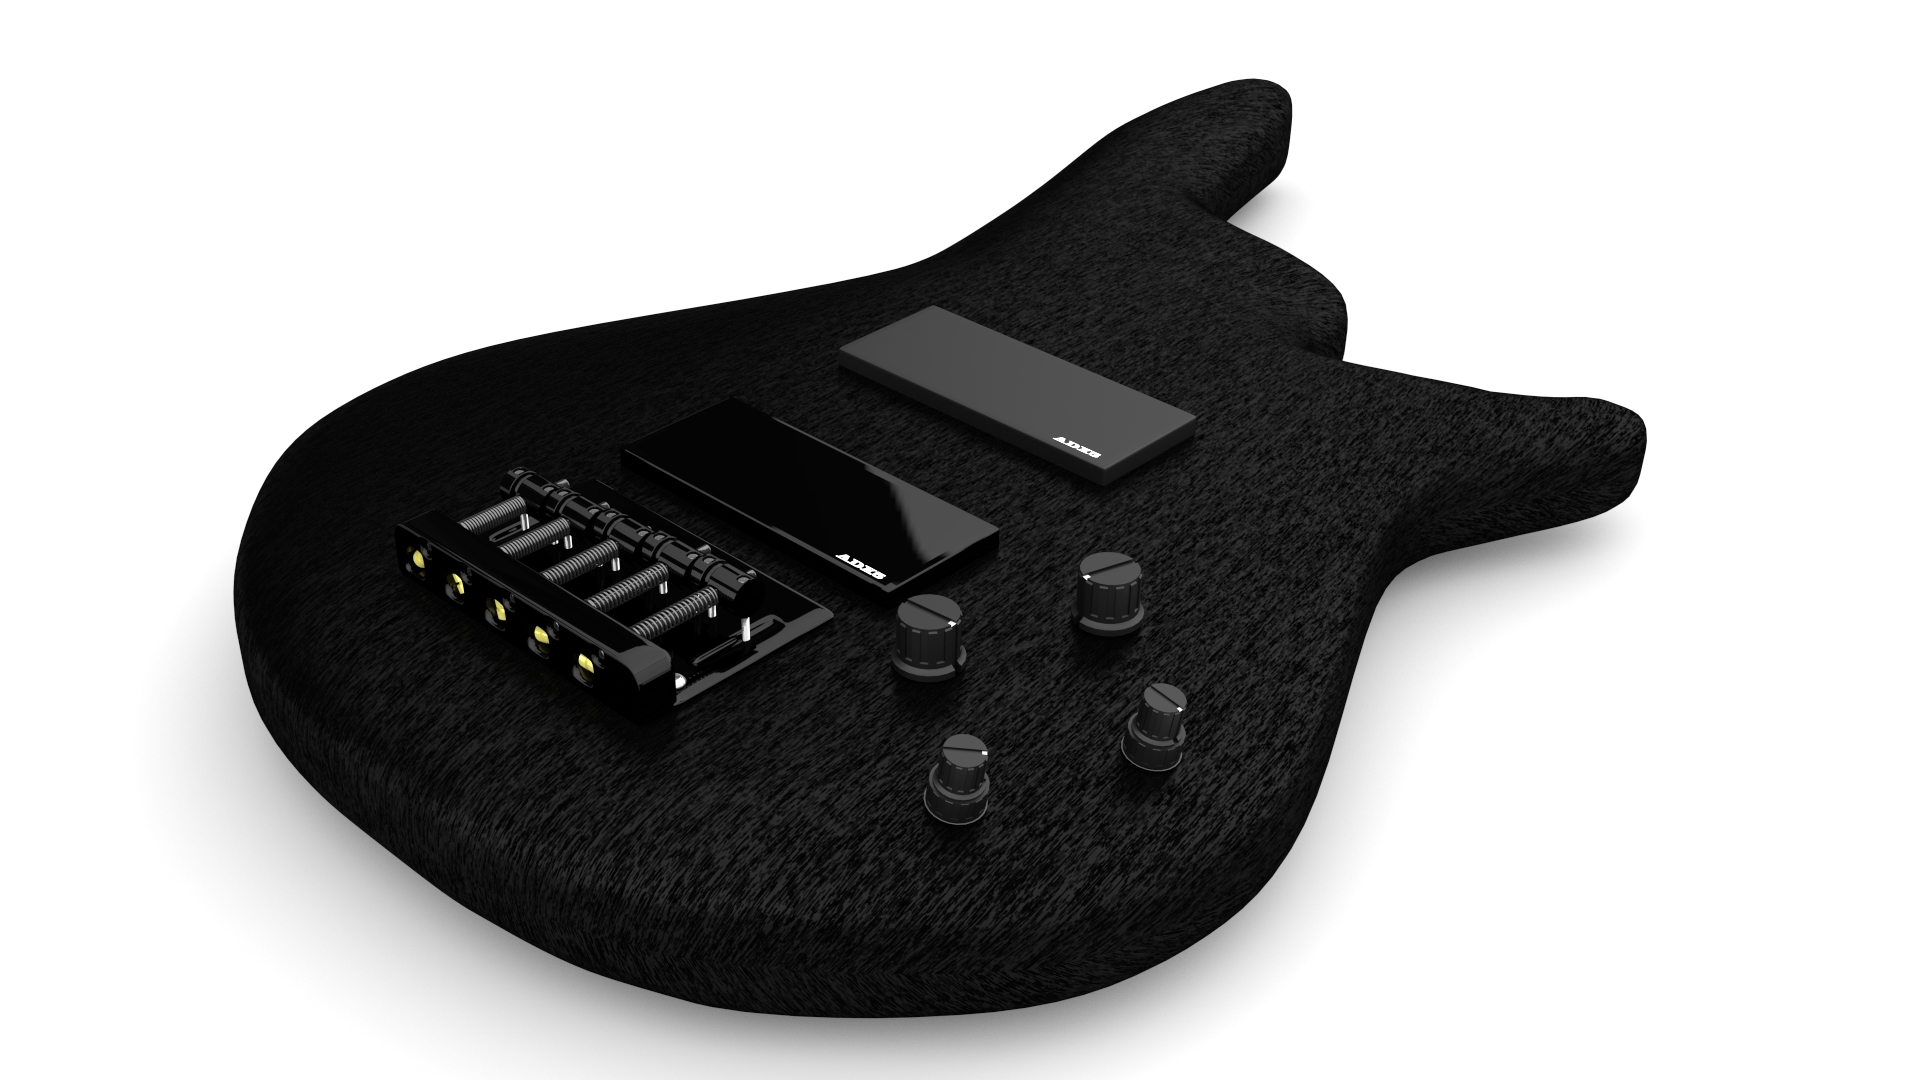
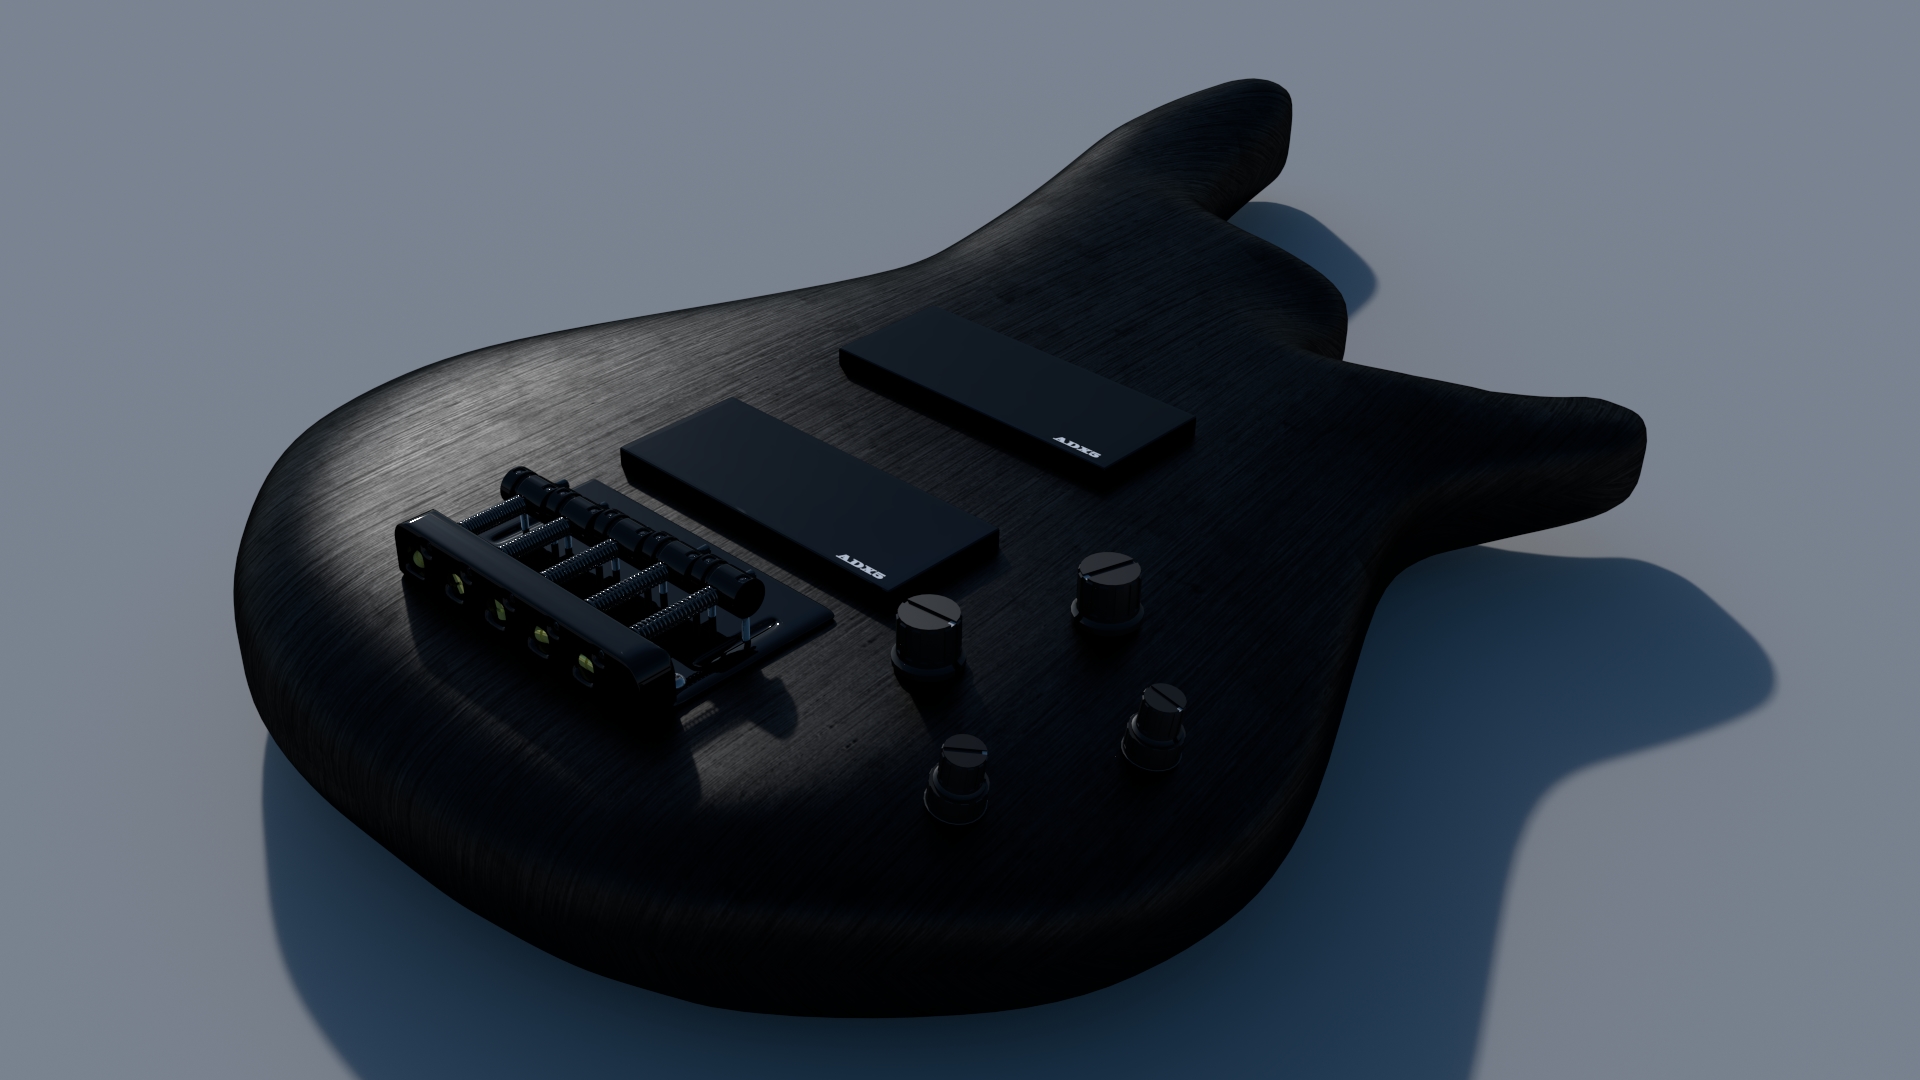
Thank you for the advice. I have watched Andrews tutorial and I can get a good result using any other wooden material. What I don´t understand is how to get the wood to look painted black. Any advice on that? That´s why I used a black material and only wanted the grooves to affect the displacement.
Here it is with light wooden material:
Also how do you suggest I unwrap the body piece? I did my best trying to get it to look right.
Best regards
Sussi
Try this out and see if is what you are looking for, you will obviously need to eventually use your own bump texture and play a little with the settings.
https://dl.dropboxusercontent.com/u/65776980/sussi.blend
Shaun
Thank you very much Clock!
My UV map around the edges are completely wrong but I had no clue how to fix them. I will try this tonight when I get home from work! By the way, that is a beautiful violin! Not sure I would be able to pull that shape off just yet!
I made a seam straight through the middle, is that the correct way? Or should I put any more seams in this model? I´m always having trouble to figure that out with soft models. Anyway, this is how my UV is looking right now:
I have started on the neck, and the shape is challenging. But then again, I do this because I want to learn and be better at modelling aswell as texturing ![]()
All the best
/Sussi
OK here is a simple guitar body - I just created a cube, added some edge loops (CTRL+R) then moved the vertices about a little and extruded some faces to get the shape. Then I added a Sub-division modifier (View set to 2 Render to 3 and check the Optimal Display box) and UV mapped it using “Smart UV Project”:

Fig 1 - The basic vertices

Fig 2 - The Sub-div modifier view

Fig 3 - The UV map.
You see the UV map areas are all the same colour, so are all of uniform scale. So go to EDIT mode and select all the vertices. If you then go to the UV/Image Editor and select some of the vertices in here and move them, you will see the colour change - you are aiming for a uniform blue colour, unless you scale them to fit the image, in which case they will change colour, but they should all be the same colour. You can also pin some of the vertices in the UV/Image editor (key P I think) and then scale the others, the pinned ones stay in place. Yo can also select some of the islands and rotate them for example to get correct orientation to the texture image. I did not use any seams in this UV map.
I used a reference image of my own guitar to get the shape right - I made the guitar myself so it is my own design and it is also fretless, as I prefer to play a fretless bass.
I hope all this will help you. :yes:
Cheers, Clock.
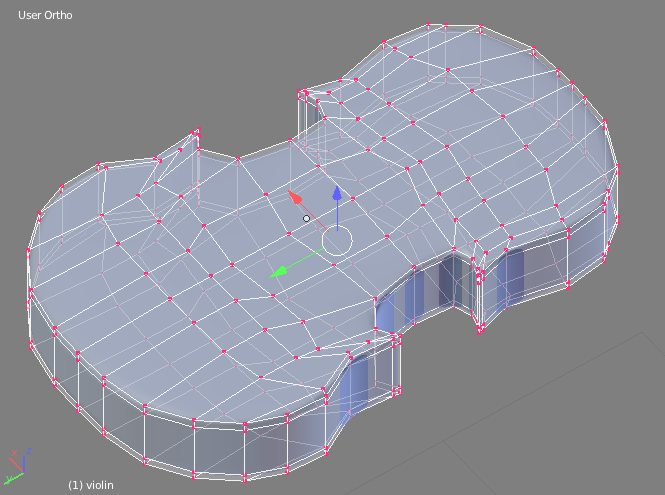
Here are the vertices for the violin body, I could not post it last time as there is a three image limit…
Cheers, Clock. 
EDIT: I might equalise the spacing a little but it will not affect the overall render particularly as the body will only move not deform.
Here’s the render:

OK - I thought of a better method, the results are below, I have not spent a lot of time moving things around to get exact colour matches, but the principle remains:

What I did here was:
-
Select the front and front rounded edges and then UV project these from the view (front view)
-
Select just the front faces and then pin these points in the UV Editor (key P). The red dots are the pinned vertices.
-
Select the front faces and rounded corners and then unwrap them in the UV editor (Key E)
-
Repeat for the back faces and back rounded edges from the back view (key CTRL+1 to get the back view).
-
Select the flat edge faces and then “Smart UV Project” them.
Line up the various islands on the image and move some of the vertices in the UV editor to get the colours nearly equal, I could spend a bit more time here, but it does not matter too much.
And Voila! - you have a good UV map created. If you then use this map on your texture image to get colour and bump maps I think it will look convincing. You might like to turn the edge faces maps through 90 degrees, depending on how the grain goes on your wood image or edit the image - add a copied area to the edge and rotate it - so the grain falls how you want it on these faces.
This may help you further, I hope.
Cheers, Clock.
EDIT:
What you won’t ever get with the type of UV mapping and a single “face” of wood grain is the end grain that occurs for example on the left and right edges of the guitar. For this you need more images showing end grain as well. Having said that the guitar would probably have been made from a very close grain wood like maple (that’s what I use to make guitars) and the end grain is very indistinct anyway, so you have to make call here as to how far you go. What I have done here in really is akin to “veneering” the body with all side grain wood, rather than carving it from a solid piece of wood. This method is good for acoustic guitars and violins, etc, as this is exactly how they are made, in that the wood is steamed and bent around a pattern mould.
Wow! That is beyond helpful Clock! Thank you very much for taking the time to make such a thorough explanation! You have already taught me a lot. I didn´t know you could pin vertices and I didn´t know about the unwrapping command in the UV-editor or even the stretch alternative and the colors. It has all been a big mystery to me.
I have one question though. Since I for some reason decided to apply the subdivision modifier I decided to start all over with the body. My bass body has much more rounded edges so I only subdivided the edge one time, hence there is no flat edge. I tried making a small edge but it just didn´t look right. However, when I have unwrapped both sides according to your explanination the edges of both sides connect so that if I move one edge vertex in the front view, the corresponding edge vertex on the back view moves aswell. I just wanted to ask if that is the normal thing?
I hope you understand what I mean, since english isn´t my language ![]() Here´s a screenshot of my UV so far:
Here´s a screenshot of my UV so far:
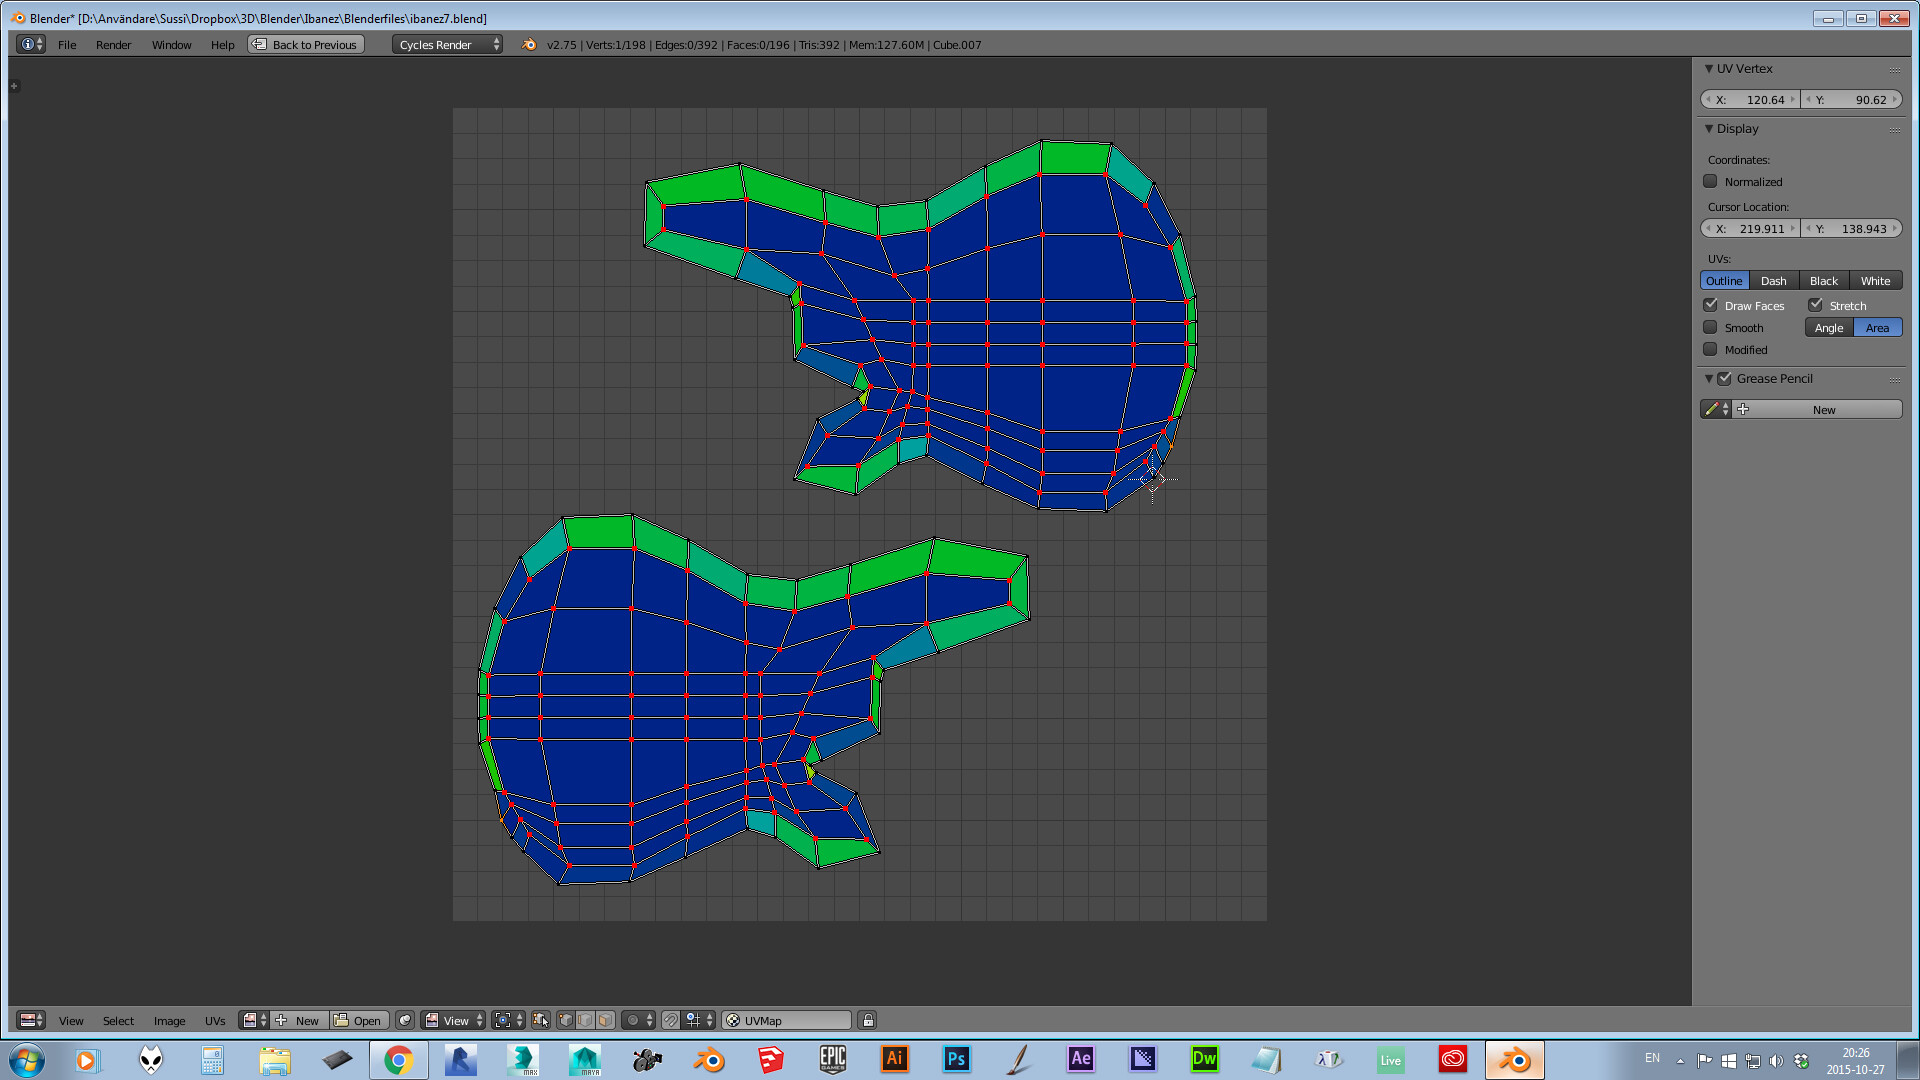
In the image, you can see the selected vertex in both the front and the back view.
The edges has no grain at all on my bass, they´re just smooth and black, so I will have to work on the texture after I´m done correcting all of the vertices. As you can see, I have only just started to correct them. I just wanted to verify if I´m on the right track or if I´m doing something wrong.
So you make your own guitars? That is very impressive. I could maybe do a paint job on one but never make a whole guitar or bass ![]()
All the best
Sussi
Yes, this is normal as you are editing the same vertex on both the front and back mappings. This is where you can use a seam to split the two halves of the map.
Cheers, Clock.
PS. As you are Swedish, I suspect your English is better than a lot of English people’s!
Thanks Clock!
I thought as much! Thanks for clarifying 
All the best
/Sussi
You’re welcome!
Here is a picture of my bass along with my Ibanez TCT10E and keyboard, etc - I made the bass, the fifth I have made for myself over the years:
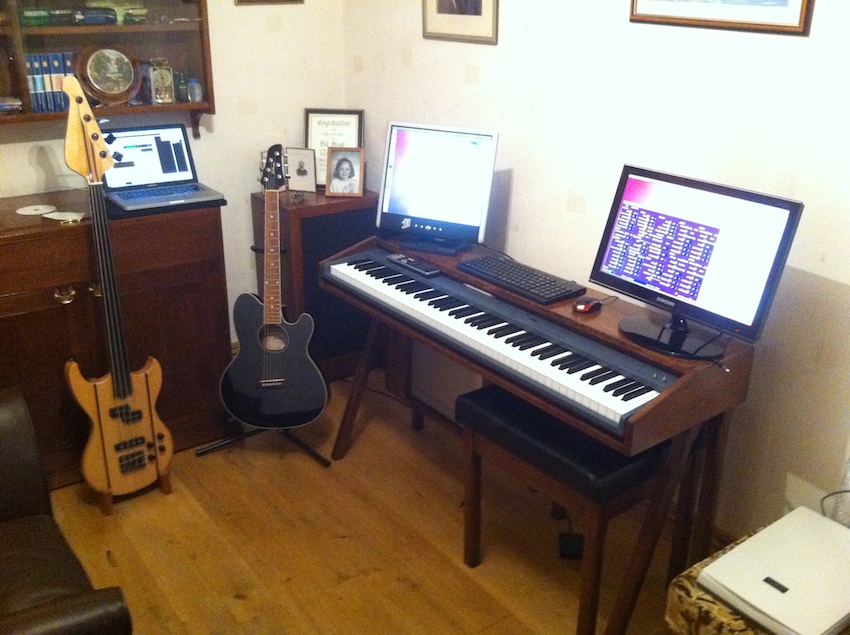
If you would like a video of a character playing your bass when it is finished, let me know and I will happily oblige.
I am going to get my Erkinator robot to play bass on the next video I produce for my “Clockophone” project, that will be some time as these take out 2 weeks to animate and the same time to render.
Cheers, Clock
@clockmender: cool that you built your own bass. I have considered doing so myself. Is that a fretless?
@sussi: the new material looks great, imo.
Yes - I prefer fretless these days, I can slide them easier and they sound much nicer. The tone is better too as you are pressing the string onto an ebony fretboard rather than a brass fret. The body is Canadian maple and Brazilian mahogany - again it gives a better tone than anything else I have tried.
Cheers, Clock.
Well Clock, this business with UV-unwrapping is not a piece of cake. I´m still not happy with the material around the edges of my bass body.
It´s been a hectic week with other blender projects I´ve had to do in the evenings. I ended the week with going to a concert, In Flames. It was great! They played for almost 2 hours. And on wednesday nov. 4 I´m going to Stockholm to watch Papa Roach and Five Finger Death Punch. I´ve even got VIP tickets for Papa Roach ![]()
Anyway! I´m taking a break from the UV-unwrapping and have started to model the neck. So, that´s what I´m working on now. This is how far I´ve come:
I´m impressed with you building your own instruments. It has to be difficult and every measurement has to be right for it to sound right. I could never do that ![]()
All the best
Sussi