Imported Unreal Engine 3 models and need some texture help, please!

Hello, Blender Artists!

I’m fairly new to Blender and software like this in general, and have been struggling to wrap my head around some things, especially as it pertains to textures.
I’ve imported models from Batman: Arkham Origins (an Unreal Engine 3 game) and while I’ve been able to piece together what diffuse, normal, and alpha textures are and where they plug into, I’m not so sure about these other ones.

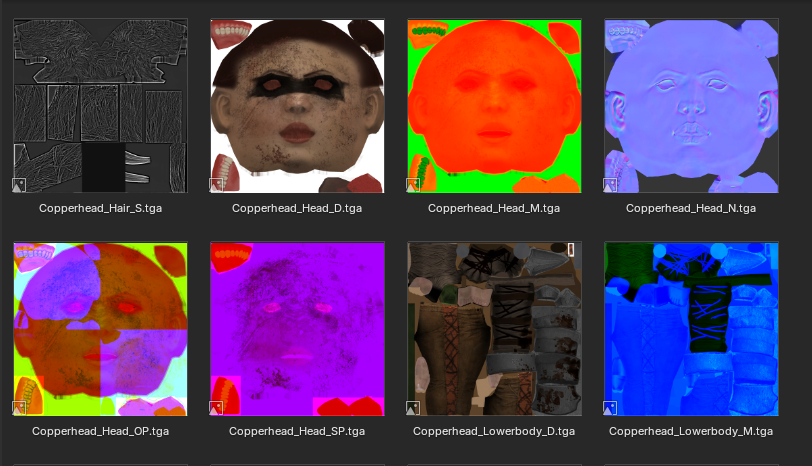
These are “M”, “OP”, “SP”, and “S” (only for hair models), with some visual reference:
I’ve taken my best guess at where these are supposed to plug in. I put “M” in Metallic, “OP” into an Invert Color node which plugs into Roughness, “SP” into Specular IOR, and “S” into Specular IOR too.

Now, all this has given me the result I’d like, but I would still like to understand it better. Knowing what I’m working with will help me with future imports, and any guidance would be greatly appreciated.

I should note that these models all come with a “MaterialInstanceConstant” text document which contains all this technical stuff I don’t understand. Here’s an example:

Parent = Material3'Gotham_Character_MasterMAT.Material.Character_Base_v2_MAT'
ScalarParameterValues[7] =
{
    ScalarParameterValues[0] =
    {
        ParameterInfo = 
        ParameterValue = 2
        ParameterName = SSS_Radius
    }
    ScalarParameterValues[1] =
    {
        ParameterInfo = 
        ParameterValue = 0.4
        ParameterName = SSS_Intensity
    }
    ScalarParameterValues[2] =
    {
        ParameterInfo = 
        ParameterValue = 0.2
        ParameterName = Reflection_Intensity
    }
    ScalarParameterValues[3] =
    {
        ParameterInfo = 
        ParameterValue = 25
        ParameterName = Cloth_Detail_Tiling
    }
    ScalarParameterValues[4] =
    {
        ParameterInfo = 
        ParameterValue = 1
        ParameterName = Metal_Detail_Intensity
    }
    ScalarParameterValues[5] =
    {
        ParameterInfo = 
        ParameterValue = 0.5
        ParameterName = Skin_Detail_Intensity
    }
    ScalarParameterValues[6] =
    {
        ParameterInfo = 
        ParameterValue = 9
        ParameterName = Skin_Detail_Tiling
    }
}
TextureParameterValues[5] =
{
    TextureParameterValues[0] =
    {
        ParameterInfo = 
        ParameterValue = Texture2D'Copperhead_OZ.Texture.Copperhead_Head_SP'
        ParameterName = Material_Attributes
    }
    TextureParameterValues[1] =
    {
        ParameterInfo = 
        ParameterValue = Texture2D'Copperhead_OZ.Texture.Copperhead_Head_OP'
        ParameterName = Material_Options
    }
    TextureParameterValues[2] =
    {
        ParameterInfo = 
        ParameterValue = Texture2D'Copperhead_OZ.Texture.Copperhead_Head_D'
        ParameterName = Color_Map
    }
    TextureParameterValues[3] =
    {
        ParameterInfo = 
        ParameterValue = Texture2D'Copperhead_OZ.Texture.Copperhead_Head_M'
        ParameterName = Mask_n_Spec
    }
    TextureParameterValues[4] =
    {
        ParameterInfo = 
        ParameterValue = Texture2D'Copperhead_OZ.Texture.Copperhead_Head_N'
        ParameterName = Normal_Map
    }
}
VectorParameterValues[6] =
{
    VectorParameterValues[0] =
    {
        ParameterInfo = 
        ParameterValue = { R=0.701169, G=0.737205, B=0.766744, A=1 }
        ParameterName = Cloth_Modulation_Color
    }
    VectorParameterValues[1] =
    {
        ParameterInfo = 
        ParameterValue = { R=0.2, G=0.2, B=0.2, A=1 }
        ParameterName = Metal_Modulation_Color
    }
    VectorParameterValues[2] =
    {
        ParameterInfo = 
        ParameterValue = { R=1, G=1, B=1, A=0 }
        ParameterName = Skin_Modulation_Color
    }
    VectorParameterValues[3] =
    {
        ParameterInfo = 
        ParameterValue = { R=0.524066, G=0.667509, B=0.977865, A=1 }
        ParameterName = Cloth_Specular_Color
    }
    VectorParameterValues[4] =
    {
        ParameterInfo = 
        ParameterValue = { R=0.665923, G=0.848894, B=1, A=1.4 }
        ParameterName = Skin_Specular_Color
    }
    VectorParameterValues[5] =
    {
        ParameterInfo = 
        ParameterValue = { R=0.2, G=0.2, B=0.2, A=1 }
        ParameterName = SpecularGloss
    }
}
BasePropertyOverrides = 
StaticParameters = 
RuntimeVirtualTextureParameterValues[0] = {}
FontParameterValues[0] = {}
FlattenedTexture = None
MobileBaseTexture = None
MobileNormalTexture = None
bUseMobileSpecular = false
MobileSpecularPower = 16
MobileSpecularMask = MSM_Constant (0)
MobileMaskTexture = None
TextureStreamingData[0] = {}

Is there anything I can do with this? Can it help with figuring out textures?

Thanks!

I can only upload one image in my posts as a new member, so I’m posting my nodes here!

Welcome!

Unreal 3 didn’t use the current way of doing materials (the metallic/roughness workflow), it’s old enough to use the old, less accurate way of doing things, so those textures will probably not map 1 to 1 with Blender’s materials.

Back then, there wasn’t a metallic or a roughness attribute, there usually was a “specular” map instead, which decided the amount of specularity. If you want to emulate this old way of doing things, you would leave the roughness at a constant value, then plug the specular texture into the specular IOR. You could also try to adapt the old textures to the new way of doing things, in which case you would invert the specular map and use it as roughness instead (it might need a bit of contrast adjustment, as it wasn’t made for this).

Some of those textures have wild colors, those are probably channel-packed textures. This means that each of the RGB channels is actually a separate grayscale texture. It’s a method that’s often used in video games to compact multiple grayscale textures in a single file to save space. I don’t know what the letters mean, but your best bet is probably to pass those into a separate color node and look at the individual channels to see what they might be. The Head_OP texture even looks like the blue channel is meant to be used with a different UV set than the rest.

I have found the documentation about UE3 materials.

Not sure M meant metallic back then, as it wasn’t the standard way. Maybe it is, depending on how they built their materials, but they would have needed to manually add reflections to those parts as proper metal wasn’t a thing. It could also stand for “mask”. It looks like both M textures are channel packed, so separating them is going to be more helpful.

OP could mean opacity, but it looks like that texture has multiple channels too, From the thumbnail, the red channel on that one looks like SSS, but it’s hard to tell like this.

SP could be “specular power”, which I see in the documentation. This controlled the softness of the specular, so the era’s closest thing to roughness. But it looks like there are multiple textures there too.

There seem to be lots of textures here and no way to know for sure how they were used. I think I would just look at what’s available and treat them as different masks to create a plausible material for the character. You are unlikely to get the exact material like it was, but as long as you manage to create something that looks good, it should be fine.

So this one seems to confirm that “M” is for “Mask”.

ParameterValue = Texture2D'Copperhead_OZ.Texture.Copperhead_Head_M'
ParameterName = **Mask_n_Spec**

But also contains Specular in another channel? Which is different from Specular Power it seems

And this seems to indicate that they added details with texture tiling (like fabric texture? Was that method used back then?). If so, some masks probably define where details should go.

Specular is the amount, power is the softness. If you were to emulate the old workflow using the current shaders, you would use specular as the “IOR level” and specular power as roughness. Though, the way modern shaders work, the result will be a bit different, as the specular fades when it’s rougher, which wasn’t the case back then.

Thank you so much! I’ll try my best to apply these to Blender’s workflow, but if it doesn’t yield better results I’ll be happy with what I’ve got so far :slight_smile:

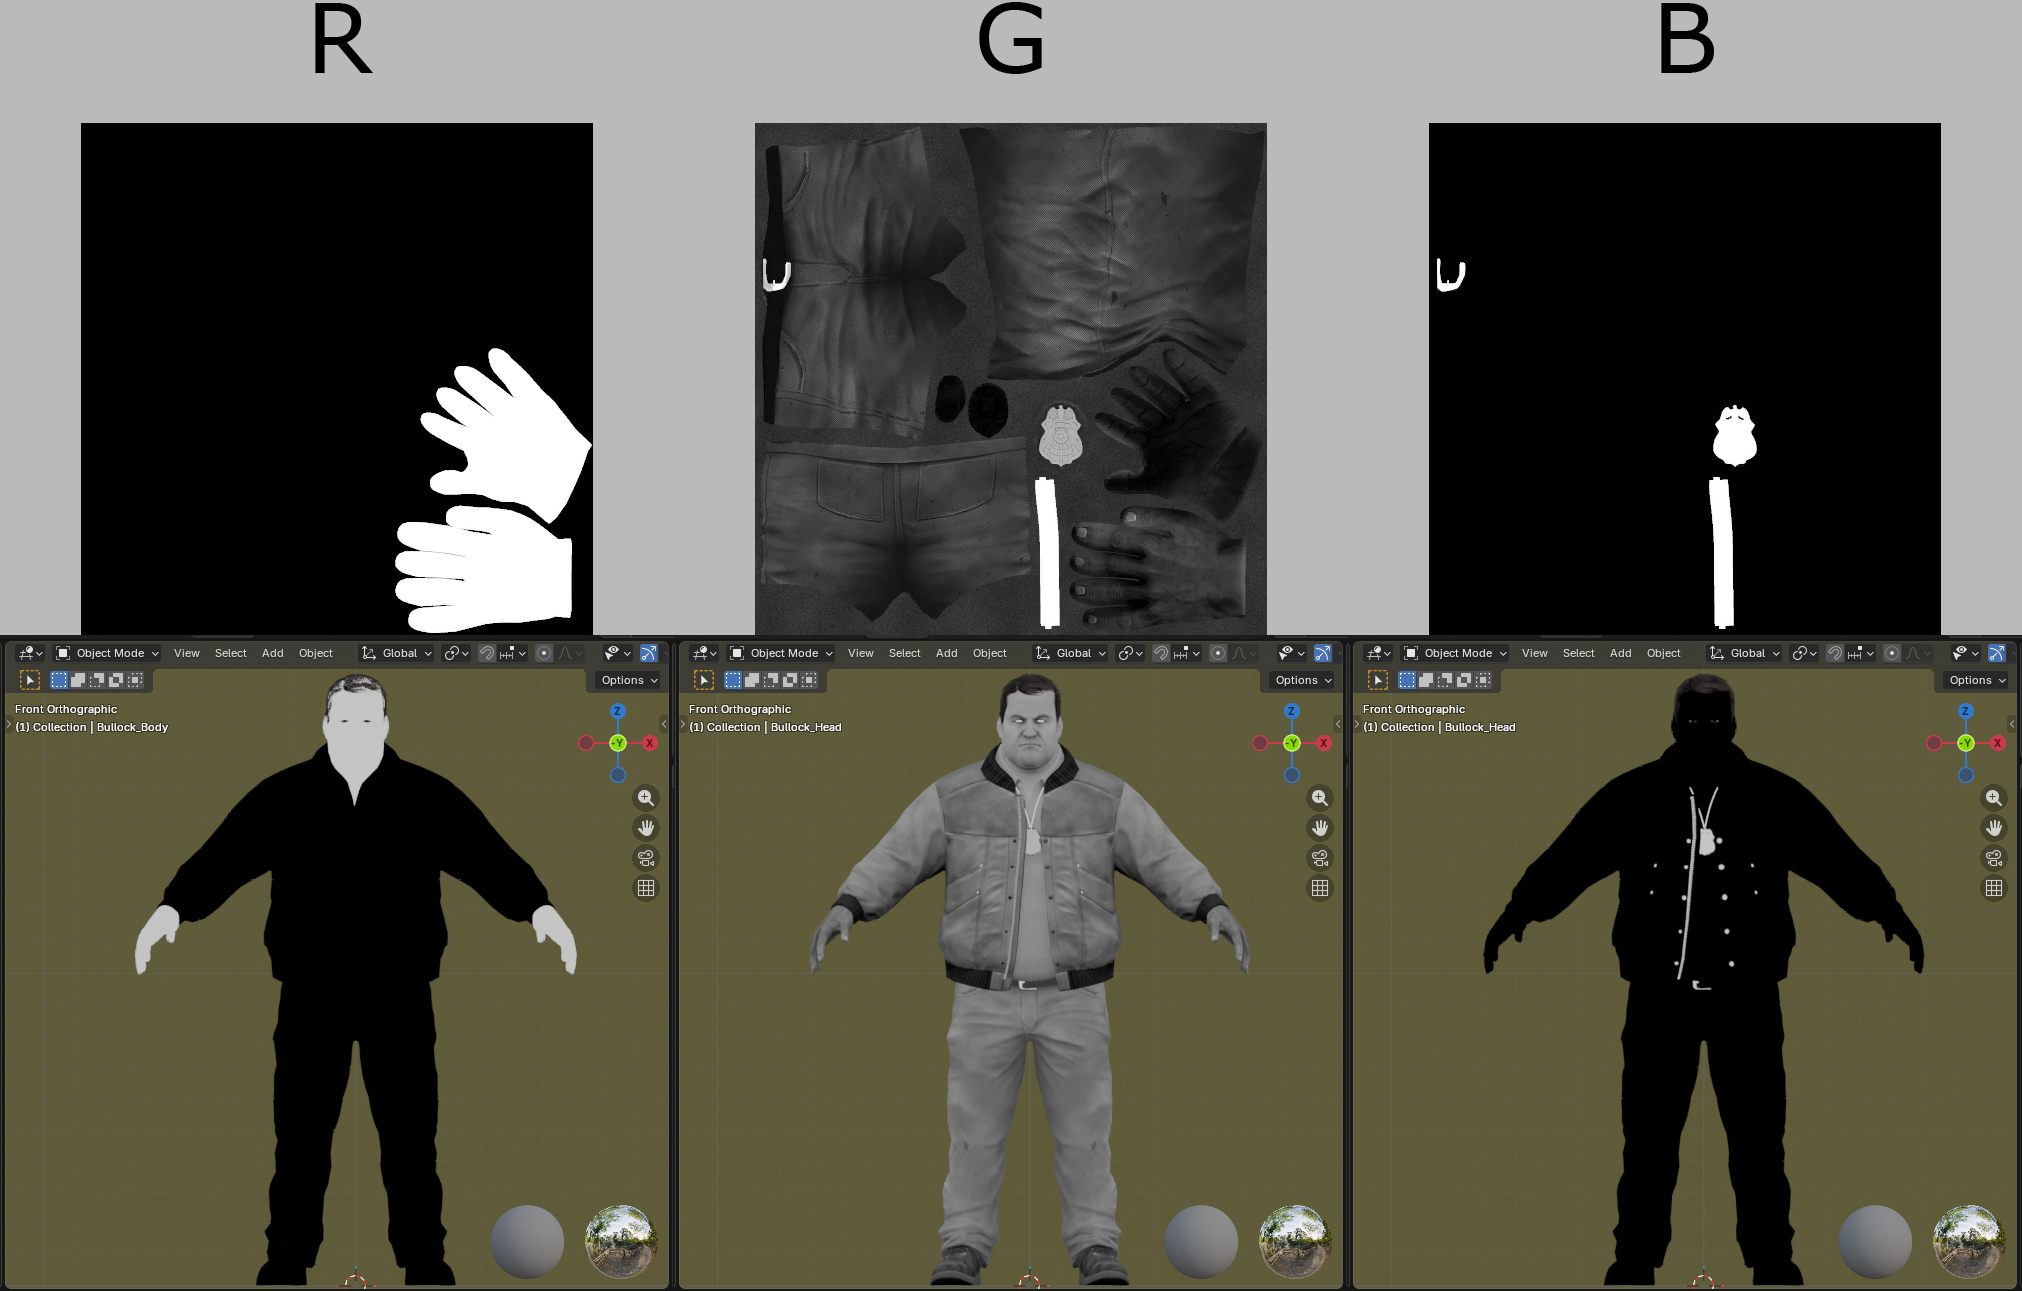
Okay, I’ve separated the RGB channels for each packaged texture (from a different model that better shows things) and these are the results!

First up is “M”:

Next is “SP”:

And finally, “OP” with its strange blue channel:

Sorry for the triple post! It’s the only way I could get past the single image limitation.

The strange blue channel look like it contains four different masks: one in each quadrant.
You probably need to scale the map by 0.5 (in materials only) and translate it depending on the channel… though, I’ve no idea what these masks are for

The M texture’s red channel looks like a mask that isolates the skin (so SSS could be added probably). The green channel looks almost like ambient occlusion, except the colors of the clothes affect the brightness. I don’t know what it’s for, maybe for some additional shading in the original game? it can probably be ignored unless the purpose is obvious once everything is plugged. The blue channel looks like a metallic texture.

The SP texture’s red channel looks like specular intensity. The green looks like a mask that isolates reflective parts (back then, reflection and specular were separate, you probably don’t need it with modern materials as they are now one). The blue channel looks like a mask that isolates the rough fabric parts (in black) from the rest (in white).

The OP texture looks like it contains all the textures from the previous 2, except the masks have been shrunk so all the textures fit in a single file. Like, they created a version that works as a single texture, at the cost of some resolution loss for the less detailed ones.

In such a case it’s alway good to handle the four possible color channels of the images not as colors but as values and so separate them into greyscale images to have and “unbiased look”.

So… properly the N map is a normal map and as we all know those are not colors but a vector… ( :wink: ) next the S map seems to be the sam ein all channels (or the images is even only singled channeled → greyscale); also @stray’s suggestion now “looks” obvious…

Remember :exclamation: We have no fourth channel in the overview image posted above… using this also as value visualization (gray image) may give some more clues…

Also: some of those maps seems to be channel backed vesions and so not really all a “needed” ??