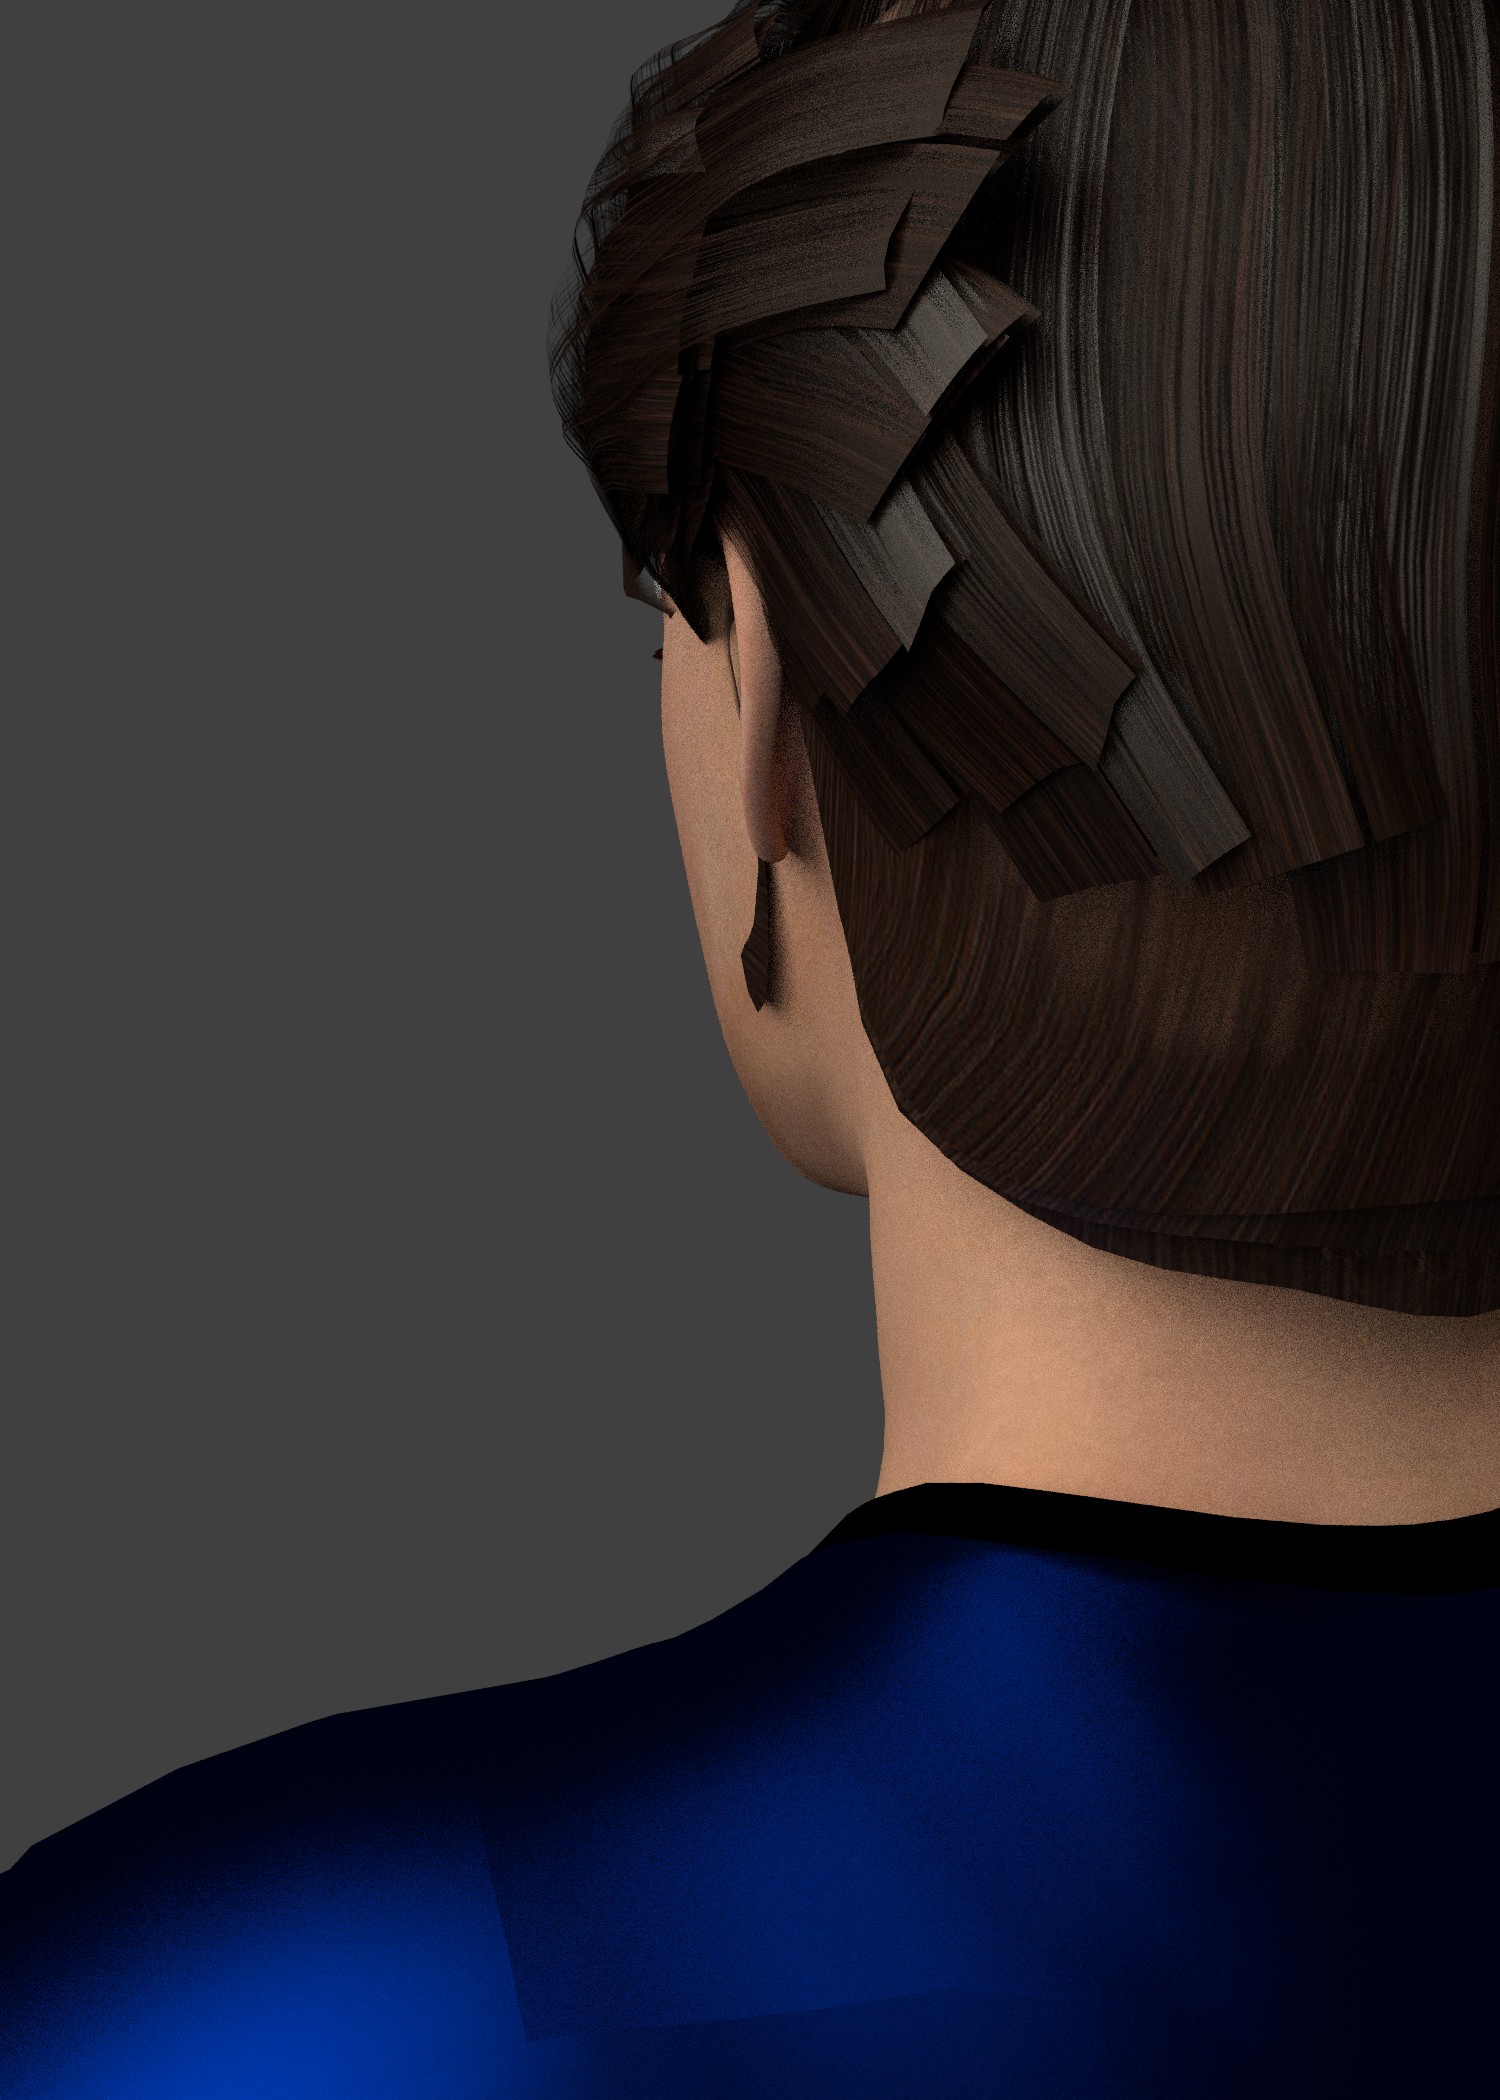
I imported a Poser 9 character as an object from into Blender Cycles and the hair
rendered is not refined at all. Any ideas on how to get the hair to render like hair in Blender Cycles?
I think the hair alpha in Poser or DAZ Studio is usually stored in a grayscale file. You probably need to go into the material and click “Calculate Alpha” (assuming you’re using Blender Internal). If you’re using cycles, you’ll have to mix your shader with a transparent shader based on the alpha map.
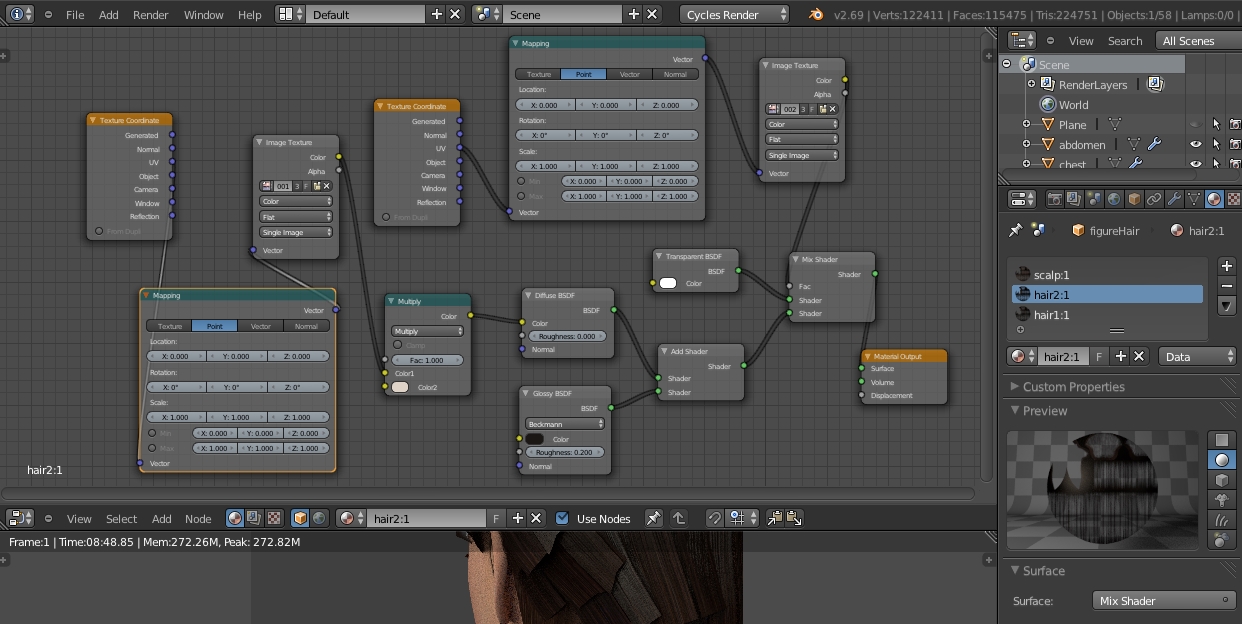
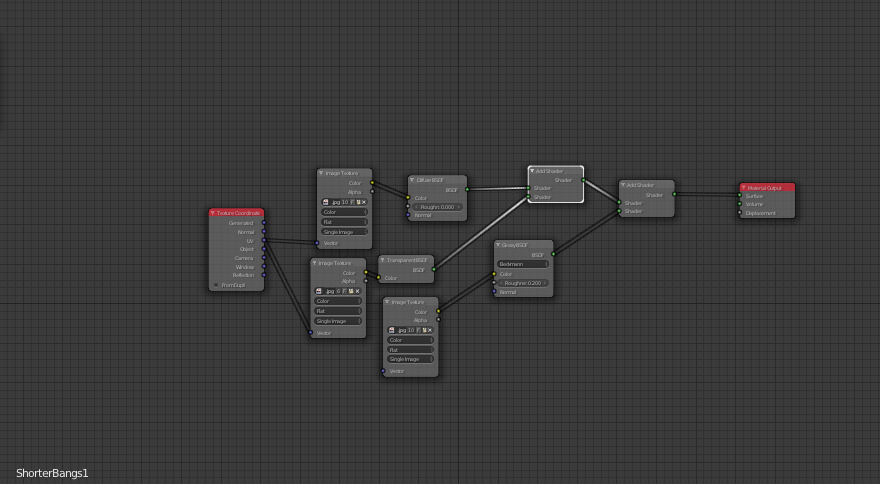
thanks, jeff_lamarche. Yes, it’s in Cycles. Attached is my node setup for hair. Could you give me any tips with this to get it working and the hair displaying correctly?
There’s probably other ways, but I always did it by connecting the grayscale transparency map into the Fac of a Mix (or in your case “Add”) Shader, then using a Transparent shader for one input and my hair texture for the other.
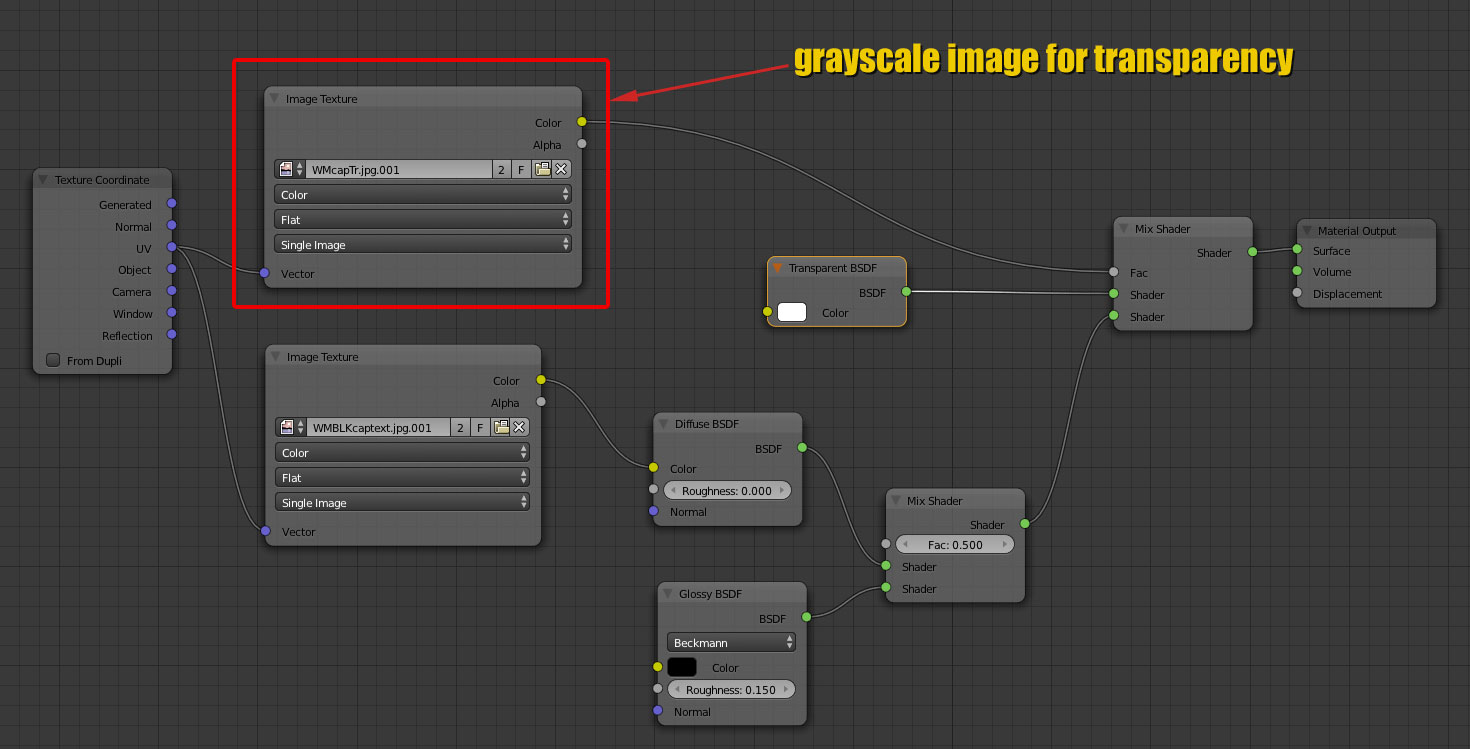
see my screenshot for an example. it works for me…
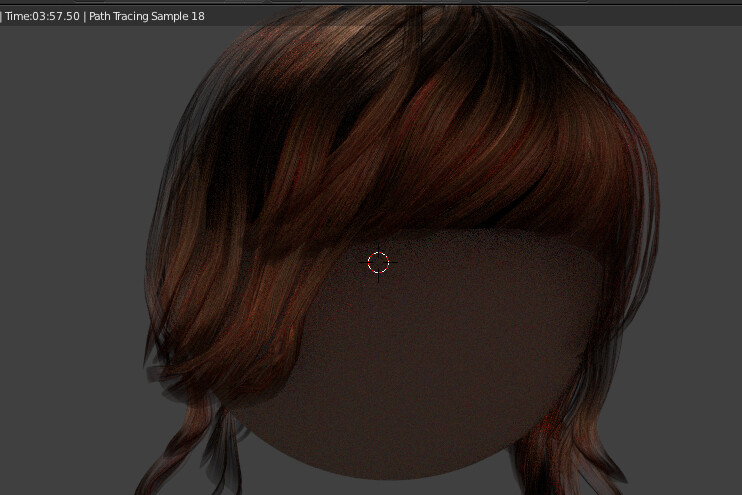
Thank you, jgstyle but it didn’t seem to work. I applied your node setup to all three hair textures and it didn’t change the results in the render.
I’ve done this successfully in Blender internal. Having applied the same technique to cycles. IMO you have a bit to much going on in the shaders. When it works for me I have very little going on in the way of nodes. Your nodes should consist of a diffuse, transparency and gloss. Two add shaders and Texture coordinate shader.
Like This:
The other thing is that the transparency map has solid tops and bottoms. Therefore, your edges are going to be solid unless you adjust the map. What I would suggest is opening it in GIMP and panting out the hard black at the bottom. This is what’s causing your solid edges at the ends of the strands.
You want this
not this
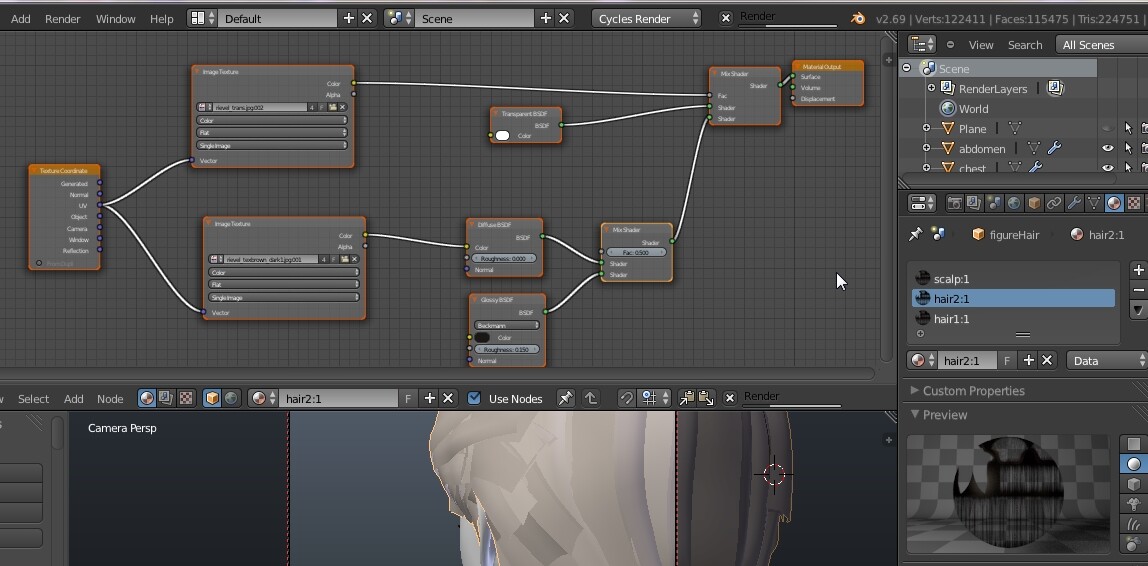
That’s interesting. I see using an Add shader you plug the map directly into a Transparent shader, instead of into the Fac on the Mix shader. I never thought to do it that way, could be very useful.
I have a bit of experience with other 3D packages and transparency maps are typically just grey scale maps where black is completely opaque and white is completely transparent. I try use that philosophy with all transparency in any software. Same goes the displacement, bump and other utility maps.
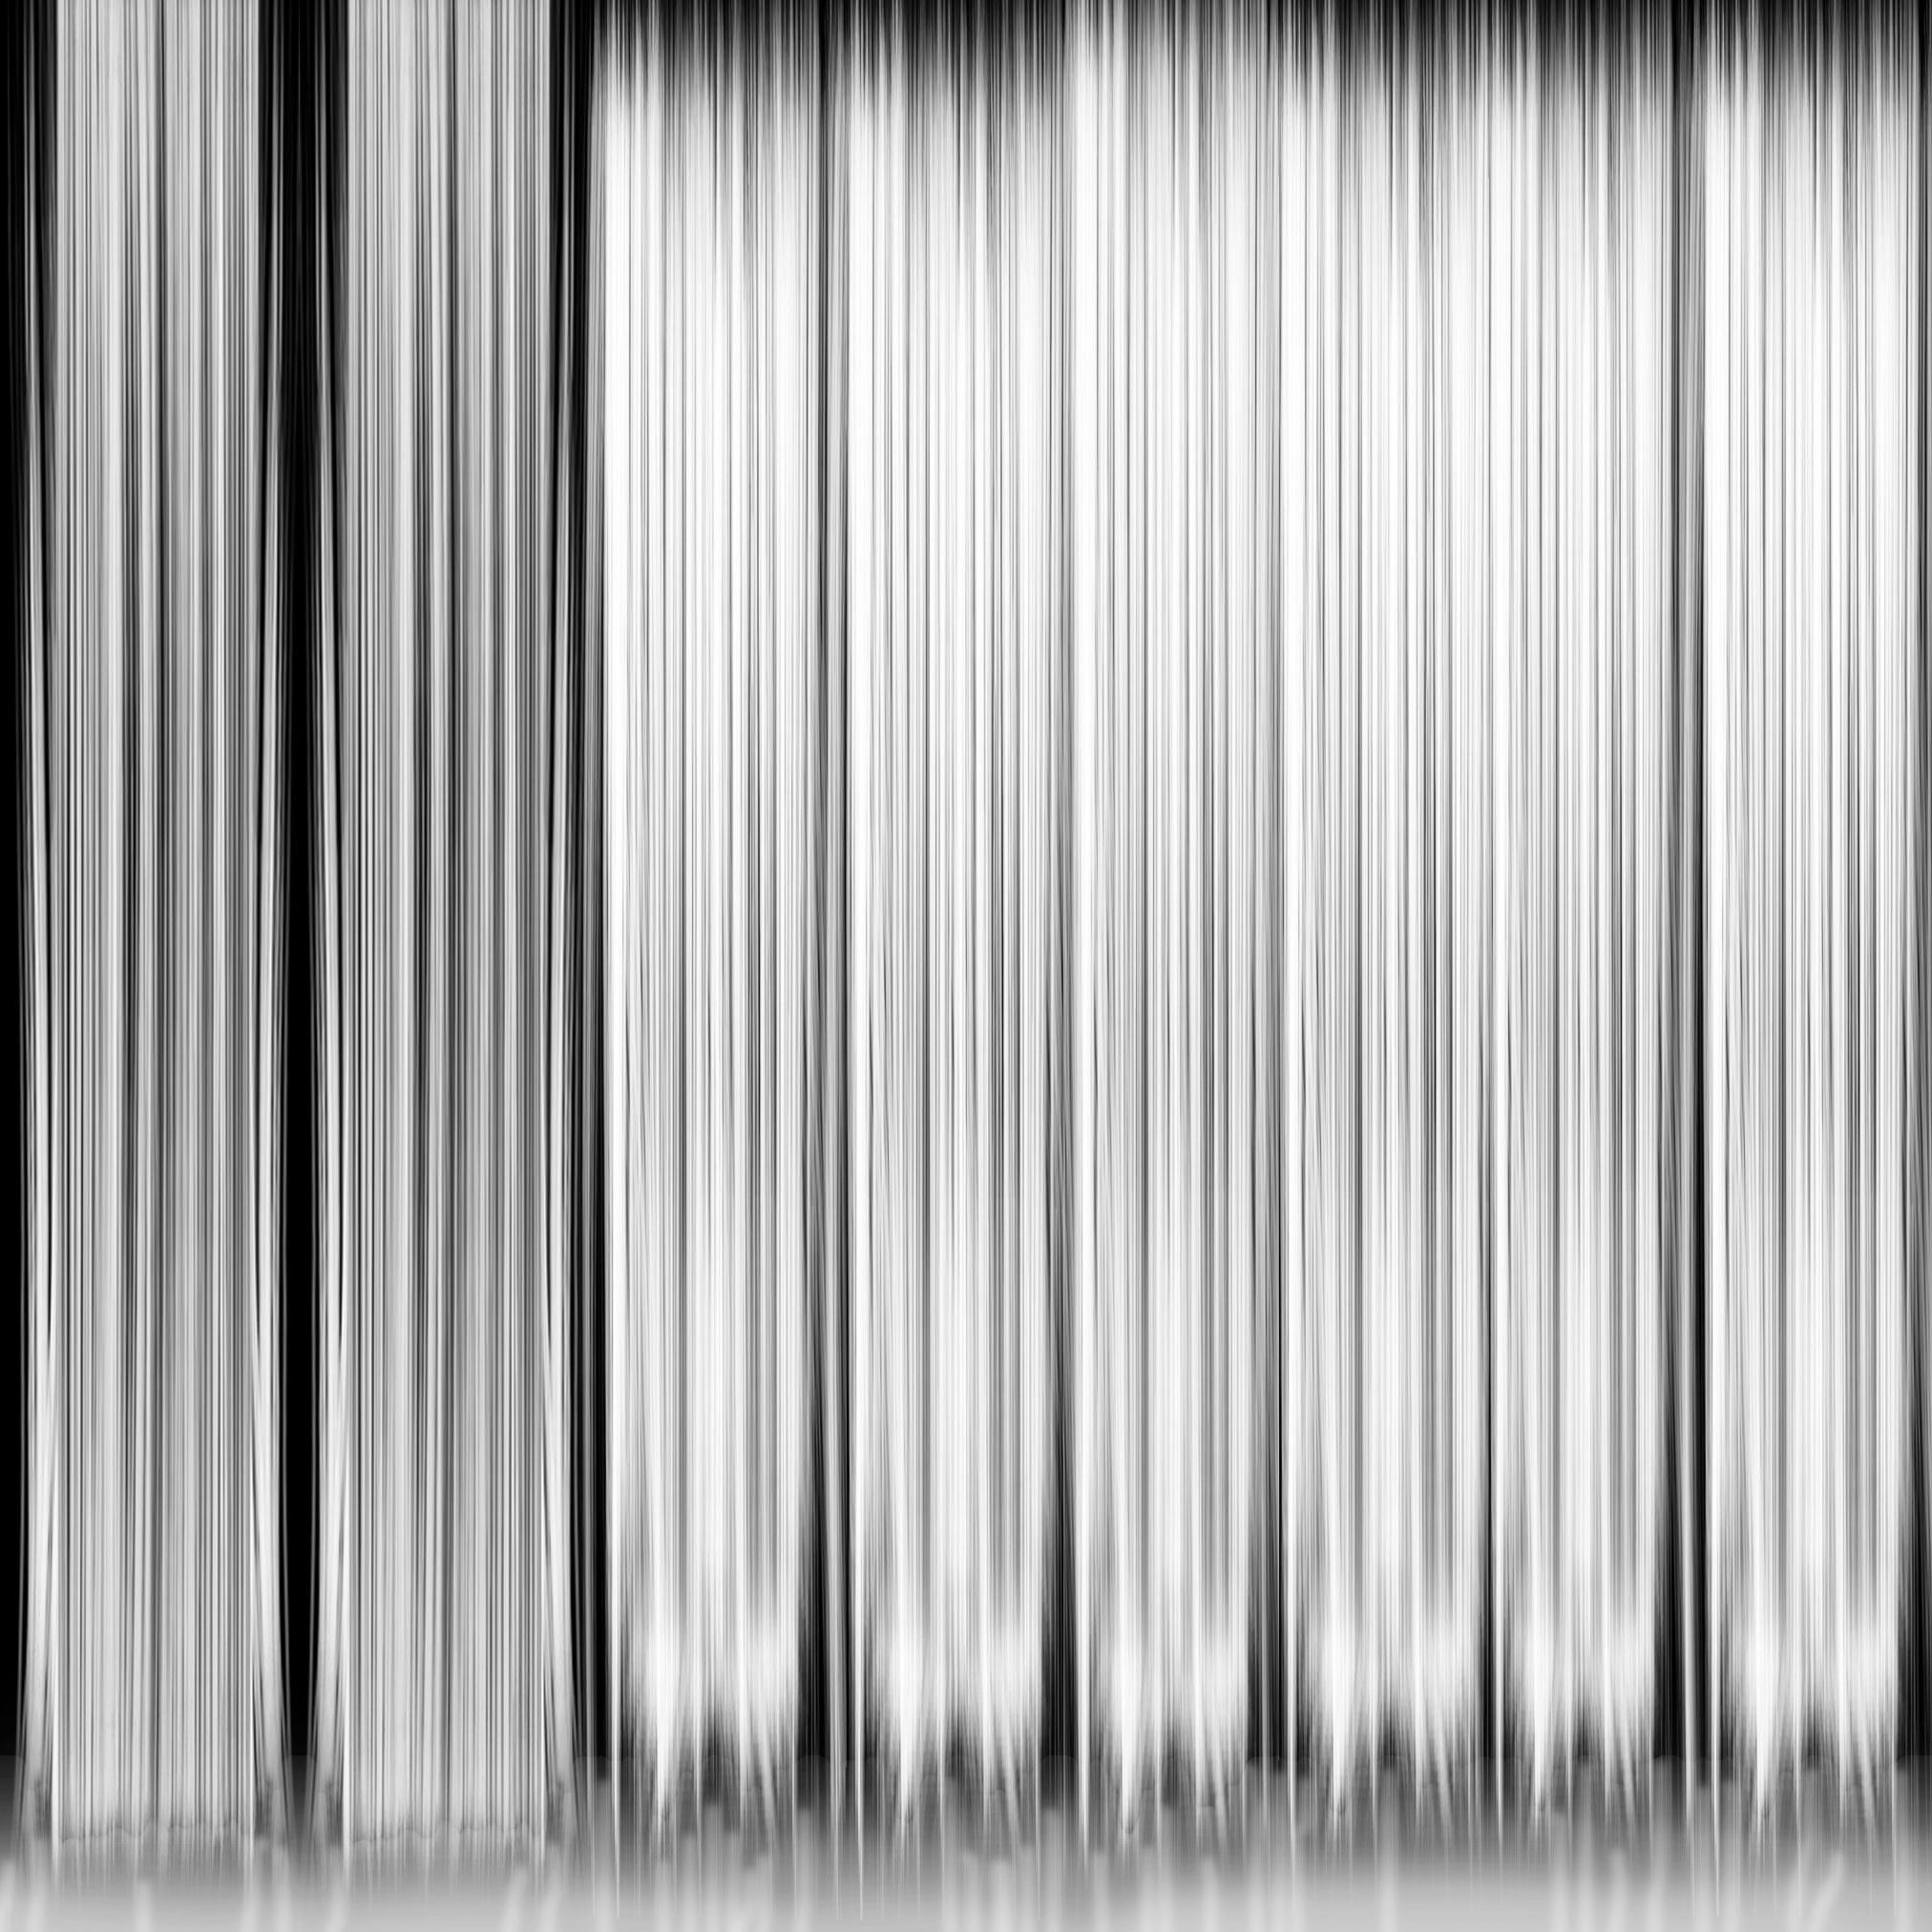
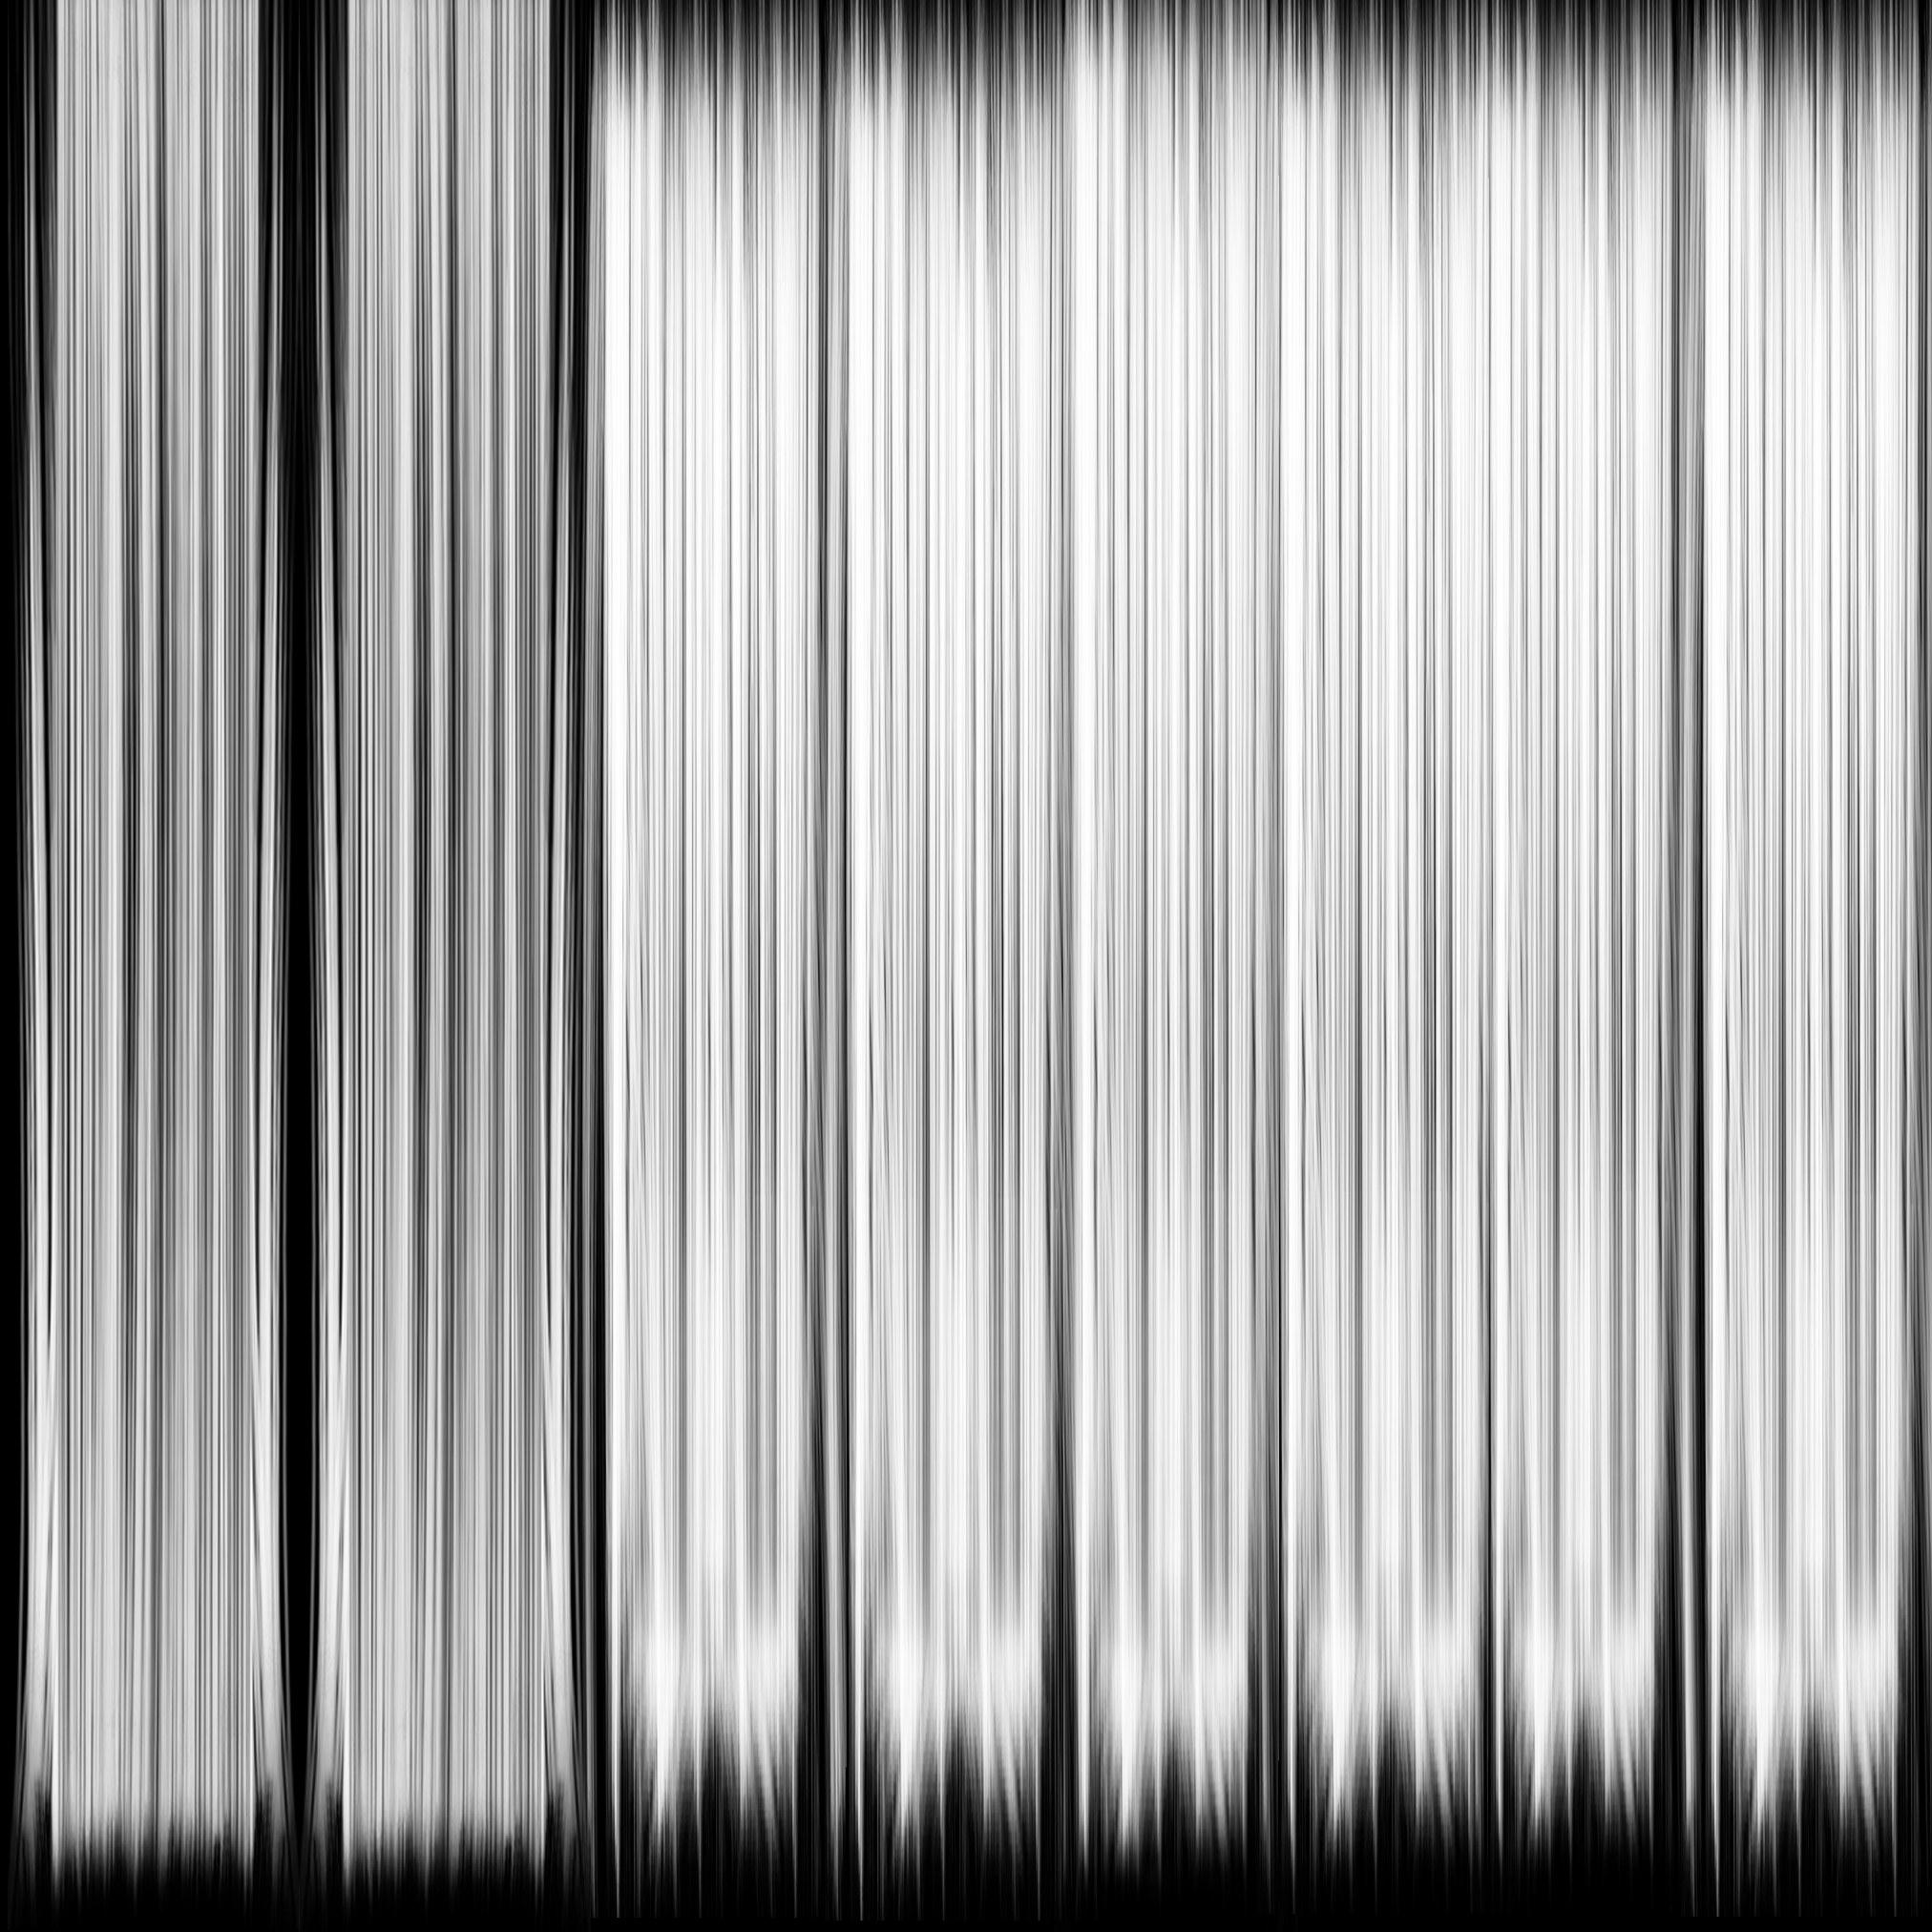
My trans map is this: [ATTACH=CONFIG]275464[/ATTACH]
Tainted-luv what should I do with that?
couldn’t see the link. Try adding it to the post as an image.
My trans map is this: [ATTACH=CONFIG]275464[/ATTACH]
Tainted-luv what should I do with that?

This actually looks fine. The whites will be completely transparent so your ends will feather properly and the darker streaks will appear to be thicker clumps of hair. Just make sure that the UV’s match up and everything should be good.
Typically I don’t make any changes to the uv’s when importing from Daz and just make the same nod set up for each selection set in the texture. So it the original comes in with 5 or 6 different textures I just recreate the node set up 5 or 6 times for each one to ensure that nothing has changed since I ported it over.
I have to check and see if I have this hair in my library and check it out.