Here:
https://openimagedenoise.github.io/
one more denoiser in the race!
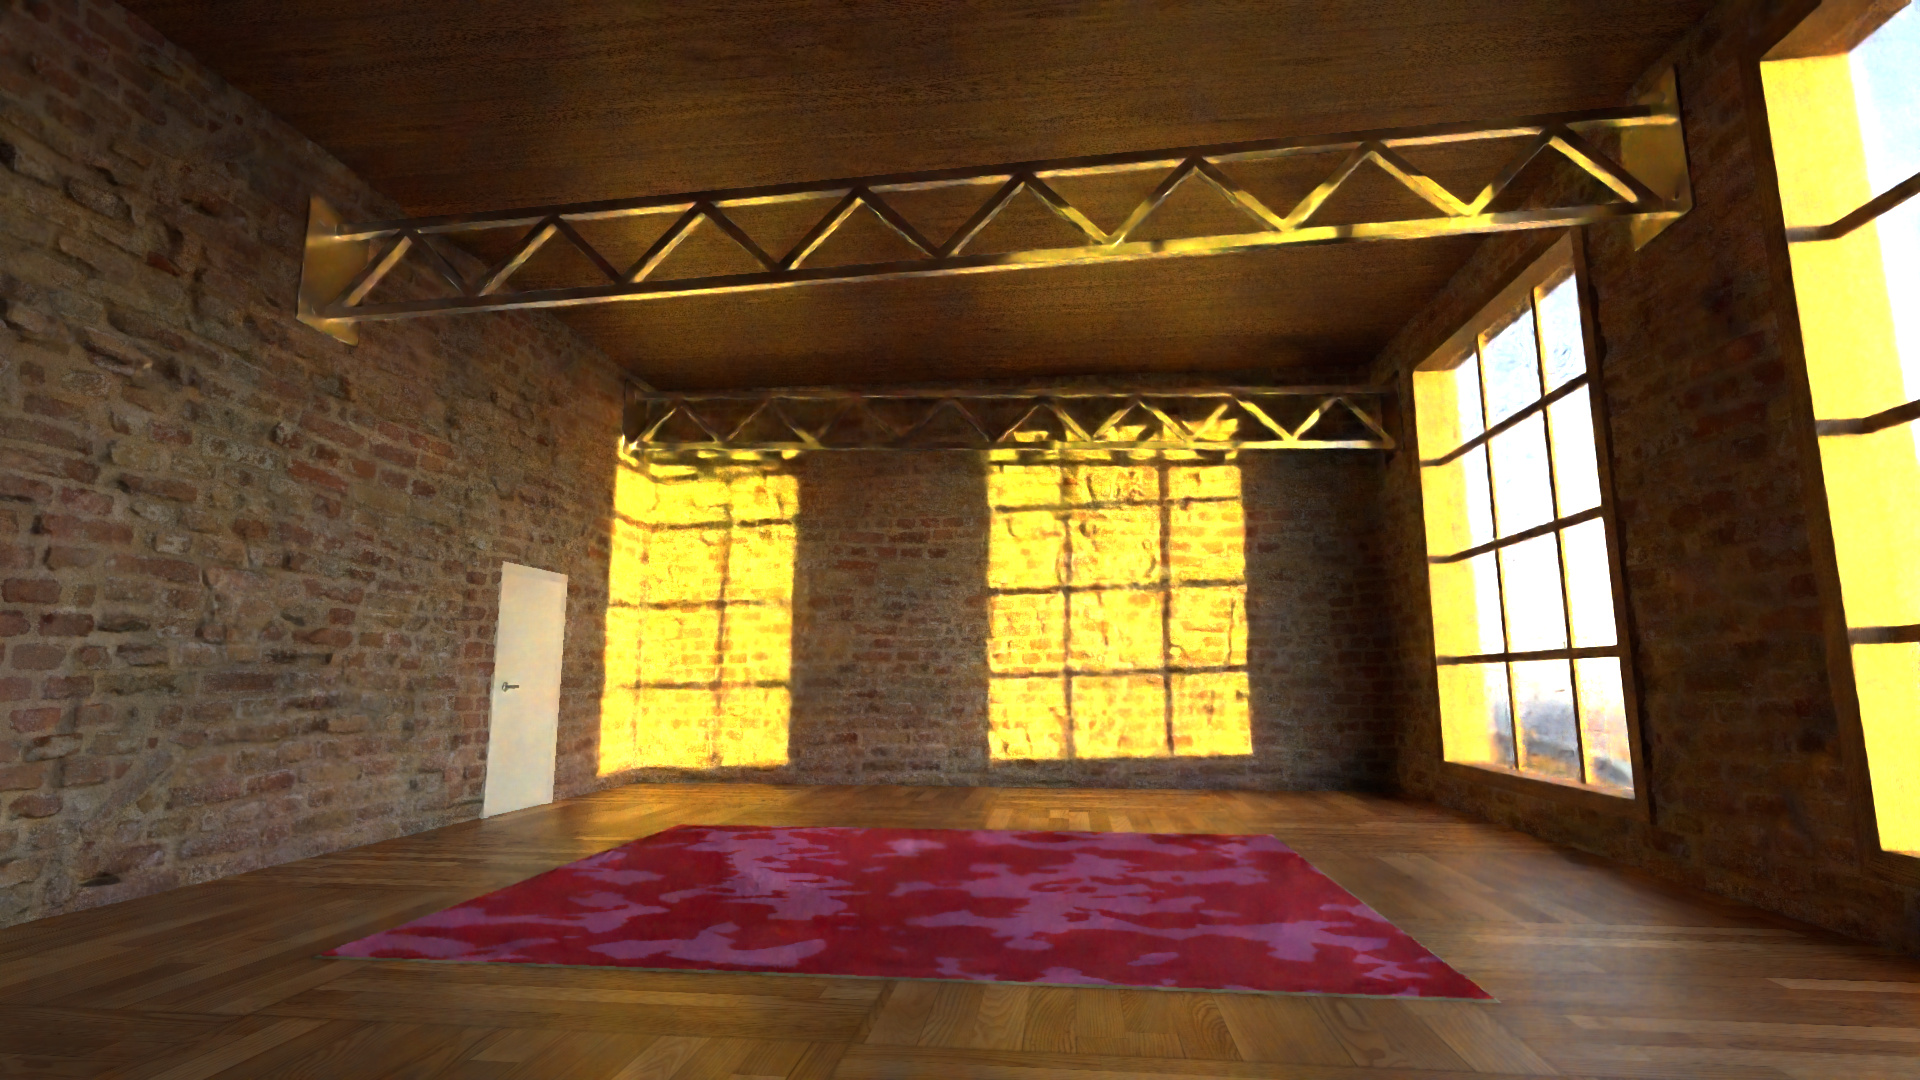
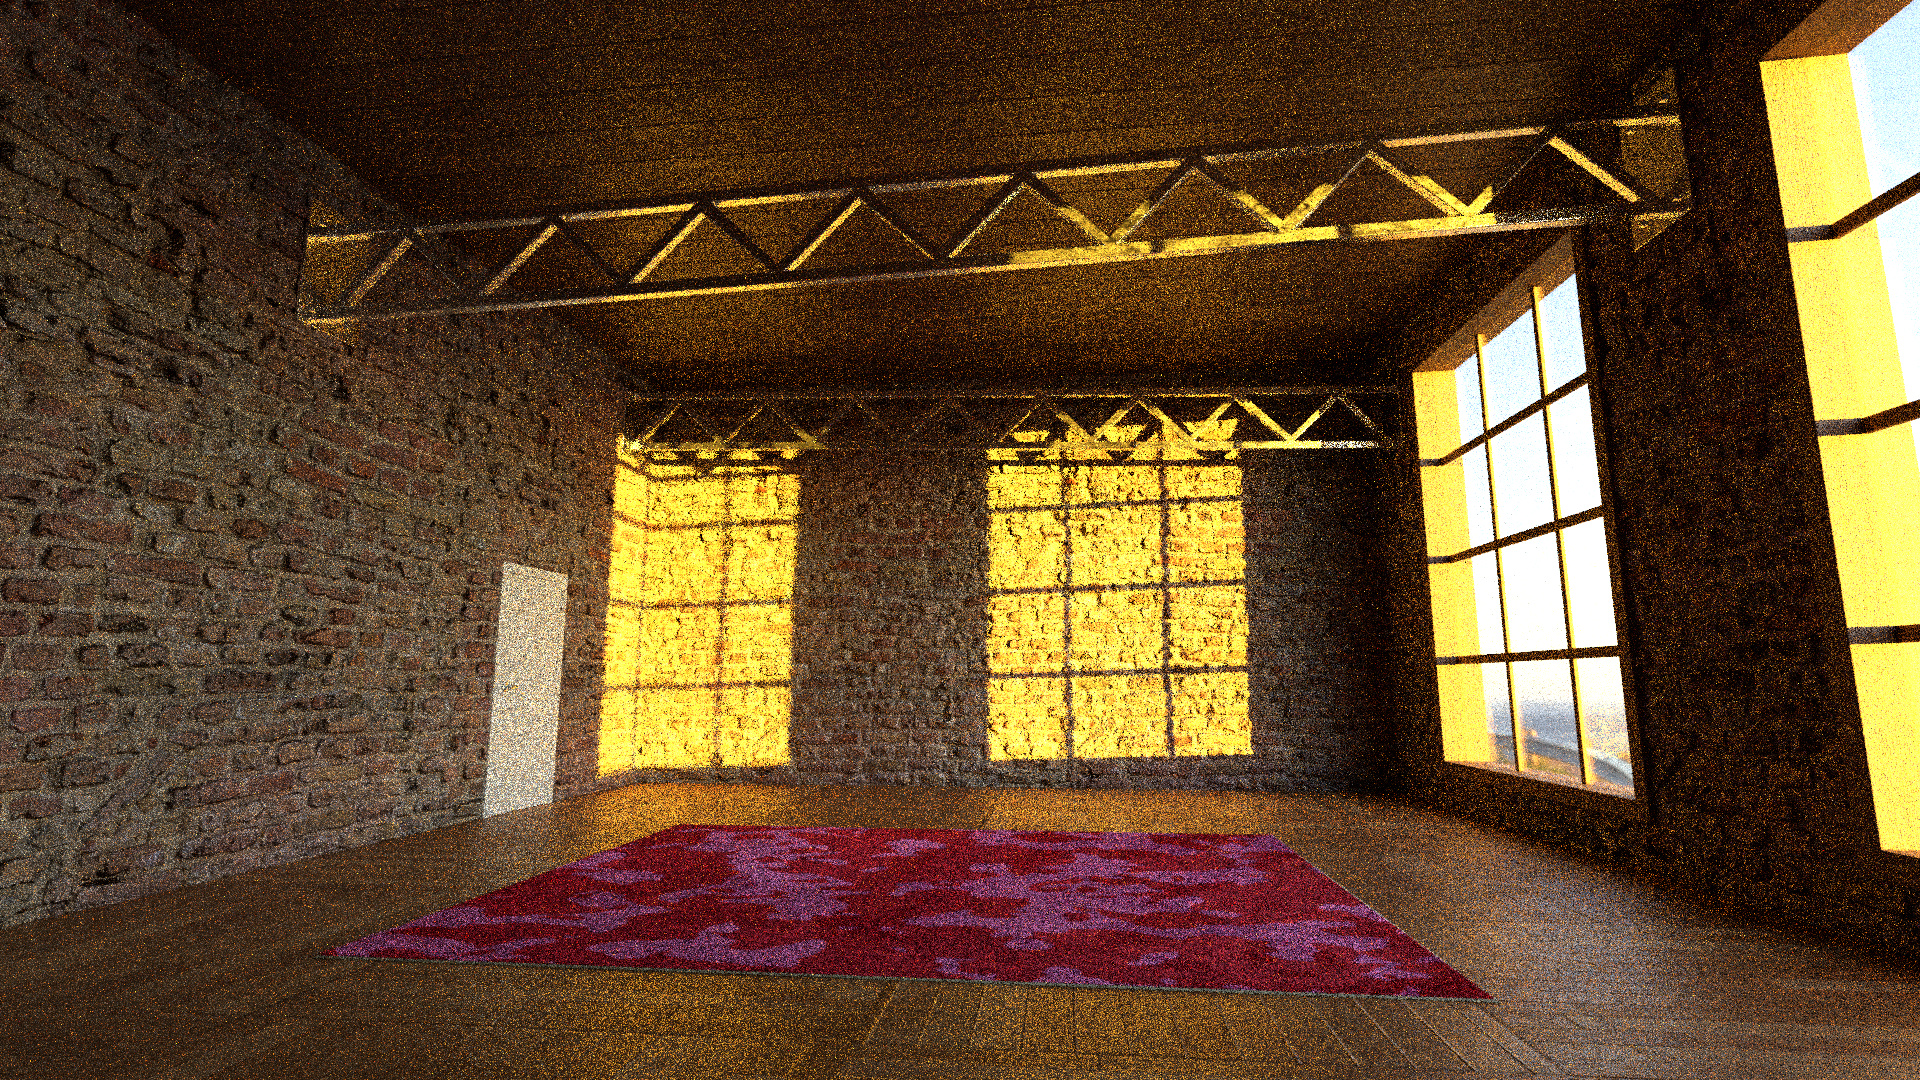
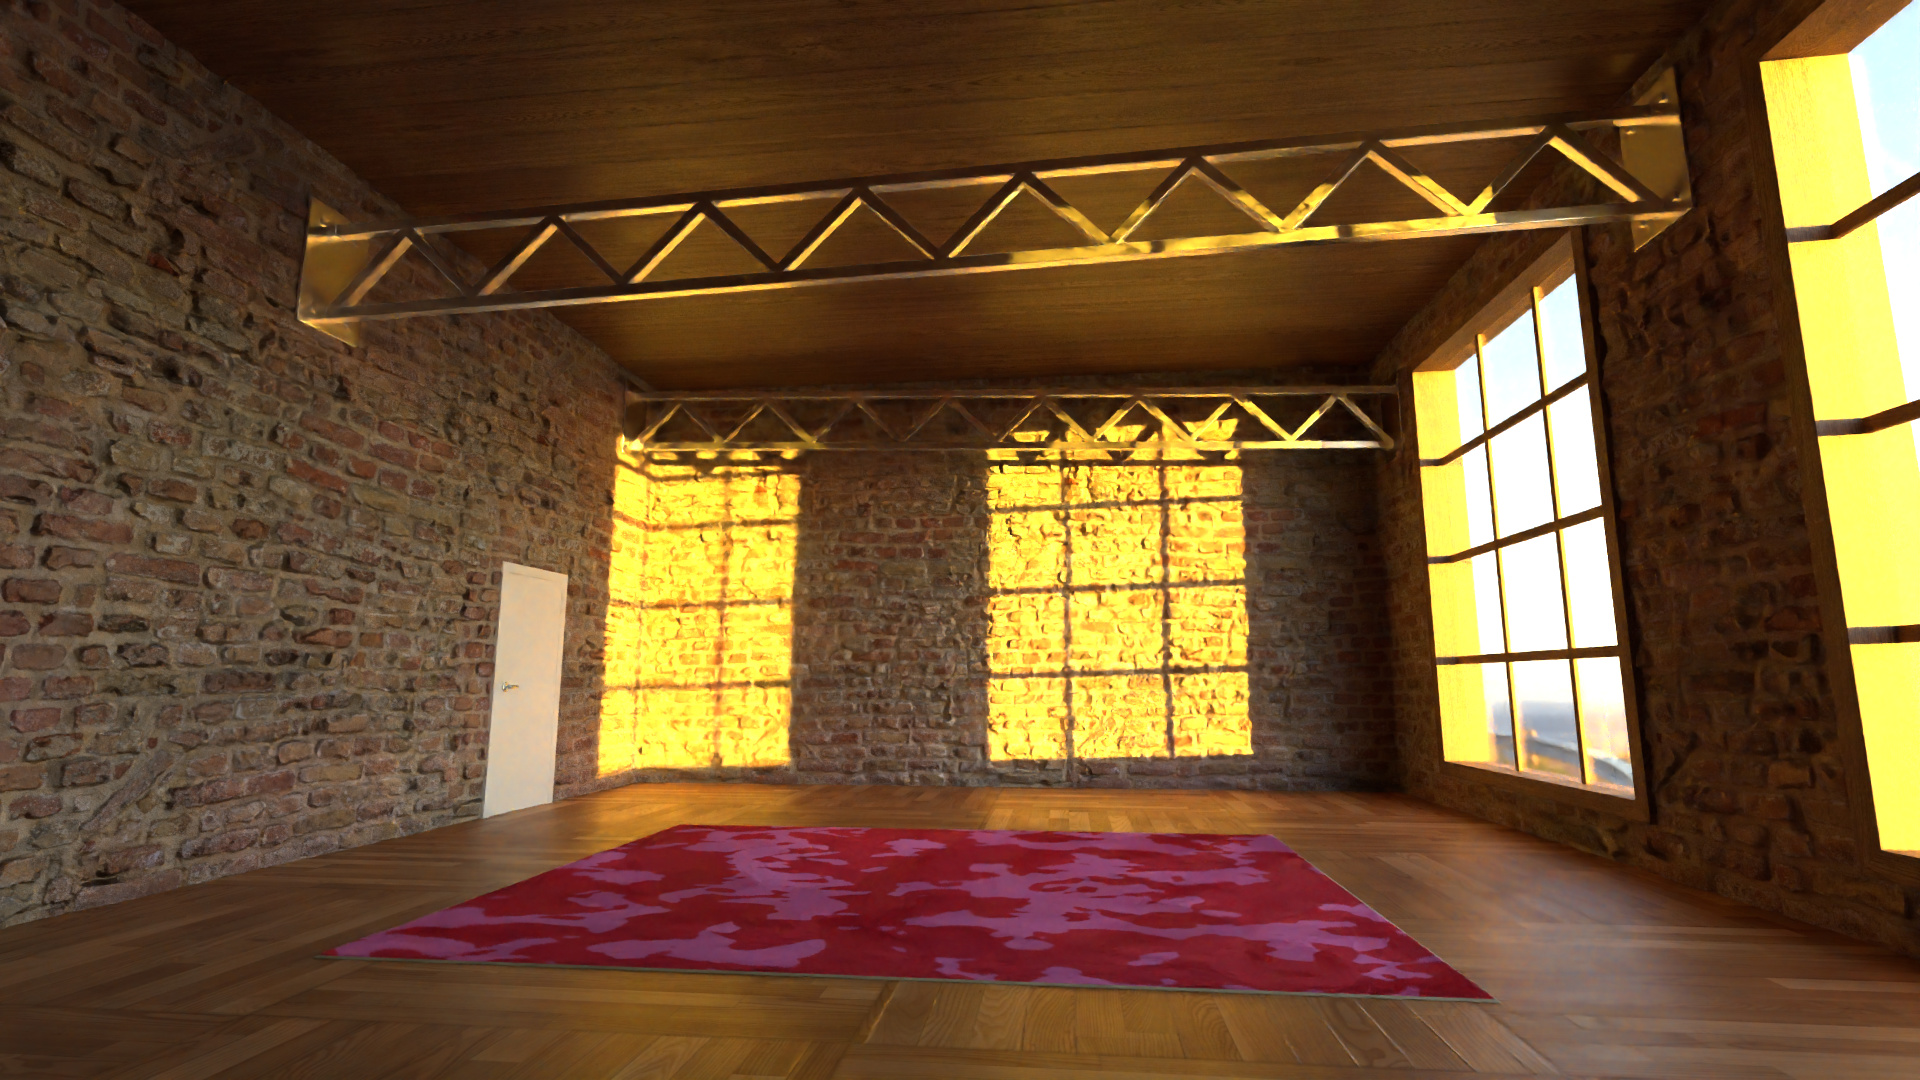
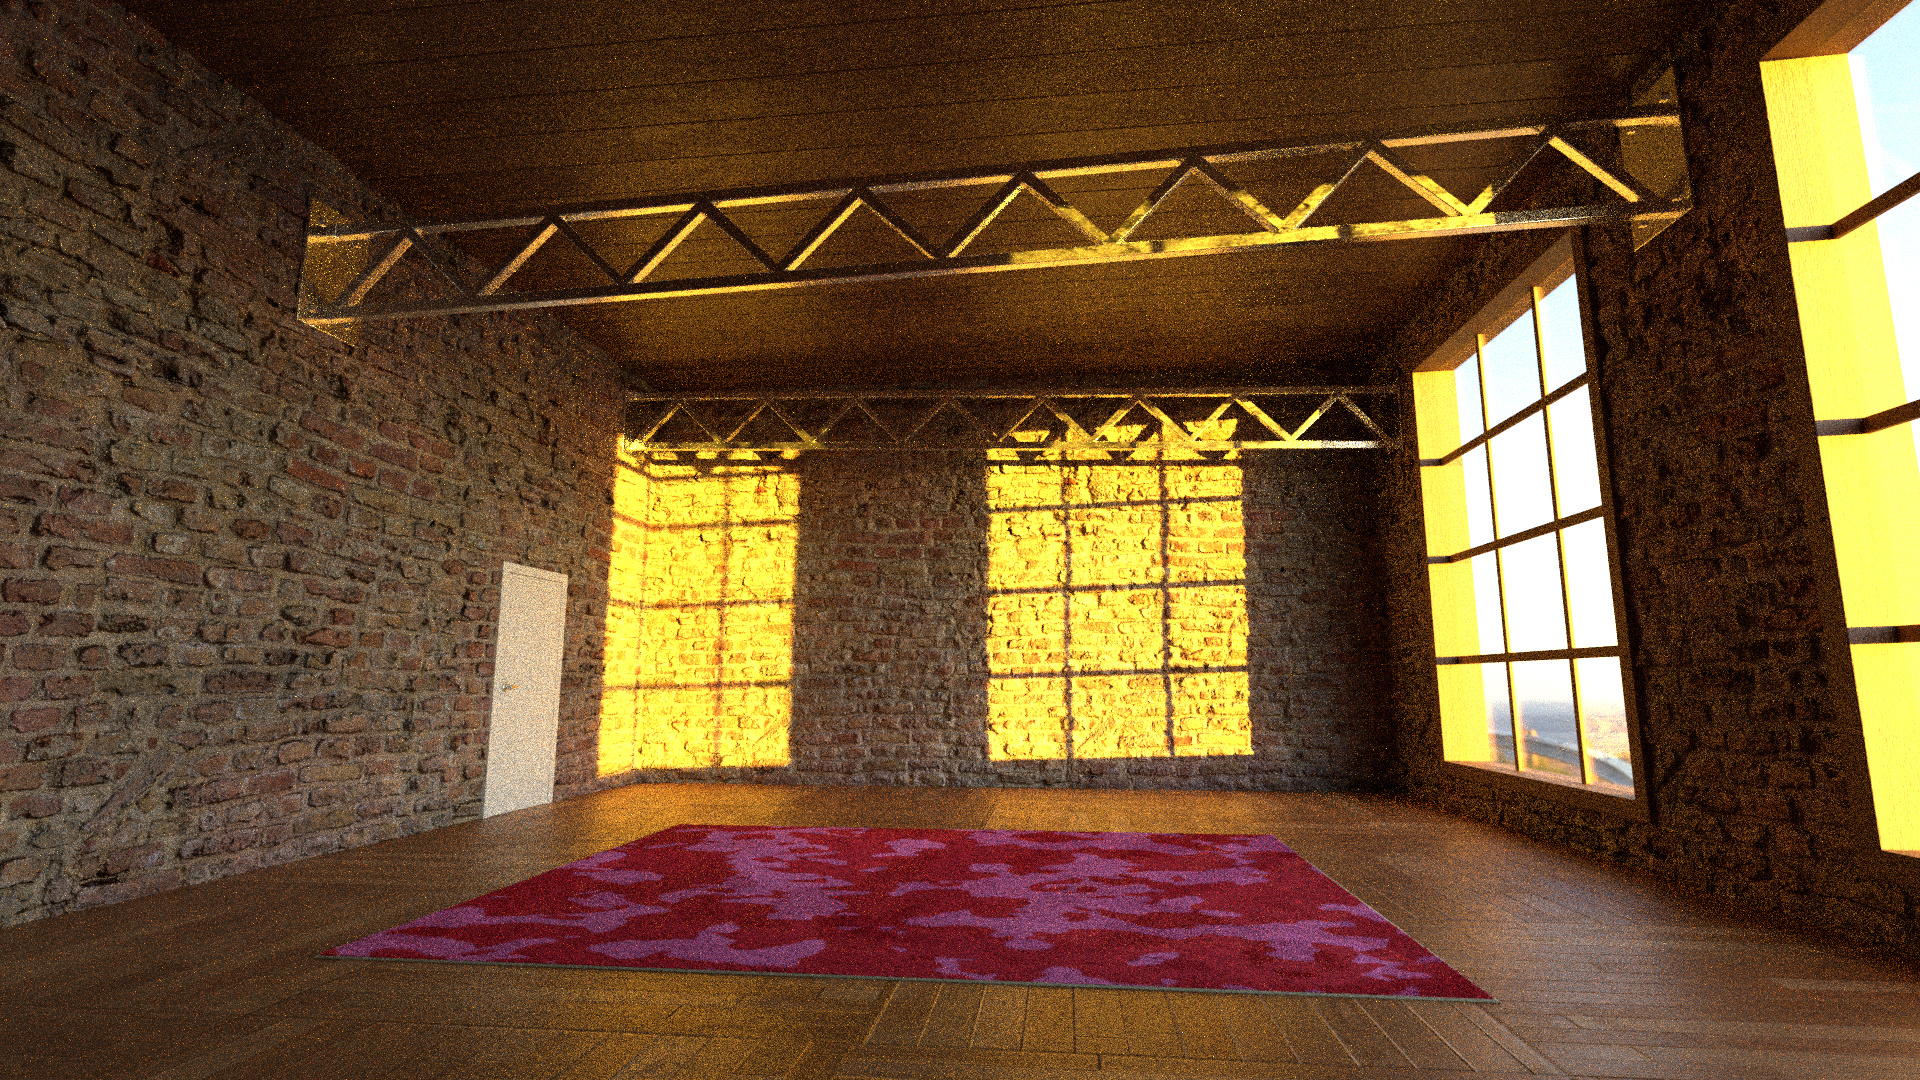
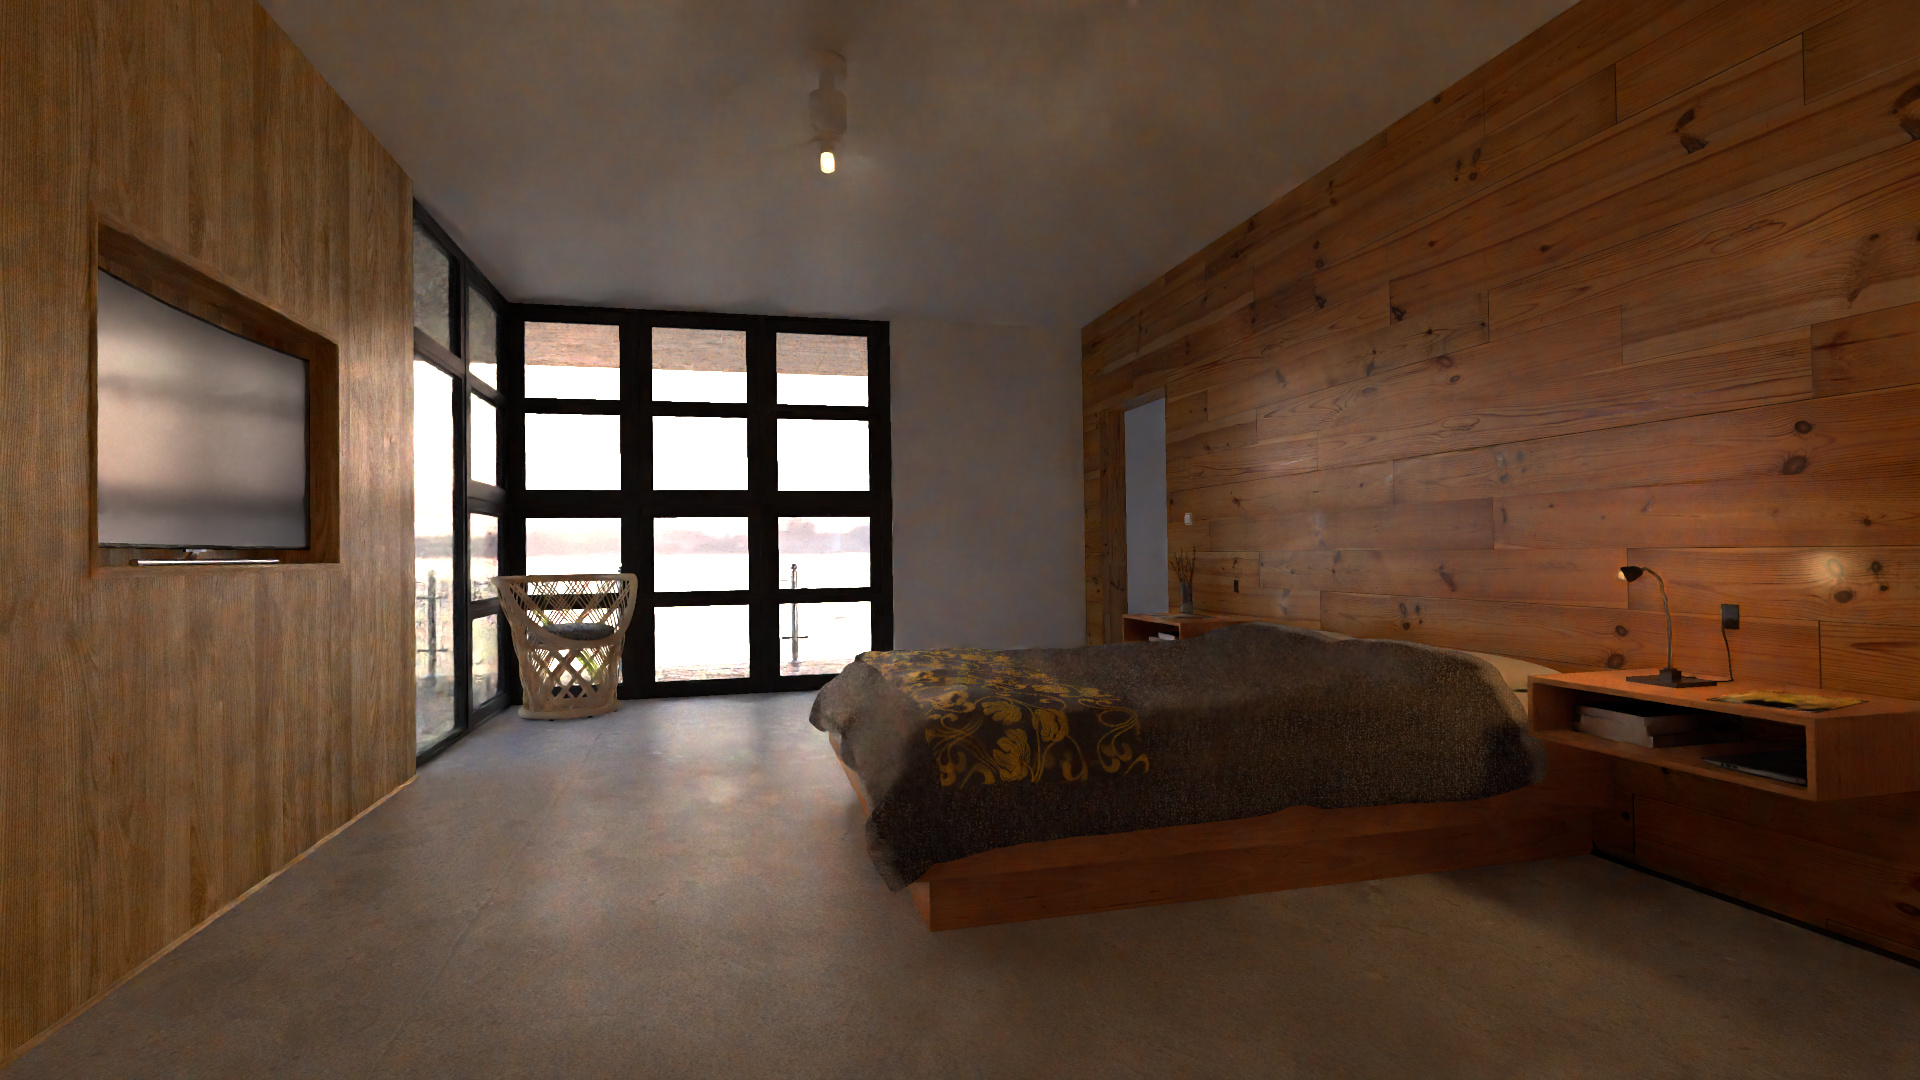
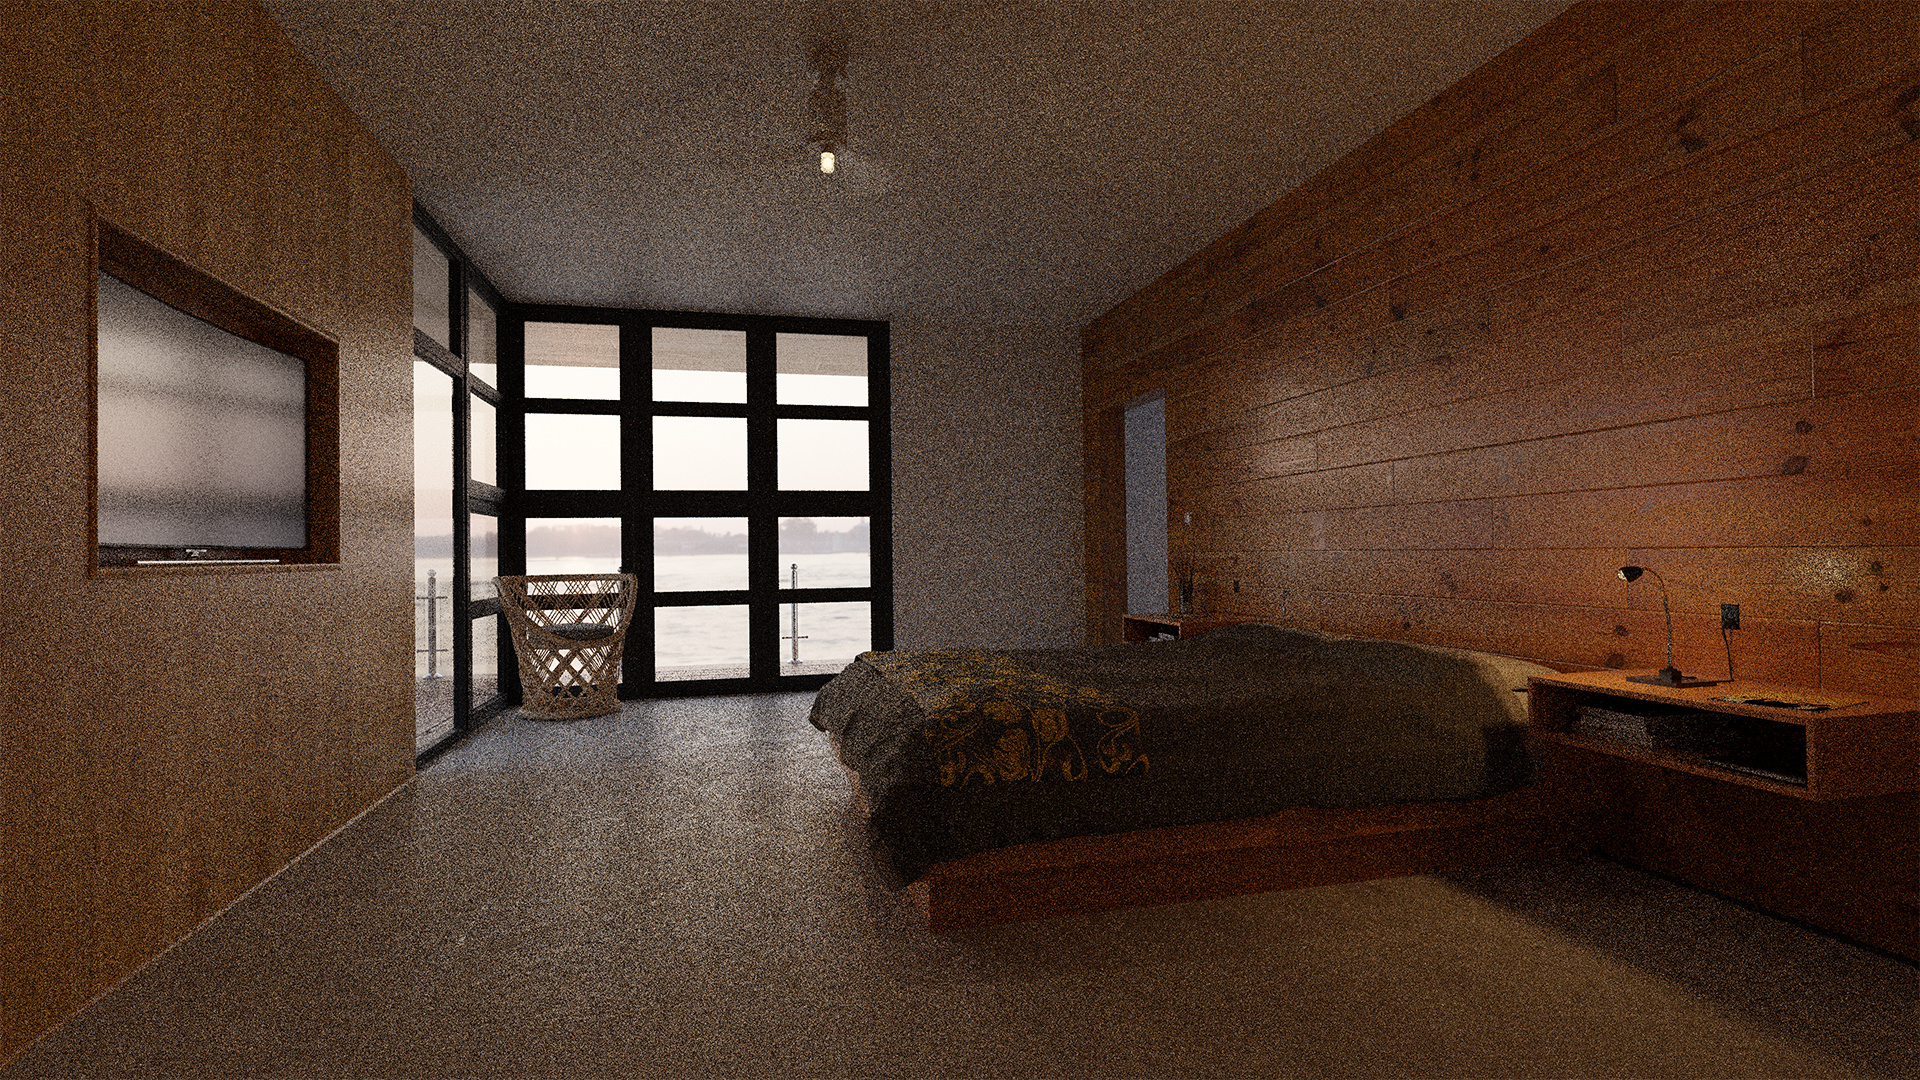
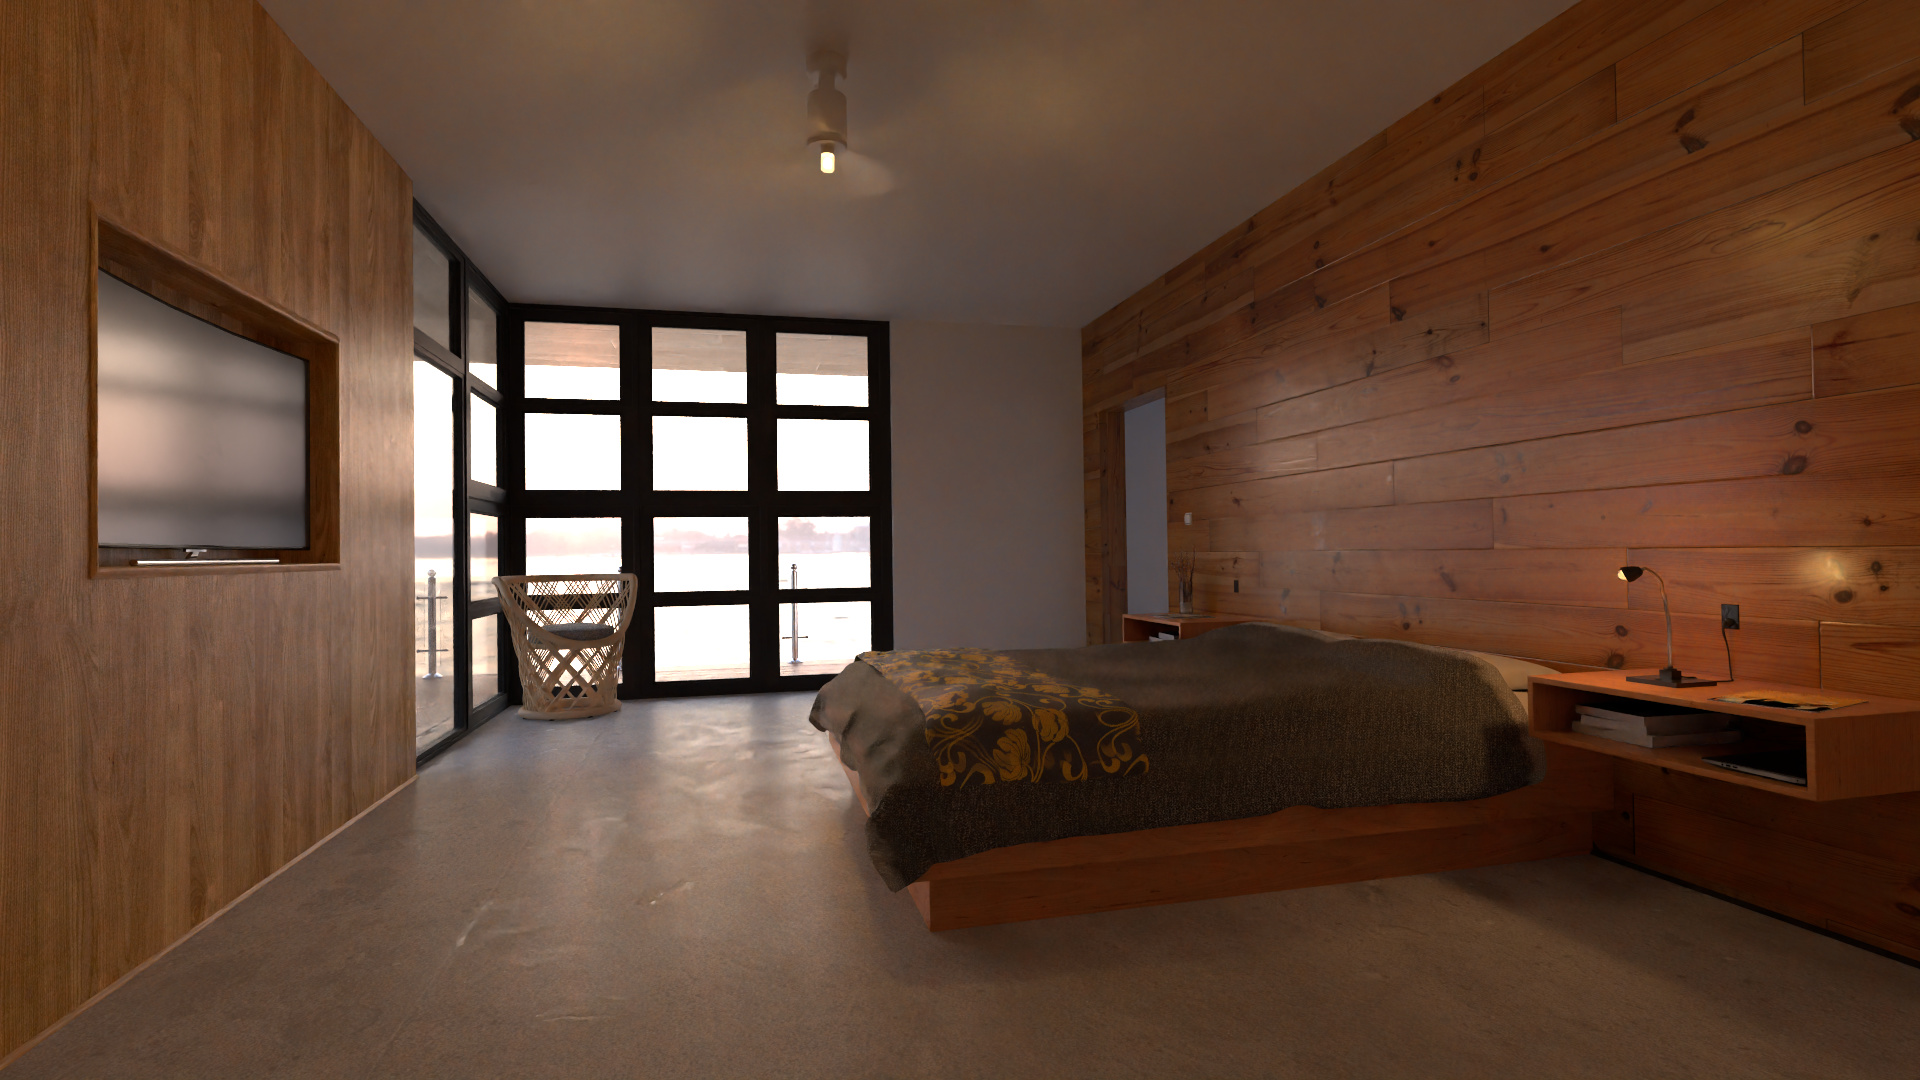
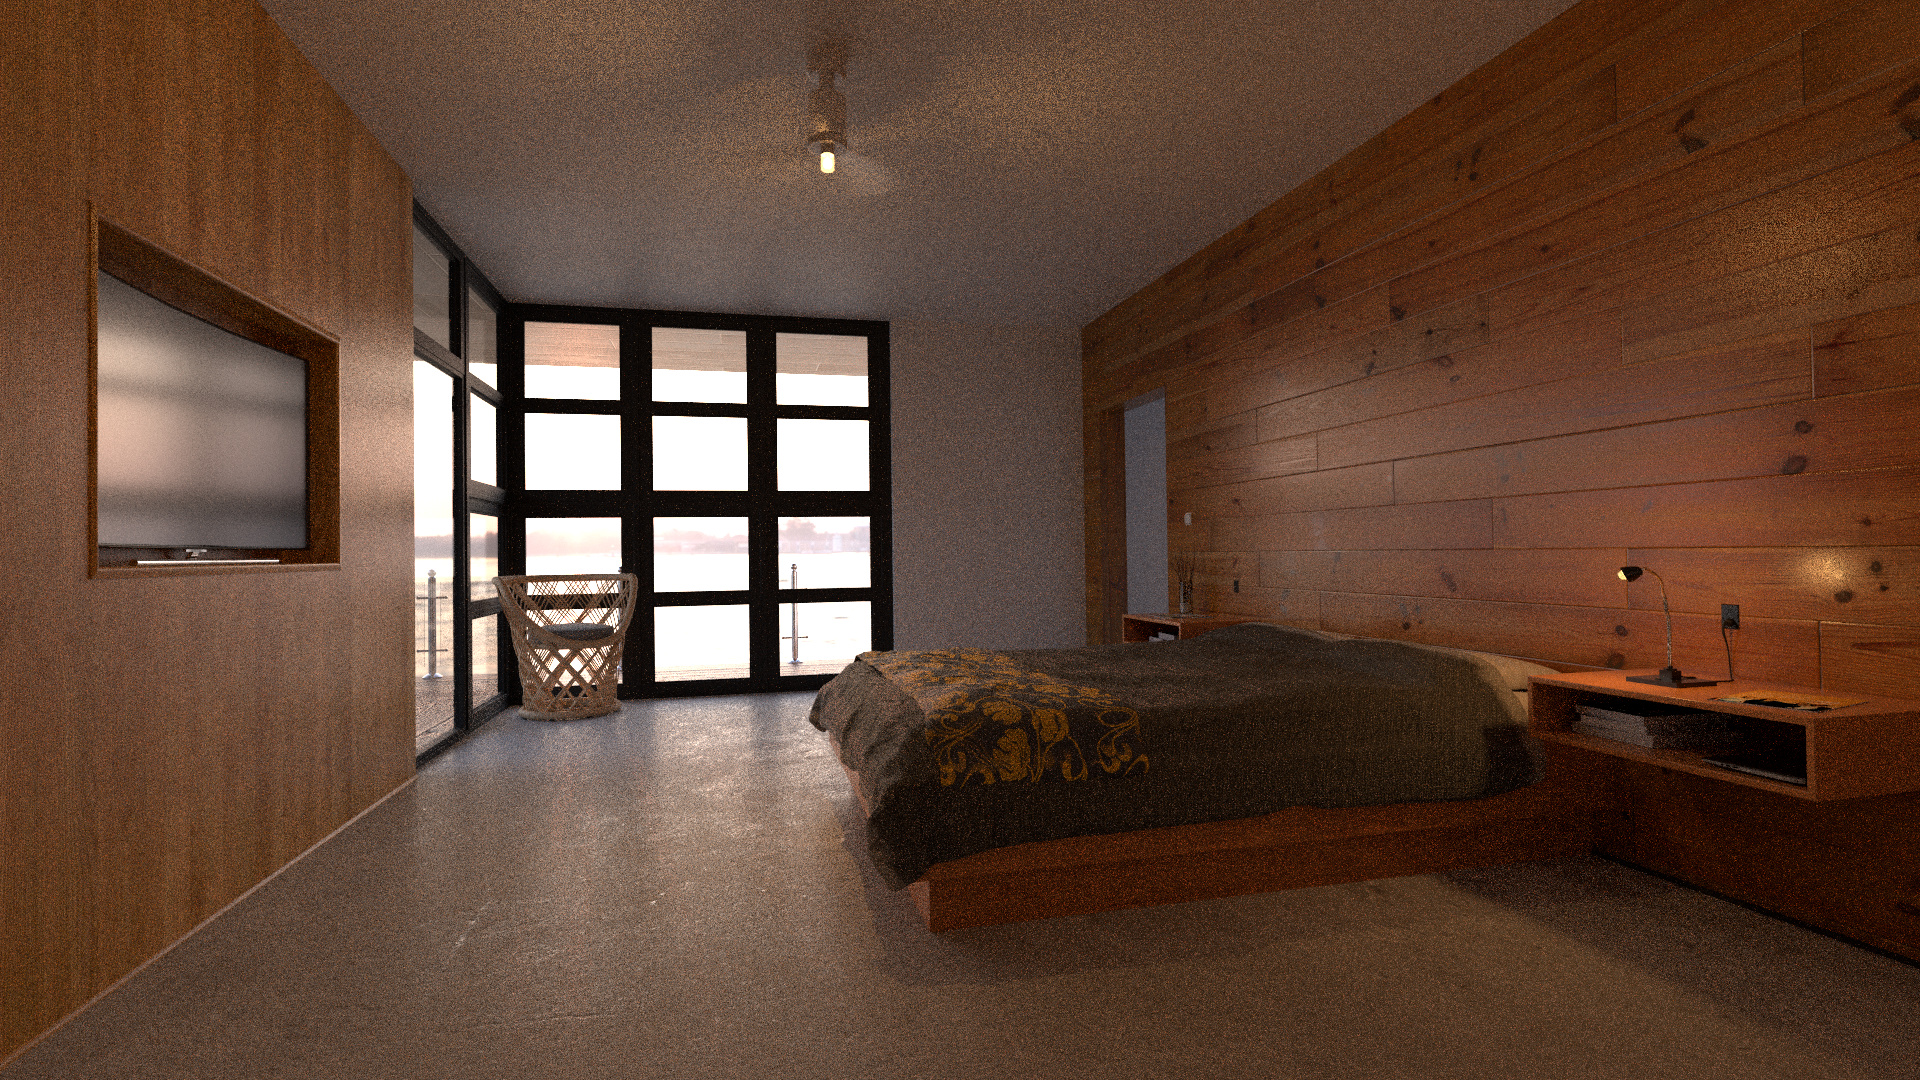
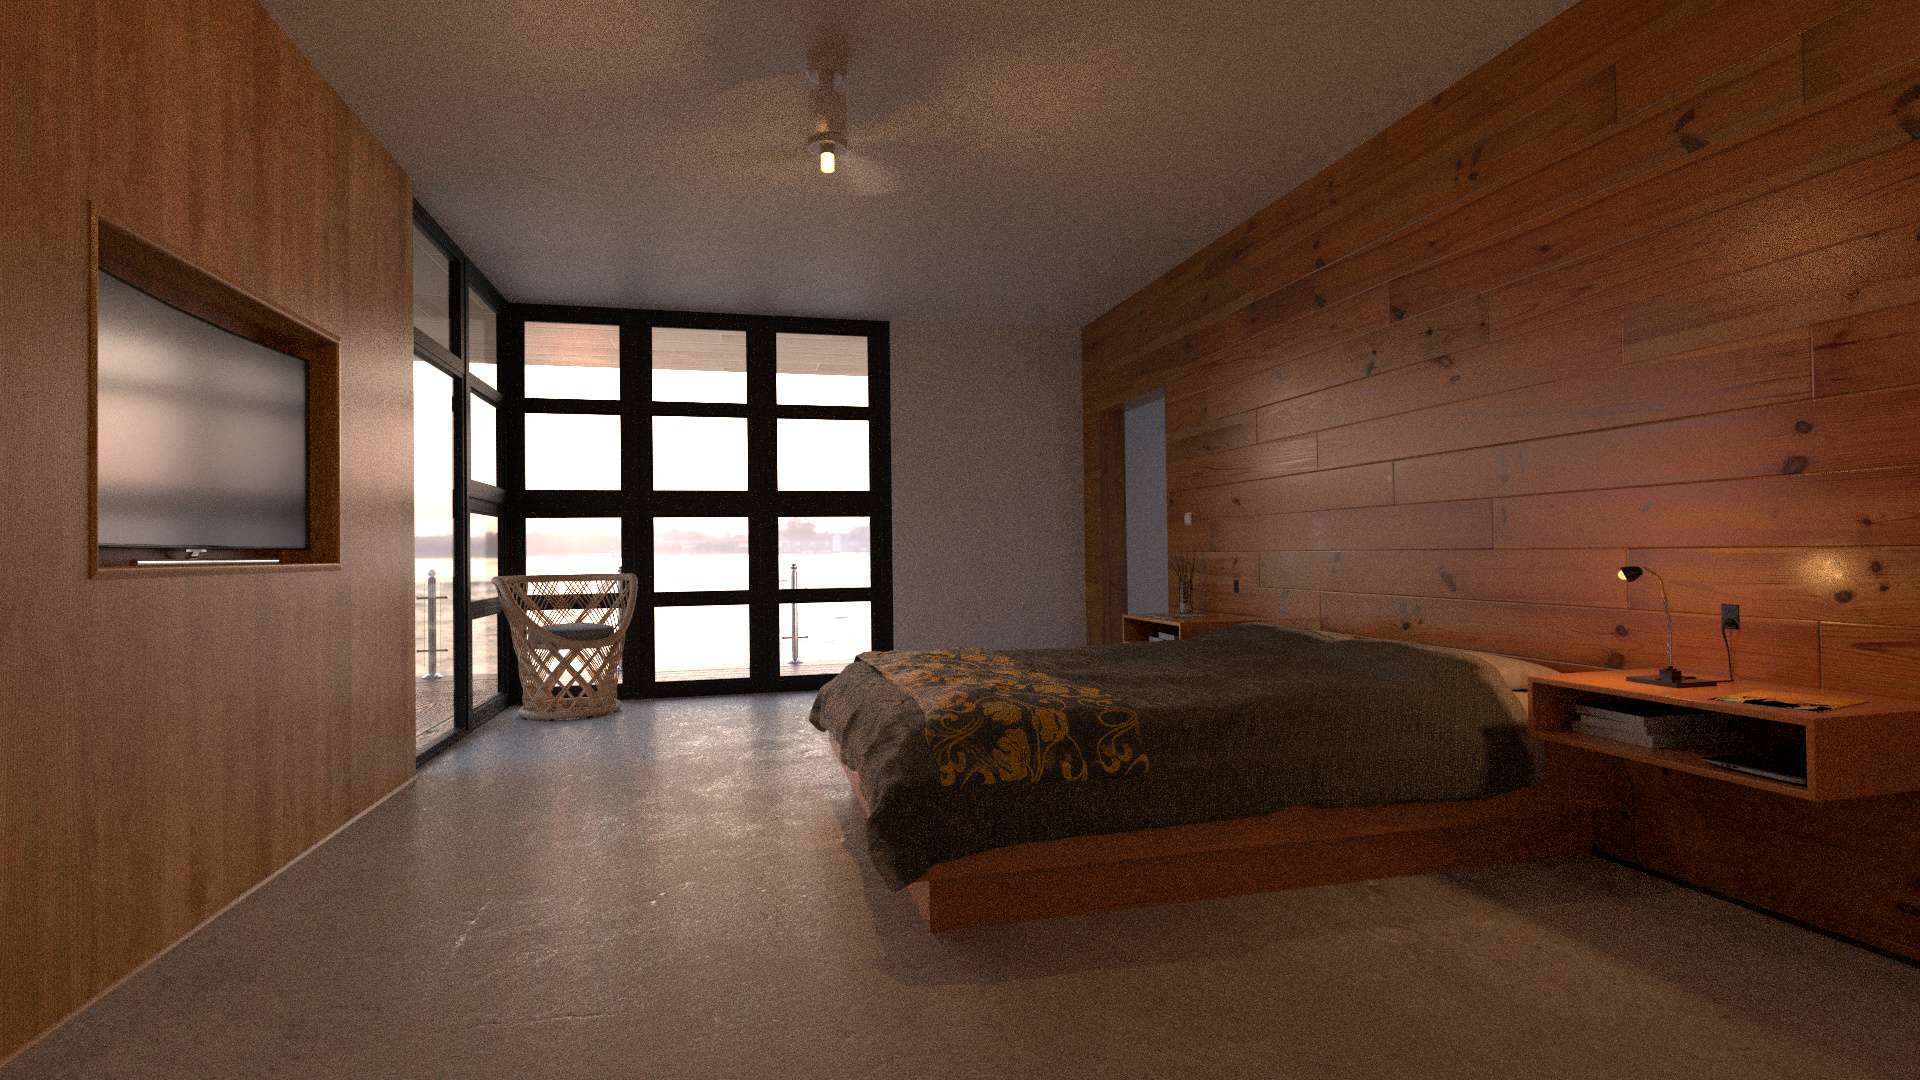
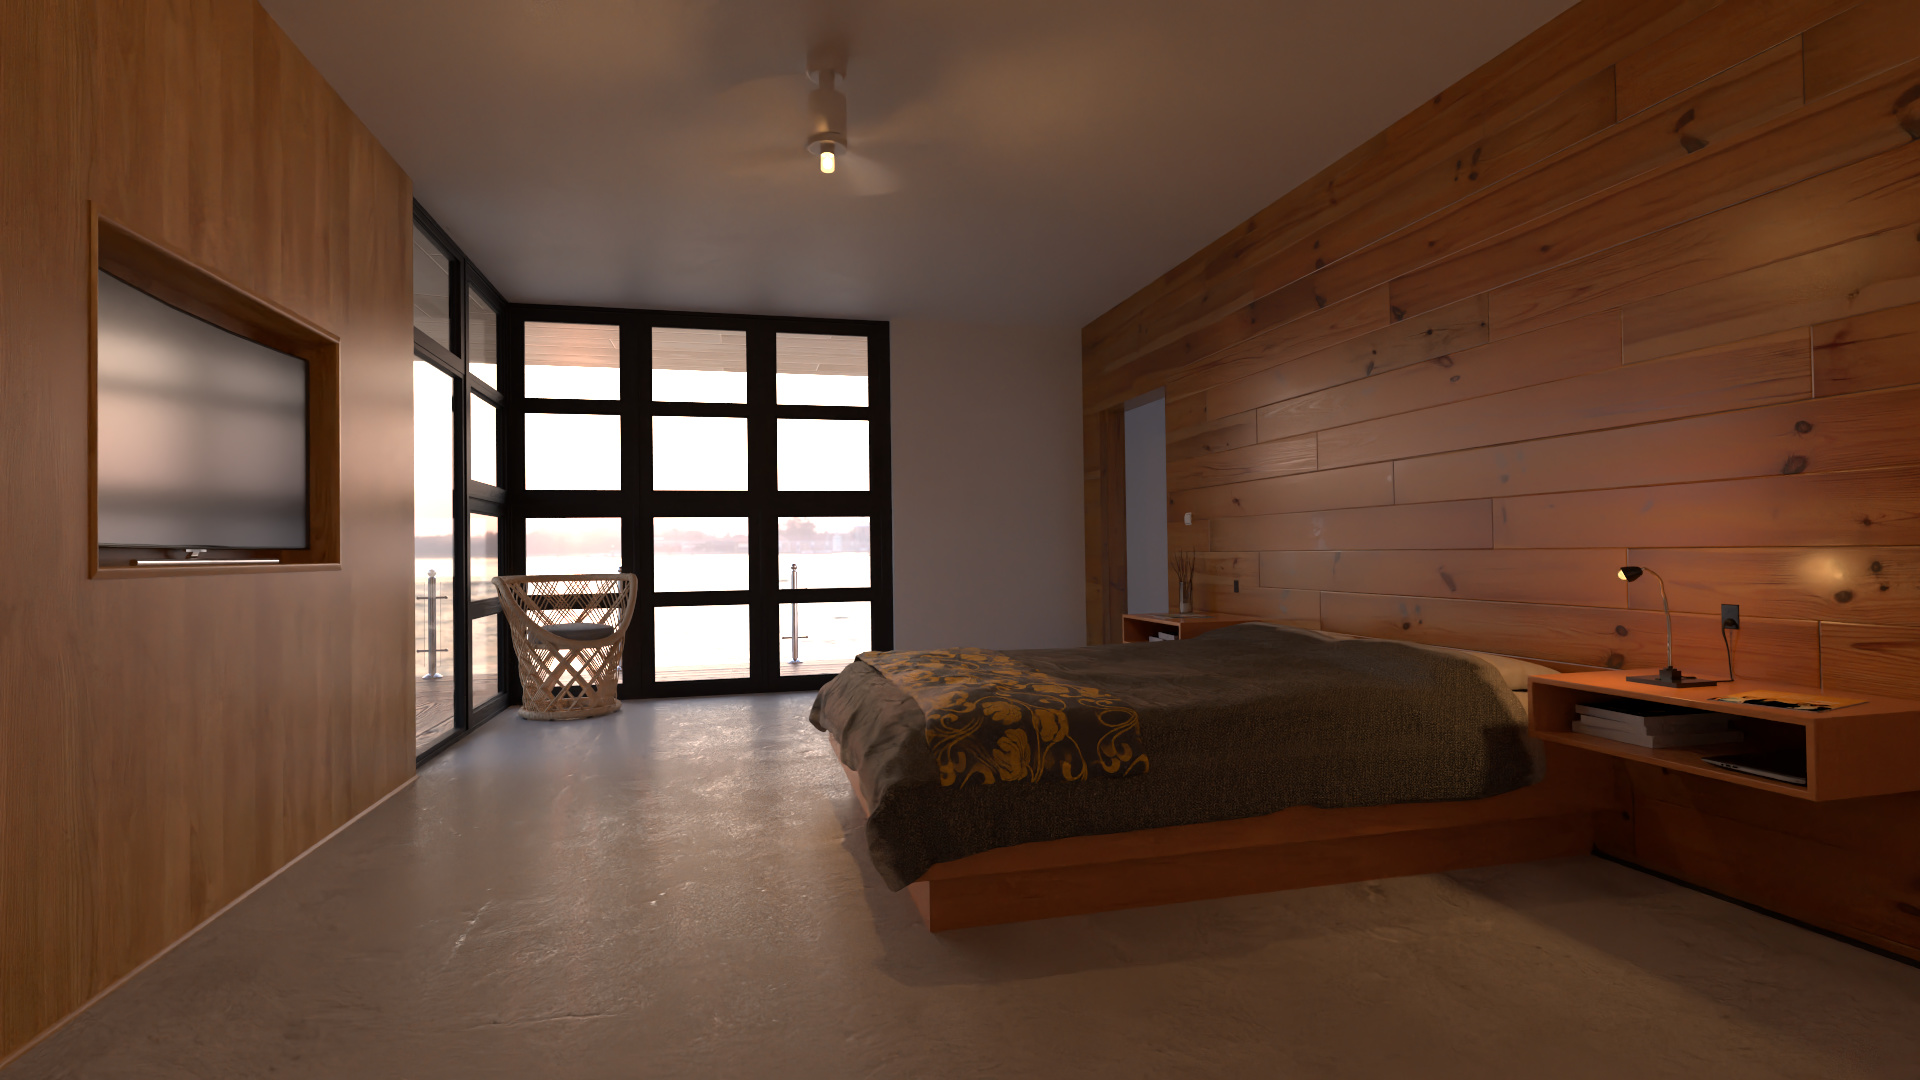
So far I have seen pretty good results with the denoiser. Here are some comparisons using different scenes of size and complexity.
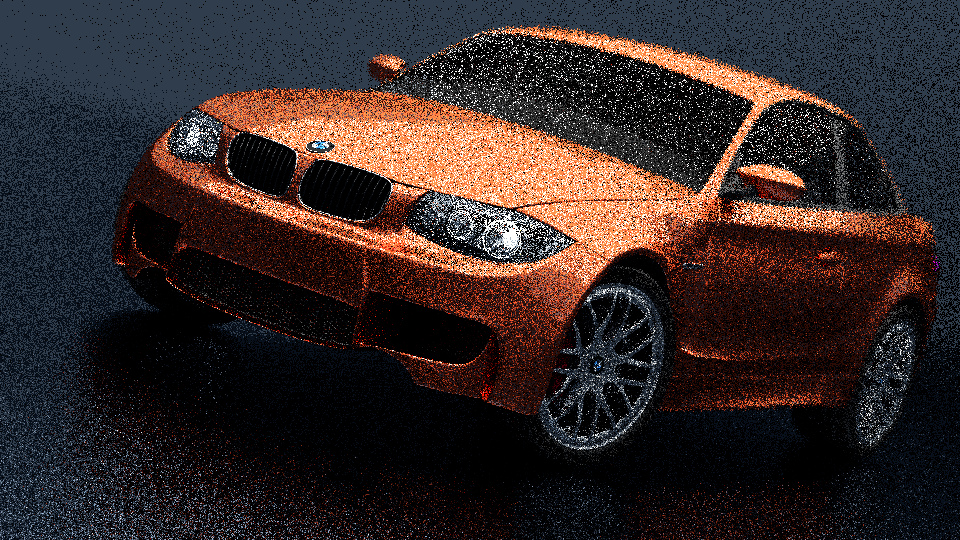
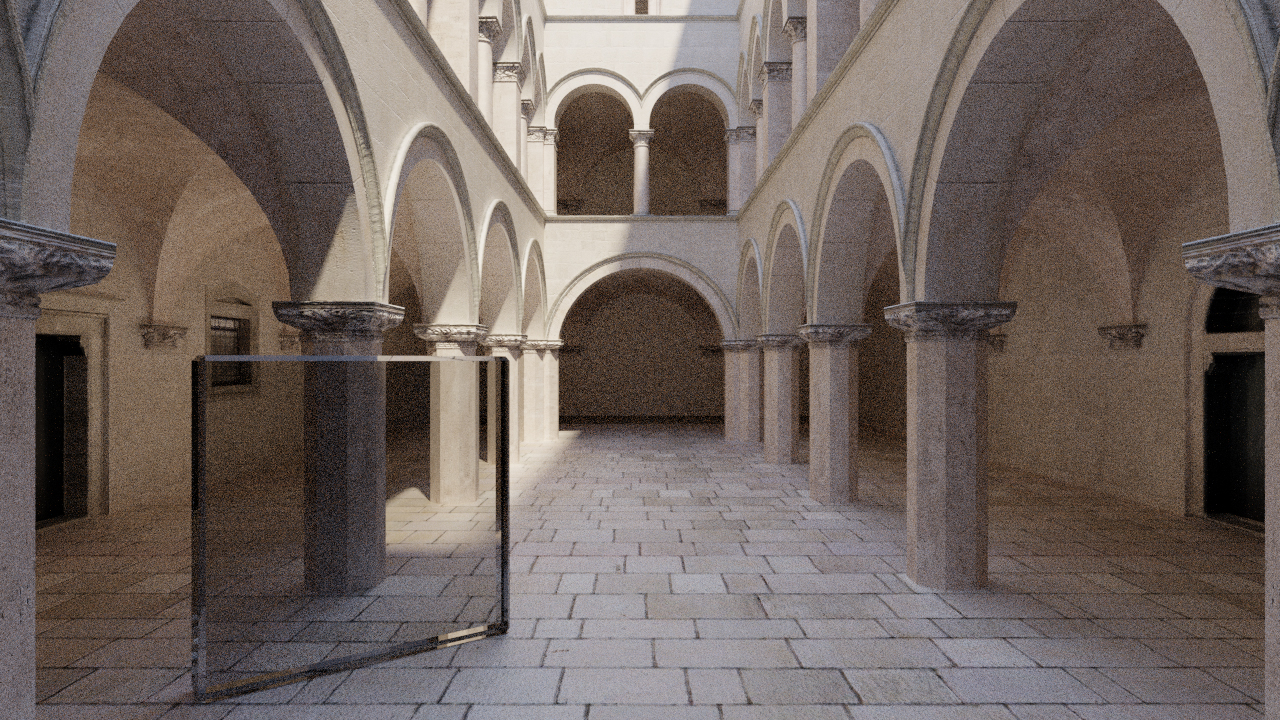
1 Sample:
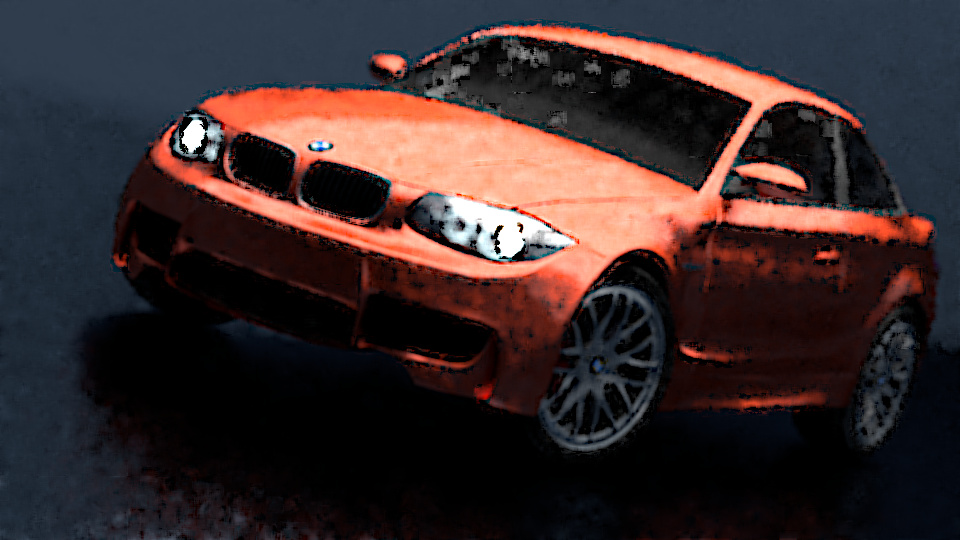
10 Samples:
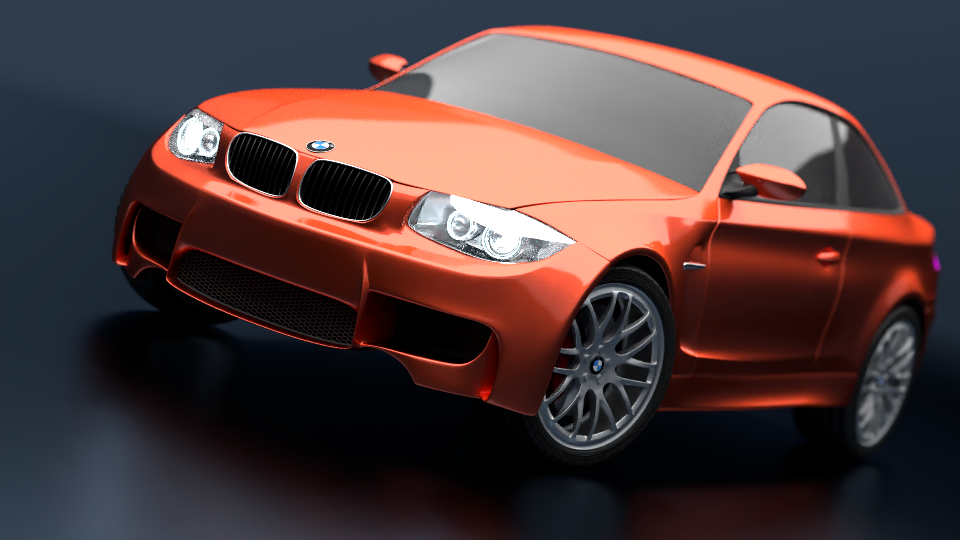
50 Samples:
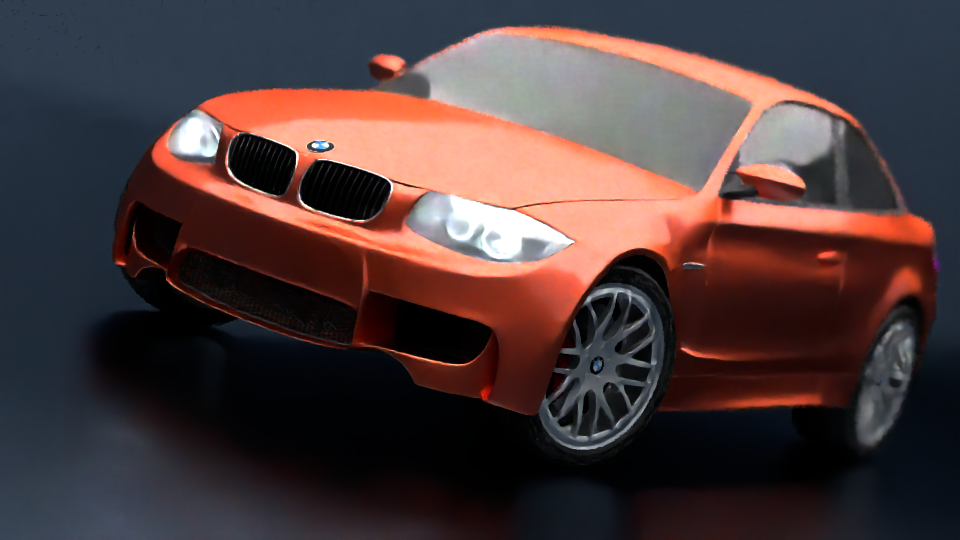
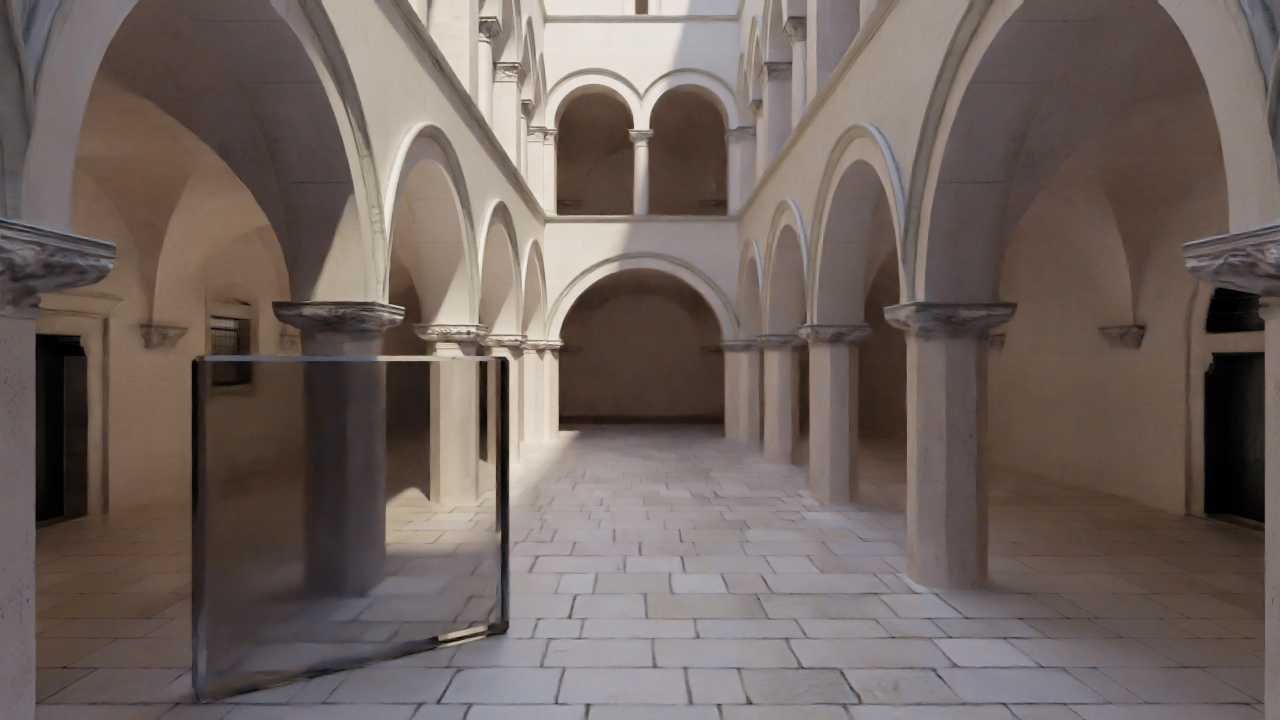
100 Samples:
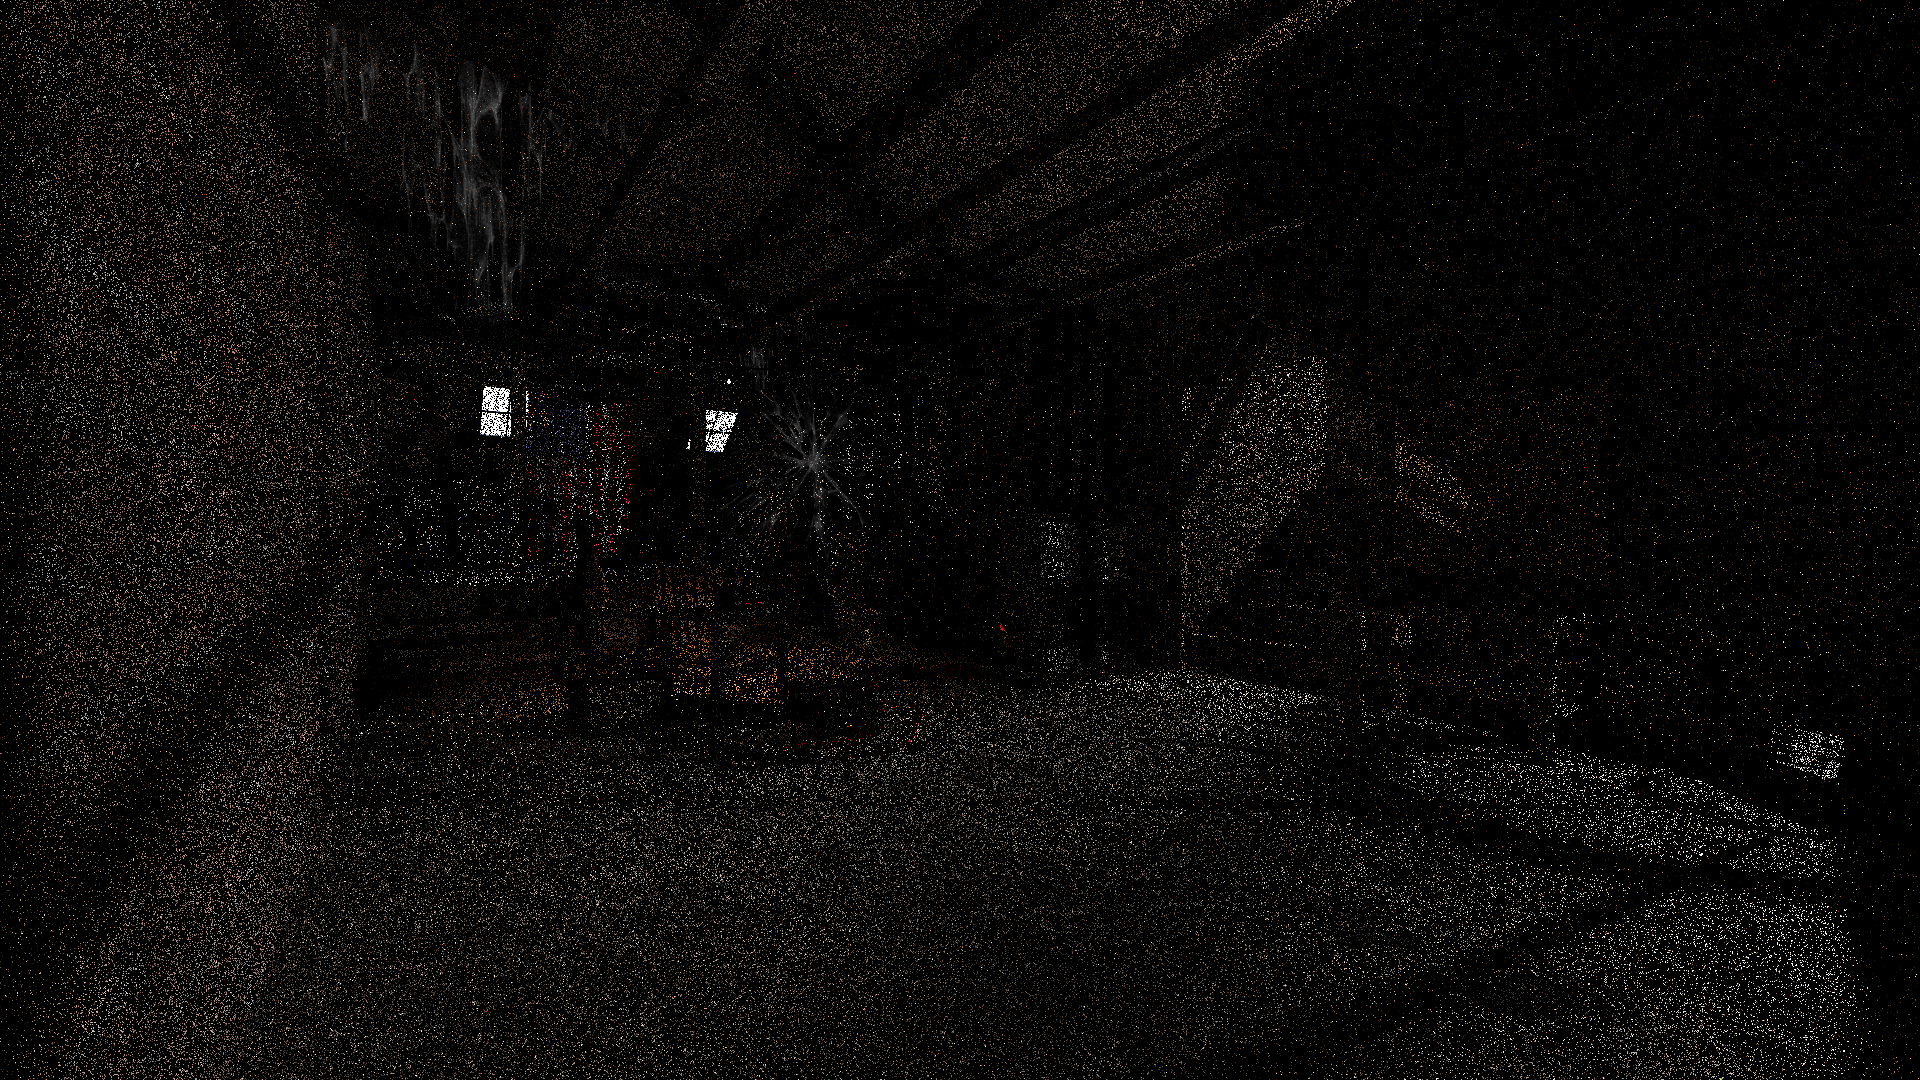
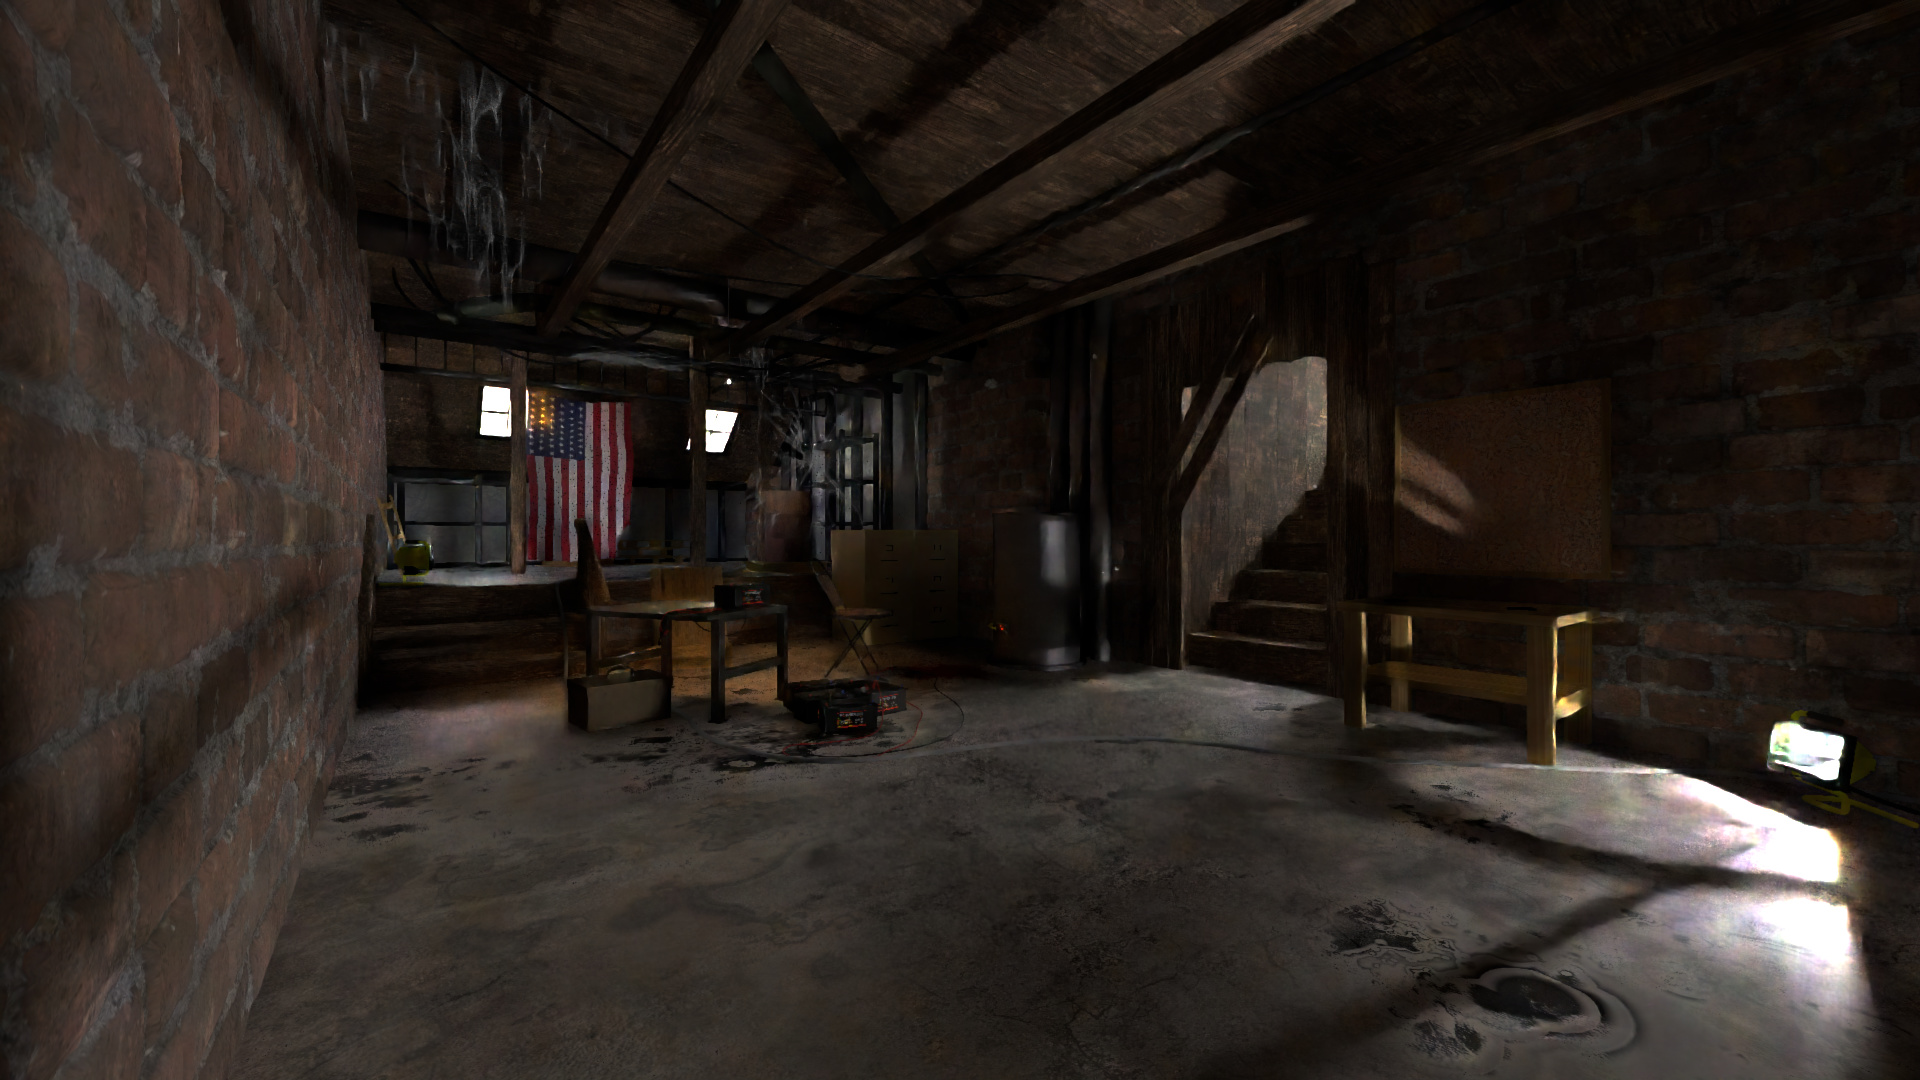
1 Sample:
Original 4K Image took 21 seconds to denoise, scaled to 1080p for the upload.
10 Samples:
50 Samples:
100 Samples:
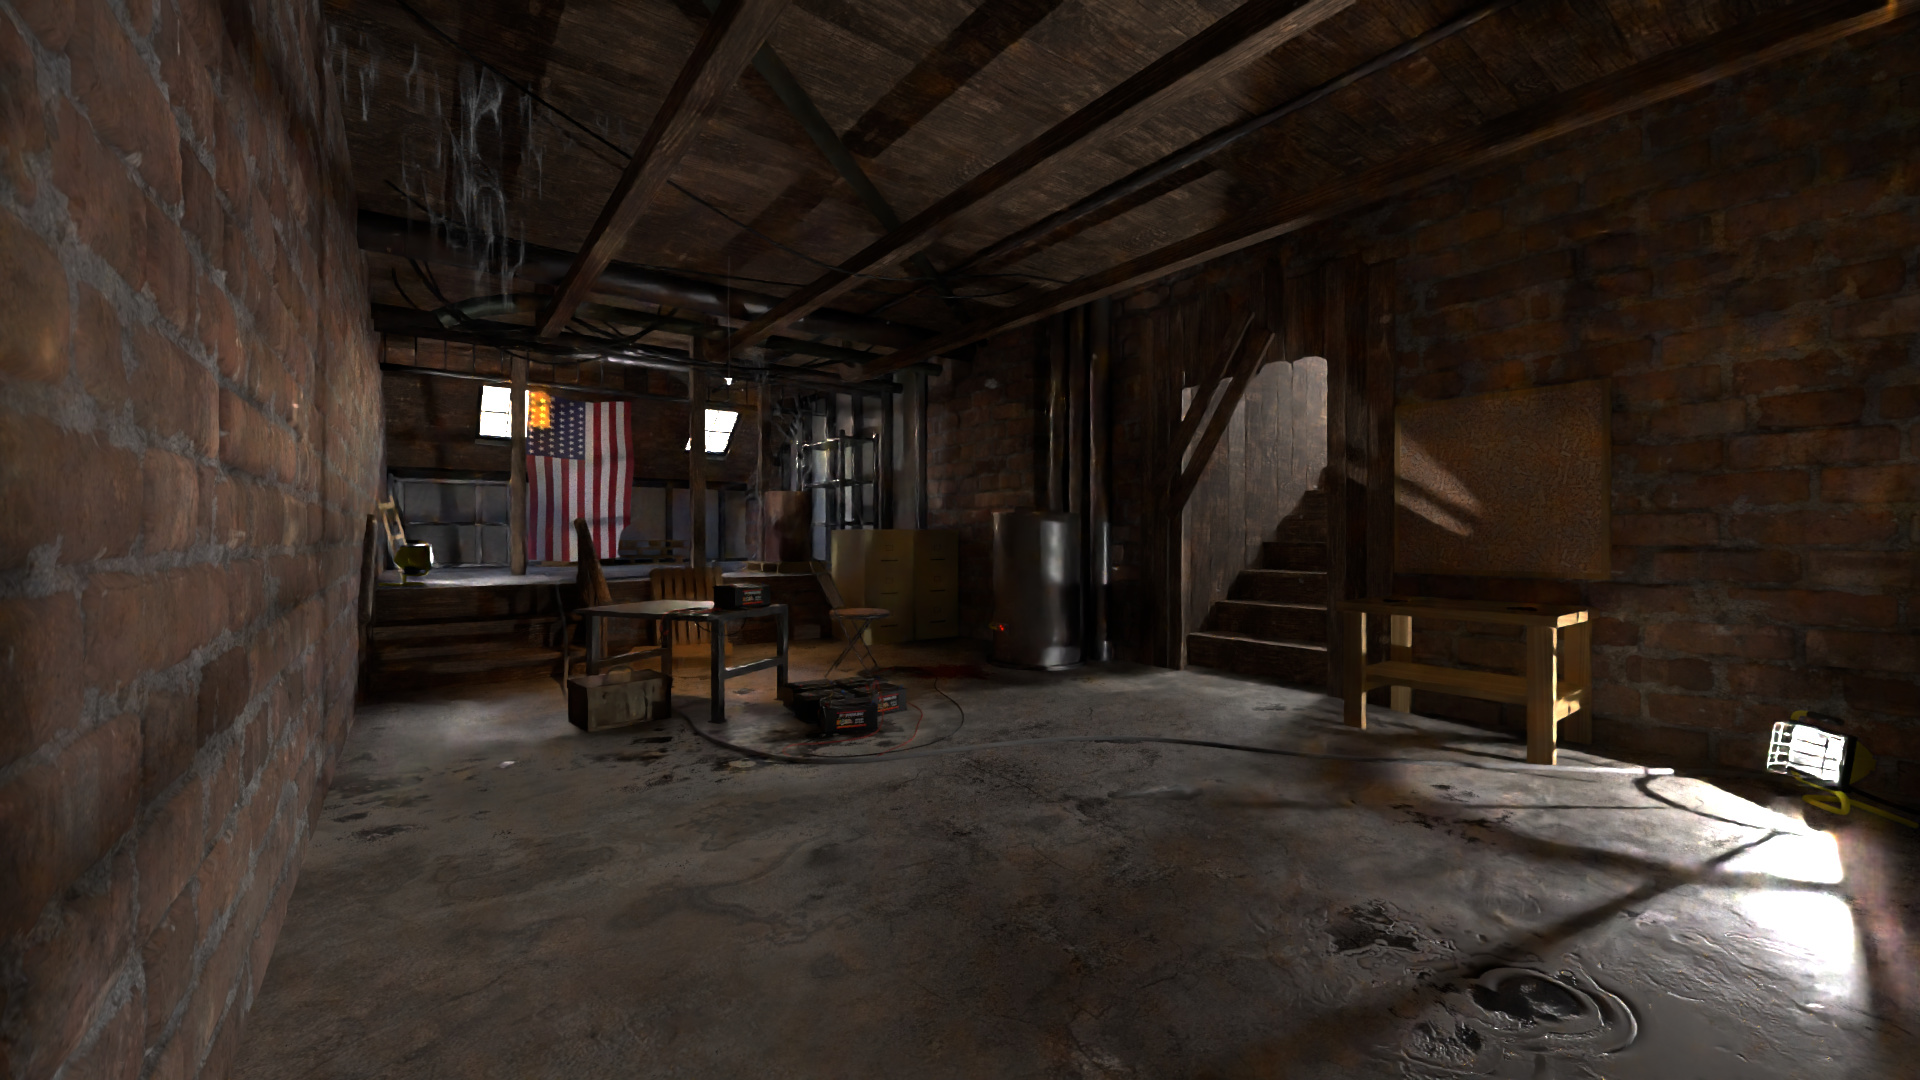
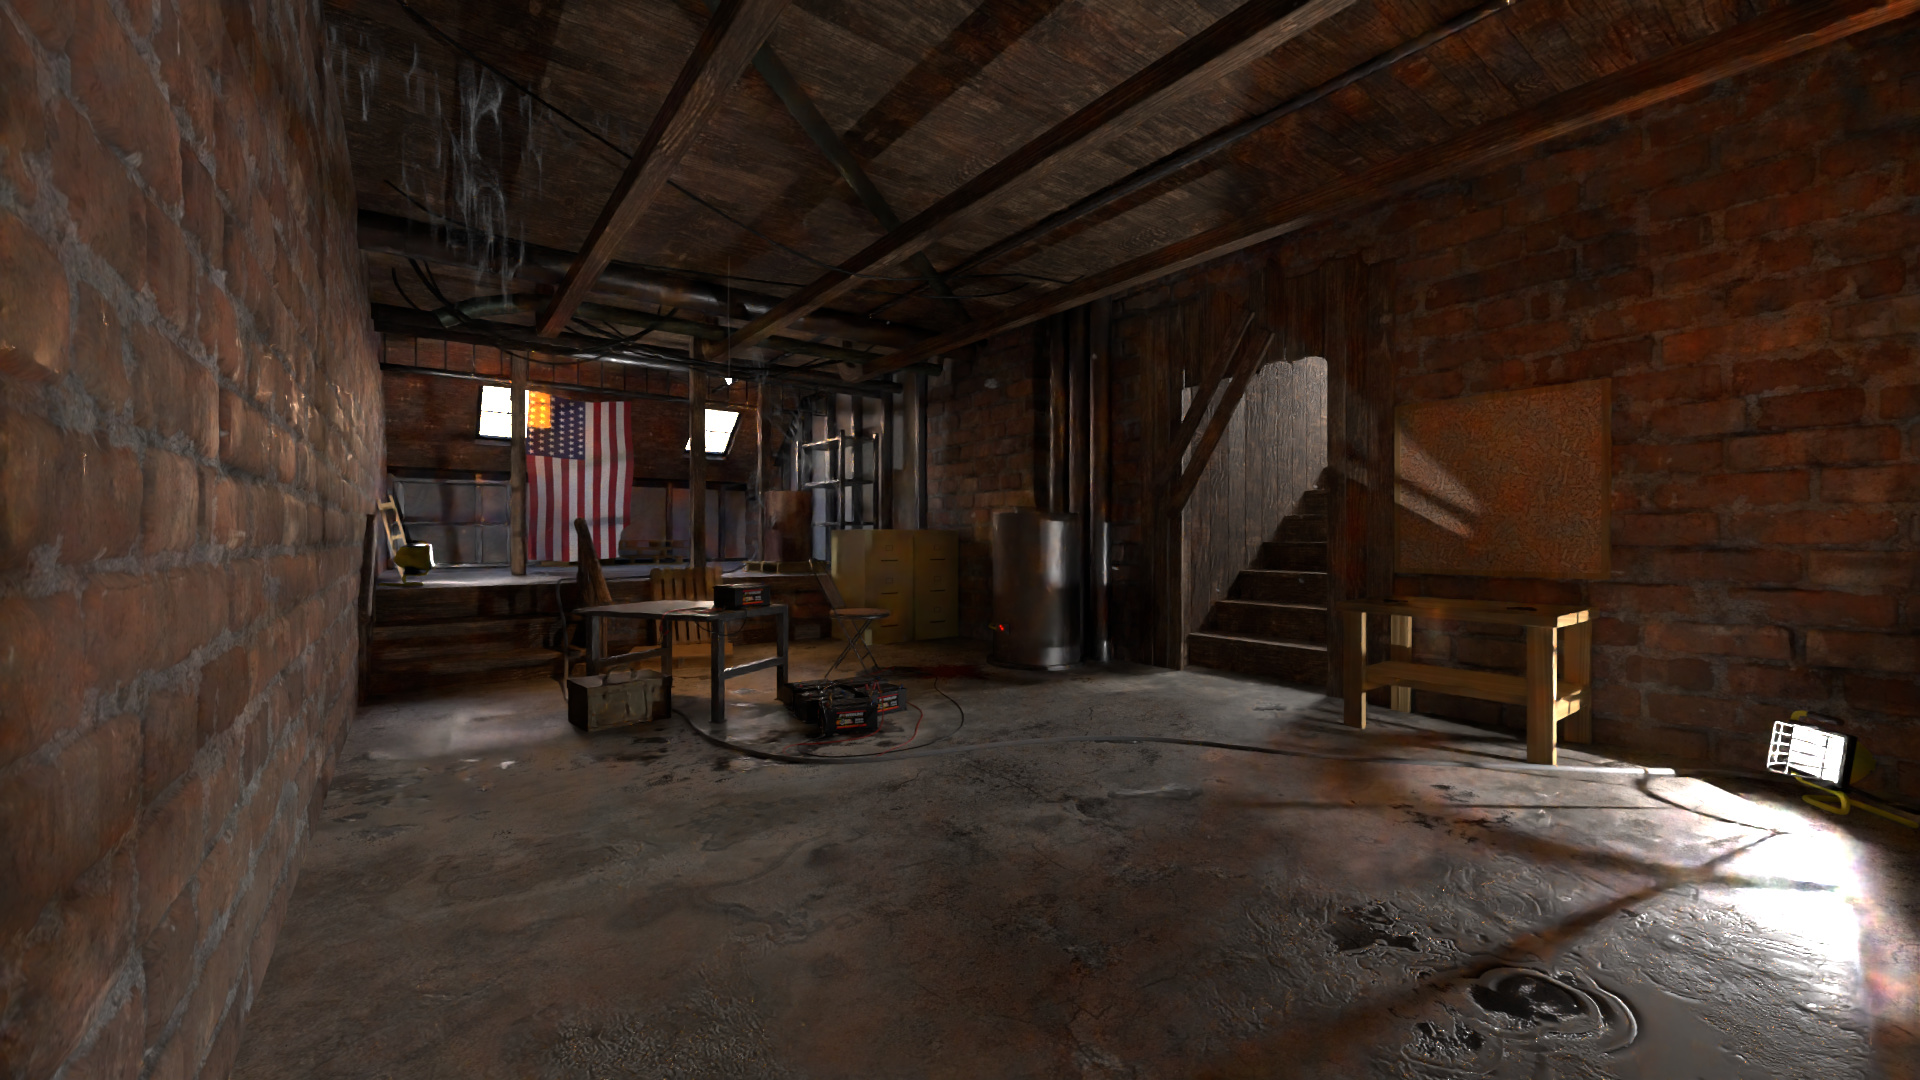
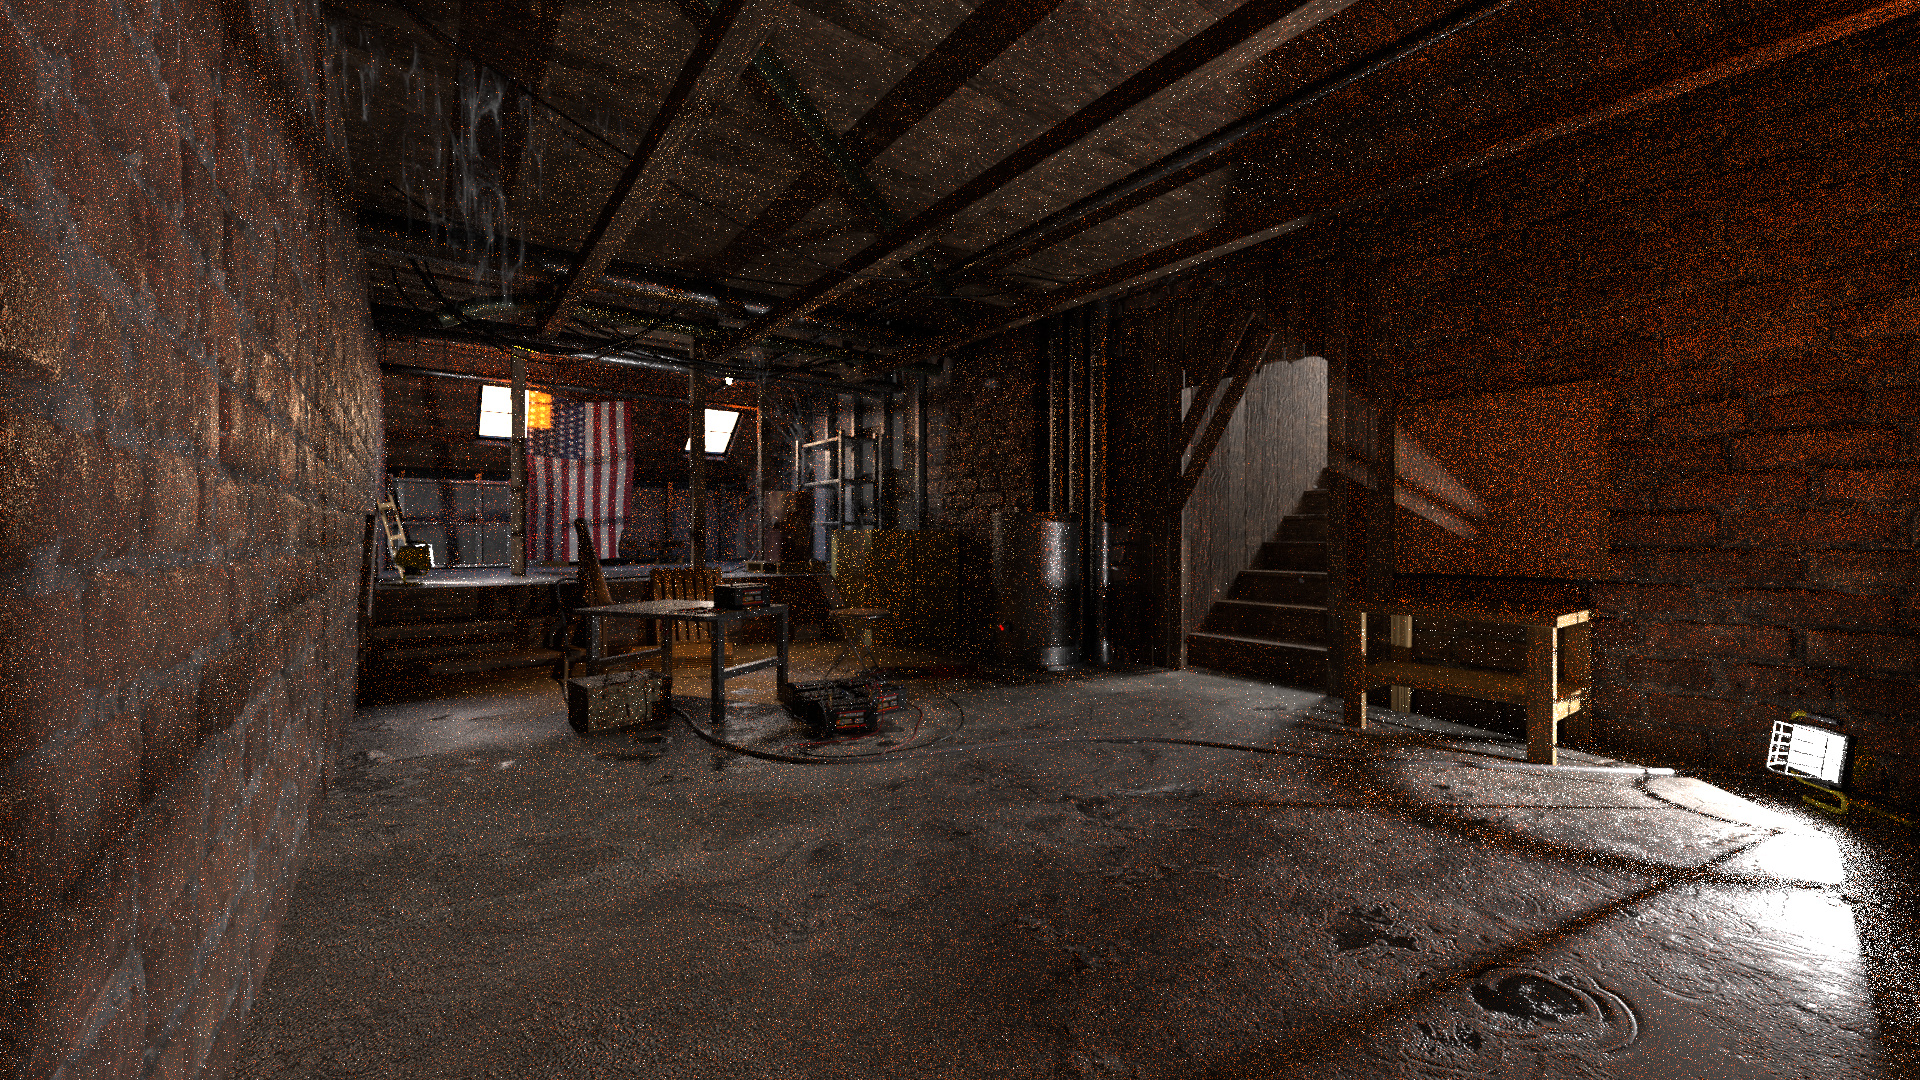
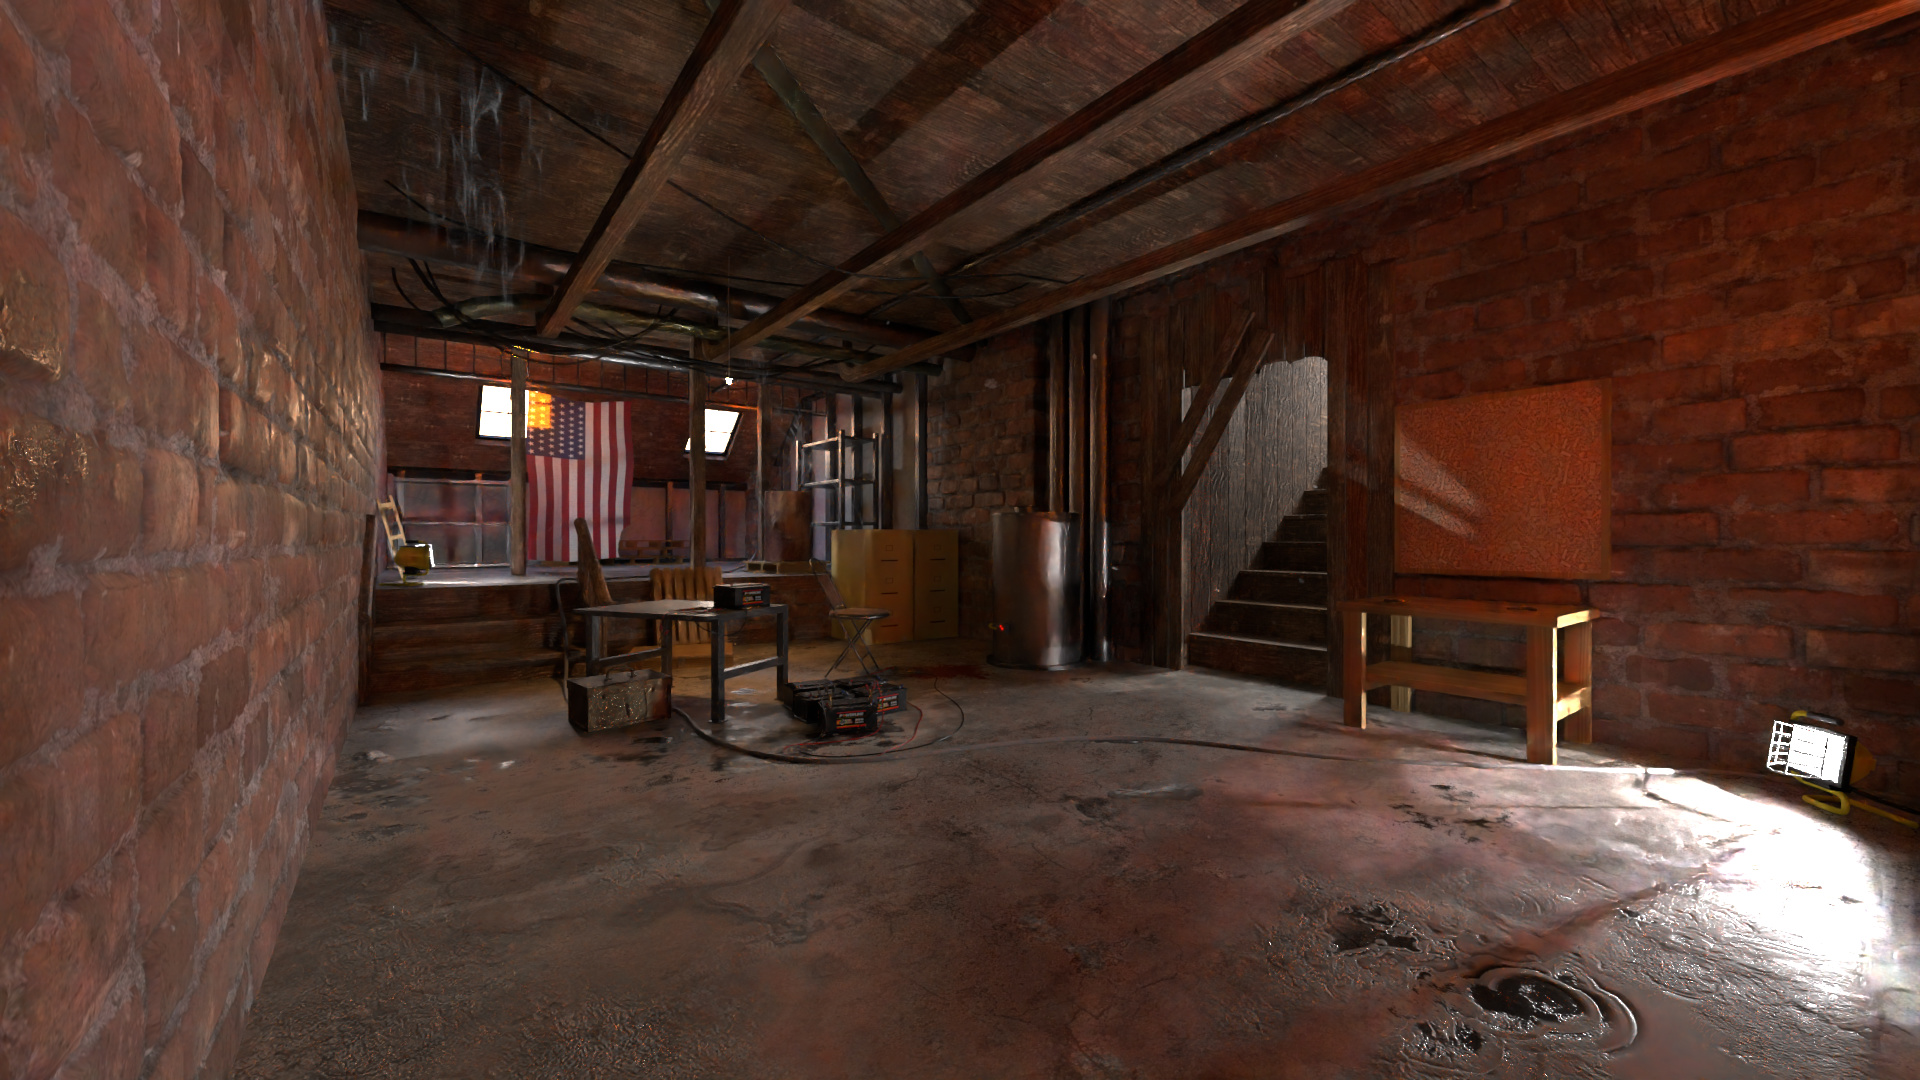
1 Sample:
10 Samples:
50 Samples:
100 Samples:
1000 Samples:
I will try to update this post with more images as time goes on.
Thanks,
Brandon
That is quite good! Also that it does not overblur tricky areas…
What about speed? How long did it take on average?
For 1080p around 5 seconds. And 4k around 20 seconds.
I experimentedwith viewport integration for it - I need faster hardware. ![]()
https://twitter.com/stefan_3d/status/1090607219975045120
Also ran some tests and this looks excellent - 1700ms for 720p on an old i-2500…
here are the images: Noisy / Denoised / Denoised with Normal and Albedo passes. 16 and 128 samples
(check the filenames)
you can try it yourself - its a bit tricky to get a normal pass that has no negative values - check the last image for more info!
Also it looks like the Algorithm is very forgiving as far as normals are concerned - can be world or screen space.
The compiled version is found on the website and you need photoshop or something similar to create the 32bit pfm image files that OpenImageDenoise accepts.
Edit: looking at it now my Normal math is very wrong… maybe someone else can make tests with proper screen normals…
How does this compare to the included denoiser in Cycles?
Oh wow so much better!
Expand the second post in this thread.
Can anyone please explain how I can use this?
I’ve downloaded the zip for windows (extract it) but I don’t know how to run it.
Did you convert the images from cycles to pfm if yes how?
Save as 8 or 32 bit, works with both but you have to specify it in the command line later on.
In photoshop you have to convert the image to 32 bit (in case of 8 bit input) and save as pfm. By default the extension is ppm or similar - you have to manually set it in photoshop.
Thats it.
ok, thanks a lot for the quick answer.
Exactly what Atair said. I usually export my images as .exr extensions using zip and float(full) in my options, so the denoiser is working with an high dynamic range image after I convert to pfm extension in photoshop.
And for those without Photoshop, it also works with GIMP. I can’t show my results, but definitely worth trying.
To build Open Image Denoise you need CMake 3.1 or later, a C++11 com-
piler (we recommend using Clang, but also support GCC, Microsoft Visual
Studio 2015 or later, and Intel ® C++ Compiler 17.0 or later), and Python
2.7 or later.
• Additionally you require a copy of Intel ® Threading Building Blocks (TBB)
2017 or later.
WHAT THE! Thats me down at the first hurdle then. Since im not a computer scientist and messing with compilers and code is way over my head. not to worry tho i have real working friendly software. Topaz AI Clear and Topaz AI gigapixel.
this is a library not a software… its like comparing an engine to a car and complaining that it has no seats
I would say that it having no seats or wheels is a very valid complaint if one was wanting to make use of the engine for transport… Lol. Anyway im sure you technological wizards can use it, im merely saying its way over my head and i need real software or else its no use to me.
@Thesonofhendrix I hope you know you don’t actually need to build it from source…
This will also be a general use tutorial for anyone that hasn’t dealt with running exe’s via batch script before.
In the downloads page, you can download the pre-compiled Winx64 binary to run as you please.
When you extract the zip, there should be 4 folders. All your work will be done in the bin folder.
I wrote a simple batch script that will run the .exe with the given input parameters.
run_hdr.bat (Must be saved with the .bat extension, name can be whatever you like)
@echo off
denoise.exe -hdr color.pfm -alb albedo.pfm -nrm normal.pfm -o output.pfm
pause
Don’t copy the below lines into a bat file, use the complete script above and edit as needed.
If you don’t have the extra passes it can also be run as:
@echo off
denoise.exe -hdr color.pfm -o output.pfm
pause
Going line by line.
denoise.exe #Calls the executable. Must be in same folder as the .bat file.
# If it's not, you can always call it from a path, like:
C:/Users/a_username/Documents/Denoiser/bin/denoise.exe
# I would also recommend renaming the folder from oidn~~~~ to
# something simple like Denoiser.
# The hdr parameter is your base image that needs to be denoised, NOT the render passes.
-hdr color.pfm # hdr is an input parameter telling it you are giving it a HDR image.
#color.pfm can be replaced with a path to a file:
-hdr "C:/Images/color.pfm"

# Alternatively if you only have LDR images in PFM format, use the LDR parameter
-ldr color.pfm
# Use the below parameters with the same style as above.
-alb albedo.pfm # Refers to the albedo color pass you can render out in Blender
-nrm normal.pfm # Refers to the normal pass you can render out in Blender
# Can be used the same way as above.
-o output.pfm # Can either be an actual file or one that doesn't exist.
# It will overwrite or create a new output file using this name "output.pfm"
# You will have to convert the output with Photoshop or GIMP, back to exr or png
There are some other parameters, but I don’t fiddle with them because I find that default settings work perfectly fine for me.
That would be like expecting the teams behind Bullet Physics, Open Image IO, OpenCollada, OpenVDB, Alembic, Vulkan, ect… to put out fully functional standalone software as opposed to intending to develop technologies to be integrated into other software.
The point of Github is to host code, not fully functioning programs. One might post binary files, but that is still far from downloading something fully packaged and with a GUI.
Thank you so much for breaking this down!