I was wondering if anybody could tell me how I might go about making a camera lens-type iris effect, opening and closing. I think you can guess what it’s for.
My strength is modeling, my animation knowledge only goes so far as simple keyframing and IPO drivers. I know nothing about armatures, rigs, things of that sort, so any help would be greatly appreciated.
If you mean a diaphragm shutter (pheugo.com/cameras/ diaphragm/diaphragm.html). My suggestion would be to
model the blades
add an armature
add an armature modifier to each blade
add a bone in each blade
add a vertex group with the corresponding bones name in each blade
create a copy rotation constraint in the bones, either to one of the bones in the setup or alternatively an external bone you could rotate to shut the shutter.
keyframe and create an action for shutting and opening the shutter (I’m purposefully vague here because I have not started learning actions yet - plan to when I get far enough with the lion I’m rigging and modelling right now)
Another option might be the new array modifier but someone else have to tell you if that is possible because I have not more than looked at demos of its use.
I think you can just model one of the iris plates, set a rot key-frame with the I-key, rotate it to its maximum over some frames, hit I-rot again to generate your IPO curve, and then duplivert it around with the rot button active. I don’t think you need bones for this function, tho you could do it that way I suppose. There are many ways to solve this, I’d bet.
I haven’t done this, but I’m pretty sure those are the tools. You’ll probably have to do a bit of research on the wiki and the documentation to verify how to preserve the relative IPO curves of each blade correctly. I might just try this, for fun, when I get home. Its a neat problem that could look cool in animation.
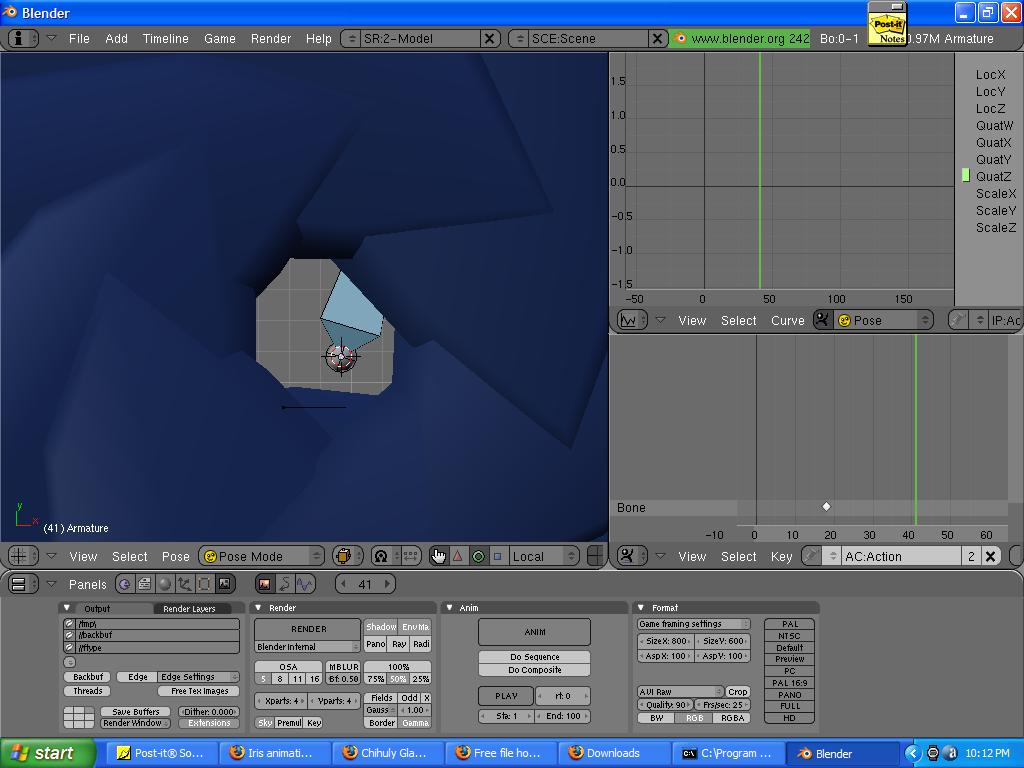
I’ve had this iris blend file sitting around for a couple of years. I made one blade and set up its dRotZ IPO to be driven by the single bone in the middle of the arrangement (R-Z to rotate the bone in pose mode). Then Alt-D to duplicate instances of the blade, snapping each to a vertex of a mesh circle. The hard part is getting the shape of the blades right, and positioning each blade’s object center so it rotates correctly.
If any or all of this is gibberish to you, let me know and I’ll try to explain.
CD38’s idea sounds the best to me so far, it would allow for easy opening and closing of the iris whenever needed without having to re-keyframe a lot. All that would need to be done is keyframe the bone. I plan to control the energy of the chevron lights the same way, only using the X translation of a cube to drive the energy (think a slider for each chevron.)
[Edit] CD38, your file looks pretty good, but I noticed that for some reason the hole in the center of your iris gets malformed when it’s almost closed.
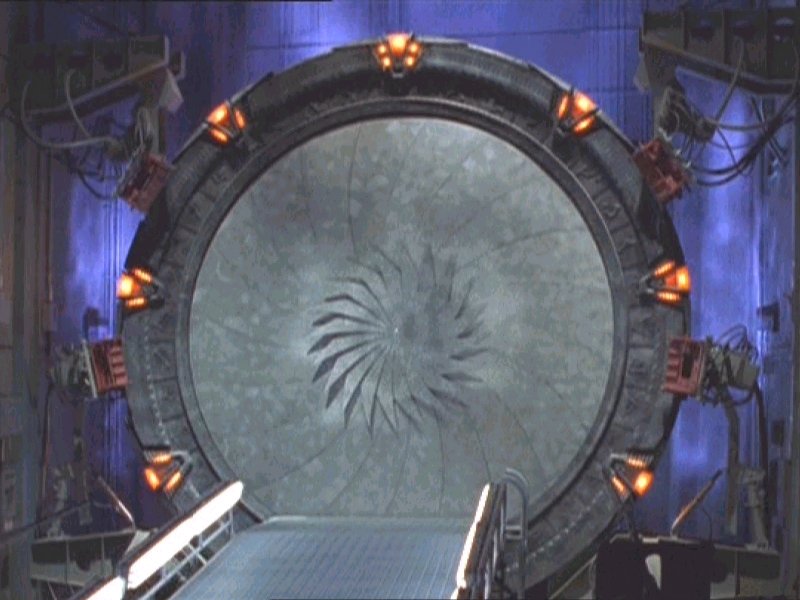
One of the blades’ initial rotations may be slightly off. I don’t have the file on this machine, will check when I have a chance tomorrow, as well as write up a step-by-step. Btw how many “blades” does a stargate have?
A quick fix for the off-center iris in the file I posted: go to Top view or whatever orthogonal view lets you look at the gate face-on. Select all the blades in Object mode. Shift-S, snap cursor to selection. Add a mesh circle and scale it to fit just inside the opening. One by one select each blade and rotate it so it just touches the circle. Delete circle when you’re done.
I haven’t forgotten about you, I’ve been out sick. I have the text written up and need to upload the figures from a fast connection. Trust me, you’ll need the pictures.
Hi,Lord of the Rings Junkie. A simple and effective way of doing this is using an old classic “Dupliverts”.
Add a mesh ring with a vertice for each iris shutter, in your case 20.
Model your shutter arm with the base in the middle and the tip reaching the outer edge.
Add the arm as a child to to the ring and then select the ring, go to "Object"mode and press the “Dupliverts” button, and hit the “Rot” button as well.
After rotating the main arm right you should get something like the blend below.
Simple and very accurate. Then all you have to do is animate the main
child arm and change its “Draw type” to bounds so it dosn’t render.
Here is how I made my iris shutter. It’s a little tedious but it allowed me to use different materials on the blades. Nozzy’s dupliverts would be much simpler, so by all means use dupliverts if they suit you. Procedure details are added for newer users.
In top view, make a mesh circle the size of the fully open hole / portal, with as many sides as you want blades. This will be the guide for accurate placement of the blades, as well as the parent object for all the blades.
Model the blade shape shown in Figure 1 (I took apart an old camera to find the correct shape). Its total length should be about twice the length of one side of the guide circle. Move the blade’s Object center to the indicated position (select blade in object mode, LMB to put the 3d cursor in the desired location, F9->Centre Cursor). In front view, add a slight rotation as shown, to prevent the blades crossing each other when the iris closes.
Now to add the bone that you will use to control iris open/close. This driven IPO is not absolutely necessary, but I think it makes subsequent animation simpler.
Go back to Top view. Add a one-bone armature in the center of the circle
Select the blade. Open an IPO window and do all the following steps while pointing at the IPO window.
Click dRotZ. Press the N key and Add Driver.
Fill in the fields like this.
Ob: Armature
Driver type: Pose
BO: Bone
Loc X: change to Rot Z.
Press I-key and select one-to-one.
Now if you rotate the bone in pose mode (R-Z), the blade should rotate.
4. Snap the blade to a vertex of the circle. Using R-Z, rotate it so the middle of the inside arc just touches the circle (Figure 2). Parent the blade to the circle.
Now the most tedious step: duplicating the blade around the circle. This will make instances of the original blade that will inherit the IPO driver, and will be easier to edit as a group. Select the blade and use Alt-D to duplicate it. Snap the new blade to the next vertex of the guide circle and rotate it so it touches the circle. Repeat this Alt-D / Snap process until every vertex of the circle has a blade.
When you rotate the driver bone in Pose mode (R-Z), the iris should open and close.
If the shape of the blades is off, you can edit any one of the duplicates and they will all change.
The movement may also end up off-center when you close the iris; here’s a way to correct it. Go to Top view to look at the gate face-on. Rotate the driver bone (in Pose mode) to close the iris about halfway. Select the guide circle and Shift-S, snap Cursor to selection. Add another mesh circle and scale it to fit just inside the current opening. One by one select each blade and rotate it so it just touches the circle. Delete this circle when you’re done.
Do you think I would be able to get the overlap in the center by rotating the blade on the X axis slightly before duplicating?
I’ve never seen a stargate in action, but if you’re talking about the “teeth” that go past the center of the closed iris, yes that sounds like it would work. You might have to re-shape the blades a bit as well.
is it possible to permanently limit an object’s movement to one axis?
Select the object and do N-key to open the Transform panel. Click the little padlocks to lock the Loc/Rot/Scale along that axis. For bones in pose mode I think this only works for local coordinates, ie you can’t lock global rotations for bones.