Hey, I have a question. Is it possible to render an image that has been zoomed in on not blurry? I imported the image using the included plugin “Images as Planes”.
My settings: 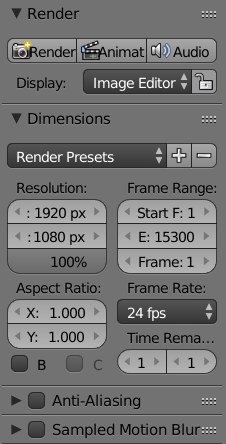 (Let me know if you need more!)
Close-up of the image imported: https://i.imgur.com/W5rMt7e.png
Close-up of the rendered image: https://i.imgur.com/gcXEtjG.png
Thanks in advance. ![]() I tried using VEGAS Pro first, but when it didn’t work someone suggested using Blender. I thought that was a great idea, so I learnt how to use it, but then I was disappointed to find out that Blender too made the render blurry.
I tried using VEGAS Pro first, but when it didn’t work someone suggested using Blender. I thought that was a great idea, so I learnt how to use it, but then I was disappointed to find out that Blender too made the render blurry.
I am not sure if I understood your problem, what are you tryign to achieve?
Do you want your image to have higher resolution?
I’m sorry that you don’t understand my problem. Thank you for commenting. I want the second image to look exactly like the first image. i.e., not blurry. You can see that it’s blurry, right?  I do not want it to have a higher resolution, no.
It seems like some kind of anti-aliasing is going on. But I have anti-aliasing turned off, as you see.
The issue gets worse the further I zoom in on the image, i.e. the closer to the image plane I put the camera.
It seems like Blender first downscales the image, and then upscales it again. But it shouldn’t do that (the source image is 19200 * 10800, so if I zoom in with a factor of 10 it should still be completely sharp, but it becomes extremely blurry).
You’re having a laugh, right . . . ?
![]()
1 Like
From the image you posted, I’m guessing you’re trying to make a visualization of zooming into a fractal image of something similar to the mandelbrot set.
If that’s the case, rendering a zoomed in image more clearly isn’t going to work in the way you’re hoping.
An image has a static amount of data available, so you will only ever be able to get so much information out of it before it becomes just a mess of noise and artefacts.
You could potentially use AI based image upscaling. But it will only get you so far before once again just turning into noise.
The other thing is to figure out the math behind the fractal set you’re trying to visualize and recreate it using nodes.
This fantastic article by Jeremy Behreandt is a great starting point for fun math visualizations in blender.
You could also go the 3d volumetric route.
And finally CGMatter will be releasing what promises to be a fun and in depth guide on doing flat visualizations in blender, though it will require a bit of low level C++ knowledge.
Well, thanks, that’s indeed what I’m trying to do, but this crucial sentence of your post is not relevant to my problem:
Because:
Because 19200 x 10800 / 10 = 1920 x 1080, which is the resolution I’m rendering to.
(I don’t need to figure out the math; the picture in question was created with my own program ;))
How do you mean? I’ve worked on this for many hours already, so unless it turns out this is in fact possible with Blender or someone suggest another program with which it can in fact be done, I won’t be laughing. ![]()
Paint.NET can do zooming without blurring, but it is undoable to create the thousands upon thousands of frames necessary to create a long video using that (even two seconds would be a whole lot of work, if I’d want to have a smooth framerate).
@607 You failed to mention in your initial post that you are using a high resolution image to zoom into the image. Hence the confusion.
The cause is simple: you are using the Transform Effects strip, which in VSE will only scale the target output resolution. if you’re rendering to a lower resolution than your original image, this results in a blurry result.
In effect, it does not scale the original image resolution, but the video resolution!
Various solutions exist. You could import the image as a 2d plane (use the image plane addon), and use an orthographic camera to zoom in.
There are some other tricks. Instead of using the video sequencer, use the compositor with the transform node.
But the simplest solution is this addon:
It includes a transform modifier for VSE that will work as expected.
PS Why are you using an old version of Blender?
Hm, that could be a source of confusion, thanks for pointing it out!
I’m pretty sure that’s what I did. ![]()
I’ll check out the addon, though! Looks like I will have to look into “video strips” as well.
Good question. It is because I thought that if I’d learn a bit of Blender, it would be nice if I could use it for something else as well, and I play a video game for which people use this version of Blender. Should I get the newer version?
I’m surprised by the amount of replies, thank you! When I asked this in the Discord server, nobody replied.
Ah, that makes sense. I have advice for this as well, though I’ve never done it with such a large image, so I can’t make any promises.
you’ll need to hit “s” on the keyboard and type a number around 50-100. this will scale the plane up to a larger size by a factor of whichever number you use. With large files, when importing images as planes, blender will automatically resize to around 1m while still keeping to the image aspect ratio. So you need a bigger plane.
if after doing this, you notice that some of the image is clipping, you’ll need to hit “n” to bring up the tool panel. under that panel, you should see a tab labeled “view,” and under that tab, you’ll see options for focal length, clip start, and clip end. you’ll want to mess around with each of these until you find something that works. but judging from what you’re working on, I would set it something like this:
-
focal length: 100mm
-
clip start: .0001m (maybe smaller by another decimal place)
-
clip end: 5000m
from there, you’re going to want to make sure your camera object has similar settings so that there are no adverse interactions during your final render. this can be done by selecting the camera and clicking on it’s icon in the properties panel. probably also want to make sure DOF is turned off.
from there, to make sure you are getting the most of your pixels, you’re gonna UV the thing.
Hit “tab” to take the plane into edit mode, tap “A” on the keyboard to select all, then under the edge menu (top of the viewport) select subdivide. There will be a menu in the bottom corner that allows you to change the amount, turn this up pretty high (~50 for the size of the image). then tap “u” on the keyboard and click on “project from view (bounds)” This will map the newly created faces to the actual image.
The whole UV process will be used in this case as a way to sort of partition the pixels.
That range sounds too high. I wouldn’t use more than 0.001m-100m.
At least for normal perspective use. Don’t know about orthographic.
I think the older version limits the image resolution of the imported plane in the viewport, although it should render at the correct high resolution. It will be much slower to render than the new Eevee render engine in 2.8 and later.
In the latest 2.8 version (I tested the 2.81 beta) I placed a hires image similar to your dimensions in the Eevee viewport, and although it took a while to digest, once it had the view was smooth and the high resolution came through. I am running a GTX1080 with 8GB. Old video cards or less capable graphics hardware might struggle with this. Not sure. Test.
Feel free to keep using the older version to play Blender games (the 2.8 and beyond releases no longer include the game engine), but I suggest you learn and use the newest version. Besides, if you are really interested in creating your own games in Blender, download the Armory engine. Or just use Godot or Unity, and import assets you created in Blender.
Alright. I had been trying to follow Anthony’s directions but I was having trouble. I will install the new version tomorrow. ![]()
I didn’t know there were Blender games. ![]() It’s just custom content creation. Nobody has made a plugin for the game for Blender 2.8 yet (in fact, the 2.7 plugin is fairly recent; until late 2017, content creators were stuck on 2.6x). But this purpose is completely different from that, and I could probably have two different versions of Blender installed.
It’s just custom content creation. Nobody has made a plugin for the game for Blender 2.8 yet (in fact, the 2.7 plugin is fairly recent; until late 2017, content creators were stuck on 2.6x). But this purpose is completely different from that, and I could probably have two different versions of Blender installed. ![]()
I would usually say the same. But this person’s picture is so large that scaling it to it’s natural size in blender would maybe call for this. tbh, I’m entirely unsure, though, because I’ve never worked with a 19k image before. I rarely go past 2k unless it’s for super detailed displacement or something similar.
Okay, I got Blender 2.80. With this, there was an option for “2D animation” when creating a new file, and I thought I should try that.
To my delight, it now worked well enough right away. I did update the focal length, clip start and clip end to the values suggested by Anthony, just in case.
I do find that it is very awkward to control the camera, though, now that the image plane is so gigantic. First, so it is clear what I am trying to do: I want to have an 8-minute animation moving around and zooming in and out on the picture. I can do this by keyframing the position of the camera.
When the image was small, this was quite doable, but with this huge frame it’s a pain. ![]() I do know about the keys G + X/Y/Z, but does anyone have any other tips for making this more doable? It is also rather hard to judge what the actual image will be, so I keep having to click “Render frame”. Ah! I just found that if you hit Num Pad 0, you will switch to the camera’s view. See, it’s those kinds of tips I’m looking for.
I do know about the keys G + X/Y/Z, but does anyone have any other tips for making this more doable? It is also rather hard to judge what the actual image will be, so I keep having to click “Render frame”. Ah! I just found that if you hit Num Pad 0, you will switch to the camera’s view. See, it’s those kinds of tips I’m looking for. ![]()
Here’s a screenshot to show how small the camera and how huge the distance between it and the plane becomes, with such a big plane. ![]()

1 Like