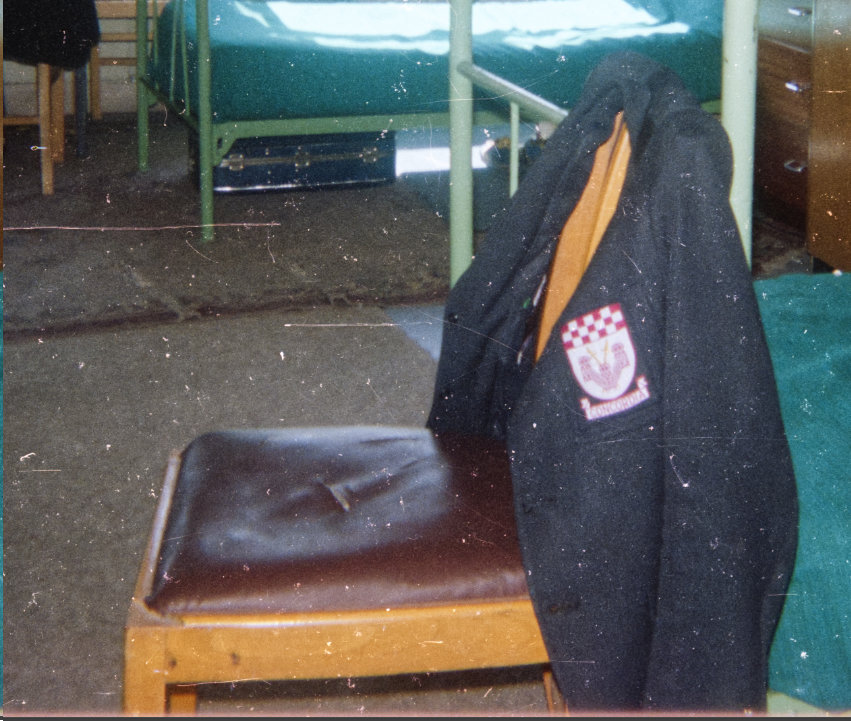
I can’t seem to work out how to make a jacket look like it’s on the back of the chair as shown in the reference picture.
Do you switch to Sculpt mode and then use the elastic deform to carefully drag things around so it molds to the chair, or is there something with material and collision that would somehow make it drop nicely? I’ve tried with collision and the jacket just gets destroyed as it impacts and the sculpting is really difficult for me.
Any advice is ap[preciated and I’m using Blender 3.5.1
Use a decimate modifier on your jacket or retopologize manually, then add a cloth sim. Add collision to your chair. A tutorial like this might be helpful:
Thanks to you both for the replies. Excellent tutorial on the cloth simulation and I’ve subscribed to his channel. Also I’ve never used the decimate modifier so watched a few tutorials on that.
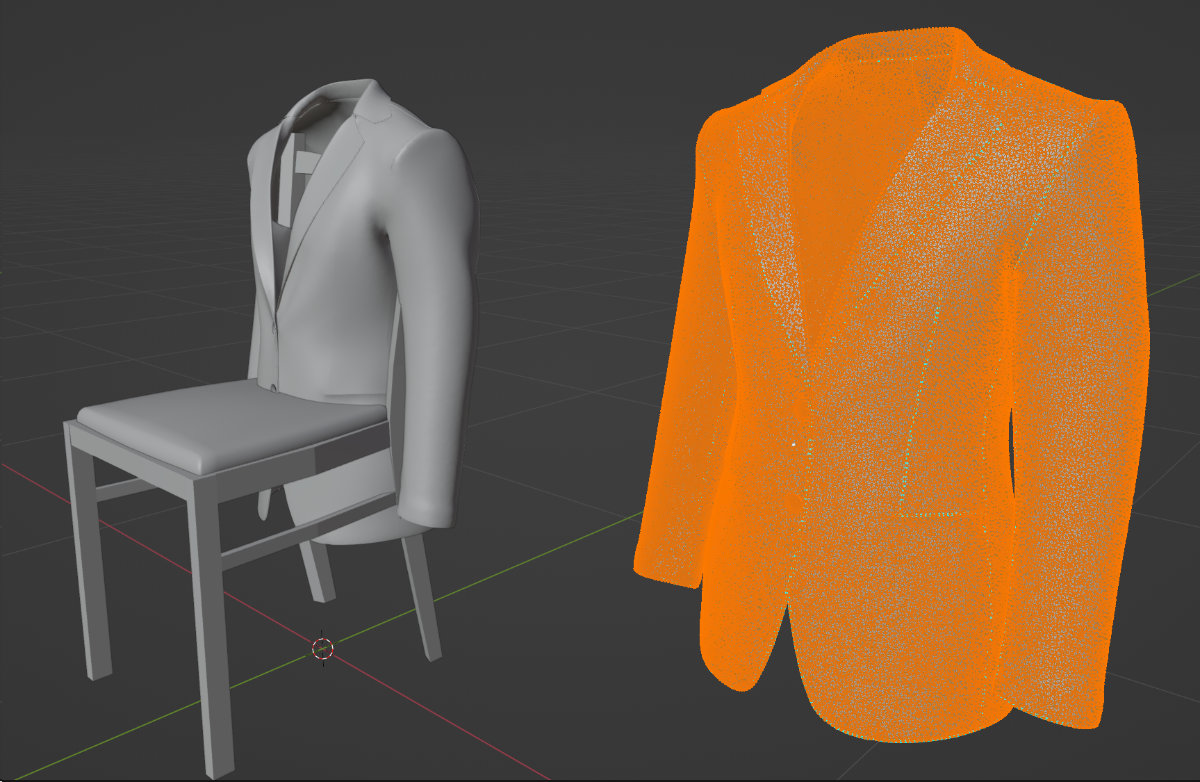
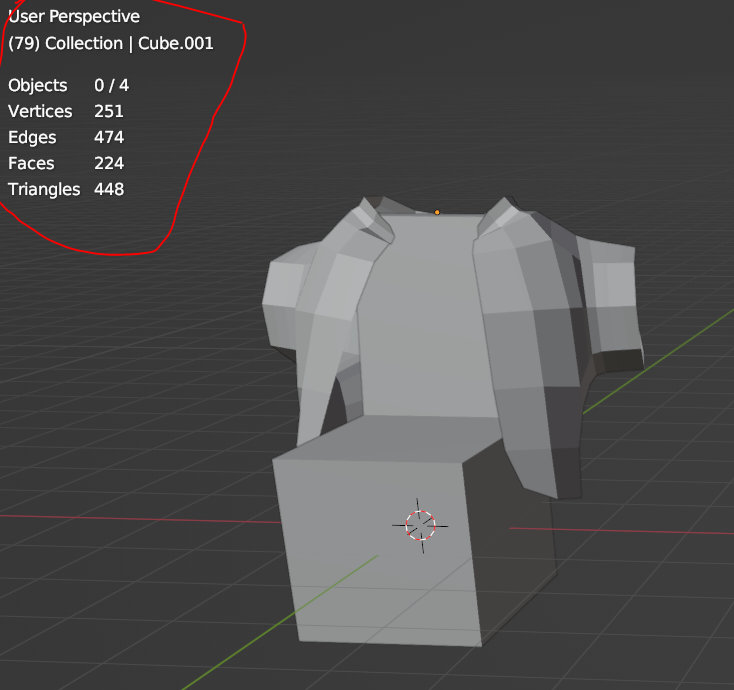
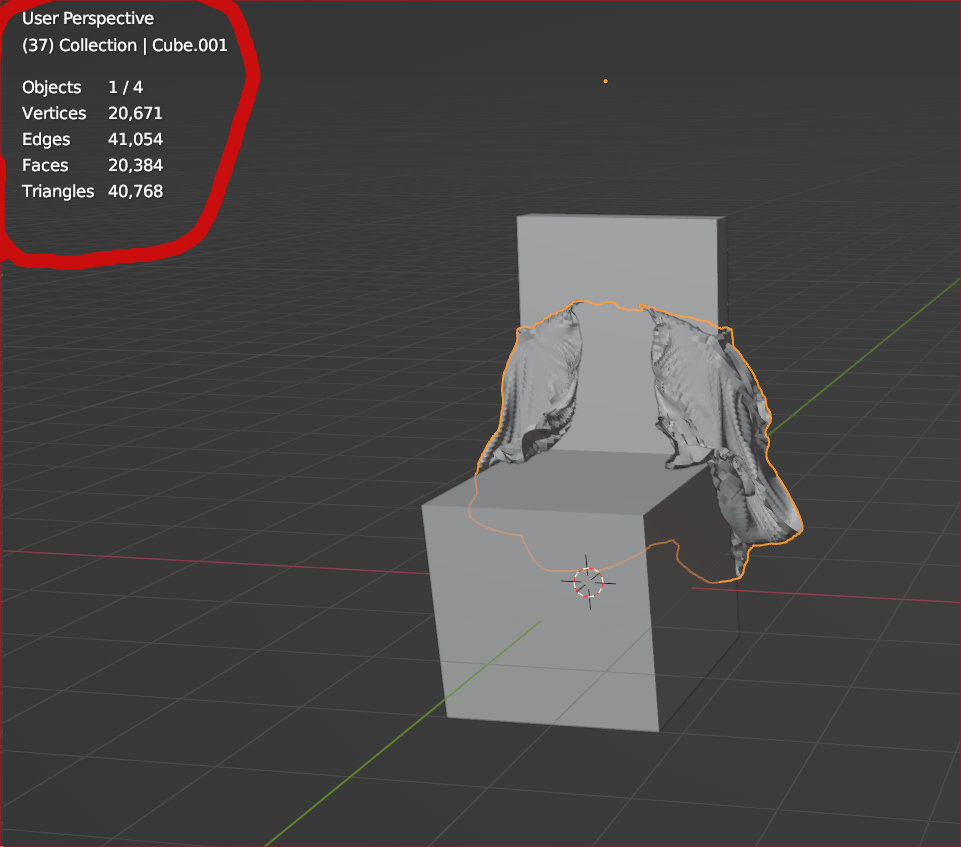
Regarding your model Okidoki, I’m glad that you posted the demo so I could see it working and it does look good. I’ve had similar results with my own very low poly jackets but the issue seems to start when the vertices count is raised using subdivide. I’ve added screenshots showing it below and made no changes to the cloth or collision settings in your blend file.
I used Decimate on the hi vertices model jacket I have to bring it right down but the model still gets destroyed on the way down and doesn’t hang realistically.
note that having subdiv before cloth will give different results than subdiv after cloth, in the modifier list. if you really want subdiv first, then you need to adjust the Cloth Quality Steps in the Physics tab to adjust for that.
Thanks Kelly. I never thought about the order in which modifiers are added. The high poly jacket I have doesn’t have any modifiers at all applied to it as it was imported as a glb. The only modifier added to the actual jacket (after it’s been decimated and then modifier applied) is the cloth. And then the collision is added to the chair.
When I test with the blender file Okidoki supplied, I add the subdivide to the model by going into edit mode, select all, and then right mouse click and choose subdivide. Nothing added over in the modifiers tab.
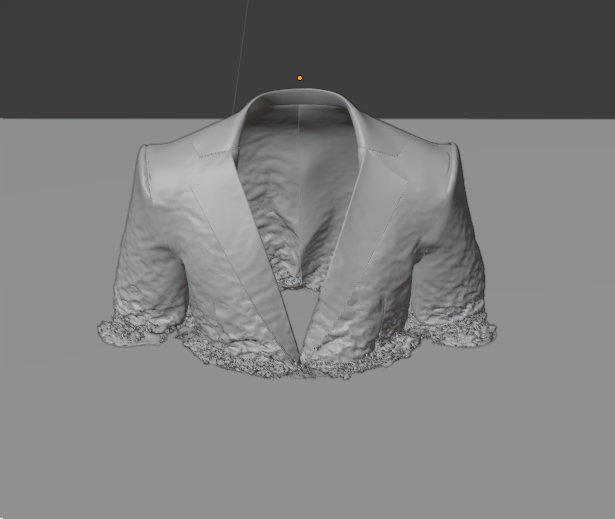
You can see it tearing and shattering in the shot below rather than just falling nicely. I’ve also been adjusting the vertex max to 0.01 kg but that makes no difference with higher poly.
Basically there are two schools, some people are more comfortable with simulation and or automation, personally I prefer to eyeball something manually.
Since it’s soft and distorted by the chair, anything that feels organic and wrapped around the chair might work, in that matter even some mistakes might feel ok to some extent.
Watching a few good references might help to catch a few important details to add in order to make it believable.
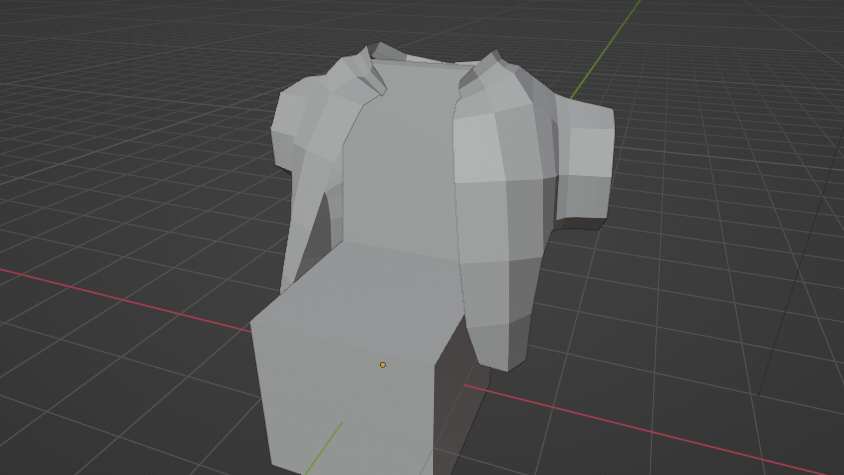
First the model doesn’t seem to take advantage of all it’s polygons , so I’d probably re-model something with much less polygon so it’s easier to work with, and then I’d try to get something ok-ish in that simple state by moving vertex around, and latter add some detail and folds by adding more loopcuts once I’m happy with the shape.
Since I’m not used to sculpt I’ll do that the old school way… But someone good at that could probably add really cool details once the basic shape is in place. Rather than trying to go from the un-derformed mesh to it’s final state all in sculpt in one go.
But maybe a good sculptor can manage that as well. ( I’m adding sculpt training to my todo as I write…)
Anyway, having a two step process where 1 get the right overall shape with a simple mesh, and 2 add finer details with a multires might be a good idea !
it’s also possible to take advantage of modifiers like Lattices, surface deform, and probably others to add broad deformation in a non-destructive way.
It’s also possible to add folds and randomness using one or several displace modifiers, where you can even paint some areas to displace with a vertex group.
Of course all that depends on how much that thing is important, if it’s something that is going to be close to camera, maybe adding a bit of simulation or extra sculpt might help.
If it’s just a detail, probably messing the shape in a quick and dirty way can do the trick.
yeah, my result looks a bit different, using subdiv in the modifiers. i use one before cloth, enough to get it to ‘hang’ better, and then a 2nd after cloth in order to smooth it the rest of the way out. note that Cloth’s Quality Steps have been adjusted, and i tweaked the other settings mostly to keep it from sliding right off the chair back. JakedOnChair2.blend (1.7 MB)
Well… like in everything else… if someone wants to get more accurate then someone has to take more things into account and the subject gets more and more complex…
Here: if you want to simulate more accordingly to the cloth… then you have to consider the real stiching and also the different stiddiniess of the material on the inside/outside … etc. …
…so yes… using a simpler dummy could help and even then there willbe some polygon which have to be moved a bit… maybe in sculpt mode…
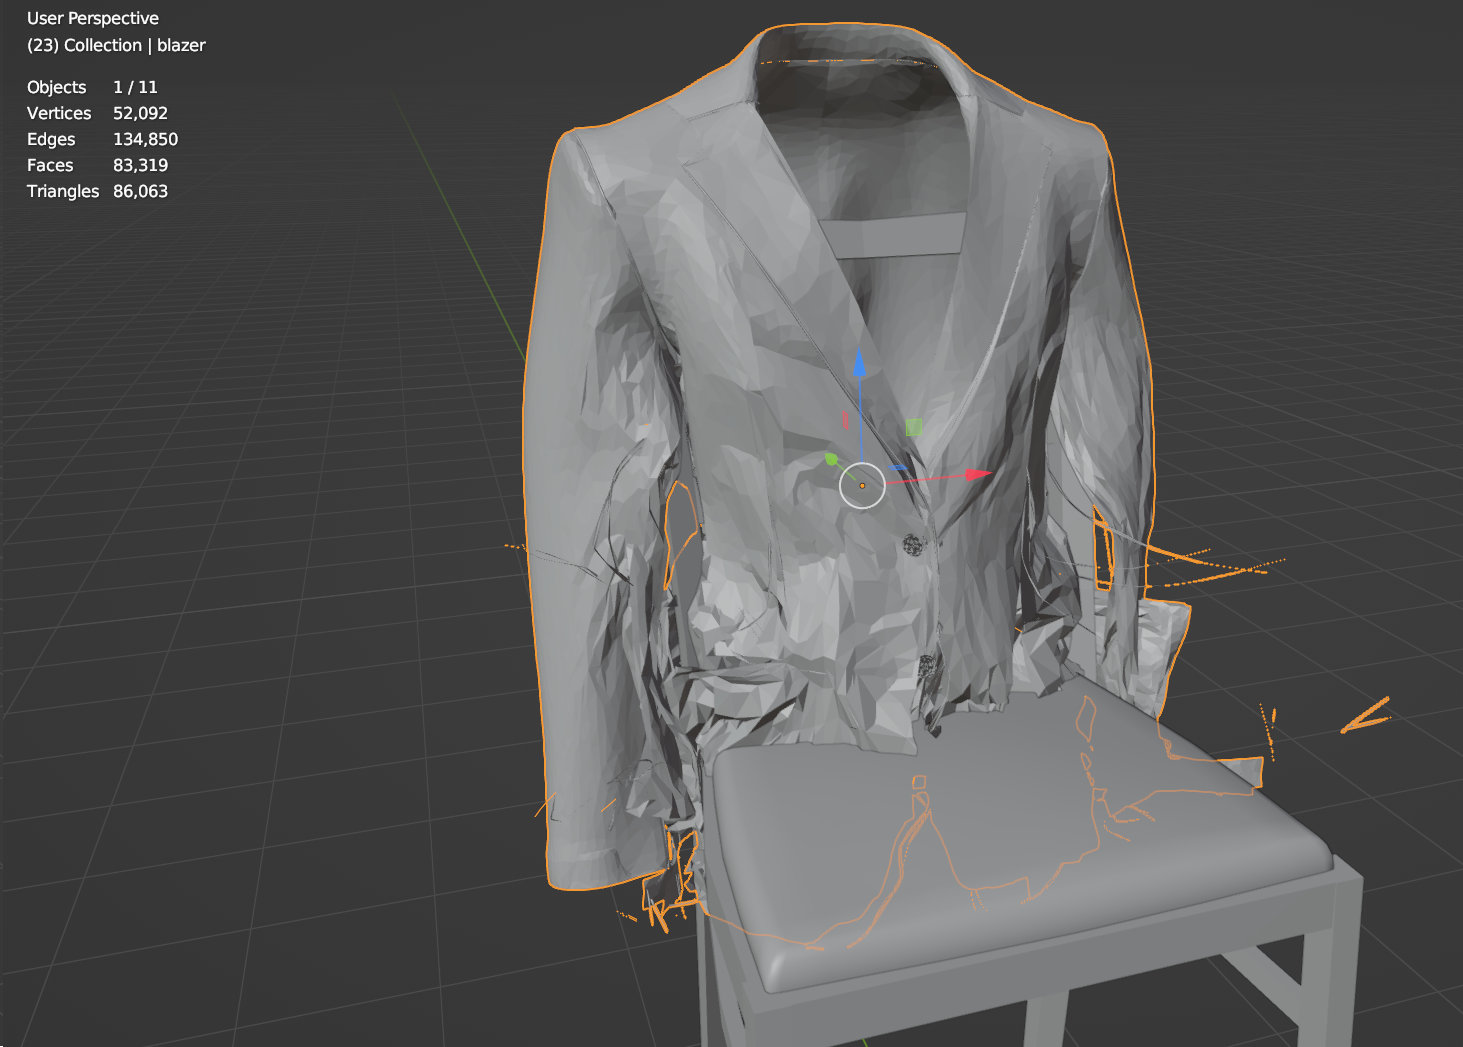
Thanks for the additional replies. KDLynch, I checked your settings and then applied them to a jacket I just made for the test. Managed to get it close to the look I’m after and will finish the rest with sculpting to tidy it up. Spent pretty much all of today changing settings and seeing how it affects the falling cloth. Mind-boggling stuff.
Tried scaling yet?
Make the chair skinny side to side and animate it growing into the jacket.
You will need to pin the jacket shoulders to keep it in place.
Perhaps it is only the seat & legs that need animating.
This will automatically get the sides of the jacket folded to their correct location against the chair.
Sometimes you need to think of the opposite of nature and gravity…
You could also make the jacket wide, move it into location then make it skinny again.